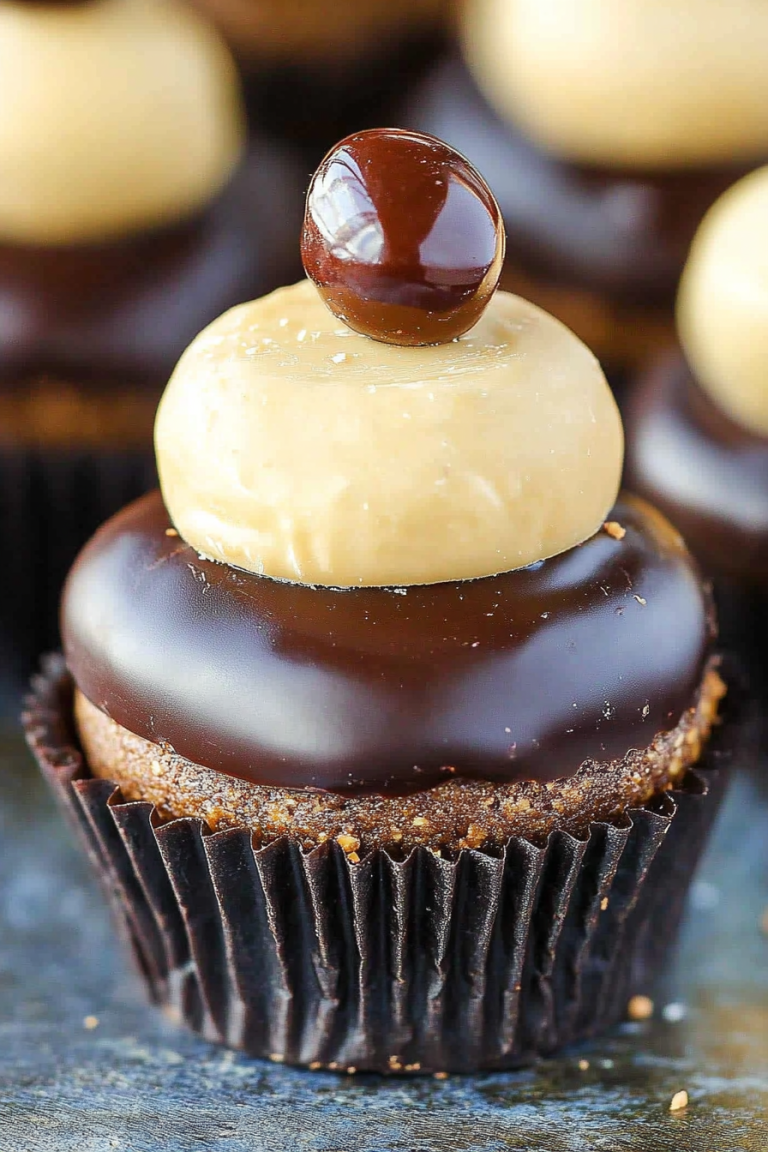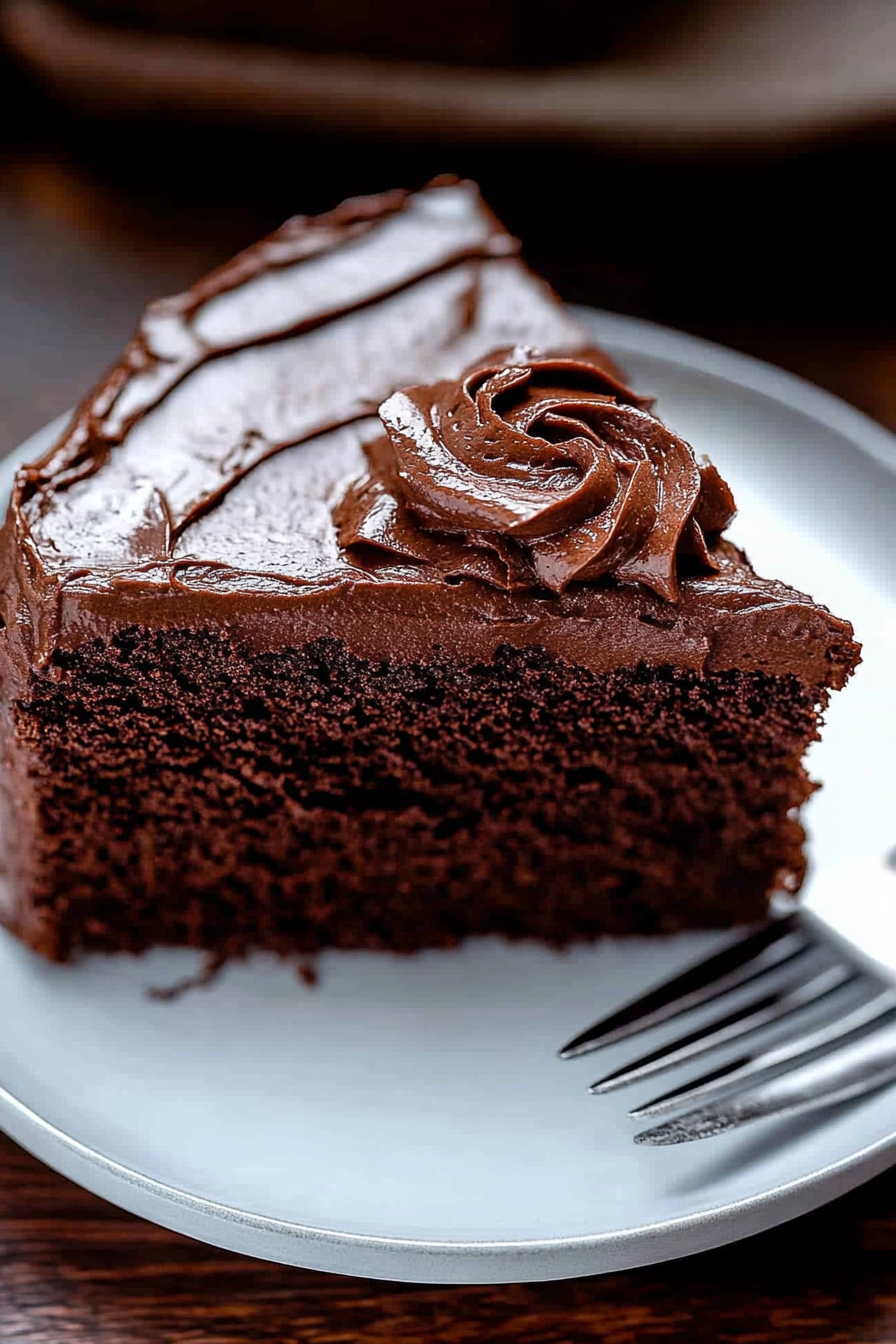
Rich Chocolate Cake With a Secret Ingredient
There’s something about the smell of a freshly baked chocolate cake that instantly transports me back to childhood — baking with my grandma, who always had a secret recipe up her sleeve. I remember sneaking bites of batter while waiting for the cake to finish, and the joy of that first bite when the warm, gooey chocolate met my tongue. Over the years, I’ve tested dozens of recipes, but this one? It’s become my go-to because it’s incredibly flavorful, surprisingly easy, and always makes everyone’s eyes light up. Honestly, it’s the kind of dessert I turn to on rainy afternoons when I need a little comfort, or when friends surprise me with a visit — because let’s be real, nothing says “welcome” like a slice of homemade chocolate cake. And trust me, this one’s a lifesaver on busy nights when I want something rich and satisfying, but don’t have hours to spend in the kitchen. I’ll even admit, I’ve made it with a splash of espresso or a sprinkle of sea salt on top for an extra special touch. Just wait — you’ll want to keep this recipe close forever!
What is chocolate cake?
Think of a chocolate cake as the ultimate chocolate lover’s dream—think layers of moist, tender sponge infused with rich cocoa, topped with luscious frosting that melts in your mouth. It’s essentially a celebration in cake form, perfect for birthdays, parties, or just because you’re craving something sweet. The beauty of chocolate cake is that it’s endlessly versatile—pick your favorite cocoa intensity, add fruits or nuts, or go all-out with ganache or whipped cream. The name “chocolate cake” might sound simple, but behind that humble label lies a decadent treat that’s captured hearts across generations. It’s a combination of tender crumb, deep chocolate flavor, and just the right amount of sweetness that makes it a classic for any occasion. Honestly, I think everyone has their own special version, but the one I swear by is a little nostalgic, a little indulgent, and ridiculously easy to make at home. No fancy equipment needed—just good-quality ingredients and a little love.
Why you love chocolate cake?
What I love most about this chocolate cake is how it hits all the right notes—moist, rich, and just the right amount of sweet. The flavor is deep and intensely chocolatey, but not overwhelming, with a hint of vanilla rounding everything out. It’s one of those recipes that’s foolproof, even for bakers still finding their groove. I’ve made this countless times, and it never fails to get rave reviews from friends and family. Plus, it’s budget-friendly—you probably have most of the ingredients in your pantry right now! This cake is also super versatile. You can dress it up with a simple dusting of powdered sugar for a fuss-free dessert or go all-in with chocolate ganache and fresh berries for special occasions. My kids actually ask for this all the time, and I’ve even baked it as a surprise for my partner’s birthday — it disappears in minutes at my house! It’s perfect when you’re craving something gooey at 10pm but don’t want to fuss with complicated recipes. Honestly, once you get the hang of it, you’ll see just how forgiving and rewarding this chocolate cake can be.
How do I make my own chocolate cake?
Quick Overview
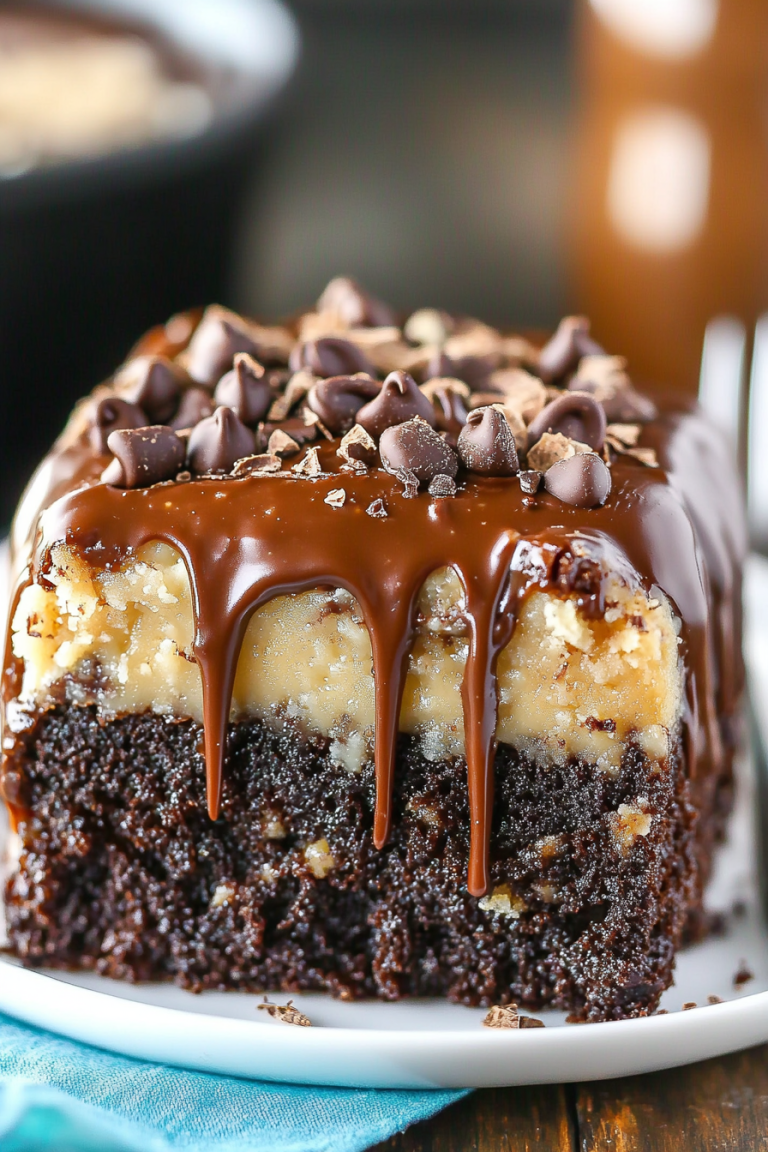
This chocolate cake is all about simplicity. You start by mixing your dry ingredients — flour, cocoa powder, baking soda, and sugar — in one bowl. In another, blend your wet ingredients — eggs, oil, milk, and vanilla — until smooth. Combine the two gently, so the batter stays light and airy. Pour half the batter into a prepared cake pan, dollop your favorite filling (think: jam, Nutella, or even cream cheese), then swirl it through the batter with a knife for a marbled effect. Cover with the remaining batter, bake at a moderate temperature until your kitchen smells like a chocolate heaven, cool completely, then top with your favorite glaze or frosting. The magic tricks are in the details—like not overmixing to keep it fluffy, and letting the cake cool completely before glazing. This method keeps things straightforward but yields a bakery-worthy result that’s moist, flavorful, and totally addictive.
Ingredients
For the Main Batter:
– 1 ¾ cups all-purpose flour (I swear by unbleached for better flavor)
– ¾ cup unsweetened cocoa powder (preferably Dutch-processed for richness)
– 2 teaspoons baking soda
– 1 cup granulated sugar (can reduce slightly if you prefer less sweetness)
– ½ teaspoon salt
– 2 large eggs (at room temp, for better whisking)
– 1 cup whole milk (or almond milk for dairy-free, and yes, it still turns out amazing!)
– ½ cup vegetable oil (or melted butter if you want a bit more richness)
– 2 teaspoons pure vanilla extract
For the Filling:
– ½ cup Nutella or chocolate hazelnut spread (because who doesn’t love a gooey center?)
– Optional: fresh berries, banana slices, or caramel sauce for variety
For the Glaze:
– 1 cup semisweet chocolate chips or chopped high-quality chocolate
– ½ cup heavy cream or coconut cream for dairy-free
– A pinch of sea salt or espresso powder for boosting flavor
– Extra toppings like sprigs of mint, sprinkles, or chopped nuts (your call!)
Steps to Create Chocolate Perfection
Step 1: Preheat & Prepare Your Pan
Set your oven to 350°F (175°C). Grease your cake pan with butter or non-stick spray, then dust lightly with cocoa powder or flour. You want to prevent any sticking, especially since this batter is rich and moist. I always do this step first; it makes removal a breeze. Place a piece of parchment paper at the bottom if you’re feeling extra cautious. When I season my pans like this, I find my cake comes out clean every single time.
Step 2: Mix Dry Ingredients
In a large mixing bowl, sift together the flour, cocoa powder, baking soda, sugar, and salt. Sifting is like magic—it lightens the mixture and keeps your cake tender. A dry, well-mixed bowl means even distribution of cocoa and leavening agents, which is key to rise and flavor. I’ve made the mistake of not sifting enough—trust me, lumps are no fun in this cake!
Step 3: Mix Wet Ingredients
In another bowl, whisk together eggs, milk, oil, and vanilla until smooth. I like to do this by hand; it’s satisfying and makes me feel connected to the process. Make sure everything’s at room temperature so that the liquids blend seamlessly into the dry ingredients. When I first started baking this, I overlooked this tip and ended up with a slightly lumpy batter, which I quickly fixed by whisking longer.
Step 4: Combine
Pour the wet mixture into the dry bowl gradually, folding gently with a spatula or whisk just until combined. Overmixing makes the sponge dense, so stop when everything’s just incorporated. It’s okay if some small lumps remain—that’s what keeps the cake tender. Be gentle; treat this like a delicate dance, not a vigorous workout.
Step 5: Prepare Filling
If you’re adding filling like Nutella or fruit, keep it at room temp so it spreads easily. I usually dollop spoonfuls in the center of the batter—think of it as a little treasure—and swirl it with a toothpick or skewer. This creates a marbled effect that’s as pretty as it is delicious. Feel free to experiment with other fillings—caramel, cream cheese, or even marshmallow fluff—whatever makes your heart sing!
Step 6: Layer & Swirl
Pour half the batter into your prepared pan, spoon your filling on top, then cover with the remaining batter. Using a toothpick or skewer, make gentle swirls through the batter and filling. You want a marbled look—don’t overdo it, or you’ll lose the beautiful contrast. I love watching the swirl form as I go—it’s a little moment of magic in the kitchen.
Step 7: Bake
Pop the cake into the oven and bake for about 30-35 minutes. It’s done when a toothpick inserted into the center comes out with moist crumbs, not batter. Every oven cooks a little differently; my first batch took 33 minutes, but don’t be surprised if yours needs a tad more or less time. Let the cake sit in the pan for 10 minutes before transferring to a wire rack. This helps it set so it doesn’t fall apart when you move it.
Step 8: Cool & Glaze
Give your cake enough time to cool completely—at least an hour—before adding the glaze. If it’s warm, the chocolate might melt and become too runny. When cooled, pour your glossy, slightly thickened glaze over the top, letting it drip down the sides naturally. I love sprinkling sea salt or a pinch of espresso powder into my glaze—adds depth and balances the sweetness beautifully.
Step 9: Slice & Serve
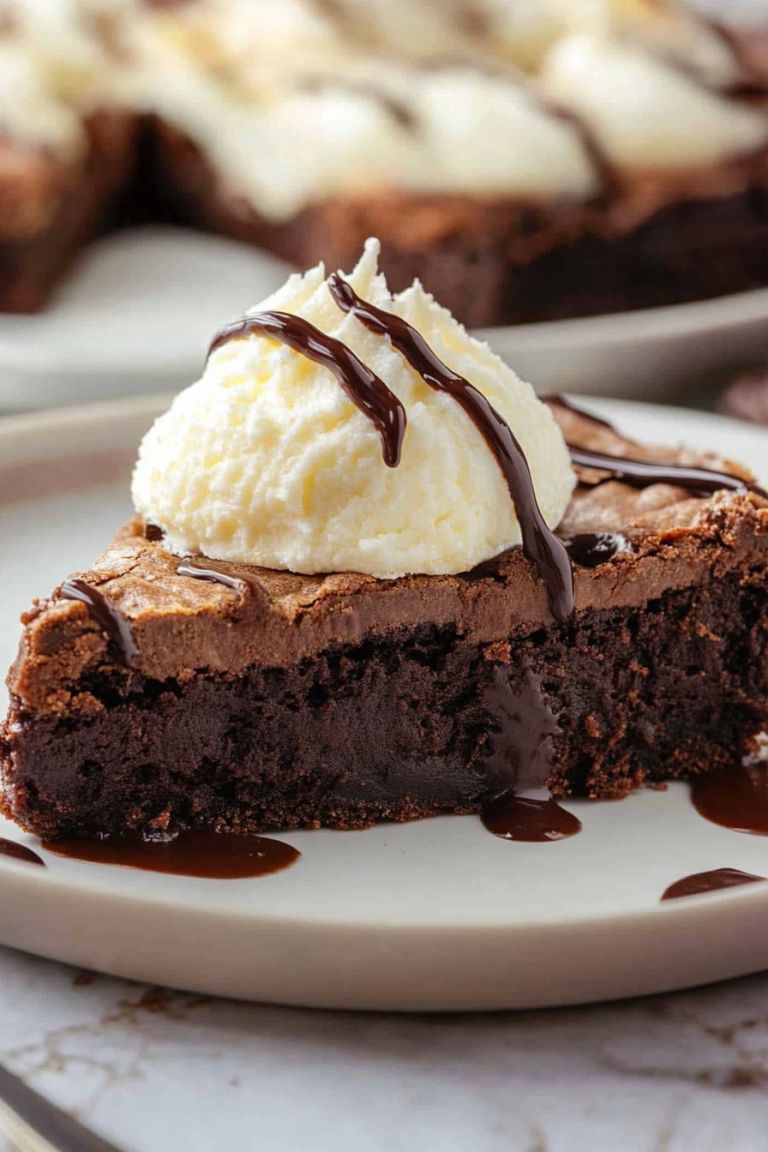
Use a serrated knife for clean cuts, wiping it between slices for the neatest look. Serve at room temperature for the best texture and flavor. A dollop of whipped cream or a scattering of berries makes it even prettier—plus, it’s a nice contrast to all that chocolate richness. Watch as everyone dives into their slice—trust me, there’ll be oohs and ahhs all around. It’s this kind of moment that makes all the baking worth it.
What to Serve It With
This chocolate cake is adaptable enough to be a breakfast treat or a dessert showstopper. For breakfast, pair it with a robust cup of coffee or a tall glass of cold milk—because start the day with chocolate is always a good idea. For brunch, serve slices with a dollop of mascarpone and some fresh berries—elegant yet comforting. As an after-dinner dessert, I love adding a scoop of vanilla ice cream or a drizzle of caramel sauce to turn it into a decadent finale. If I’m craving something cozy and casual, a simple cup of hot chocolate or a latte alongside a piece of this cake makes it feel like a warm hug. My family loves having it with tea in the afternoon, especially when the weather’s gloomy outside—perfect for those lazy Sundays or cozy get-togethers. This cake just asks to be shared, enjoyed, and made a little bit special every time.
Top Tips for Perfecting Your Chocolate Cake
After making this recipe dozens of times, I’ve picked up a few tricks that help elevate it from good to extraordinary. First, always sift your dry ingredients—trust me, lumps are enemies of a fluffy crumb. When mixing wet ingredients, I like to add a splash of hot water or brewed coffee to intensify the chocolate flavor; it’s subtle but really makes a difference. For the swirl effect, I recommend using a toothpick and making gentle, figure-eight motions—this creates a beautiful marbled look. Don’t overmix once combined; it’ll toughen the cake. As for ingredient swaps, I’ve substituted coconut oil and even applesauce in a pinch—both work well, but the texture shifts slightly, so I adjust baking times accordingly. When baking, always check your cake a few minutes early—the oven’s quirks can surprise you—and insert a cake tester into the center; if it comes out with moist crumbs, you’re perfect. For the glaze, I like making a ganache by gently heating the cream and pouring it over chopped chocolate—smooth, shiny, and foolproof. If you want extra depth, add a splash of bourbon or coffee liqueur to the glaze. The key is patience: let your cake cool completely before glazing, and give yourself time to admire your beautiful creation. Little tweaks here and there can really make this your signature chocolate cake—trust me, I’ve been there!
Storing and Reheating Your Chocolate Cake
Ever wonder how to keep that moist texture and luscious flavor intact? I’ve learned a few things over the years. If you’re not serving the cake right away, loosely cover it with plastic wrap or a cake dome to prevent it from drying out—don’t seal it tight, or it’ll trap moisture and make the frosting soggy. Room temperature storage is fine for a day or two, but beyond that, pop it in the fridge wrapped well (it’s good for up to 5 days). Reheating isn’t necessary for most slices, but if you like your chocolate cake warm, microwave a slice for about 15-20 seconds—trust me, the chocolatey aroma instantly awakens, and the texture becomes even more indulgent. Freezing is a smart option if you want to make it ahead: wrap the whole cake tightly in plastic wrap, then foil, and store for up to 3 months. When ready, thaw overnight in the fridge and bring to room temperature before glazing or serving. If you’ve added glaze or frosting, a quick re-heat can soften it up if it’s firmed over time. Just be gentle—over-reheating can dry it out or cause the glaze to melt unevenly. Bottom line: store it as you’d want to find it—fresh, moist, and luscious, every single time.
Frequently Asked Questions
Final Thoughts
This chocolate cake has become a staple in my kitchen because it’s reliable, deeply satisfying, and surprisingly versatile. Every time I bake it, I remember why I fell in love with baking in the first place—bringing family and friends together over something homemade, warm, and indulgently chocolatey. It’s not just a dessert; it’s a small celebration, a comfort, and a little bit of joy in every slice. I hope you’ll try it out, tweak it to your taste, and find your own special moments with this recipe. Remember, baking is all about loving the process and tasting your creation—don’t stress if it’s not perfect the first time. The best treats come from a little experimentation and a lot of passion. Happy baking, and I can’t wait to hear how yours turns out! Be sure to share your pictures and stories—this cake deserves all the love. Now, go grab some ingredients, turn on your favorite playlist, and let’s get baking!
Classic Chocolate Cake
Ingredients
Method
- Preheat oven to 350°F. Grease and flour two 9-inch round cake pans.
- In a large bowl, combine flour, sugar, cocoa powder, and baking soda.
- Add buttermilk, vegetable oil, and vanilla to the dry ingredients. Mix until smooth.
- Gradually add boiling water, mixing continuously. The batter will be thin.
- Pour batter evenly into prepared pans and bake for 30 minutes or until a toothpick inserted into the center comes out clean.
- Allow cakes to cool in pans for 10 minutes, then turn out onto wire racks to cool completely.