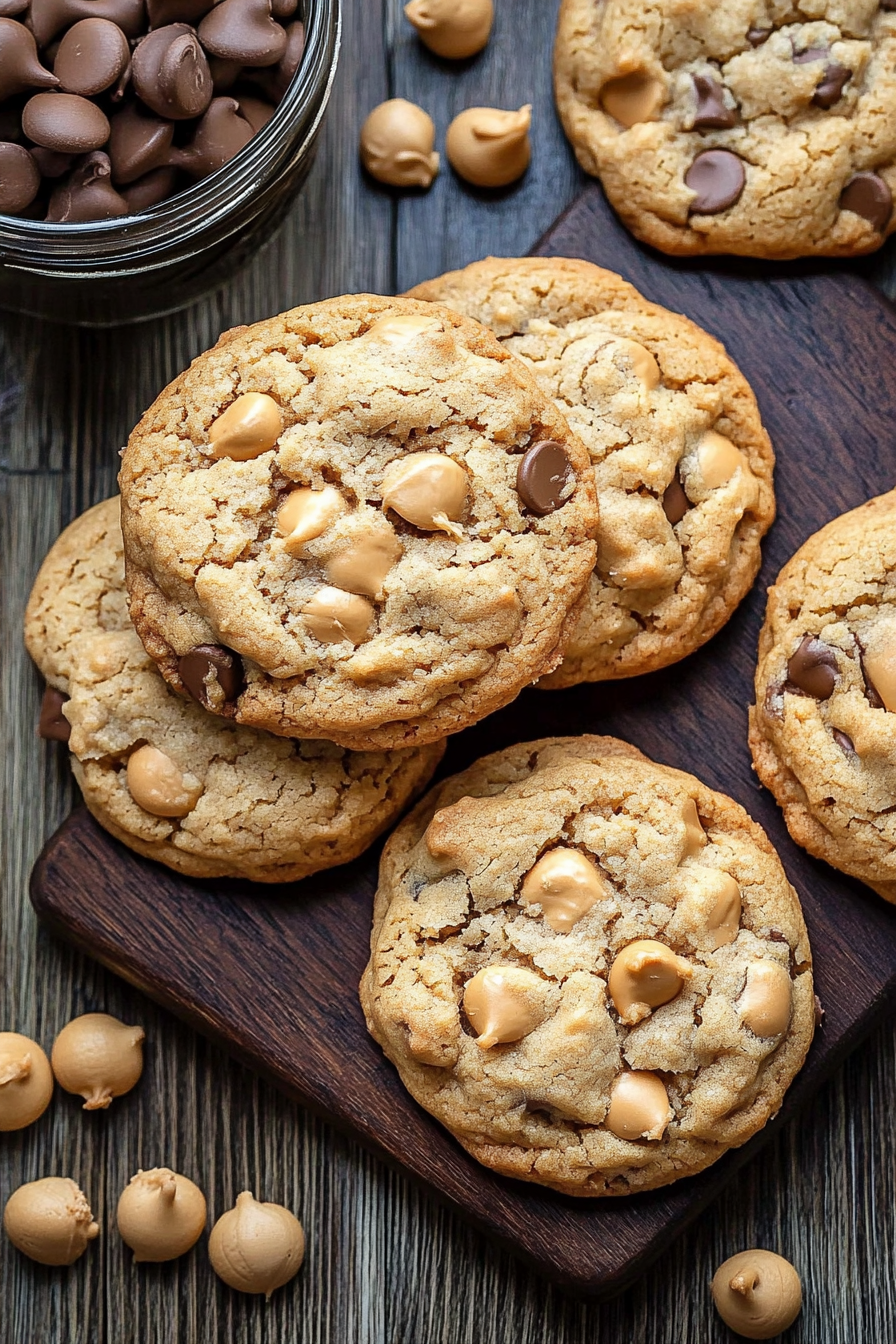
Rich Peanut Butter Chocolate Cookies Recipe
There’s something about the smell of warm freshly baked peanut butter cookies that instantly takes me back to my childhood. I can still remember sneaking bites from the cookie jar as a kid, my fingers sticky with that rich, nutty aroma. My mom always made these cookies when she needed a quick pick-me-up or something sweet to share with friends. Trust me, once you try making them yourself, you’ll understand why they’ve become a staple in my kitchen—and probably yours, too.
This recipe is a bit of a game-changer because it’s so straightforward but yields cookies that are soft, chewy, and bursting with peanut butter flavor. My kids ask for these all the time—they disappear in minutes at my house—and I love that I can whip them up with just a handful of pantry staples. Unlike complicated desserts, these are super forgiving, so even if you’re new to baking, you’ll end up with perfect cookies every time. Plus, they’re kind of addictive in the best way—once you start, you won’t want to stop. So, grab your mixing bowls, and let’s get baking!
What is peanut butter cookies?
Think of peanut butter cookies as that cozy, familiar treat that combines the velvety creaminess of peanut butter with the satisfying crunch of a cookie. It’s essentially a peanut lover’s dream—warm, soft in the middle with a slightly crispy edge, and packed with that unmistakable peanut flavor. The name says it all: these cookies are all about peanut butter, but the magic is in how simple and approachable they are to make. The basic idea is just combining butter, sugar, and plenty of peanut butter, then shaping the dough into rounds before baking. Sometimes, I like to press a little fork pattern into the top—classic and adorable.
These cookies are a universal crowd-pleaser, whether for a quick snack, a party treat, or even a comforting after-dinner dessert. They’re so versatile—you can jazz them up with a sprinkle of sea salt for that sweet-salty combo or add chocolate chips for extra decadence. The best part? They’re easy to customize based on what you have. Think of peanut butter cookies as that reliable, warm hug in cookie form—you’ll keep coming back to this recipe over and over.
Why you’ll love this recipe?
What I love most about these peanut butter cookies is their unbeatable flavor. The peanut butter really shines through—rich, nutty, and just a little bit salty, balancing beautifully with the sweetness of the sugar. The smell alone when these are baking is enough to make your neighbors wonder what’s happening in your kitchen! These cookies are also incredibly simple to put together. No fancy equipment needed, just a bowl, a spoon, and a oven, making them perfect for last-minute cravings or busy weeknights.
And let’s talk about budget. Peanut butter is an inexpensive ingredient that goes a long way here—it’s basically the star of the show. Plus, you likely already have most of the ingredients: sugar, eggs, and flour. Honestly, these cookies are a real money-saver because they’re so satisfying, you won’t be tempted to buy store-bought treats that cost twice as much.
Versatility is another reason I keep coming back to this recipe. Sometimes I add a handful of chocolate chips or chopped peanuts for crunch. Other times, I’m feeling a bit fancy, and I’ll swirl in some caramel or press a few mini peanut butter cups into the top before baking. They’re perfect for sharing, but I won’t judge if you stash a few for yourself—these ones disappear fast! Whether you’re craving a comforting snack or a crowd-pleasing dessert, these peanut butter cookies hit the spot every single time.
How do I make peanut butter cookies?
Quick Overview
This recipe is honestly so easy that it might just become your go-to. You’ll start by creaming together butter and sugar, then mix in peanut butter until everything’s smooth and velvety. After that, just stir in the eggs and a few dry ingredients—no fancy techniques, I promise! The dough comes together quickly, and the best part is you can chill it briefly or bake right away. Scoop out rounded tablespoons, flatten them slightly, and add your favorite toppings if you want. A quick bake, and you’re rewarded with warm, gooey peanut butter cookies that taste like they came straight from a bakery—except they didn’t take all afternoon.
Ingredients
For the Main Batter:
- 1 cup creamy peanut butter (natural or processed—you can use either but creamy works best for a smooth texture)
- 1 cup granulated sugar (white or a mix of brown and white for a richer flavor)
- 1/2 cup unsalted butter, softened (I like to soften mine at room temp for easy mixing)
- 2 large eggs (at room temperature makes mixing easier)
- 1 1/4 cups all-purpose flour (plain, high-quality flour does the trick)
- 1 teaspoon baking soda (for the perfect rise and texture)
- 1/2 teaspoon salt (balances the sweetness and enhances the peanut flavor)
For the Filling (optional):
- A splash of honey or swirl of caramel sauce (for extra gooeyness)
- Chopped roasted peanuts or mini peanut butter cups for texture
For the Glaze (optional):
- ½ cup powdered sugar mixed with a teaspoon of milk or lemon juice (for a quick glaze)
- Chocolate drizzle or sea salt flakes for finishing touches
Step-by-Step Instructions
Step 1: Preheat & Prep Pan
Heat your oven to 350°F (175°C). Line a baking sheet with parchment paper—trust me, this makes all the difference in preventing sticking and prevents your cookies from spreading too much. Keep everything ready because these cookies come together quickly once you start.
Step 2: Mix Dry Ingredients
In a small bowl, whisk together the flour, baking soda, and salt. This ensures everything is well combined and evenly distributed, which helps your cookies rise uniformly. I’ve learned the hard way that skipping this step can lead to uneven texture or baking mishaps—and nobody wants flat, sad cookies!
Step 3: Mix Wet Ingredients
In a large bowl, beat the softened butter, peanut butter, and sugar until creamy and fluffy—about 2-3 minutes. I always do this first because it gives the cookies that tender, melt-in-your-mouth quality. Then, add the eggs one at a time, mixing well after each addition. The mixture should look smooth, slightly glossy, and inviting enough to lick the spoon. Do a quick smell test—nothing beats that warm peanut aroma!
Step 4: Combine
Gradually add the dry ingredients to the wet mixture, stirring gently just until everything is combined. Overmixing can make your cookies tough, so I always stir just enough to incorporate. The dough will be soft but manageable—if it feels too sticky, a sprinkle more flour helps.
Step 5: Prepare Filling
If you’re using any fillings like mini peanut butter cups or chopped nuts, now is the time. Gently fold them into the dough, or set aside small portions to stuff into the centers later. I like to leave a few plain so the peanut butter flavor really shines through.
Step 6: Layer & Swirl
Using a tablespoon or cookie scoop, form rounded balls and place them on your prepared baking sheet. If you want the classic pattern, gently press them with a fork to make a crisscross pattern—my kids think these look adorable! For extra flair, you can sprinkle a tiny bit of flaky sea salt on top—trust me, that salty-sweet combo is addicting.
Step 7: Bake
Pop the tray into the oven and bake for 8-10 minutes. Keep an eye on them—look for edges that are just starting to turn golden. They might look underdone once out, but they set as they cool. I always pull them out just before they look perfect because they firm up a little while cooling.
Step 8: Cool & Glaze
Let the cookies cool on the baking sheet for about 5 minutes, then transfer to a wire rack. If you’re glazing or adding toppings, do that once they’re completely cooled—this keeps the shine and prevents melting. A quick drizzle of chocolate over the top makes them look fancy, but honestly, they’re just as amazing plain.
Step 9: Slice & Serve
These cookies are best enjoyed warm or at room temperature. I like to serve them on a pretty platter, maybe with a cold glass of milk or coffee. They’re perfect with a scoop of vanilla ice cream too if you’re feeling indulgent. Sometimes, I even stash a few in an airtight container overnight—trust me, they’re just as good the next day, if they last that long!
What to Serve It With
These peanut butter cookies are so versatile, I swear they can fit almost any occasion. For a cozy weekend breakfast, serve them with your morning coffee or tea—pair with a banana or a handful of berries for a well-rounded start. When friends come over, I love to set a platter with these cookies, some fresh fruit, and a side of whipped cream or a drizzle of honey—simple yet impressive. As an after-dinner treat, I warm up a few and top with a dollop of whipped cream or vanilla ice cream—pure comfort.
And don’t forget, these cookies are a must-have for my kids’ lunchboxes; they pair perfectly with a cold glass of milk or a splash of almond milk if you’re dairy-free. They’re also great for picnics or weekend baking sessions with family—kids love shaping the dough and pressing the fork pattern. Honestly, these cookies have become a little tradition around here, creating happy, sticky fingers and lots of smiles.
Top Tips for Perfecting Your peanut butter cookies
Over the years, I’ve picked up a few tricks that make these peanut butter cookies turn out just right every time. Here’s what I’ve learned:
- Zucchini Prep: I actually discovered this one by accident—adding a touch of grated zucchini (squeezed dry) makes the cookies extra moist and tender without overpowering the peanut butter flavor. Plus, it sneaks in some veggie nutrients!
- Mixing Advice: Be gentle when combining the dry and wet ingredients. Overmixing leads to tough cookies—trust me, I’ve made that mistake a hundred times. Mix just until you see no flour streaks and avoid pressing the batter too hard.
- Swirl Customization: If you want a pretty marbled effect, try swirling in some chocolate or caramel before baking. Use a toothpick to create fun patterns—looks impressive, tastes divine.
- Ingredient Swaps: Almond or cashew butter works beautifully if you want to switch things up. Adjust the flour slightly if the dough feels too runny or too stiff—every nut butter is a little different.
- Baking Tips: For a chewier cookie, bake a minute or two less. For crispier edges, give them an extra minute. Remember, oven temperatures can vary, so keep an eye on that golden edge!
- Glaze Variations: If you’re short on time, a dusting of powdered sugar or a quick nut butter drizzle works well. For a creamy contrast, whip up some cream cheese frosting or caramel sauce—they’re usually a hit with the family.
This recipe is forgiving, and each batch you bake teaches you something new. My biggest lesson? Always let the cookies cool fully before glazing or stacking—otherwise, they may fall apart. And don’t be afraid to experiment; that’s how I found my favorite version with a hint of cinnamon and a sprinkle of flaky sea salt. Trust me, learning the little tweaks makes all the difference—and makes baking these cookies even more fun.
Storing and Reheating Tips
Now, the only tricky part about these cookies is knowing how to keep them fresh and delicious for days. But don’t worry, I’ve got that covered. Once cooled, store them in an airtight container at room temperature. They stay soft and chewy for about 3-4 days. If you want that freshly-baked goodness a little longer, pop them in the fridge—just give them a quick minute in the microwave or warm oven before serving to revive the texture.
If you need to freeze them, wrap each cookie tightly in plastic wrap, then place in a freezer bag or container. They’ll keep for up to 3 months. Thaw at room temperature or warm in a low oven for a minute or two—perfect for last-minute cookie cravings. When it’s time to serve, add your glaze or toppings after reheating so they stay fresh and flavorful. Honestly, I think these cookies get even better with a little age—they develop a richer, more rounded peanut flavor.
Frequently Asked Questions
Final Thoughts
If there’s one thing I want you to remember about this peanut butter cookie recipe, it’s that simplicity and heart matter the most. These cookies are a warm hug for your taste buds, packed with nostalgic flavors and made with ingredients so common you probably already have them in your pantry. I’ve made dozens of batches over the years, tweaking little things here and there—like adding a splash of vanilla or pressing in some chocolate chips—and each time, they bring a smile to everyone’s face. Trust me, once you bake these, they’ll become a regular in your baking rotation too. Give them a try, and I can’t wait to hear how yours turn out! Happy baking, and don’t forget to share your picture on social—these cookies look adorable on any plate.
Homemade Peanut Butter Cookies
Ingredients
Method
- Preheat your oven to 400°F. Line two baking sheets with parchment paper.
- Using a mixer, beat the cold butter with brown sugar and granulated sugar until creamy.
- Add the egg and egg yolk, and mix until well combined.
- Mix in vanilla extract.
- Whisk together the flour, cake flour, salt, baking powder, and baking soda in a bowl.
- Gradually add dry ingredients to wet mixture, mixing on low speed.
- Stir in the chocolate chips and peanut butter chips.
- Shape the dough into 8 large balls and place them on the baking sheets.
- Bake for 12 minutes, until edges are golden brown.
- Cool on sheets for 10 minutes before transferring to a wire rack.
- Serve warm or at room temperature.