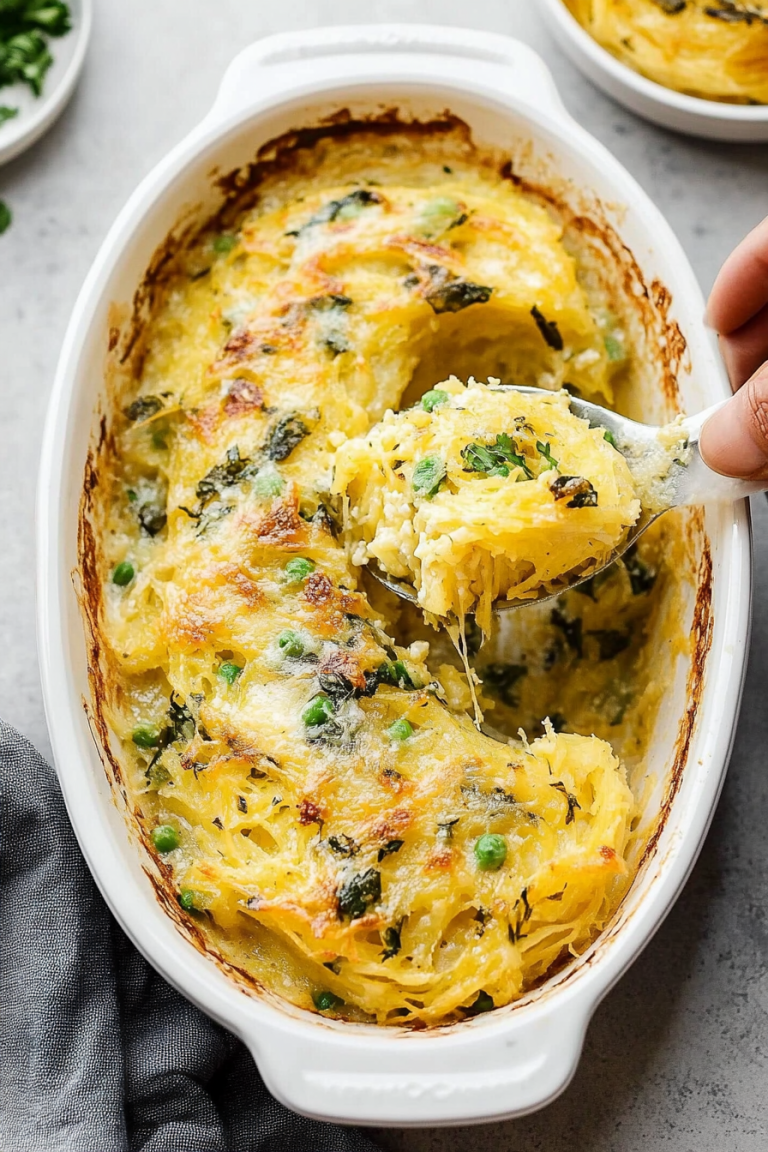
Savory Noodle Pie Recipe: Easy Comfort Food
There’s something about baked pasta dishes that immediately takes me back to my childhood kitchen—warm, cheesy, and utterly comforting. I still remember the smell that wafted through my house when my mom pulled out her spaghetti pie from the oven, the golden crust shimmering, and the inside bubbling with flavor. It’s that perfect blend of savory, cheesy goodness with a hint of homemade magic. Honestly, this spaghetti pie is a real lifesaver on busy weeknights when I want something hearty but don’t want to spend hours cooking. And trust me, my kids ask for seconds every single time—sometimes even thirds! It’s almost like a family secret weapon now. Whether you’re a tender green bean or a spice enthusiast, this dish is versatile enough to tweak to your liking. Plus, it’s an easy throw-together that makes a great leftover—something I always do when I want a quick, satisfying bite. If you’ve never tried spaghetti pie before, I promise, once you do, it’ll become a staple in your cooking arsenal too. Let’s dive into making this cozy, cheesy delight!
What is spaghetti pies?
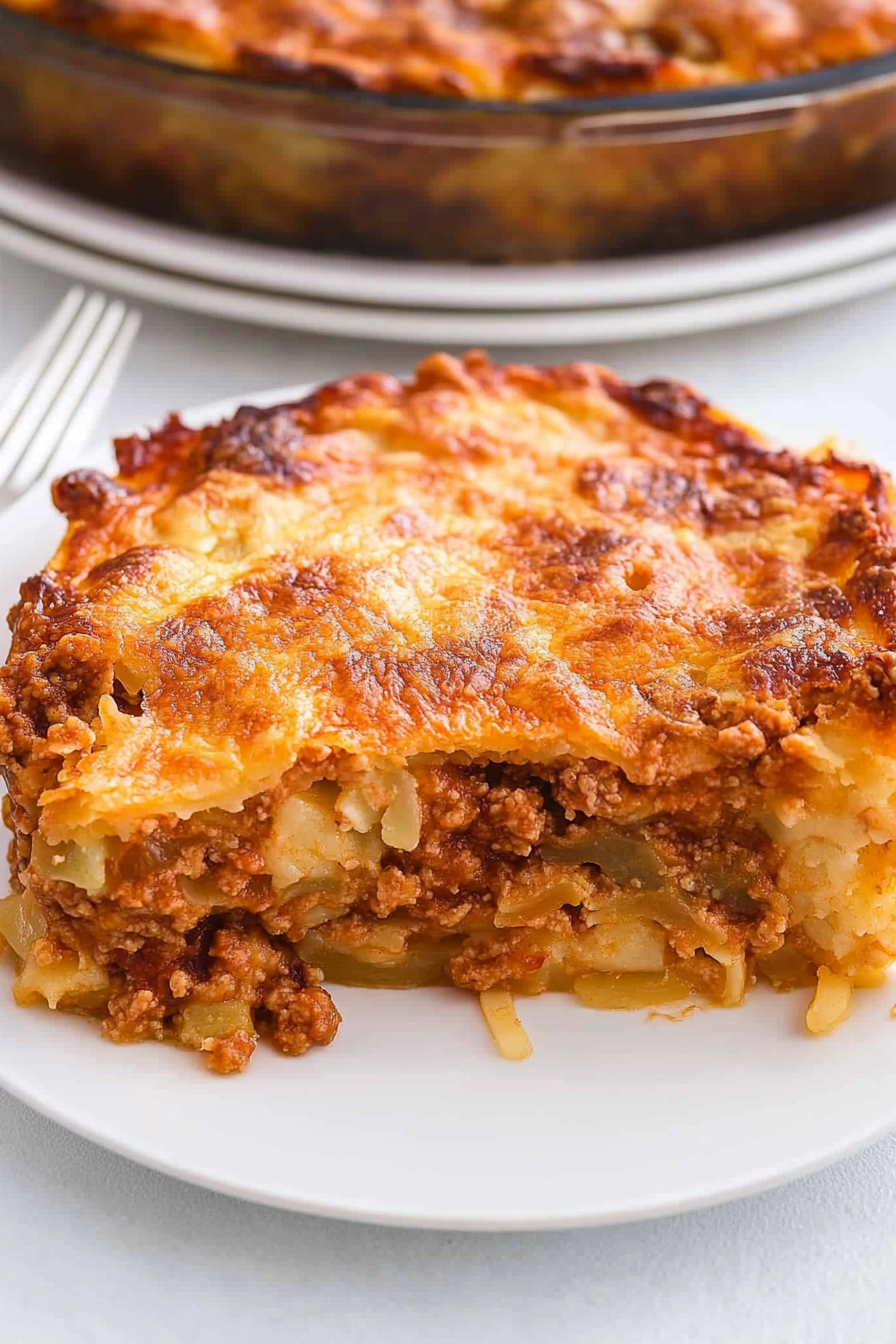
Think of spaghetti pie as a homemade casserole that combines all the goodness of your favorite spaghetti with the heartiness of a pie. It’s essentially cooked spaghetti mixed with eggs and cheese, then layered with savory fillings like sausage or veggies, topped with more cheese, and baked until everything is golden and bubbly. Its name might make you think of a savory quiche or traditional meat pie, but in reality, it’s a pasta lover’s dream. The magic is in how the cooked pasta forms a kind of crust that holds everything together—imagine a big, cheesy, flavorful nest for your favorite fillings. It’s a dish that’s kind of a cross between lasagna and a baked spaghetti, but with a homey, rustic twist. Think of it as comfort food with a little bit of fancy—perfect for family dinners, potlucks, or even a laid-back brunch. And the best part? It’s surprisingly simple to prepare, making it a go-to when I want something delicious without all the fuss.
Why you’ll love this recipe?
What I love most about this spaghetti pie is how it hits all those nostalgic notes while being surprisingly straightforward. The flavor? Oh, it’s incredible. Layers of cheesy richness and savory fillings come together in perfect harmony, and the smell alone will bring everyone to the kitchen. Plus, it’s totally forgiving—I’ve experimented with different cheeses, adding spinach, or swapping in ground turkey, and it’s always a hit. The beauty of this dish is in its simplicity: cooked pasta coated in eggs and cheese, nestled with your favorite fillings, then baked to perfection. And let’s not forget how budget-friendly it is—most of the ingredients are staples I always keep on hand. Whether I’m making this for a quick weeknight dinner or piling it onto a buffet for guests, it never disappoints. It’s versatile, too—I’ve even made a vegetarian version that my husband couldn’t tell wasn’t meat. Honestly, once you get the hang of it, this spaghetti pie becomes a beloved family recipe that I’ll be making for years. It’s comfort in every slice, and I promise, it’ll become a favorite in your house too.
How do I make Spaghetti Pie?
Quick Overview
This spaghetti pie is nothing fancy, but it’s packed with flavor and super easy to throw together. You start by cooking your spaghetti, mixing it with eggs and cheese for that perfect hold-together base, then layering in your fillings—whether it’s sausage, vegetables, or leftovers. Pop it in the oven, bake until golden, and finish it with a drizzle of your favorite sauce or some extra cheese on top. The trick is not overmixing the pasta mixture—just enough so it’s all evenly coated—then layering carefully. Trust me, this is one of those dishes that looks impressive but comes together in no time. Plus, I tested this with different cheese combos and even almond milk (to make it lighter), and it always turns out amazing. The smell alone will make your family gather around the kitchen, practically begging for a slice!
Ingredients
For the Main Batter:
– 12 oz cooked spaghetti (you can use whole wheat or gluten-free if you like)
– 2 large eggs (or flax eggs for plant-based version)
– 1 cup shredded mozzarella cheese
– 1/2 cup grated Parmesan cheese
– Salt and pepper to taste
– 1 tbsp olive oil (to coat the pasta)
For the Filling:
– 1/2 lb cooked sausage or ground beef (or sautéed vegetables for veggie version)
– 1 cup cooked spinach or other greens (optional but so good!)
– 1/2 cup chopped onions or peppers (optional but packed with flavor)
– 2 cloves garlic, minced
– Salt, pepper, Italian herbs to taste
For the Glaze:
– 1/2 cup shredded cheese (a little extra mozzarella or cheddar)
– A splash of milk or heavy cream if you want it extra creamy
– Fresh herbs or red pepper flakes for a little kick
Step-by-Step Instructions
Step 1: Preheat & Prep Pan
Crank your oven to 375°F (190°C). Grease a pie dish or a deep baking dish with a little butter or non-stick spray. I usually line it with parchment paper for easy cleanup. Make sure your spaghetti is cooked al dente—that way it’ll hold together better when baked. Drain and set aside, but don’t forget to toss it with a drizzle of olive oil so it doesn’t stick, especially if it’s been sitting on the stove for a bit.
Step 2: Mix Dry Ingredients
In a large bowl, combine your eggs, cheeses, salt, and pepper. Whisk until smooth. This layer is what turns your pasta into that pie-like crust, so don’t skimp on the cheese—trust me, it’s all about that gooey, cheesy goodness!
Step 3: Mix Wet Ingredients
Add the cooked, drained spaghetti to the egg and cheese mixture. Toss gently until everything’s nicely coated—try not to overmix or your pasta might turn gluey, which isn’t what we want. If you’re adding herbs or seasoning here, this is the moment.
Step 4: Combine
Pour half of your pasta mixture into the prepared baking dish. Spread evenly. Now, layer your cooked fillings—sautéed sausage, greens, or whatever you like—on top, then cover with the rest of the pasta. Carefully swirl with a fork or spoon to create pretty marbled patterns—trust me, a little swirl makes it look extra tempting once baked!
Step 5: Prepare Filling
If you’re going veggie, sauté your chopped veggies with a little garlic, salt, and pepper until tender. You can also add a splash of soy sauce or herbs for flavor. Once ready, sprinkle evenly over the layered pasta in the dish.
Step 6: Layer & Swirl
It’s fun to get creative here—use a toothpick or fork to gently swirl the fillings into the pasta layer for a marbled effect. It makes each slice prettier and more flavorful with swirls of filling peeking through.
Step 7: Bake
Pop it into your preheated oven and bake for about 25-30 minutes, or until the top is golden brown and bubbly. If you want an extra cheesy crust, sprinkle additional cheese on top during the last 5 minutes of baking. Keep an eye on it—oven temps can vary, and you want that perfect crispy top without burning.
Step 8: Cool & Glaze
Let your spaghetti pie cool for about 10 minutes before slicing—this helps it set and makes serving a lot neater. Meanwhile, prepare your glaze—warm some cheese, milk, or even a little butter until melted and smooth, then drizzle over the sliced pie for that finishing touch of gooey goodness.
Step 9: Slice & Serve
Use a sharp serrated knife for clean cuts. Serve warm, garnished with fresh herbs or a sprinkle of extra cheese. I like to pair it with a crisp green salad or some roasted veggies to balance out all that cheesy richness. This dish is so good straight from the oven or even reheated the next day—it just gets better!
What to Serve It With
I almost always serve spaghetti pie with a fresh, crunchy side salad—think baby arugula, cherry tomatoes, and a balsamic vinaigrette. For breakfast or brunch, I love pairing slices with scrambled eggs and fresh fruit—this dish actually works beautifully for morning too! When company drops in, I toss a simple Caesar salad and some crusty bread on the table. And if I want to turn it into a more elegant dinner, I add a glass of chilled white wine or rosé. Sometimes, I even dollop a little marinara sauce on each slice for an extra burst of flavor. My kids? They ask for it as their official comfort meal—sometimes they even sneak seconds before I can say “dessert!” This is what I love about it—so adaptable, so comforting, and honestly, it never fails to be a crowd-pleaser. Plus, I always make extras because it reheats beautifully, and I think leftovers are just as good—if not better—the next day. It’s the kind of dish that feels like a warm hug at the end of a busy day.
Top Tips for Perfecting Your Spaghetti Pie
Over the years, I’ve learned a few tricks that make this dish even better. First, always cook your spaghetti al dente—I swear, it helps the pie hold together without becoming mushy. When mixing everything, avoid overmixing; it can make your crust dense. Instead, fold gently until just combined. For fillings, feel free to get creative—leftover roasted vegetables, cooked chicken, or even a handful of chopped olives or sun-dried tomatoes work great. When layering, I like to sprinkle cheese between the layers for an irresistible gooey bite in every slice. A tip I discovered after many tries: if you want a crispier top, broil the pie for a few minutes at the end, but keep an eye on it so it doesn’t burn. Baking at the right temperature is key—don’t forget to check your oven, as some run hot. As for toppings, I prefer shredded mozzarella for stretchiness, but sharp cheddar or even a sprinkle of Parmesan on top adds depth. And don’t skip the cooling time—if you slice too early, it might fall apart, but patience pays off. I’ve also experimented with different cheeses—goat cheese, feta, or even a splash of ricotta can add a new twist. Trust me, it’s all about balance, and once you tweak it to your taste, this spaghetti pie becomes an unmissable staple in your recipe box.
Storing and Reheating Tips
This dish keeps beautifully! Once cooled completely, store leftovers in an airtight container in the fridge for up to 3 days. To reheat, I prefer the oven—cover it with foil and bake at 350°F for about 15 minutes, or until warmed through—that way, it retains its crispy top and gooey center. If you’re in a rush, zap slices in the microwave, but I find the microwave can sometimes make the cheese a little rubbery. Freeze individual slices if you want to stockpile for busy nights—wrap tightly in plastic wrap and then foil, and they’ll keep for up to 2 months. To defrost, move them into the fridge overnight, then reheat in the oven or microwave. A word of caution—if you’re planning to add extra cheese or sauce after storing, do so just before reheating to keep that fresh-from-the-oven feel. A little fresh herbs or a drizzle of good olive oil over reheated slices really elevates the flavor. I’ve learned that patience and gentle reheating make all the difference, especially if you want to preserve that perfect balance of crispy crust and melty cheese. Honestly, leftovers might be my favorite part—they’re nearly as good as fresh, and I love knowing I’ve got a comforting meal ready in minutes.
Frequently Asked Questions
Final Thoughts
If you’re wondering whether spaghetti pie is worth the fuss—trust me, it is. This dish combines everything I love about comfort food: creamy cheese, satisfying pasta, savory fillings, and that unbeatable aroma that makes everyone come running. Over the years, I’ve played around with different fillings and toppings, and every variation feels just as cozy and delicious. It’s a forgiving, adaptable recipe that makes you feel like a pro in your own kitchen—no complicated techniques, just good ingredients and a little love. When I serve this at gatherings, I watch as it disappears in minutes, peeled off slices that reveal swirls of filling and cheesy goodness. And honestly, I’m already planning my next batch because leftovers are just as addictive. So go ahead—gather your ingredients, turn on your oven, and make a spaghetti pie that’ll become a new family favorite. Can’t wait to hear how yours turns out! And if you experiment with it, do share your tweaks—I love hearing about different spins on this classic.
Classic Spaghetti Pie
Ingredients
Method
- Preheat oven to 375°F. Lightly grease a 9-inch pie dish with olive oil.
- In a skillet over medium heat, cook ground beef, green pepper, and onion for about 10 minutes, until beef is browned. Stir in pasta sauce, chili powder, salt, and pepper. Simmer for 6 minutes, stirring occasionally.
- Cook spaghetti according to package instructions. Drain and place into the prepared pie dish.
- In a small bowl, whisk together eggs and cottage cheese until well blended. Spread this mixture evenly over the spaghetti in the dish. Top with beef mixture, then sprinkle with shredded mozzarella.
- Bake for 35 minutes, or until the center is set and top is golden. Let stand for 5 to 10 minutes before slicing.