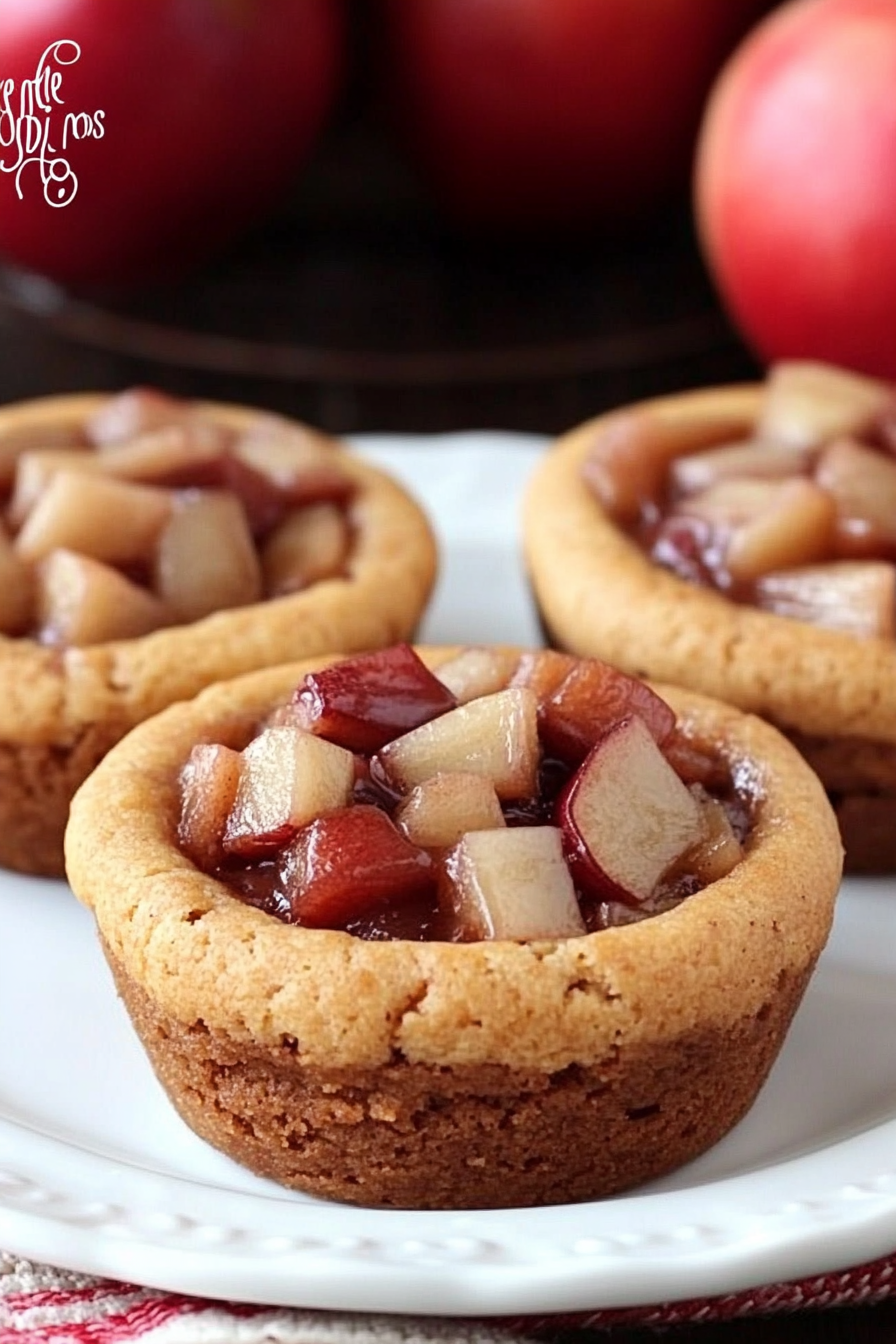
Sweet Caramel Apple Cookie Cups How To
If there’s one treat I always turn to when I want something cozy and indulgent, it’s my favorite caramel apple cookies. They remind me of fall mornings, the smell of cinnamon filling the air, and my kids eagerly waiting at the kitchen counter. These cookies aren’t just delicious—they’re a little slice of comfort, packed with the perfect balance of sweet, tart, and gooey goodness. Trust me, once you try them, they’ll become a staple in your house too. I’ve made this recipe countless times, tweaking it just right so that every bite bursts with flavor. It’s honestly one of those recipes that’s simple enough for a quick treat but fancy enough to serve at get-togethers. It’s definitely a bit like a homemade caramel apple in cookie form—crisp edges, tender center, and that irresistible caramel swirl. The smell alone will bring everyone to the kitchen—my little secret weapon for busy weeknights or lazy weekends. Are you ready to bake this delightful dessert together? Let’s go!
What is Caramel Apple Cookies?
Think of caramel apple cookies as a delightful mash-up of two classic favorites: the crispness of a fresh apple, the gooey richness of caramel, and the soft, chewy comfort of a cookie. It’s essentially a cookie dough infused with bits of tart apple pieces, swirls of silky caramel, and warm spices like cinnamon and nutmeg. The name says it all—they’re reminiscent of biting into a caramel-coated apple, but in cookie form, which makes them just perfect for baking on cool days when you want something fruity and sweet. The concept is simple but addictive—those flavors combined create a nostalgic feeling, like fall in every bite. And because they’re made with everyday ingredients, these cookies are a fantastic way to turn simple pantry finds into something extraordinary. They’re also versatile—serve them warm with a drizzle extra caramel or chilled for a more chewy texture. Think of them as your new go-to special treat—adorable, flavorful, and insanely comforting.
Why you’ll love this recipe?
What I love most about these caramel apple cookies is that they hit all the right notes—sweet, tart, rich, and a little spicy, all in one bite. The combination of fresh apple bits and gooey caramel makes these cookies stand out from your everyday batch. Plus, they’re shockingly easy to make—no fancy equipment needed, and most ingredients are ones you probably already have in your kitchen. I’ve tested this recipe with both regular and organic all-purpose flour, and honestly, it’s forgiving enough to handle a few swaps if needed. They’re budget-friendly too—no specialty ingredients here—just simple baking staples and a few sweet extras. And the best part? You can enjoy them in so many ways: warm and drippy straight out of the oven, cool and chewy after a night’s rest, or even frozen for a quick dessert later. My kids ask for these all the time, especially around the holidays, but I make them year-round because they’re just that good. Trust me, these cookies are a little piece of heaven—perfect for snacking, sharing, or just treating yourself. Plus, they’re impressive enough to serve at parties but simple enough to make on a lazy weekend. Once you get the hang of it, I promise, you’ll find yourself sneaking a second batch every time!
How do you make caramel apple cookies?
Quick Overview
This recipe is all about simplicity—mix up a cozy cookie dough, fold in tart apple pieces, swirl in rich caramel, then bake until golden. The trick is letting the caramel and apple flavors shine through without overpowering the cookie’s soft interior. I love that you can customize these cookies—add more caramel if you like extra gooeyness, or throw in a handful of chopped nuts for crunch. It’s a straightforward process that doesn’t demand hours in the kitchen, but the result looks and tastes like a baker’s masterpiece. Best of all, this method allows the caramel to melt beautifully into the cookies, creating pockets of melt-in-your-mouth bliss. Whether you’re baking for a family snack or a holiday gathering, these cookies are sure to steal the show!
Ingredients
For the Main Batter:
- 2 1/4 cups all-purpose flour (preferably unbleached for richer flavor)
- 1 teaspoon baking soda
- 1/2 teaspoon salt
- 1 teaspoon ground cinnamon
- 1/2 teaspoon ground nutmeg (optional, but adds warmth)
- 1 cup unsalted butter (melted or softened)
- 1 cup brown sugar (pack it tight for extra moisture)
- 1/2 cup granulated sugar
- 2 large eggs
- 1 teaspoon vanilla extract
For the Filling:
- 1 large tart apple (Granny Smith is perfect), peeled and diced small
- 1/2 to 1 cup caramel bits or chopped soft caramel candies (look for the good stuff!)
- Optional: Chopped pecans or walnuts for extra crunch
For the Glaze:
- 1/2 cup caramel sauce (store-bought or homemade)
- Optional: Sea salt for finishing
- Extra caramel bits for drizzling
Step-by-Step Instructions
Step 1: Preheat & Prep Pan
Start by preheating your oven to 350°F (175°C). Line a baking sheet with parchment paper or a silicone baking mat—trust me, this stops the cookies from sticking and makes cleanup a breeze. If you want your cookies to be perfectly round and even, lightly spray your measuring spoon or cookie scoop with non-stick spray before scooping out the dough. This little trick keeps the dough from sticking so you get uniform cookies every time.
Step 2: Mix Dry Ingredients
In a medium bowl, whisk together the flour, baking soda, salt, cinnamon, and nutmeg. Sifting isn’t necessary, but I do it when I want super smooth dough. Mixing the dry ingredients first ensures the baking soda and spices are evenly distributed—no surprises in your batter.
Step 3: Mix Wet Ingredients
In a large bowl, beat together the melted butter, brown sugar, and granulated sugar until smooth and slightly fluffier. Add the eggs one at a time, mixing well after each, and then stir in the vanilla. The mixture should be creamy and coat the back of a spoon—this is what helps your cookies stay tender and flavorful.
Step 4: Combine
Gradually add the dry ingredients to the wet mixture, folding gently with a spatula or wooden spoon. Don’t overmix; just until the flour disappears. Overmixing can make cookies tough, and nobody wants that—trust me, I’ve learned this the hard way after a few dense batches!
Step 5: Prepare Filling
Peel and dice the apple into tiny, bite-sized pieces—this helps it bake evenly and prevents sogginess. Chop your caramel into small chunks; this way, they melt faster and spread through every cookie. If using nuts, toss them in now for a little added crunch.
Step 6: Layer & Swirl
Add the diced apples and caramel bits into the batter, folding gently so they’re evenly distributed. Now, scoop out golf-ball-sized portions of dough onto your prepared baking sheet. To get that beautiful marble effect, take a small spoonful of caramel sauce and gently swirl it into each cookie. You can also layer some apple pieces on top for extra visual appeal.
Step 7: Bake
Pop those cookies into your preheated oven and bake for 10-12 minutes. Keep an eye on them—they should be golden around the edges but still soft in the center. If you like your cookies chewier, pull them out a minute early. I’ve found that rotating the baking sheet halfway helps them brown evenly, especially if your oven’s hot spots are sneaky. Let them sit for a couple of minutes on the pan—they firm up slightly—and then transfer to a wire rack to cool completely.
Step 8: Cool & Glaze
Once cooled just enough to handle, drizzle with warmed caramel sauce or extra caramel bits melted into a smooth glaze. If you’re feeling fancy, sprinkle a pinch of sea salt on top—it balances that sweet caramel beautifully. Wait about 15 minutes for the glaze to set and the flavors to meld—it’s totally worth the wait.
Step 9: Slice & Serve
The cookies are best enjoyed at room temperature but I love popping one in the microwave for 10 seconds for an extra gooey experience. Serve them on a pretty plate with a cold glass of milk or hot coffee, and watch how quickly they disappear. I often make a double batch because I swear they taste even better the next day—if they last that long!
What to Serve It With
These caramel apple cookies are pretty versatile and can shine at breakfast, brunch, or dessert. For breakfast, pair them with a steaming cup of coffee or apple cider—trust me, they make an irresistible morning treat. If you’re hosting brunch, serve them warm with a dollop of Greek yogurt or vanilla whipped cream; they add a lovely fruity contrast to savory dishes. As dessert, they’re fantastic on their own, or topped with a scoop of vanilla ice cream to melt over the warm edges. My family often enjoys them as a cozy afternoon snack, especially with a mug of spiced tea or hot chocolate. And for a fancy touch, a drizzle of extra caramel and a sprinkle of flaky sea salt make them look just as good as they taste. Honestly, I’ve knocked out these cookies on busy weeknights, holiday parties, and school bake sales—they always steal the show. They’re the kind of sweet treat that everyone seems to love, no matter the occasion.
Top Tips for Perfecting Your Caramel Apple Cookies
After many batches, I’ve picked up a few tricks that turn good cookies into total showstoppers. First, when preparing your apple, make sure to squeeze out any excess moisture with a paper towel—wet apples can make your cookies a bit soggy. I’ve tried adding a splash of lemon juice when chopping apples; it keeps them fresh and prevents browning, plus it adds a tiny zing that complements the sweetness. When mixing your dough, avoid overworking it—tough cookies are the result of too much handling. Use a gentle folding method to keep the batter airy and tender. For swirl effect, use a toothpick or skewer to drag through the caramel and dough—this creates beautiful marbled patterns that are so tempting. You can also experiment with different caramel types—store-bought caramel candies melt well, but homemade caramel sauce gives you richer flavor. Just keep in mind that baking times can vary based on your oven’s quirks—so if your cookies seem underdone, give them a minute or two more. When adding glaze, I prefer pouring it on warm to get a shiny, even coating, but if you want a matte, rustic look, just lightly drizzle and let it set naturally. Over the years, I’ve learned that the best cookies are the ones you play with, tasting and adjusting until they’re just right in your own kitchen. So don’t be afraid to make these your own—add extra spices, nuts, or even a hint of bourbon for a grown-up twist!
Storing and Reheating Tips
Once baked and glazed, these cookies will stay fresh for about 3 days at room temperature if stored in an airtight container. I like to cover them loosely with a paper towel before sealing—this prevents excess moisture buildup. If you want them to stay soft and chewy, keep them in a container with a slice of bread; the moisture transfers and keeps the cookies tender. For longer storage, pop them in the fridge—just be sure to bring them to room temp before eating so they regain that cozy softness. If you plan to keep them for more than a week, freezing is your friend. Wrap each cookie tightly in plastic wrap, then toss them into a zip-top bag—they’ll last up to 3 months. To reheat, microwave for about 10-15 seconds until warm and melty. I recommend adding a fresh drizzle of caramel after reheating for maximum flavor. Just a quick note: if you’re storing with glaze, keep the cookies uncovered or in very loose containers—moisture and condensation can make the glaze soggy. I’ve found that the quality of these cookies only improves with gentle reheating, so don’t be shy about savoring them over several days! They’re definitely worth a little extra effort to preserve that cozy, gooey goodness.
Frequently Asked Questions
Final Thoughts
If you’re into warm, fruity, and irresistibly gooey treats, these caramel apple cookies are going straight to the top of your must-bake list. They combine the best of fall flavors with the comfort of a cookie—a perfect balance that’s both nostalgic and refreshingly tasty. Over the years, I’ve made adjustments and personalized this recipe to fit my family’s taste, and I guarantee you’ll enjoy putting your own spin on it too. Whether you serve them warm with a scoop of ice cream or enjoy them with a cup of tea on a lazy afternoon, these cookies never fail to bring a smile. Honestly, I think they’re one of those recipes that taste even better the next day—to me, that’s the hallmark of a good cookie. So gather your ingredients, get baking, and make some sweet memories. And please, come back and tell me how yours turned out—nothing makes me happier than sharing these little bites of happiness with friends like you. Happy baking!
Caramel Apple Cookies
Ingredients
Method
- Preheat oven to 350°F and spray a cupcake pan with non-stick spray.
- In a medium bowl, whisk together flour, baking soda, cinnamon, cornstarch, and salt. Set aside.
- In a large mixer bowl, beat butter, light brown sugar, and granulated sugar for 2-3 minutes until light and fluffy.
- Add the egg and vanilla extract; beat until combined.
- Gradually add dry ingredients to wet and mix until dough is thick.
- Shape dough into balls about 2 tablespoons each. Press into cupcake cups, forming a cup shape.
- Bake for 10-12 minutes until lightly golden around edges.
- Allow cookies to cool for 5 minutes, then remove and cool on a rack. Press centers down to create space for filling if needed.
- Prepare caramel sauce and cinnamon apples as instructed, then cool.
- Fill each cookie cup with about half a tablespoon of caramel sauce. Top with cinnamon apples and drizzle additional caramel if desired.
- Serve slightly warm or store in an airtight container at room temperature for up to 24 hours.