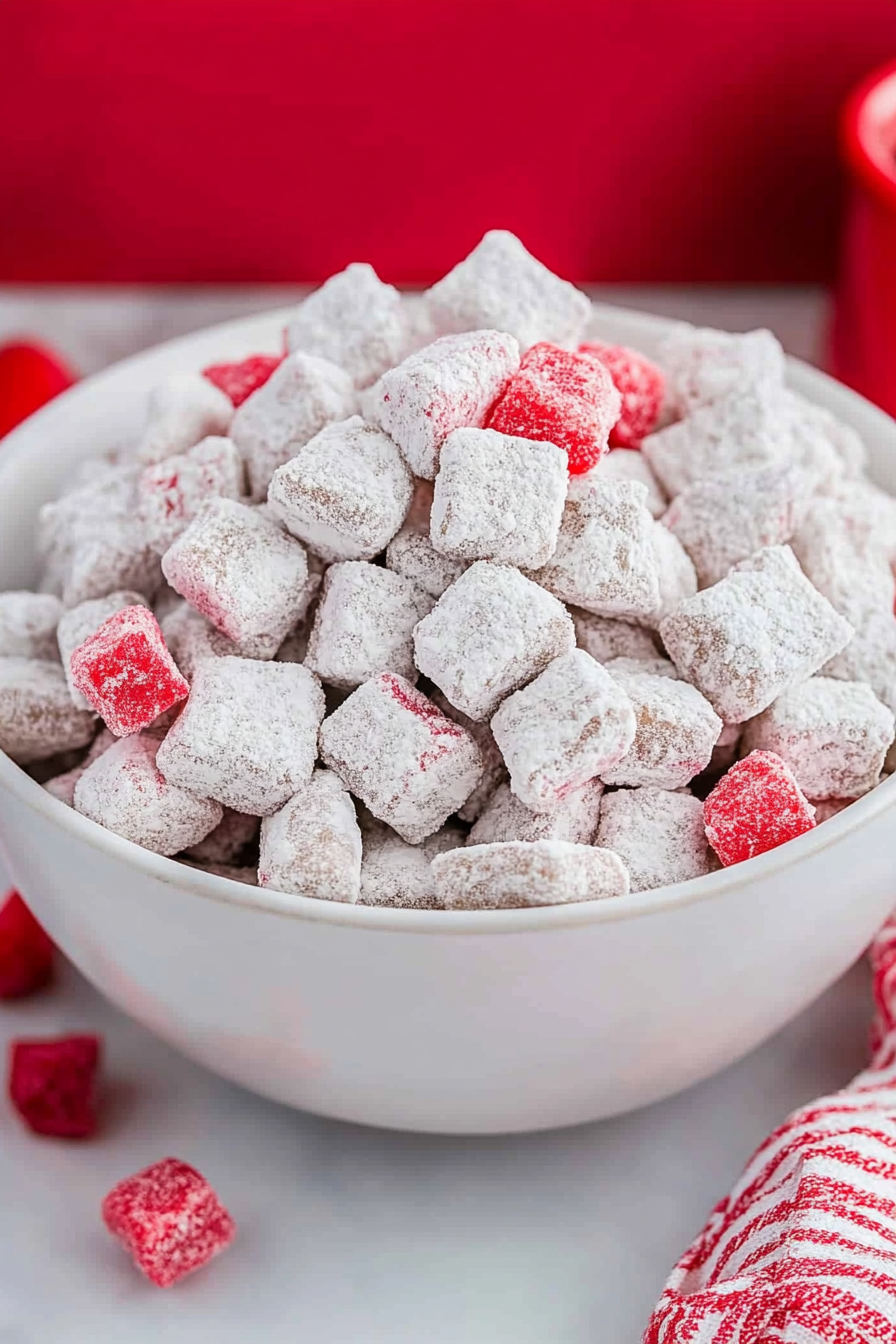
Sweet Cherry Puppy Treats How To Make Them
Oh, you guys. Today, we’re diving headfirst into a recipe that holds such a special place in my heart. It’s the kind of treat that instantly transports me back to sunny afternoons, giggling with my siblings, and that unmistakable scent of something sweet baking (or, in this case, no-baking!). We’re talking about Cherry Puppy Chow. Now, I know what you might be thinking – Puppy Chow? Like the Chex Mix version? Well, yes, but with a vibrant, delightful twist. Forget your classic chocolate-peanut butter combo for a moment and imagine that same crunchy, dippable goodness, but infused with the bright, tangy sweetness of cherries. It sounds a little wild, maybe, but trust me, it’s pure magic. This isn’t just a fun snack; it’s a nostalgic trip, a conversation starter, and honestly, a lifesaver when you need a quick, impressive treat that requires zero fuss. It’s that perfect something for movie nights, bake sales, or just because your sweet tooth is calling louder than usual. I’ve tweaked this recipe over the years, finding that perfect balance of sweet and tart, and I’m so excited to finally share my absolute favorite version with you all.
What is a cherry pug puppy chow?
So, what exactly *is* Cherry Puppy Chow? At its core, it’s a playful, no-bake snack mix that takes inspiration from the classic “puppy chow” or “muddy buddies” you might already know and love. You know, the one with the cereal, chocolate, peanut butter, and powdered sugar? This is like its cheerful, fruitier cousin. We’re taking those same crunchy cereal pieces and coating them in a luscious, cherry-infused mixture, then dusting them with a sweet, powdery finish. The “cherry” part comes from real cherry flavor – either from a concentrate, a syrup, or even dried cherry bits blended in, depending on how you like your cherry punch. The name itself is just a fun nod to the original, evoking that same craveable, snackable quality. It’s essentially a delightful mashup of childhood nostalgia and grown-up flavor experimentation, resulting in something that’s both familiar and wonderfully new. Think of it as a grown-up candy coating on a kid-friendly cereal base, with a bright, fruity surprise!
Why you’ll love this recipe?
Honestly, there are so many reasons why this Cherry Puppy Chow is a regular fixture in my kitchen. First off, the **flavor**. It’s just out-of-this-world good. You get that satisfying crunch from the cereal, then this burst of sweet, slightly tart cherry flavor that’s so refreshing. It’s not cloying or overly sweet; it strikes a beautiful balance that makes you reach for just one more piece… and then another. It’s the kind of flavor that surprises and delights everyone who tries it. And the **simplicity**? Oh, it’s a dream. We’re talking about a recipe that you can whip up in less time than it takes to watch your favorite half-hour comedy. There’s no complicated baking involved, no fussy techniques. It’s perfect for those busy weeknights when you need a quick dessert or a fun snack for unexpected guests. Plus, it’s surprisingly **cost-efficient**. The ingredients are all pantry staples or easily found at any grocery store, and you get a huge batch of deliciousness for a relatively low cost. It’s far more economical than buying pre-made treats. And let’s not forget the **versatility**! While this recipe is fantastic on its own, it’s also incredible sprinkled over ice cream, added to trail mix, or even used as a fun topping for yogurt. What I love most about this recipe, though, is the sheer joy it brings. It’s the kind of treat that makes people smile, sparks happy memories, and always leaves them asking for the recipe. It’s a proven crowd-pleaser that’s guaranteed to disappear in minutes at my house, every single time.
How do I make a delicious Puppy Chow?
Quick Overview
Making this Cherry Puppy Chow is surprisingly straightforward. You’ll essentially be toasting your cereal slightly to give it a better texture (optional, but I swear by it!), then melting together a luscious cherry-infused coating. We’ll toss the cereal in this mixture until it’s perfectly coated, then give it a final dusting of powdered sugar. That’s it! The whole process is designed to be mess-free and quick, meaning you can go from craving to indulging in under 20 minutes. It’s the ultimate simple pleasure.
Ingredients
For the Main Batter:
9 cups Chex cereal (Rice, Corn, or a mix work beautifully. I personally love a blend for texture!)
1 cup granulated sugar
1/2 cup unsalted butter
1/3 cup cherry juice concentrate (or a good quality cherry syrup, like maraschino juice for intense flavor)
1 teaspoon vanilla extract
1/4 teaspoon almond extract (optional, but it adds a lovely depth)
Pinch of salt
For the Filling:
1/2 cup maraschino cherries, roughly chopped (reserve a little juice if you can!)
2 tablespoons cream cheese, softened (this is my secret for extra creaminess!)
1 tablespoon cherry juice or liqueur (like Kirsch, if you’re feeling fancy)
For the Glaze:
1/4 cup melted white chocolate chips (optional, for extra sweetness and a pretty sheen)
2 cups powdered sugar
Step-by-Step Instructions
Step 1: Preheat & Prep Pan
First things first, preheat your oven to 250°F (120°C). This low temperature is perfect for gently toasting the cereal without burning it, which really amps up the crunch factor. Grab a large baking sheet (or two, if yours aren’t huge) and line it with parchment paper. This is a lifesaver for cleanup, trust me! If you’re not toasting, you can skip this oven step and go straight to mixing.
Step 2: Mix Dry Ingredients
If you’re toasting, spread your 9 cups of Chex cereal in a single layer on the prepared baking sheet. Pop it into the preheated oven for about 8-10 minutes, just until it’s lightly golden and smells a little toasty. Keep an eye on it – it can go from perfect to burnt in a flash! Once toasted, remove it from the oven and let it cool slightly while you get the coating ready. If you’re skipping the toasting, just pour your cereal directly into a large bowl.
Step 3: Mix Wet Ingredients
In a medium saucepan, combine the granulated sugar, butter, cherry juice concentrate (or syrup), vanilla extract, almond extract (if using), and a pinch of salt. Place this over medium-low heat, stirring constantly until the butter is melted and everything is well combined. You want it to be smooth and slightly thickened, but don’t let it boil vigorously. We’re just looking for a gentle simmer to meld the flavors.
Step 4: Combine
Once your cereal is ready (either toasted and slightly cooled, or just in a big bowl), pour the warm cherry mixture over it. Gently stir with a rubber spatula until every piece of cereal is beautifully coated. I like to do this carefully to avoid breaking the cereal pieces too much. If you’re toasting, you can pour this coated cereal back onto the baking sheet and spread it out again to cool down a bit more before the next step. This helps it stay extra crunchy.
Step 5: Prepare Filling
While the cereal coating is cooling (or while you’re waiting for it to cool), it’s time for our secret weapon: the filling! In a small bowl, mash together the softened cream cheese, the chopped maraschino cherries, and the extra cherry juice or liqueur. Mix it until it’s mostly smooth, but don’t worry if there are a few little cherry bits. This cream cheese adds an incredible tanginess and a luxurious creaminess that balances the sweetness perfectly.
Step 6: Layer & Swirl
Once the cereal mixture is cool enough to handle but still a little sticky, place it in a large zip-top bag or a big bowl. Dollop spoonfuls of the cherry cream cheese filling all over the cereal. If you’re using the optional white chocolate, melt it now and drizzle it over the top as well. Now, the fun part: add your powdered sugar to the bag or bowl. Seal it up (or cover the bowl tightly) and gently toss and shake until the cereal is evenly coated in powdered sugar. It will look snowy and delicious! For extra visual appeal, I sometimes like to swirl the filling gently into the cereal *before* adding the powdered sugar.
Step 7: Bake
If you toasted your cereal initially, you can actually pop this back into the 250°F (120°C) oven for another 5-8 minutes, uncovered, to help everything dry out and get extra crispy. This step is totally optional but really does make a difference in texture. Watch it closely, you don’t want it to brown!
Step 8: Cool & Glaze
Remove the Cherry Puppy Chow from the oven (if you did the second bake) and let it cool completely on the baking sheet. This is crucial! If you try to glaze it while it’s warm, the glaze will melt right off. Once completely cool, if you want that extra touch of sweetness and sheen, drizzle the melted white chocolate over the top. Or, you can skip this entirely if you prefer!
Step 9: Slice & Serve
Once everything is cool and set, break apart any large clumps with your fingers. Serve it up in bowls, or pack it into cute little treat bags. It’s best enjoyed at room temperature so you can really appreciate the crunch and the flavors. You can also garnish with a few fresh cherries if you’re feeling fancy!
What to Serve It With
This Cherry Puppy Chow is so versatile, it’s practically begging to be paired with different occasions! For **Breakfast**, I sometimes like to toss a small handful into my morning yogurt parfait for a delightful crunch and a burst of fruity flavor. It’s a fun surprise that makes a regular breakfast feel special. Imagine it nestled among fresh berries and granola! For **Brunch**, it’s an absolute star. You can arrange it artfully on a platter alongside other pastries and fruit, or even use it as a whimsical topping for a pancake or waffle bar. It looks so pretty scattered among fresh fruit, especially with its vibrant cherry hues. For a truly decadent **Dessert**, it’s phenomenal served alongside a scoop of vanilla bean ice cream or even drizzled over a chocolate cake. The sweet, tangy cherry flavor cuts through the richness beautifully. And of course, for **Cozy Snacks**, it’s the ultimate movie night or game day treat. Just pile it high in a big bowl and let everyone dig in! My family loves it during the holidays, or just on a random Tuesday when we need a little pick-me-up. It’s always a hit when we have friends over for casual get-togethers, too.
Top Tips for Perfecting Your Cherry Puppy Chow
I’ve made this Cherry Puppy Chow more times than I can count, and over the years, I’ve picked up a few tricks that really make it shine. For the **Zucchini Prep**, although this recipe doesn’t use zucchini, the principle of moisture removal is key for any no-bake treat. For this recipe, ensuring your cherry juice concentrate is thick and not watery is super important for coating. If it seems too thin, you can simmer it gently for a few minutes to reduce it. When it comes to **Mixing Advice**, the key is gentle handling. You want to coat the cereal without turning it into crumbs. Use a large bowl and a flexible spatula. If you feel like the mixture isn’t coating evenly, a quick toss in a large zip-top bag works wonders. For **Swirl Customization**, if you add the cherry cream cheese filling *before* the powdered sugar, you can use a toothpick to gently swirl it through the cereal for a more marbled effect. This looks beautiful and distributes the creamy flavor throughout. For **Ingredient Swaps**, if you can’t find cherry juice concentrate, a good quality cherry syrup (like the kind used for cocktails or desserts) works well, but you might need slightly less as they can be sweeter. You can also experiment with raspberry or strawberry for a different berry twist! If you’re not a fan of almond extract, you can omit it, but it really does add a lovely complexity. For **Baking Tips**, that low oven temperature is your friend. It’s not about cooking, it’s about drying and crisping. Always keep an eye on it to prevent burning, especially if your oven runs hot. If your cereal seems a bit stale to begin with, that low bake will work wonders. For **Glaze Variations**, the white chocolate drizzle is purely optional; it adds an extra layer of sweetness and visual appeal. If you prefer a less sweet treat, you can omit it entirely. You could also experiment with a light pink candy melt drizzle for a different color pop!
Storing and Reheating Tips
This Cherry Puppy Chow is best enjoyed fresh, but it does store reasonably well, which is great for when you want to make a batch ahead of time. For **Room Temperature** storage, keep it in an airtight container or a large zip-top bag. It should stay nicely crunchy for about 3-5 days, though I find it’s at its absolute best within the first 2 days. Make sure it’s completely cooled before sealing it up to prevent any condensation from making it soggy. **Refrigerator Storage** is generally not recommended because the humidity can make it soft and lose its crispness, but if you absolutely must, seal it very tightly and aim to eat it within 2 days. Just be prepared for a slightly less crunchy texture. For **Freezer Instructions**, you can freeze it, but again, expect a textural change upon thawing. Wrap it tightly in plastic wrap, then place it in a freezer-safe bag or container. It can last for up to 2-3 months, but the crunch factor will definitely be reduced. To thaw, let it sit at room temperature for a few hours. The **Glaze Timing Advice** is important: if you know you’ll be storing it for more than a day or two, I’d recommend adding the white chocolate glaze *just before* serving or storing it, as it can sometimes get a little sticky or soft when stored for extended periods. For best results, enjoy it within a few days of making!
Frequently Asked Questions
Final Thoughts
So there you have it – my beloved Cherry Puppy Chow! It’s a recipe that’s stood the test of time in my family, evolving from a simple idea into a guaranteed crowd-pleaser. It’s proof that you don’t need to be a gourmet chef or spend hours in the kitchen to create something truly special and delicious. The combination of that irresistible crunch, the bright cherry flavor, and the creamy undertones is simply addictive. It’s the perfect treat for holidays, parties, or just those moments when you need a little bit of happy in your day. If you love fun, no-bake recipes, I think you’ll also really enjoy my recipe for No-Bake Peanut Butter Balls – they have a similar spirit of easy indulgence! I truly hope you give this Cherry Puppy Chow a try. It’s more than just a snack; it’s a little bit of joy in every bite. I can’t wait to hear how yours turns out! Don’t forget to leave a comment below and let me know your favorite part, or if you’ve tried any fun variations. Happy snacking!
Cherry Vanilla Puppy Chow
Ingredients
Method
- In a microwave-safe dish, melt the vanilla bark for one minute. Stir, then heat an additional 30 seconds until smooth. Mix in the cherry gelatin mix.
- In a large bowl, combine the cereal with the melted chocolate mixture. Stir until fully coated.
- Pour the mixture into a large gallon-sized container containing powdered sugar. Shake vigorously until evenly coated.
- Spread onto a baking sheet lined with parchment paper. Add sprinkles on top as desired. Allow to set before storing in an airtight container. Enjoy within two weeks!