Sweet Italian Treat Dip How Easy
If you’ve ever been to an Italian bakery or boutique cafe, chances are you’ve tried some cannoli. That crispy shell filled with sweet, creamy ricotta — it’s pure heaven, right? Well, what if I told you that you can get all that deliciousness in a dip form? That’s where this cannoli dip comes into play. It’s honestly one of those recipes I keep on hand for everything — quick gatherings, family movie nights, or just when I need a little sweet pick-me-up. My kids ask for it all the time, and I can whip it up in about five minutes. Plus, it’s essentially a no-bake miracle that tastes just like the real deal — but easier, more casual, and perfect for sharing. This dip has quickly become a staple in my house because it disappears so fast, and honestly, I love how versatile it is. You can scoop it with cookies, fruit, or even spread it on toast. It’s one of those recipes that feels fancy but is so damn simple to make. Trust me, once you try it, it’ll become your go-to sweet treat, too!
What is cannoli dip?
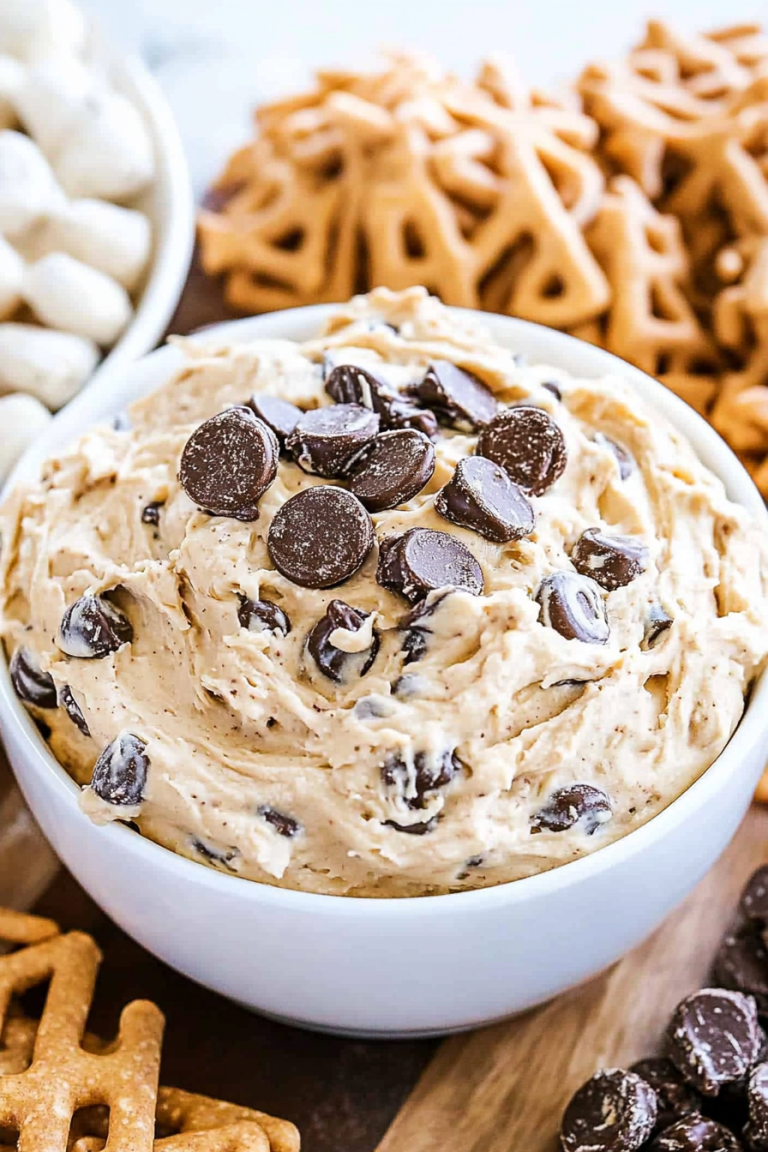
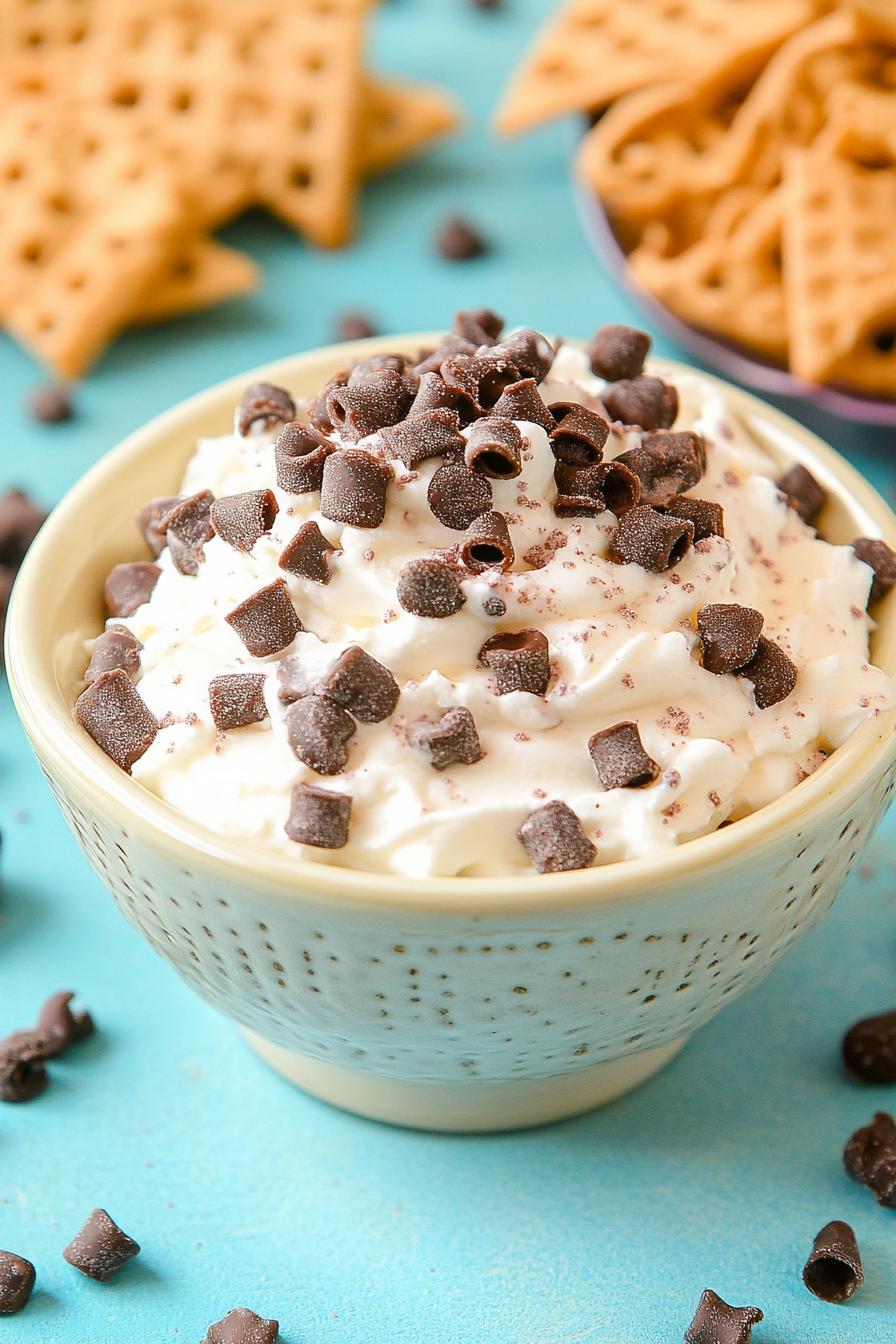
Think of cannoli dip as a decadent, creamy homage to the classic Italian dessert, but in a chow-worthy, shareable format. It’s essentially a rich blend of ricotta cheese paired with sweetened cream cheese, vanilla, and just a hint of cinnamon or citrus zest for that extra pop. To mimic the crunch of the traditional shell, I sometimes add crushed cookies or waffle cones sprinkled on top or stirred into the mix. The name “cannoli” comes from the Italian word for “tube” or “small tube,” referring to the pastry shell that’s traditionally filled with ricotta-based cream. This dip takes all those beloved flavors — the sweet, citrusy ricotta, the crunch of cookies or shells, and that irresistible hint of vanilla and cinnamon — and combines them into an easy-to-eat, finger-friendly treat. It’s perfect for those times when you’re craving something sweet but don’t want to bother with baking or complex preparations. Plus, it’s endlessly adaptable — you can jazz it up with chocolate chips, orange zest, or even a splash of liqueur if you’re feeling fancy. Simple, nostalgic, and seriously addictive!
Why you’ll love this recipe?
What I love most about this cannoli dip is how effortlessly delicious it is. The flavor — wow. It’s that perfect balance of creamy, tangy ricotta with just enough sweetness to satisfy any dessert craving. You get that classic cannoli flavor without the hassle of making delicate shells or frying them up. The best part? It’s super simple, which is a lifesaver on busy nights or when guests drop by unexpectedly. You know those recipes that taste like you’ve labored in the kitchen for hours, but actually took minutes to assemble? That’s this. Plus, it’s budget-friendly since most ingredients are pantry staples or something you already have on hand. You can serve it with fruit slices for a lighter option, or with cookies or waffle cones for that crunch. It’s also endlessly versatile — I’ve tweaked it with dark chocolate, orange zest, and even a splash of amaretto, and every version turns out amazing. Whether I want an easy dessert or a crowd-pleasing snack, this cannoli dip never lets me down. It’s creamy, crunchy, sweet, and just addictive enough to keep licking the spoon!
How do you make cannoli dip?
Quick Overview
This recipe is honestly so carefree — just blend, fold, and top. You’ll whip together ricotta, cream cheese, sugar, vanilla, and a pinch of cinnamon until smooth. Then, you can add your mix-ins—chocolate chips, citrus zest, or crushed cookies. Chill it for about an hour to let the flavors meld (but honestly, it’s good right away if you’re in a pinch!). Top with more crushed cookies, chocolate, or a dusting of cinnamon, and serve with fruit slices, cookies, or waffle cones. I love how forgiving it is — no precise timing or fancy equipment needed. It’s perfect when you want that dreamy cannoli flavor without any fuss. Just a few minutes, some assembly, and you’re good to go. Seriously, it’s one of those recipes that tastes even better the next day because those flavors really get to mingle. You can make it ahead, keep it in the fridge, and even add fresh topping just before serving. That’s what makes this so special — minimal effort, maximum flavor!
Ingredients
For the Main Batter:
– 1 cup ricotta cheese (fresh, full-fat makes it extra creamy)
– 8 oz cream cheese (softened, so it blends smoothly)
– 1/2 cup powdered sugar (sifted to avoid lumps)
– 1 teaspoon pure vanilla extract
– 1/2 teaspoon ground cinnamon (or more to taste)
– Optional: zest of 1 orange or lemon for that citrus zing
For the Filling:
– 1/2 cup mini chocolate chips or chopped dark chocolate
– 1/4 cup crushed graham crackers or vanilla cookies (for that crunch)
– Optional: a splash of liqueur like amaretto or Grand Marnier for extra flavor
For the Glaze or Topping:
– Additional crushed cookies, chocolate shavings, or a light dusting of cinnamon
– Fresh fruit slices: strawberries, kiwis, or orange segments for serving
Step-by-Step Instructions
Step 1: Preheat & Prep Pan
There’s no oven here — just grab yourself a serving bowl or a pretty dish. If you want a more textured topping later, crush some cookies or waffle cones while you prep. Keep everything close — this recipe comes together fast!
Step 2: Mix Dry Ingredients
Start by sifting your powdered sugar and cinnamon into a bowl. This step stops clumps and ensures smoothness. Trust me, it makes a big difference in how silky your dip turns out. Set aside.
Step 3: Mix Wet Ingredients
In a separate large bowl, beat the softened cream cheese and ricotta until silky smooth. I usually do this with a hand mixer, but a sturdy whisk works too. Add the vanilla and citrus zest if using. Mix until combined — the smell alone is enough to make you hungry!
Step 4: Combine
Slowly add the powdered sugar mixture into the ricotta mixture, folding gently so it stays fluffy. If you overmix here, it can get too runny — so just fold until everything looks combined and smooth. If it seems too soft, pop it in the fridge for 10-15 minutes to firm up.
Step 5: Prepare Filling
Mix in the chocolate chips and crushed cookies or graham crackers. Taste as you go — I always sneak a spoonful at this stage to make sure it’s sweet enough. Feel free to add more chocolate or zest if you’re craving a punch of flavor.
Step 6: Layer & Swirl
If you want to make it extra pretty, layer some crushed cookies or fruit slices at the bottom of your serving dish, then dollop the mixture on top. Use a skewer or toothpick to gently swirl for a marbled effect — it’s a little artistic and makes it look fancy!
Step 7: Bake
No baking needed! Just pop it in the fridge for an hour or two, or even overnight if you want the flavors to deepen. The cold makes it even more satisfying to scoop out.
Step 8: Cool & Glaze
If you’re adding extra toppings or a glaze, do so right before serving. A drizzle of chocolate or crushed cookies on top makes it look irresistible. Keep it chilled until you’re ready to serve.
Step 9: Slice & Serve
Serve with fresh fruit, cookies, or waffle cones. I love arranging everything on a big platter — it looks inviting and makes everyone want to dig in. The first scoop should be rich, creamy, and packed with flavor. Trust me — once you taste this, you’ll be asking for it on repeat!
What to Serve It With
This cannoli dip is versatile enough for every occasion. For breakfast, I’ve served it with croissants and fresh strawberries — it’s decadent but feels like a treat. When entertaining friends for brunch, I usually pair it with flaky Danish pastries and a big pot of coffee. For a cozy night in or a casual dessert, it’s perfect with sliced bananas, apple slices, or even pretzel chips. Seriously, I keep little bowls of crushed cookies or chocolate shavings nearby because everyone asks for a sprinkle. And if you want to keep it light, fresh fruit slices work beautifully — not only do they look pretty, but they also balance the sweetness perfectly. My family loves to spread it on toast in the mornings, pretending it’s fancy cream cheese. And for the kids, I sometimes add mini marshmallows or colorful sprinkles for that fun twist. Whatever the occasion, this dip always steals the show!
Top Tips for Perfecting Your Cannoli Dip
This is where I share some secrets I’ve picked up over making this dish dozens of times. First, use full-fat ricotta — it’s so much creamier and genuine-tasting than the low-fat stuff. Sifting the powdered sugar is a game-changer; it keeps everything silky and smooth. When mixing the ricotta and cream cheese, don’t overdo it — overmixing tends to make it watery. Instead, fold gently until just combined. If your dip seems too soft, refrigerate it for a bit; I find the flavors deepen, and it firms up nicely. I’ve experimented with swapping vanilla for almond extract or adding orange zest — all work beautifully, so don’t be afraid to tweak! For the crunch, crushed cookies or waffle cones add texture, but I’ve also used chopped nuts or even granola for variation. Baking tips? No oven required! But if you want a toasted look or flavor, lightly toast your crushed cookies or cones before adding them. When it comes to the glaze or toppings, a good rule of thumb is to add fresh or crunchy toppings right before serving — this keeps everything crisp and inviting. Trust me, the first time I made this, I overmixed, and the texture was off. Now, I gently fold, taste test, and everything turns out perfect. It took me a few tries, but once you master the fold, it’s smooth sailing.
Storing and Reheating Tips
This dip keeps really well in the fridge — I usually store it in an airtight container for up to 3 days. Just give it a gentle stir before serving; sometimes, it firm up a little, and a quick whisk makes it silky again. If you want to make it ahead for a party, I recommend preparing the day before — it actually tastes better once those flavors have had time to mingle. For longer storage, you can freeze it — just transfer to a freezer-safe container, and it’ll stay good for up to a month. Thaw in the fridge overnight, and give it a quick stir before serving. If you’re adding that extra layer of crunch with crushed cookies or fruit, wait to sprinkle those on until right before serving to keep everything crisp. As for the glaze — if you’ve added one on top, best to keep it refrigerated, especially if it’s chocolate-based. This way, the dip stays fresh, creamy, and delicious. Whether you’re enjoying leftovers the next day or making it ahead of time, it’s one of those recipes that’s even better after a little rest. Just remember to cover it well so it doesn’t absorb fridge odors or dry out.
Frequently Asked Questions
Final Thoughts
This cannoli dip is one of those recipes I keep tucked in my back pocket for every occasion. It’s creamy, flavorful, and so versatile — plus, it’s impossible to mess up. I love how it brings a little piece of Italy into my kitchen without any fuss, and it always gets rave reviews from friends and family. Whether I’m making it for a quick family dessert, a potluck, or just because I need a bowl of something sweet, it never fails to bring smiles. The best part? It’s just as good the next day (if it lasts that long!), and you can tweak the flavor to suit your mood. If you haven’t tried it yet, do yourself a favor — whip this up for your next get-together, and I promise it’ll become a new favorite. Happy baking! And I’d love to hear how yours turns out, so don’t forget to leave a comment or share your own fun variations!
Easy Cannoli Dip
Ingredients
Method
- Mix cream cheese and ricotta cheese together until well blended.
- Stir in powdered sugar, orange extract, and lemon zest and mix until ingredients are fully incorporated and smooth.
- Stir in mini chocolate chips until well combined.
- Cover the bowl with plastic wrap, and chill in the refrigerator for at least 30 minutes.
- Serve with broken waffle cone pieces, graham crackers, fruit, cookies, pretzels, or any of your favorite dipping treats.