Sweet Peanut Caramel Bites How To Make Them
There’s nothing quite like the smell of melting caramel filling the kitchen—rich, sweet, and just a little toasty from the peanuts. I always do this when I want a quick, no-fuss treat that hits all the right notes. My kids ask for these caramel peanut clusters all the time—they disappear faster than I can say “dessert”! Honestly, they’re one of those recipes that feel fancy enough for a holiday plate but simple enough to whip up on a busy weeknight. Whenever I make these, I can’t help but smile, remembering trips to candy shops and my grandma’s kitchen where she’d toss handfuls of peanuts into warm caramel with a teasing smile. Trust me, once you get the hang of making these, they’ll become a go-to for when you’re craving something sweet and crunchy. Plus, they only need a handful of ingredients—you probably have everything in your pantry right now! Let’s dive into my favorite secret-family recipe: caramel peanut clusters.
What is caramel peanut clusters?
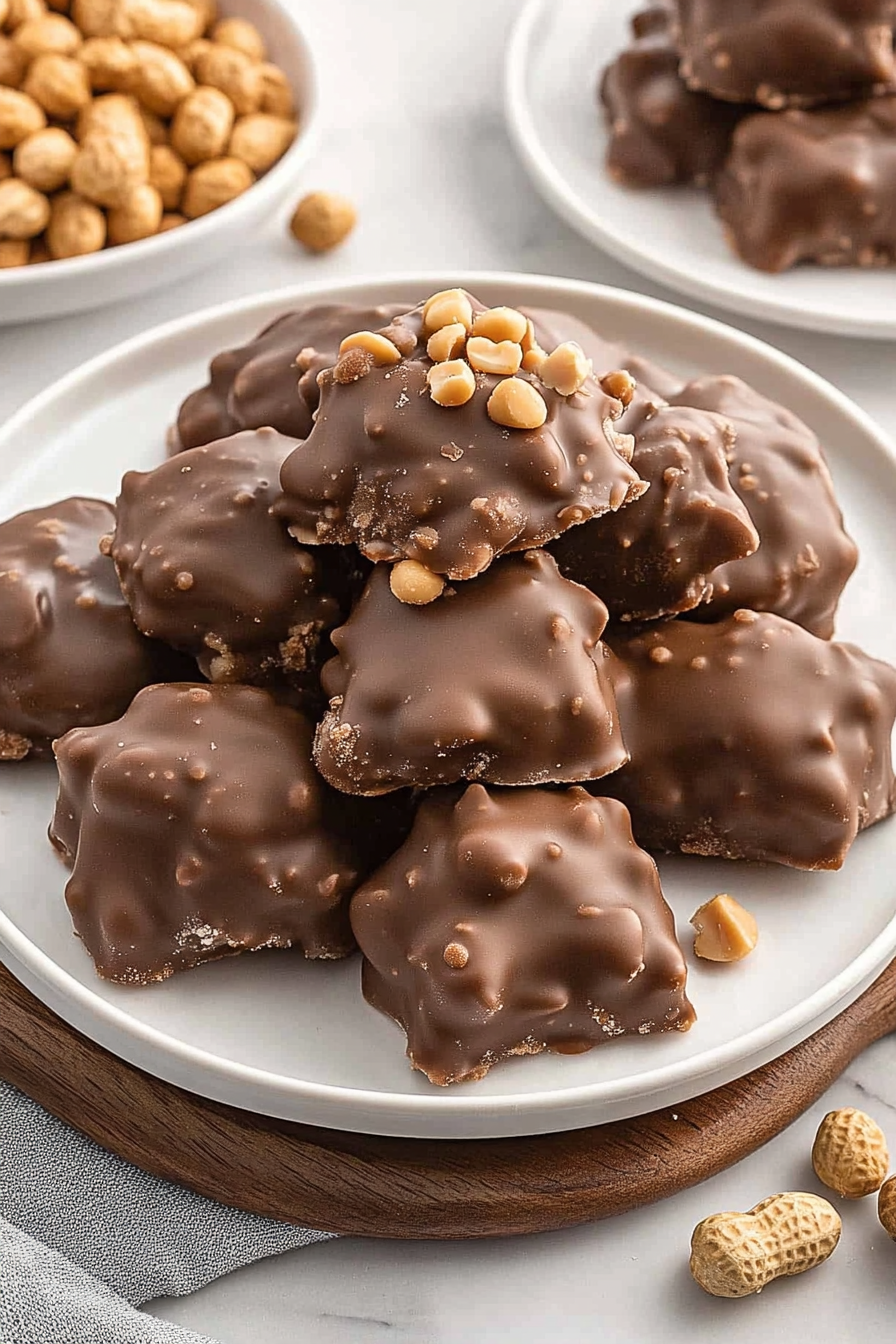
Think of caramel peanut clusters as tiny, luscious bites of heaven—crisp, chewy, sweet, and nutty all at once. They’re essentially homemade candy where roasted peanuts are coated with a rich, buttery caramel that’s slightly gooey but firm enough to hold its shape once cooled. The name “clusters” perfectly describes how the caramel naturally binds the peanuts together into little imperfect but charming groups. It’s kind of like a classic peanut brittle but softer and more indulgent, thanks to the gooey caramel. It’s a bit nostalgic—reminding me of childhood candy baskets and holiday treats—yet so simple to make at home. The best part? You can customize these clusters by adding a dash of sea salt, sprinkling chocolate chips, or even tossing in some toasted coconut. At their core, they’re just buttery, crunchy, and downright addictive—perfect for sharing or sneaking a few for yourself!
Why you’ll love this recipe?
There are so many reasons to get excited about these caramel peanut clusters—let me tell you what makes them stand out in my book. First off, the flavor. It’s honestly like a warm hug—sweet caramel blending perfectly with the roasted peanuts, with a hint of salt that balances everything out. I’ve tested this recipe with different types of peanuts—from classic roasted salted to unsalted lightly toasted—and honestly, each brings its own lovely twist. What I love most about this is how insanely easy it is to make. No fancy equipment or complicated steps—just stovetop magic and a little patience. Plus, they’re budget-friendly: a bag of peanuts and a bit of sugar, and you’re in business. And versatile? Absolutely. You can serve them as a quick holiday gift, a cozy movie night snack, or even toss mini clusters into lunchboxes for a surprise treat. They’re my go-to when I want something sweet but don’t feel like fussing with complicated recipes. Honestly, once you make these once, they’ll become part of your family’s sweet tradition—trust me on this one!
How do you make caramel peanuts?
Quick Overview
This recipe is so straightforward. You start by roasting or using ready-roasted peanuts, then make a rich caramel sauce on your stove. Once the caramel is just right—golden, glossy, and fragrant—you toss in the peanuts, stir quickly, then scoop dollops onto parchment paper to set. After a quick chill, they’re ready to enjoy! The magic is in getting that caramel just the right consistency—thick enough to coat but not hard as rock. Once cooled, they’re irresistibly chewy and crunchy, with that perfect peanut caramel combo that’s really hard to resist. What’s great is that this process takes under 30 minutes, and you’re left with a batch of homemade candy that looks like you bought it at the fanciest bakery!
Ingredients
For the main caramel mixture:
– 1 cup (200g) light brown sugar (trust me, deepens the flavor and makes it richer)
– 1/2 cup (120ml) heavy cream (or even almond milk for a lighter, more dairy-free version)
– 4 tablespoons unsalted butter (for that melty, buttery gloss)
– 1 teaspoon pure vanilla extract (for depth)
– Pinch of sea salt (the game-changer for balancing sweetness)
For the Clusters:
– 2 cups roasted peanuts (unsalted or lightly salted, whatever you prefer)
– Optional: sea salt flakes or a sprinkle of flaky salt on top for extra flair
Step-by-Step Instructions
Step 1: Preheat & Prep Pan
Line a baking sheet with parchment paper—this will be your candy-catching station. Make sure everything’s ready because once the caramel is done, you’ll need to work quickly. No need to grease the paper; parchment’s non-stick magic does the job.
Step 2: Mix Dry Ingredients
While your pan is warming up, I always do this: gather all your ingredients because the caramel stage moves fast. No time for last-minute runs to the pantry once the sugar hits the heat!
Step 3: Mix Wet Ingredients
In a medium saucepan over medium heat, combine the brown sugar, butter, and cream. Stir gently and consistently—watch for that bubbling, glossy bubble to form. This process takes about 3-4 minutes. When it’s thickening and turning a rich amber, you’re golden.
Step 4: Combine
Once the caramel is velvety and smooth, remove from heat. Stir in vanilla and a tiny pinch of sea salt (trust me, this elevates everything). Pour over your peanuts and quickly stir to coat everything evenly. If you feel the caramel isn’t thick enough, just cook it for another minute or so, but keep a close eye—burnt caramel is a no-go.
Step 5: Prepare Filling
Drop spoonfuls of caramel-coated peanuts onto your prepared parchment. You can press them down gently if you want more of an even cluster, or leave them rustic for that homemade charm. For variation, sprinkle a bit of sea salt or mini chocolate chips on top while the caramel is still warm.
Step 6: Layer & Swirl
If you like a swirled look, you can drizzle a little melted chocolate or caramel over the clusters for extra visual appeal—and added flavor. Just melt a handful of chocolate chips and thin with a teaspoon of cream or coconut oil, then drizzle generously.
Step 7: Bake
This step isn’t exactly baking—more like setting. Pop the tray into the fridge for about 20-30 minutes, or until the caramel is firm. This step really helps everything hold together beautifully.
Step 8: Cool & Glaze
Once firm, remove from the fridge and let the clusters sit at room temperature for a few minutes. If you’re adding a glaze (I love a quick chocolate drizzle or a dusting of powdered sugar), do it now. This keeps everything looking glossy and irresistible.
Step 9: Slice & Serve
Carefully break the clusters apart if they’ve stuck together a little—these are delicate! Serve them in a pretty bowl or pack them into cute bags for gifting. They’re best enjoyed within a week if kept airtight, but believe me, they won’t last that long!
What to Serve It With
Honestly, these caramel peanut clusters are versatile enough to serve for almost any occasion. For breakfast, slap a couple on your yogurt or oatmeal—it’s basically a crunchy sugar topping that feels fancy but is secretly just pure indulgence. They’re fantastic at brunch alongside a mimosa or coffee—they pair so well with a hot latte that it’s almost unfair.
At a dinner party, pile them in a pretty dish as a sweet conversation starter, or add a handful to your cheese platter for that sweet-salty contrast. My absolute favorite way to serve them? Toss a few into a mixed nut bowl next to some flaky croissants—they’re the perfect pre-dessert snack or late-night treat. And, of course, they make adorable homemade gifts wrapped up in clear paper with a twine bow. Trust me, everyone loves getting these little bites of caramel peanut goodness!
Top Tips for Perfecting Your Caramel Peanut Clusters
This recipe is foolproof once you get a couple of tricks down—and I’ve learned these the hard way. First, always use a heavy-bottomed saucepan. Thin pans tend to scorch sugar faster, and burnt caramel is a sad day in my kitchen. When making the caramel, keep the heat at medium—not too high—so it cooks evenly and avoids bubbling over.
My secret? I take the caramel off the heat just before it looks perfect—it will thicken as it cools, so waiting until it’s just a tad under the desired consistency saves a lot of fuss. Trust me, I’ve overcooked it more times than I can count! For peanuts, I prefer roasting my own; it adds a deeper flavor, but store-bought roasted peanuts work just fine and save time.
If you want to switch up the nuts, walnuts, cashews, or even pecans are delicious, but keep the same amount—peanuts are my favorite because they’re hearty and so familiar. For a touch of elegance, sprinkle a little flaky sea salt on top before they set. You don’t need much—just a few flakes elevate everything.
Baking tips? If your clusters aren’t sticking together as much as you’d like, warm the caramel slightly and give everything a good stir again. And if your kitchen runs cold, a quick 10-minute fridge chill hours before breaking them apart can do wonders. For the glaze, I’ve tried everything from dark chocolate to white chocolate—both are divine, just melt and drizzle for that professional look. Remember, patience is key—let everything cool and set properly for those perfect, satisfying bites.
Storing and Reheating Tips
This part is easy—these caramel peanut clusters keep surprisingly well! If you’re planning to enjoy them over a few days, store them in an airtight container at room temperature for up to a week. Just be sure to keep them away from direct sunlight or heat, which can make the caramel sticky or melt slightly. If your house is warm, a quick fridge stint can help preserve their texture—just pop them in a sealed container, and they’ll stay fresh.
If you want to make them ahead for gift-giving or parties, they also freeze beautifully. Wrap individual clusters tightly in plastic wrap, then place in a freezer-safe bag or container for up to three months. To serve, just let them thaw at room temperature for 10-15 minutes. For that just-baked taste, pop them in a 350°F oven for a few minutes—just enough to warm the caramel and crisp up the peanuts again.
As for the glaze, if you’ve added one, it’s best to do so fresh, as melted chocolate or icing can sometimes lose their glossy finish or become dull with storage. But honestly? I love just a simple dusting of powdered sugar or a drizzle of extra caramel for an elegant finish after they’ve cooled.
Frequently Asked Questions
Final Thoughts
If there’s one treat I keep coming back to, it’s these homemade caramel peanut clusters. They embody comfort, indulgence, and just a touch of nostalgia—all wrapped into a handful of bite-sized goodness. Once you master making the caramel—the key step—the rest is pure joy. They’re perfect for gifting, snacking, or just satisfying that sweet tooth late at night. Over the years, I’ve tweaked little things here and there—from adding sea salt on top for contrast to experimenting with different nuts—but ultimately, the magic lies in that warm, caramel coating and crunchy peanuts. So, grab your ingredients, get the stove ready, and delight your family with these addictive little bites. I promise, once you’ve made these, they’ll be on your regular rotation. Happy baking! And I’d love to hear how yours turn out—please leave a comment below or share your own tips and twists!
Homemade Caramel Peanut Clusters
Ingredients
Method
- Line two baking sheets with waxed paper, silpat baking mat, or parchment paper lightly sprayed with nonstick cooking spray.
- Add unwrapped caramels and heavy cream to a microwave-safe medium bowl. Heat in 30-second intervals, stirring after each, until completely melted.
- Stir in sliced butter and vanilla until smooth.
- Stir in peanuts. Allow mixture to rest for 30 minutes at room temperature to cool.
- Use a 1 tablespoon cookie scoop to form mounded tablespoons of caramel and peanuts on the prepared baking sheets. Chill in the refrigerator for 1 hour.
- Melt chocolate wafers in a microwave-safe bowl, heating in 30-second intervals, stirring until smooth.
- Remove clusters from refrigerator. Dip each into melted chocolate, tap gently to remove excess, and place back on waxed paper or parchment.
- While the chocolate is still damp, sprinkle with sea salt if desired.