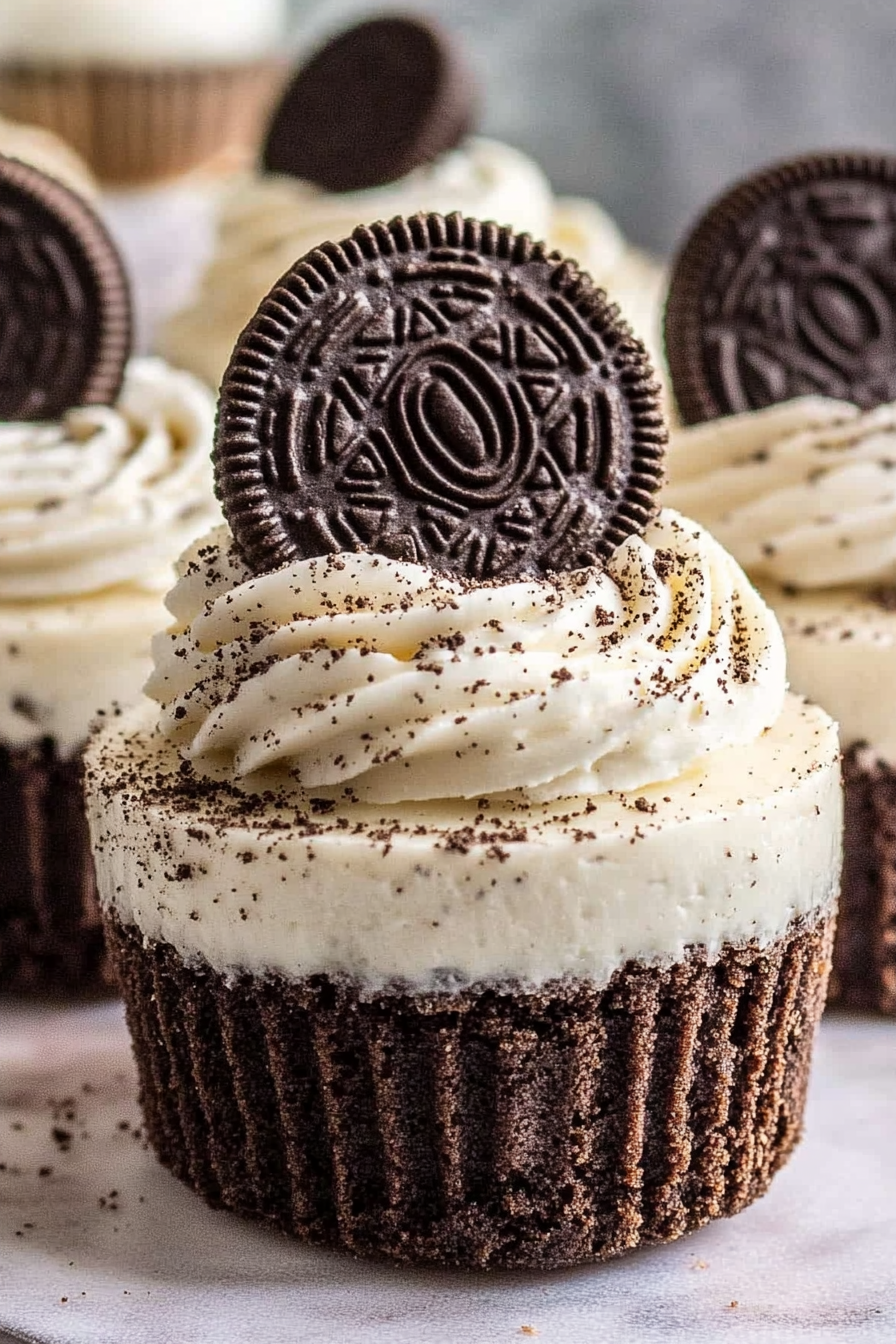
Tiny Oreo Cheesecakes How to Make Them
There’s something about biting into a creamy, velvety cheesecake that instantly transports me back to my childhood — maybe it’s the smooth richness or the nostalgic crunch of crushed cookies. But when you top that with chunks of Oreos? Well, it’s like elevating a classic to *next-level* greatness. I’ve made countless variations over the years, but this Oreo cheesecakes recipe is honestly a game-changer. It’s so incredibly easy and quick — perfect when you’re craving something sweet but don’t want to turn on the oven or fuss over complicated baking. Plus, it’s a total crowd-pleaser. My kids ask for this all the time, and honestly, I don’t blame them. The smell alone when it’s chilling in the fridge? Pure heaven. And the best part? You can customize it with different Oreo flavors or even add a hint of coffee or peanut butter for extra flair. Trust me on this one — once you try this, it’ll be your go-to for birthdays, potlucks, or just a cozy night in.
What is oreo cheesecake?
Think of Oreo cheesecakes as the lovechild of two dessert icons: the classic New York cheesecake and everyone’s favorite cookie, Oreos. They’re essentially rich, creamy cheesecakes infused with crushed Oreos inside and often topped with even more cookies or a luscious chocolate glaze. Unlike traditional baked cheesecakes, this version is usually no-bake, which makes it so much easier — no water bath, no oven, just a bit of patience in the fridge. The name ‘Oreo cheesecake’ pretty much says it all: a delightful fusion where the crunchy, chocolatey Oreos bring a playful texture and flavor boost. It’s essentially a cheesecake that’s as fun to make as it is to eat, with a perfect balance of sweetness, creaminess, and that unmistakable cookie crunch. Think of it as a dessert that’s fancy enough for special occasions, but simple enough for weeknights when you want something indulgent without any fuss.
Why you’ll love this recipe?
What I love most about this Oreo cheesecakes recipe is how fuss-free it is — seriously, you don’t have to turn on your oven or deal with tricky bain-maries. The crust is just crushed Oreos mixed with a bit of melted butter, and the filling comes together in minutes with just a whisk or spatula. It’s such a forgiving recipe, which means even if you’re a beginner, you’ll still end up with a showstopper. Plus, it’s incredibly cost-effective; most of the ingredients are pantry staples most of us have lying around. The flavor? Oh, it’s divine. The creamy, tangy filling paired with bits of crunchy cookies is basically a flavor explosion. And there’s so much versatility — you can top it with whipped cream, drizzle caramel or chocolate, or toss in some peanut butter or even crushed Reese’s for a fun twist. This cheesecake is a lifesaver on busy nights or when unexpected guests drop by — because it’s ready in a fraction of the time it takes to bake a traditional cheesecake, and it always disappears in minutes at my house. Trust me, once you try this, it’ll become your default dessert for many occasions.
Another reason I always go for this recipe is how it invites creativity. One time, I added a splash of peppermint extract and crushed peppermint candies during the mixing stage, creating a festive holiday version that my friends couldn’t get enough of. It’s a blank canvas, ready for your own personal touch — chocolate chips, caramel swirls, or even a dash of espresso powder for that mocha kick. Whether you’re baking for a crowd or just craving a sweet treat for yourself, this Oreo cheesecakes recipe has you covered — it’s quick, delicious, and endlessly adaptable.
How do you make Oreo Cheesecakes?
Quick Overview
This recipe is all about simple magic — no-bake, no fuss, just a few ingredients, and a little patience in the fridge. First, you crush a bunch of Oreos (my secret is to use a plastic bag and a rolling pin — way easier than a food processor), then mix them with melted butter to form a sturdy crust. While that sets in the fridge, you make the creamy filling by blending cream cheese, sugar, vanilla, and whipped cream or mascarpone for extra richness. Once the filling is smooth and fluffy, you fold in crushed Oreos and pour it into your crust. A quick chill in the fridge and top with more cookies or chocolate ganache, and it’s ready to serve. The beauty of this method is how quick it is to assemble, and no baking means fewer steps and less cleanup. It’s seriously foolproof, and you get a luscious, cookie-studded cheesecake that’s as beautiful as it is tasty.
Ingredients
For the Main Batter:
- 24 Oreos (double-stuffed if you really love that filling)
- 4 tbsp unsalted butter, melted
- 16 oz cream cheese, softened (full-fat, please — it makes all the difference)
- 1 cup powdered sugar (for that smooth sweetness)
- 1 tsp vanilla extract or vanilla bean paste
- 1 cup heavy whipping cream or mascarpone (test both for different textures)
For the Filling:
- Crushed Oreos (about 10-12 cookies, depending on your liking)
- Optional: a tablespoon of cocoa powder or instant coffee for a flavor boost
For the Glaze or Topping:
- Additional Oreos or chocolate chips
- Chocolate ganache or caramel drizzle (optional but highly recommended)
- Whipped cream for garnish
Step-by-Step Instructions
Step 1: Preheat & Prep Pan
Honestly, for this no-bake beauty, you don’t need to preheat. Just grab a springform pan — my favorite is 9 inches — and line it with parchment paper if you want easy removal. Lightly butter the sides if you like, but it’s not strictly necessary. Be sure your cream cheese and heavy cream are at room temperature — that’ll make mixing so much easier and smooth.
Step 2: Mix Dry Ingredients
Start by crushing your Oreos into fine crumbs. I do this by placing them in a sturdy plastic bag and hitting them with a rolling pin — way less noisy and mess-free. Mix the crushed Oreos with the melted butter until evenly coated. Press this mixture firmly into the bottom of your pan to form a crust. Use the back of a spoon or a glass to press it down evenly — this is the base of your cheesecake, so make it snug and level.
Step 3: Mix Wet Ingredients
In a large bowl, beat your softened cream cheese until smooth. I like to do this with a hand mixer or stand mixer on medium — this gets rid of any lumps and makes the texture silky. Add the powdered sugar and vanilla, then continue mixing until combined. In another bowl, whip the heavy cream until soft peaks form — just enough to hold a gentle shape. Fold this whipped cream carefully into the cream cheese mixture, using a spatula to keep it light and airy. This step is where the magic happens — the filling gets fluffy and dreamy.
Step 4: Combine
Gently fold in the crushed Oreos into the filling. Don’t overmix — you want those cookie pieces dispersed but still chunky enough to add texture. Pour this luscious batter over your crust and smooth the top with a spatula. Now, here’s a tip: if you want a marbled or swirled look, reserve a few Oreos to sprinkle on top and gently swirl them using a toothpick or skewer.
Step 5: Prepare Filling
If you’re adding any flavor extras like cocoa or coffee powder, do it here. I love adding a tablespoon of espresso powder for a subtle mocha kick — it enhances the chocolate flavor of the Oreos without overpowering. Just make sure everything is mixed smoothly.
Step 6: Layer & Swirl
Pour the filling into your prepared crust. If you’re feeling artistic, sprinkle some crushed Oreos on top and swirl them gently with a toothpick for that professional marble look. Trust me, it’s easier than it sounds, and it makes your cheesecake look absolutely stunning.
Step 7: Bake
This cheesecake isn’t baked — hurray! Instead, pop it into the fridge for at least 4 hours, ideally overnight. It sets beautifully when chilled, the flavors meld, and it firms up just right. If you’re impatient, a quick freeze for about 30 minutes works in a pinch, but slow, cool setting is best.
Step 8: Cool & Glaze
Once chilled and firm, you can add a shiny chocolate glaze or simply top with whipped cream and more Oreos. If you want that glossy finish, heat some heavy cream and pour over chopped chocolate, stirring until silky. Let it cool slightly before pouring over the cheesecake — avoid pouring hot glaze that might melt your toppings.
Step 9: Slice & Serve
Use a sharp, hot knife to cut clean slices — run it under hot water and wipe it dry between cuts. Present your slices on pretty plates, garnish with a dollop of whipped cream and a mini Oreo or two, and watch everyone’s eyes light up. Serve chilled — it’s best straight from the fridge to keep everything firm and delicious.
What to Serve It With
This Oreo cheesecakes is so versatile, it practically pairs with anything. For a breakfast twist, serve it with strong black coffee or a glass of cold milk — it’s like your dessert and breakfast all in one! During brunch, top it with fresh berries or a dusting of powdered sugar, and maybe a drizzle of caramel for extra decadence. As a dessert, it’s perfect with a scoop of vanilla ice cream or a shot of espresso on the side. If you’re looking for a cozy snack, pair it with hot cocoa or chai latte — it’s a little indulgence that makes any day special. We often have gatherings where everyone is fighting over the last slice, and I always add a few extra Oreos on top for that perfect finishing touch. It’s a crowd-pleaser, for sure, and honestly, it’s just as good as store-bought (but way more fun to make yourself). Plus, no one will believe how easy it is to whip up a homemade cheesecake that tastes so divine.
Top Tips for Perfecting Your Oreo Cheesecakes
Before you dive into making this, let me share a few lessons learned from years of testing this recipe. First, always use full-fat cream cheese — it’s what gives the cheesecake its luscious texture. I once tried low-fat versions, and while it’s okay, it just didn’t have the same creaminess. Second, don’t skip whipping your heavy cream; it’s the trick that makes the filling light and airy, so take your time whipping until soft peaks form. When crushing Oreos, I highly recommend the plastic bag method — less mess, more control. If you want a finer crust, pulse the Oreos in a food processor, but I prefer the slightly chunkier texture. For a more intense chocolate flavor, add a tablespoon of cocoa powder to the filling — just be mindful it might slightly alter the texture. When swirling Oreos into the batter, do it gently to keep that beautiful marbled effect. Ovens can vary a lot, so keep an eye on the cheesecake after the 4-hour mark, especially if you’re in a humid climate. If the top looks shiny or slightly wobbly, let it chill longer. And about toppings — the glaze should be smooth but pourable; too thick, and it won’t spread nicely. And finally, my favorite tip: plan ahead! This cheesecake gets better with time — it’s like a fine wine of desserts. I always make it the night before to allow all those flavors to settle and deepen. If you keep these tips in mind, you’re in for a treat that’s both impressive and totally doable.
Storing and Reheating Tips
This cheesecake is pretty forgiving when it comes to storage. After you’ve sliced and served, cover any leftovers tightly with plastic wrap or store in an airtight container. It’ll keep fresh in the fridge for up to 4 days — if it lasts that long! I’ve learned to slice only what I plan to eat, because the moisture can make the crust soggy if left too long. For longer storage, pop it in the freezer — just wrap it well in plastic wrap and foil. It should keep for up to 2 months, perfect for pre-portioned treats during busy weeks. When you’re ready to enjoy the leftovers, thaw it overnight in the fridge. Just give it a gentle shake or re-smooth the top if it has settled a bit. If you’ve added a glaze, it might lose some shine during storage, so consider adding a fresh drizzle when serving. Reheating isn’t necessary; I love it chilled straight from the fridge — that cold, creamy texture is the best. But if you prefer it at room temperature, take it out about 20 minutes before serving. Overall, this cheesecake is pretty hardy and forgiving, which is great for making ahead or last-minute cravings.
Frequently Asked Questions
Final Thoughts
Honestly, this Oreo cheesecakes recipe has become a household favorite. It’s one of those desserts that you can whip up in no time when a craving strikes, and no one will ever guess how simple it was to make. The combination of velvety cream cheese, crunchy Oreos, and that nostalgic chocolate flavor hits all the right notes. I always tell friends to keep a stash of Oreos in their pantry because, trust me, it’s a dessert that’s just a few hours away from being your new best friend. Whether you’re celebrating a special occasion or just need a sweet pick-me-up during a busy week, this recipe has you covered. And honestly, once you make it once, you’ll want to keep a shortcut ready for whenever the mood strikes. So go ahead, grab those Oreos, and get ready to indulge — because this is one treat you’ll keep coming back to, again and again. Happy baking!
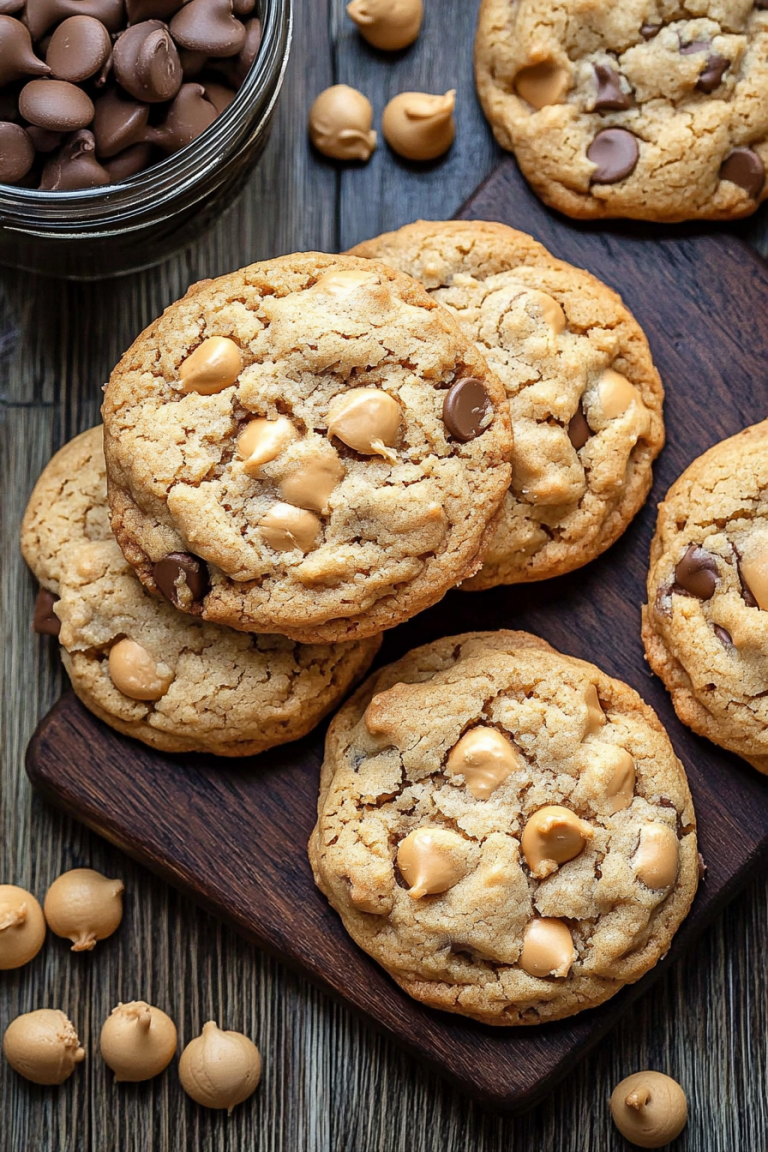
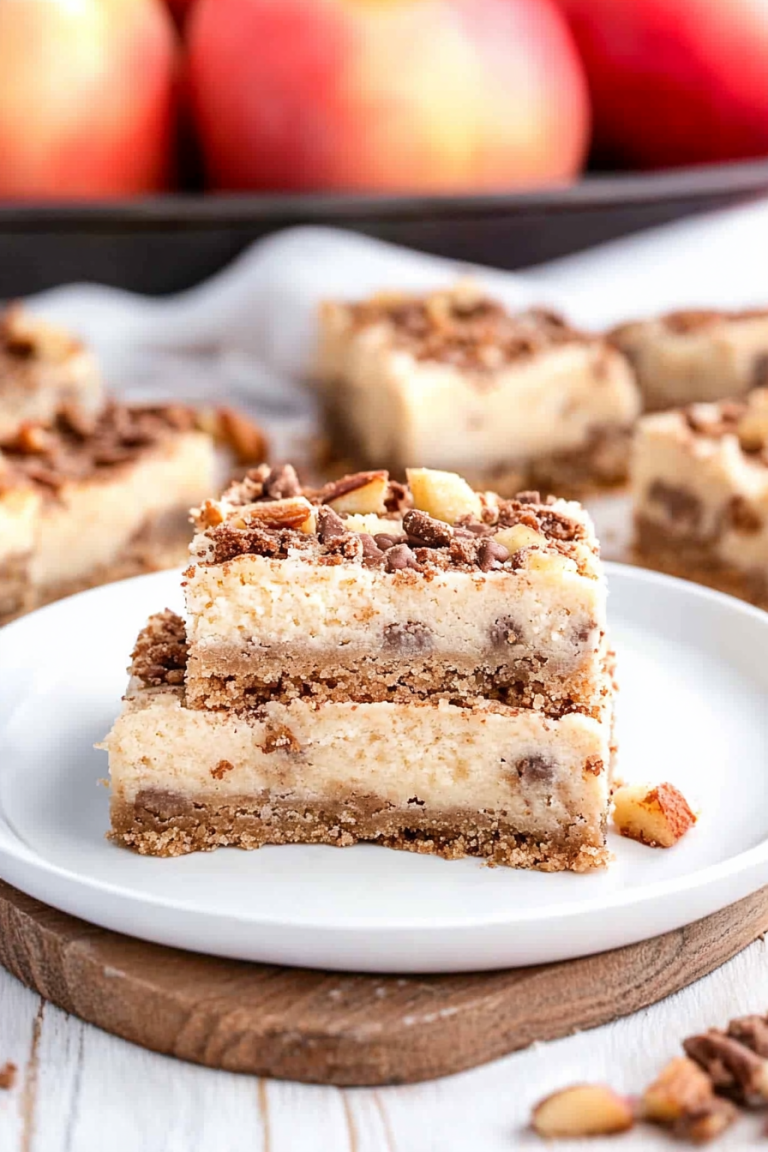
Classic Chocolate Chip Cookies
Ingredients
Method
- Preheat the oven to 350°F. Line baking sheets with parchment paper.
- Cream together the softened butter, granulated sugar, and brown sugar until light and fluffy.
- Beat in the eggs one at a time, then stir in vanilla extract.
- In a separate bowl, whisk together flour, baking soda, and salt.
- Gradually blend the dry ingredients into the wet ingredients until just combined.
- Stir in the chocolate chunks.
- Drop rounded tablespoons of dough onto prepared baking sheets.
- Bake for 10-12 minutes until golden brown around the edges.
- Allow cookies to cool on the baking sheet for 5 minutes before transferring to wire racks.