Tropical Lime Cake How to Bake Bliss
Oh, how I adore this time of year! The air starts to get that little bit warmer, the sun hangs around a bit longer, and suddenly, I’m craving something bright, zesty, and utterly delightful. And for me, nothing screams “perfect spring and summer treat” quite like a slice of this coconut lime cake. It’s not just any cake, mind you. It’s the kind of cake that makes you close your eyes with the first bite, a little moment of pure bliss. I remember the first time I made it, trying to capture that feeling of a tropical getaway without actually needing a plane ticket. My family took one look at the golden crumb and the glistening glaze and were hooked. My husband, who usually just hums politely after dessert, actually declared it “a winner,” which from him, is practically a standing ovation! It’s the perfect balance of sweet, creamy coconut and that sharp, invigorating lime zest. It reminds me of those fancy little cakes you get at bakeries, but honestly, I think this homemade version is even better. It’s less fussy, more soulful, and made with love, which I truly believe is the secret ingredient.
What is coconut lime cake?
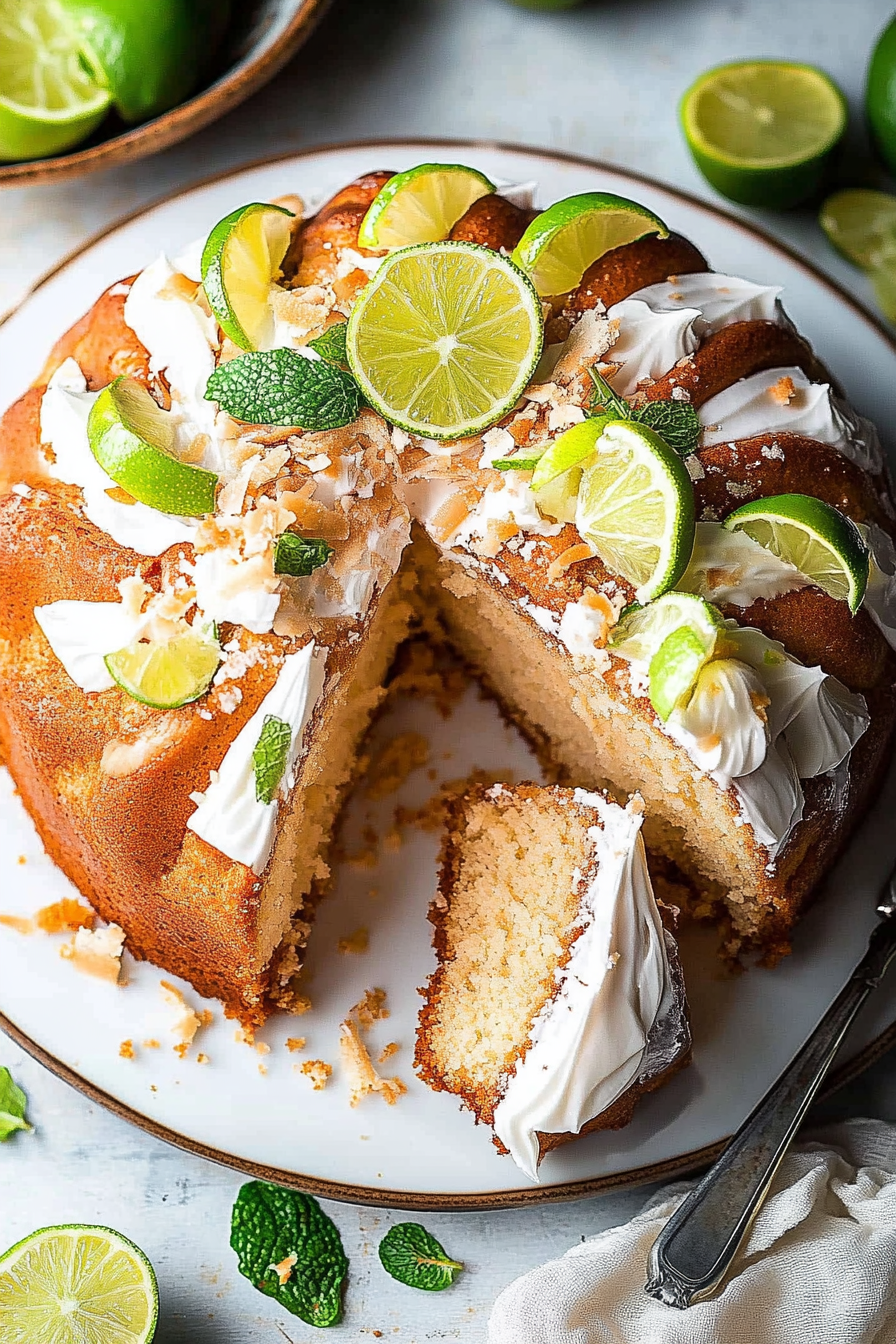
So, what exactly is this magical creation? Think of it as your quintessential comforting cake, but with a seriously sophisticated tropical twist. It’s essentially a moist, tender cake infused with the rich, nutty flavor of coconut, brightened up with the tangy zest and juice of fresh limes. It’s not overly sweet, which is a huge plus for me. The lime cuts through the richness of the coconut beautifully, creating a flavor profile that’s both refreshing and satisfying. It’s the kind of cake that feels special enough for a birthday or a holiday, but so straightforward to whip up that it’s become my go-to for a spontaneous sweet craving or when I need a guaranteed crowd-pleaser. The name itself, coconut lime cake, just sounds sunshiney, doesn’t it? It’s an invitation to a little slice of paradise, right there on your plate.
Why you’ll love this recipe?
Honestly, where do I even begin with why this coconut lime cake is my absolute favorite? Let me count the ways! First off, the flavor is just out of this world. You get that comforting, familiar taste of coconut, but then BAM! The lime comes in, zinging and awakening your taste buds. It’s not just a subtle hint; it’s a vibrant burst that makes the whole cake sing. It’s that perfect combination of sweet and tart that keeps you wanting more without ever feeling heavy.
Then there’s the texture. This cake is unbelievably moist and tender. I’ve tested this recipe with different types of coconut milk, and I’ve found that using full-fat coconut milk really makes a difference in achieving that luxurious, almost creamy crumb. It’s like a warm hug in cake form. And the best part? It’s surprisingly simple to make. I know baking a cake from scratch can sometimes feel intimidating, but this recipe is incredibly forgiving. I’ve made it on chaotic weeknights, and it always turns out perfectly. The steps are clear, and the ingredients are readily available at any grocery store.
Speaking of ingredients, this recipe is also really budget-friendly! You probably have most of what you need in your pantry already. And when you consider how impressive this cake looks and tastes, it’s an absolute steal. It’s versatile, too. I love it on its own, but it’s also fantastic with a dollop of whipped cream or a scoop of vanilla ice cream. If you love my Lemon blueberry scones: What are some good recipes for this? or my How do I make a vanilla pound cake?, I guarantee you’re going to fall head over heels for this coconut lime cake. It offers that same comforting bake with a unique, bright flavor profile that’s just perfect for any season.
How to Make Coconut Lime Cake
Quick Overview
This recipe is all about building flavor layer by layer. We’ll start by creaming butter and sugar until light and fluffy, then incorporate eggs and vanilla. Next, we’ll alternate adding our dry ingredients (flour, baking powder, salt) with our wet ingredients (coconut milk, lime zest, lime juice), ensuring everything is perfectly combined. A quick preparation of a simple lime and coconut filling, followed by a beautiful swirl right before baking, brings it all together. The result is a stunning, moist, and incredibly flavorful coconut lime cake that’s surprisingly easy to achieve. It’s proof that you don’t need complicated techniques to create something truly delicious.
Ingredients
For the Main Batter:
2 ½ cups all-purpose flour (I always use bleached for a lighter crumb, but unbleached works too!)
1 ½ teaspoons baking powder
½ teaspoon salt (just a pinch to enhance flavors)
1 cup (2 sticks) unsalted butter, softened (crucial for creaming!)
1 ¾ cups granulated sugar
3 large eggs, at room temperature (they emulsify better!)
1 teaspoon vanilla extract
1 cup full-fat coconut milk (the canned kind, not the carton, for richness!)
Zest of 2 large limes (about 2 tablespoons)
¼ cup fresh lime juice (from about 2-3 limes)
For the Filling:
½ cup shredded sweetened coconut (plus more for garnish if you like!)
2 tablespoons melted unsalted butter
2 tablespoons granulated sugar
1 tablespoon fresh lime juice
For the Glaze:
1 ½ cups powdered sugar, sifted (for a smooth glaze)
2-3 tablespoons fresh lime juice
1 tablespoon melted unsalted butter
A pinch of salt
Step-by-Step Instructions
Step 1: Preheat & Prep Pan
First things first, get your oven preheated to 350°F (175°C). This ensures the cake bakes evenly from the moment it goes in. Now, grab your favorite bundt pan or a 9×13 inch baking pan. Grease it really well with butter or cooking spray, and then flour it. I always make sure to get into all the nooks and crannies of a bundt pan. This step is non-negotiable; it’s the secret to getting your beautiful cake out in one perfect piece. If you’re using a bundt pan, you can even dust it with a little shredded coconut instead of flour for an extra hint of flavor and a lovely golden finish. Set your prepared pan aside.
Step 2: Mix Dry Ingredients
In a medium bowl, whisk together the all-purpose flour, baking powder, and salt. Whisking them together ensures that the leavening agent and salt are evenly distributed throughout the flour. This prevents pockets of saltiness or uneven rising. You want to make sure it’s well combined, so it acts uniformly when you add it to the wet ingredients. Give it a good whisk for about 30 seconds. This simple step is crucial for a consistent texture in your final cake. Set this bowl aside.
Step 3: Mix Wet Ingredients
In a large bowl, cream together the softened unsalted butter and granulated sugar using an electric mixer on medium-high speed. Beat this until it’s light, pale, and fluffy, which usually takes about 3-5 minutes. This process, called creaming, incorporates air into the batter, which helps make the cake light and tender. Scrape down the sides of the bowl as needed. Next, add the eggs one at a time, beating well after each addition. Don’t rush this! Add the vanilla extract and beat again until just combined. Then, in a separate small bowl or jug, whisk together the full-fat coconut milk, the zest of two large limes, and ¼ cup of fresh lime juice. This is where all that bright, zesty flavor comes from! Make sure to get all the zest – it holds so much aromatic oil.
Step 4: Combine
Now for the magic of bringing it all together. With the mixer on low speed, gradually add the dry ingredients to the wet ingredients, alternating with the coconut milk mixture. Start and end with the dry ingredients. So, add about a third of the dry ingredients, mix until just combined, then add half of the coconut milk mixture, mix, add another third of the dry, mix, add the remaining coconut milk mixture, mix, and finally add the last third of the dry ingredients and mix until just combined. Be careful not to overmix! Overmixing develops the gluten in the flour, which can lead to a tough cake. Just mix until you no longer see streaks of flour. It’s okay if the batter looks a little thick; that’s what you want for a dense, moist cake.
Step 5: Prepare Filling
While the oven is doing its thing and your batter is ready, let’s whip up the simple filling. In a small bowl, combine the ½ cup shredded sweetened coconut, 2 tablespoons of melted unsalted butter, 2 tablespoons of granulated sugar, and 1 tablespoon of fresh lime juice. Give it all a good stir until it’s nicely combined. This little mixture adds pockets of chewy coconut goodness throughout your cake and a lovely subtle sweetness. It’s so simple but makes a big difference in the overall texture and flavor.
Step 6: Layer & Swirl
Now comes the fun part, making it look as good as it tastes! Pour about half of your cake batter into your prepared pan and spread it evenly. Sprinkle the prepared coconut filling evenly over this layer of batter. Don’t worry if it’s not perfectly distributed; little pockets are good! Now, carefully spoon the remaining cake batter over the filling, trying to cover it as much as possible. If you’re using a bundt pan, this helps ensure the filling is mostly contained within. For a beautiful swirl effect, take a butter knife or a skewer and gently swirl it through the batter a few times. Don’t go crazy; just a few gentle swirls will create lovely patterns without overmixing the batter. This creates those gorgeous ribbons of coconut filling throughout the cake.
Step 7: Bake
Place your beautifully layered cake into the preheated oven. For a 9×13 inch pan, it will likely take about 35-45 minutes. For a bundt cake, it might take a bit longer, around 50-60 minutes. The best way to tell if it’s done is to insert a wooden skewer or toothpick into the center of the cake, away from any filling pockets. If it comes out clean or with just a few moist crumbs attached, your cake is ready! If you see wet batter, give it a few more minutes and test again. Keep an eye on it, as oven temperatures can vary. If the top is browning too quickly, you can loosely tent it with aluminum foil.
Step 8: Cool & Glaze
Once your cake is baked to perfection, remove it from the oven and let it cool in the pan for about 15-20 minutes. This allows the cake to set up properly before you attempt to remove it. If you’re using a bundt pan, carefully invert it onto a wire rack. If it’s being stubborn, gently tap the bottom of the pan. Let the cake cool completely on the wire rack before you even think about glazing. This is super important, otherwise, your glaze will melt right off! For the glaze, whisk together the sifted powdered sugar, 2-3 tablespoons of fresh lime juice, 1 tablespoon of melted butter, and a tiny pinch of salt until you have a smooth, pourable consistency. You can add more lime juice for a thinner glaze or more powdered sugar for a thicker one. Drizzle this glorious glaze all over the cooled cake. It’s going to look divine!
Step 9: Slice & Serve
Once the glaze has set slightly (which happens pretty quickly!), it’s time to slice and serve your masterpiece. I find using a sharp knife helps to get clean slices, especially with the filling. If you made a bundt cake, the holes are perfect for letting the glaze drip down in beautiful rivulets. This coconut lime cake is absolutely heavenly served at room temperature, but it’s also wonderful slightly chilled. You can garnish it with a little extra shredded coconut or a thin lime slice for an extra touch of elegance. Enjoy every single bite!
What to Serve It With
This coconut lime cake is so versatile, it’s a dream to pair with various occasions and meals. You really can’t go wrong!
For Breakfast: Imagine waking up and having a slice of this with a steaming mug of coffee. The lime zest really wakes you up in the morning, and the coconut is comforting. It’s much more interesting than a plain muffin! I sometimes serve a small sliver alongside some fresh fruit salad for a little something extra special on a weekend morning. It feels indulgent without being too heavy to start the day.
For Brunch: This cake absolutely shines at brunch. The bright flavors are perfect for a light and airy meal. Arrange slices on a platter with other brunch favorites like quiche, fresh berries, and perhaps some of my easy overnight oats. A crisp mimosa or a refreshing glass of sparkling water with a lime wedge would be the perfect beverage accompaniment. It adds a touch of tropical elegance that guests will rave about.
As Dessert: This is where it truly shines! Serve a generous slice after dinner with a dusting of powdered sugar, or perhaps a dollop of freshly whipped cream. A small scoop of coconut ice cream or even a tangy passionfruit sorbet would be incredible alongside it. The contrast of warm spices with the cool ice cream is just divine. It’s a fantastic alternative to a heavy chocolate cake when you want something lighter but still satisfyingly sweet.
For Cozy Snacks: Don’t discount this cake for a simple afternoon pick-me-up or a late-night treat. It’s perfect with a cup of tea or even a glass of cold milk. My kids often ask for a piece after school, and it’s such a simple way to give them a little treat. It’s that comforting, familiar texture with a pop of exciting flavor that makes it perfect for any time you’re craving something sweet but not overpowering.
Top Tips for Perfecting Your Coconut Lime Cake
After making this coconut lime cake more times than I can count, I’ve picked up a few tricks that I think really elevate it. These are the little things that make the difference between a good cake and a truly unforgettable one.
Zucchini Prep: Wait, zucchini? Yes, you read that right! My secret for the most incredibly moist cake is actually adding a cup of finely grated zucchini to the batter. Don’t worry, you can’t taste it at all! It just adds unparalleled moisture and tenderness. When grating, use the fine side of your grater. You don’t need to peel it – the skin is soft and adds a bit of color. Squeeze out any excess moisture by wrapping the grated zucchini in a clean kitchen towel and giving it a good squeeze. Add it in step 4 with the wet ingredients. Trust me on this one; it’s a game-changer!
Mixing Advice: I mentioned it before, but I’ll say it again: do NOT overmix! Once the flour goes in, just mix until you don’t see any dry streaks. A few small lumps are okay. Overmixing develops gluten, which makes cakes tough and dense. I often finish mixing the last bit of flour in by hand with a spatula. It gives you better control and ensures you don’t accidentally go too far. The batter should be thick and luscious, not thin and watery.
Swirl Customization: When you’re swirling the filling into the batter, don’t be afraid to get a little creative. You can make simple zig-zags with a knife, or more elaborate swirls. For a more intense coconut flavor and chewy texture, you can even reserve a tablespoon of the filling and sprinkle it on top just before baking. The key is not to over-swirl, or you’ll end up with a muddy look. Just a few passes will create beautiful, distinct ribbons of filling.
Ingredient Swaps: I’ve experimented a lot, and while the recipe is pretty solid as is, here are a few tested swaps. For the coconut milk, if you absolutely can’t find full-fat canned coconut milk, you can use 2/3 cup of regular milk mixed with ¼ cup of melted coconut oil, but the texture won’t be quite as rich. For the lime, you could try lemon, but you’ll lose that specific tropical tang. If you don’t have unsalted butter, salted is fine, but reduce the salt in the batter by ¼ teaspoon. And for the shredded coconut in the filling, unsweetened works, but you might want to add an extra teaspoon of sugar.
Baking Tips: Always use the correct pan size. If you’re using a 9×13 inch pan and the cake is done but the center still seems a bit soft, it might be that your oven runs hot. Try baking at 325°F (160°C) for a few extra minutes. Conversely, if it’s taking too long, your oven might run cool, so increase the temp slightly. I always bake cakes on the middle rack of the oven for the most even heat distribution. And remember to let it cool completely before glazing – I’ve learned that the hard way more than once!
Glaze Variations: Want to jazz up the glaze? Try adding a tiny drop of green food coloring for a more vibrant look, or stir in a teaspoon of lime zest for an extra punch of citrus. If you prefer a thinner glaze that drips more, add a splash of milk or more lime juice, a teaspoon at a time. For a thicker, more frosting-like glaze, simply add more sifted powdered sugar. You can also skip the glaze altogether and just dust the cooled cake with powdered sugar for a simpler, elegant finish.
Storing and Reheating Tips
Knowing how to properly store your delicious coconut lime cake is key to keeping it fresh and delicious for as long as possible. I’ve got a few methods that work like a charm.
Room Temperature: If your cake isn’t heavily frosted with a cream cheese or buttercream frosting (this simple lime glaze is fine!), it can sit at room temperature for about 2-3 days. Make sure it’s covered tightly. You can use plastic wrap, foil, or an airtight cake carrier. I usually place it in my cake dome. It stays wonderfully moist this way, and the flavors often meld even more beautifully on day two.
Refrigerator Storage: For longer storage, or if you’ve added a more perishable frosting, the refrigerator is your best bet. Wrap the cake tightly in plastic wrap, and then place it in an airtight container or a heavy-duty freezer bag. It should stay good in the fridge for about 4-5 days. I find that the texture is still quite lovely when chilled, especially if you give it a few minutes to come closer to room temperature before serving. It also holds up really well if you want to serve it cold.
Freezer Instructions: Yes, you can freeze this cake! It’s a lifesaver when you want to get ahead of baking for an event. First, make sure the cake is completely cooled and the glaze has set. Then, wrap it very tightly in several layers of plastic wrap, ensuring there are no air pockets. For extra protection, you can then wrap it again in aluminum foil or place it in a freezer-safe container. It will keep well in the freezer for up to 2-3 months. When you’re ready to thaw, unwrap it and let it sit at room temperature for several hours (or overnight in the fridge, then bring to room temp). The texture might be slightly different after freezing, but it’s still wonderfully moist and flavorful.
Glaze Timing Advice: This is super important! If you plan on storing your cake at room temperature or in the refrigerator for more than a day, it’s often best to glaze it just before serving or on the day you plan to eat it. The acidity in the lime glaze can sometimes cause it to “sweat” a bit or become a little sticky if left on for too long, especially in humid conditions. However, if you’re freezing it, definitely glaze it *before* freezing. The freezer and thawing process tends to dry out cakes, so that glaze is going to add some much-needed moisture and flavor back in.
Frequently Asked Questions
Final Thoughts
There you have it, my friends – the recipe for my absolute favorite coconut lime cake. It’s a recipe that brings me so much joy, and I truly hope it brings you just as much when you bake it. It’s more than just a cake; it’s a feeling – a little ray of sunshine, a reminder of warmer days, and a simple pleasure that can brighten any moment. I love how it uses simple, everyday ingredients to create something so wonderfully special. It’s proof that you don’t need to be a pastry chef to create incredible desserts right in your own kitchen.
If you enjoyed this recipe, you might also want to explore some of my other citrus-y delights, like my tangy lemon bars or my easy orange cranberry bread. They share that same bright, cheerful spirit that this coconut lime cake embodies. I can’t wait to hear how your cake turns out! Please, please leave a comment below and tell me what you think, or share any fun variations you tried. Your feedback means the world to me, and it helps other bakers know what to expect. Happy baking, and enjoy every delicious bite!