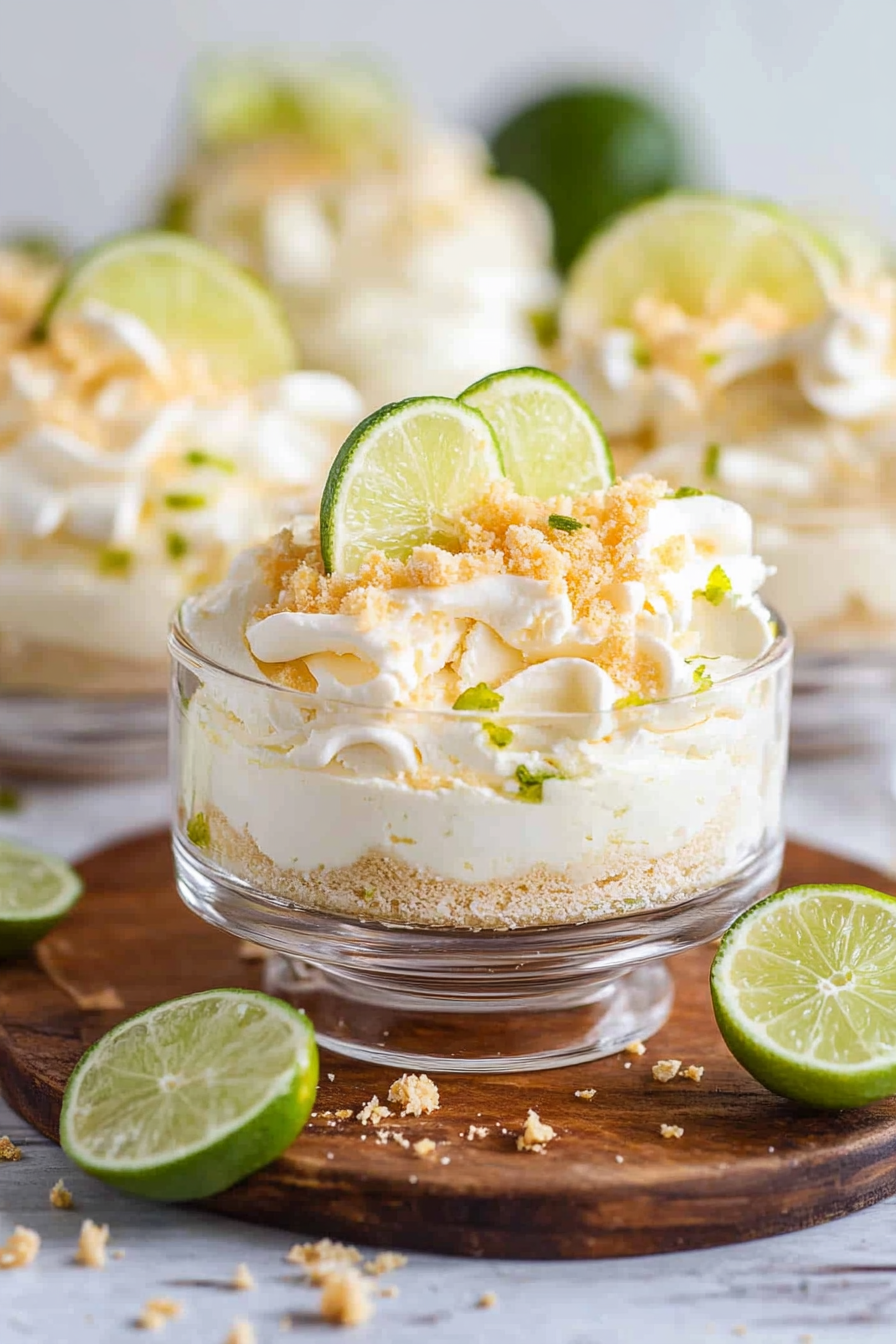
Zesty Cheesecake Parfaits A Simple Treat
There’s nothing quite like biting into a smooth, tangy slice of lime cheesecake, especially when the first hint of citrus hits your senses. I remember the first time I made this recipe—my kitchen was filled with that irresistible aroma of freshly zested limes, and my family’s eyes lit up as I cut the first slice. It’s honestly become my go-to when I want something impressive but easy enough to whip up after a busy day. My kids ask for this all the time, and I swear, it’s like summer in a dessert—bright, creamy, and just the right amount of sweet-tangy. Plus, it’s surprisingly versatile; you can serve it chilled straight from the fridge, or fancy it up with a dollop of whipped cream or fresh berries. If you love the idea of a cheesecake that’s both refreshingly different and utterly indulgent, stick around. This lime cheesecake is a little slice of sunshine that I promise you’ll fall in love with, just like I did.
What is a lime cheesecake?
Think of lime cheesecake as the zesty cousin of the traditional cheesecake—it’s essentially the same creamy, velvety filling but with a bright, citrusy twist. The idea struck me years ago when I wanted to lighten up my usual dessert lineup, and I realized that a splash of fresh lime juice and zest transforms the rich cream cheese into something lively and fresh. It’s called “lime cheesecake” because, well, lime is the star ingredient. The crust is usually a simple graham cracker or digestive biscuit base, sturdy enough to hold up to the luscious lime filling. This dessert is the perfect marriage of tart and sweet, with a texture that’s smooth yet satisfying. I love that it’s not overly complicated—no fancy techniques needed—just good ingredients and a little patience for chilling. It’s a fresh take that feels special enough for weekends but easy enough to make on a weeknight when you’re craving something special.
Why you’ll love this recipe?
What I love most about this lime cheesecake is how it manages to be both unbelievably flavorful and ridiculously simple to make. The tangy lime gives it a zing that lifts your spirits—seriously, the smell alone is enough to make everyone in the house come running. Plus, the ingredients are pretty budget-friendly: cream cheese, sour cream, limes, graham crackers, a pinch of sugar, and a bit of butter—that’s it. No fancy gadgets required! It’s also super versatile; you can serve it as a light dessert after dinner, cut into smaller squares for a brunch centerpiece, or even turn it into individual mini cheesecakes for a party. I’ve tested this with different lime varieties, and trust me, a ripe, juicy lime makes all the difference. And the best part? It tastes like it took hours of effort, but I’ve made this countless times, and it never fails. It’s a reliable crowd-pleaser, and trust me—once you try it, it’ll become a staple in your dessert rotation.
How do you make lime cheesecake?
Quick Overview
This lime cheesecake starts with a crunchy graham cracker crust, which is pressed into a springform pan. Then, you blend softened cream cheese with sugar, sour cream, and freshly squeezed lime juice and zest until silky smooth. The mixture gets poured over the crust, then chilled for several hours until set. For that extra pop of lime flavor, I like to add a hint of lime zest on top just before serving. And if you want to be fancy, a drizzle of lime glaze or whipped cream can really elevate the look and flavor. The whole process takes about 20 minutes of prep, and then it’s just waiting for that magic moment when you get to dig in. This recipe is perfect for those times when you’re craving a tangy, refreshing dessert that doesn’t require turning on the oven for hours. It’s a total lifesaver on busy nights or when hosting friends—trust me on this one!
Ingredients
For the Main Batter:
- 16 oz (450 g) cream cheese, softened (seriously, take it out early for smoothness)
- 1 cup (200 g) granulated sugar
- 1/2 cup (120 ml) sour cream (full-fat makes it creamier)
- 1/4 cup (60 ml) freshly squeezed lime juice (about 3 limes)
- 2 teaspoons lime zest (more if you really want that zing)
- 1 teaspoon vanilla extract (optional but adds depth)
For the Crust:
- 1 1/2 cups (150 g) graham cracker crumbs (or digestive biscuits, crushed)
- 1/4 cup (50 g) granulated sugar
- 6 tablespoons (85 g) unsalted butter, melted
For the Glaze (Optional but lovely):
- 1/4 cup lime juice
- 1/4 cup powdered sugar
- Extra lime zest or thin lime slices for garnish
Step-by-Step Instructions
Step 1: Preheat & Prep Pan
Preheat your oven to 350°F (175°C). Although this recipe has a no-bake element, I like to bake the crust briefly just to set it perfectly. Grease your springform pan and line the bottom with parchment paper, then set aside. If you prefer, you can skip the oven and just chill the crust, but I’ve found a light bake makes it extra sturdy and yummy.
Step 2: Mix Dry Ingredients
Combine the graham cracker crumbs and sugar in a bowl. Mix well until evenly distributed. The more uniform the crumbs, the more consistent your crust will be. Then, pour in the melted butter and stir until the mixture resembles wet sand. This step is key because it helps the crust hold together when you press it into the pan.
Step 3: Mix Wet Ingredients
Beat the softened cream cheese with a hand or stand mixer until smooth and creamy—trust me, don’t skip this step or you’ll end up with lumps. Add the sugar and keep mixing until fluffy. Then, blend in the sour cream, lime juice, lime zest, and vanilla just until combined. The mixture should be silky and pourable but thick enough to hold its shape.
Step 4: Combine
Press the crumb mixture evenly into your prepared pan, making sure to create a slight border around the edges for the filling. Then, pour in the lime filling and smooth the top with a spatula. Be gentle so you don’t disturb the crust—this is where patience pays off!
Step 5: Prepare Filling
Once the filling is in, I like to give it a few gentle taps on the counter to remove air bubbles. For a pretty swirl effect, you can add dollops of extra lime zest or small spoonfuls of prepared lime curd and swirl it with a toothpick.
Step 6: Layer & Swirl
If you want a marbled look, drop spoonfuls of lime curd or extra filling on top and swirl gently with a toothpick or skewer. Don’t overmix—just a few waves are enough for a beautiful effect. This step makes the cheesecake look as gorgeous as it tastes.
Step 7: Bake
Bake in the oven for 15-20 minutes, just until the edges are set but the center still jiggles slightly when you shake the pan. It’ll puff up a bit, but it will settle once cooled. Don’t overbake, or it can become dry. Cool on a wire rack, then refrigerate for at least 4 hours or overnight for best results.
Step 8: Cool & Glaze
Once chilled, you can add a thin lime glaze by mixing lime juice with powdered sugar until smooth. Drizzle it over the top, then garnish with lime slices or zest. The glaze adds a glossy finish and an extra hit of citrus—trust me on this one, it’s the finishing touch!
Step 9: Slice & Serve
Run a sharp knife dipped in hot water along the edge for clean slices. Serve chilled with a dollop of whipped cream or extra lime zest if you’re feeling fancy. This looks stunning on a cake stand or a pretty plate, and the flavor—oh, the flavor—is downright addictive.
What to Serve It With
This lime cheesecake is a real showstopper on its own, but I love pairing it with some simple sides to make the whole dessert shine. For breakfast (if you’re feeling daring early in the day), serve a slice alongside a fresh fruit salad and a strong cup of coffee—bright and energizing. My family always loves it for brunch, accompanied by a mimosa or sparkling water with lime wedges for a refreshing vibe. As an after-dinner treat, it pairs beautifully with a little scoop of coconut ice cream or a handful of fresh berries—blackberries, strawberries, or blueberries—add a nice pop of color and extra sweetness. When I’m craving comfort, I just cut a big slice and enjoy it with a warm cup of tea or a glass of chilled Prosecco. This cheesecake makes even simple gatherings feel special—every bite brings a little sunshine to the table.
Top Tips for Perfecting Your Lime Cheesecake
I’ve made this so many times that I’ve picked up a few tricks along the way. First, always use full-fat cream cheese—low-fat versions just don’t give that rich, velvety texture. When zesting limes, I do it before juicing so I don’t waste any zest, and I recommend using a microplane for the best flavor. To keep the filling smooth, make sure your cream cheese is softened at room temperature; this avoids lumps. When mixing, don’t overbeat—just until everything is well combined—because overmixing can incorporate too much air, causing cracks while baking. For a prettier swirl or marbled effect, try placing dollops of lime curd on top of the filling before swirling gently. If you want it extra tangy, squeeze an extra lime or two into the filling—just adjust the sugar accordingly. I’ve experimented with different crusts, and honestly, crushed digestive biscuits give a slightly richer flavor—try it! Baking with the lower rack in your oven ensures gentle heat, preventing cracks, and always check doneness with a gentle shake—if the middle jiggles, it’s perfect. For the glaze, if your lime juice isn’t very sweet, add a touch more powdered sugar but don’t make it too thick or it’ll slide right off. Lastly, always chill in the fridge for at least 4 hours; it truly makes the flavors meld and the filling firm up beautifully.
Storing and Reheating Tips
This lime cheesecake keeps well for several days—my rule of thumb is up to 3 days in the fridge, tightly covered. I recommend covering it with plastic wrap or placing it in an airtight container to prevent it from absorbing fridge odors. If you’re making it ahead for a gathering, just keep it refrigerated and add the glaze right before serving so it stays shiny and fresh. Want to freeze leftovers? No problem—wrap the entire cheesecake or individual slices tightly in plastic wrap, then foil, and freeze for up to 2 months. To thaw, transfer it to the fridge overnight. Just keep in mind that the texture might be slightly softer after freezing, but the flavor remains bright and delicious. If you’ve added a glaze, wait until the cheesecake is fully thawed before adding it—freshness counts here! Reheating isn’t necessary, but if you prefer a slightly softer, more pudding-like consistency, you can let a slice sit at room temperature for a few minutes before enjoying. My only tip? Always store in the fridge and serve chilled for that perfect, creamy, tangy bite.
Frequently Asked Questions
Final Thoughts
There’s something so uplifting about this lime cheesecake—a little burst of sunshine in every bite. I’ve shared it with friends during weekend dinners, brought it to potlucks, and even enjoyed it as a spontaneous dessert on a hot summer night. No matter the occasion, it always feels special and so satisfying. What makes this recipe truly special is how flexible it is; you can tweak the lime amount, add different toppings, or even switch up the crust. Over the years, I’ve learned that the best desserts aren’t about perfection—they’re about joy, connection, and making memories around the table. So go ahead, give this recipe a try, and don’t forget to share your own variations—I’d love to hear how yours turns out! Happy baking, and may every slice be as bright and cheerful as a summer day.
Lemon Lime Cheesecake
Ingredients
Method
- Crumble cookies and evenly divide among 4 parfait dishes.
- In a mixing bowl, beat on medium high speed the cream cheese, lime juice, sugar, vanilla extract, salt and lime zest until smooth. Stir in whipped topping until smooth.
- Pipe with a pastry bag and tip (or simply use a spoon) to add cheesecake mixture to the parfait dishes. Crumble Golden Oreos and add to each dish for garnish. Refrigerate if not serving right away.