How to Make Perfect Boiled Potatoes
There’s this warm, fuzzy feeling I get every time I bite into a perfectly fluffy Irish potato — it’s like a little piece of comfort food I didn’t even know I needed. Growing up, my grandma’s Irish potatoes were the highlight of our holiday spreads, but honestly, I make them all year round. They’re just that good. The smell alone makes my entire house feel cozy, and I swear, these little bites bring everyone to the table, no matter how busy life gets. I love how simple they are to whip up, yet they taste like you’ve spent hours in the kitchen. Plus, my kids ask for these all the time — I think it’s the inside-out toastiness and sweet vanilla swirl that gets them every time. If you haven’t tried making Irish potatoes yet, you’re in for a treat. They’re one of those recipes that look fancy but are actually super easy to make, and trust me — once you do, they’ll become a staple in your dessert lineup. Grab your mixing bowls; let’s get cozy in the kitchen!
What is Irish Potatoes?
Irish potatoes are basically tender, sweet, vanilla-infused mashed potatoes that are shaped into balls or ovals and coated in a buttery, toasted coconut mixture. No, they’re not real potatoes, but the name is a fun nod to their shape and the humble roots of this old-school treat. Think of them as a bite-sized, sweet take on traditional mashed potatoes, with a soft center and a slightly crispy exterior. Originating from Irish-American communities, these little confections have been around for decades, often served during holidays or family gatherings — kind of like a nostalgic hug in dessert form. It’s essentially a no-bake, roll-and-coat kind of recipe, which makes it perfect for lazy weekend baking or quick holiday prep. The best part? They’re kid-friendly, totally customizable, and taste way more indulgent than they look. When I first discovered Irish potatoes, I couldn’t believe how simple and addictive they are — they’ve been a family favorite ever since!
Why you’ll love this recipe?
What I love most about Irish potatoes is how they strike that perfect balance between indulgence and simplicity. The flavor is a creamy vanilla hit with just the right amount of sweetness, complemented by the toasted coconut crust — it’s like a little bite of vacation in every ball. Plus, these are incredibly easy to make. Really, you just mix, roll, toast, and savor. No fancy equipment needed. They’re also budget-friendly; most of us have these ingredients already hiding in the back of our pantry, waiting to be turned into something special. And versatile? Oh yes. You can customize them with a splash of rum extract for a grown-up version, roll them in crushed nuts or sprinkles for extra crunch, or even make them gluten-free by swapping out a couple of ingredients. I’ve made these so many times in my house, especially on busy nights when I want something sweet but don’t want to turn on the oven or fuss too much. Honestly, they’re a lifesaver. My kids ask for seconds every single time — I think it’s the perfect combo of soft, sweet, and coconut-y goodness.
How do you make Irish potatoes?
Quick Overview
This recipe is all about simple, no-fuss steps that yield a treat everyone will rave over. You start by blending mashed potatoes with sugar, vanilla, and butter to make a smooth, sweet base. Then, you shape that into small balls and roll them in toasted coconut and crushed nuts or sprinkles if you like. Toasting the coconut adds a warm, nutty aroma that’s impossible to resist, and once they’re coated, a quick chill in the fridge sets everything perfectly. No baking, no complicated techniques — just cozy, homemade confections that come together in about 30 minutes. It’s the kind of recipe I always keep in my back pocket, especially when I need a crowd-pleaser fast or a sweet treat on hand. The best part? The whole process is so forgiving; even if you’re new to baking, you’ll get perfect results every time.
Ingredients
For the Main Batter:
– 2 cups instant mashed potato flakes (trust me, this makes life easier!)
– 1/2 cup powdered sugar
– 1/2 cup unsalted butter, softened
– 1 teaspoon vanilla extract
– 3-4 tablespoons milk (or almond milk if you want dairy-free)
For the Filling:
– Extra mashed potatoes (if needed to adjust texture, I like a bit more buttery flavor here)
For the Glaze:
– 1 cup shredded sweetened coconut, toasted
– Optional: crushed nuts, sprinkles, or cocoa powder for rolling
Step-by-Step Instructions
Step 1: Preheat & Prep Pan
First, I like to have my workspace ready. Toast the shredded coconut in a dry skillet over medium heat until golden — this only takes a few minutes — and set aside. Then, line a baking sheet with parchment paper or a silicone mat, because these balls can get sticky and you’ll want to handle them easily.
Step 2: Mix Dry Ingredients
In a large bowl, combine the instant mashed potato flakes with powdered sugar. Whisk it together to evenly distribute — this makes the mixture lighter and helps everything incorporate smoothly.
Step 3: Mix Wet Ingredients
In a separate bowl, soften the butter and add the vanilla. Mix well until smooth. You can do this with a spoon or a mixer if you prefer. If your butter is too cold, just pop it in the microwave for a few seconds — trust me, this makes blending a lot easier.
Step 4: Combine
Pour the wet mixture into the dry ingredients and gently stir. Then, add milk one tablespoon at a time until the mixture comes together into a soft, pliable dough. It should be tacky but not sticky — I’ve learned that overmixing here can make the balls a little dense, so fold gently.
Step 5: Prepare Filling
Pinch off small amounts of the mixture and roll into balls about the size of a walnut. If the mixture feels too crumbly, a tiny splash of milk helps it hold together better. For a little twist, I sometimes add a small, hidden dot of jam inside for a surprise center.
Step 6: Layer & Swirl
Roll each ball in the toasted coconut and press gently to coat evenly. If you want a more colorful look, sprinkle in some crushed pastel candies or sprinkles with the coconut. I like to give each ball a gentle swirl between my palms to get an even, beautiful coating.
Step 7: Bake
Here’s a neat trick: these are best refrigerated for about 30 minutes before serving, but if you want to go straight to the coating, just chill them for at least 10 minutes. You can enjoy them right away, but chilling helps everything set nicely.
Step 8: Cool & Glaze
If you want a shiny finish, melt a little chocolate or add a drizzle of caramel, then let it set. I prefer to keep them simple and rely on the toasted coconut for that irresistible crunch, but mixing in a bit of dark chocolate shavings can make it extra fancy. Just make sure the coating isn’t too hot or it’ll melt the coconut and ruin that perfect finish.
Step 9: Slice & Serve
Honestly, these are best enjoyed slightly chilled, so I pop them in the fridge for an hour before serving. Serve on a cute plate or in little paper cups — they look adorable and taste even better knowing you made them yourself. My family loves to nibble on these at dinner parties or just as a sweet snack with coffee in the afternoon.
What to Serve It With
Irish potatoes are incredibly versatile, so here are some ideas to make them shine in different settings:
For Breakfast: Pair with a strong cup of coffee or hot chocolate — trust me, these little bites make even a slow Sunday morning feel special. I often set a plate out for my kids and watch them nibble while they do their homework or watch cartoons.
For Brunch: Serve alongside fresh fruit, cheesy quiches, or a yogurt parfait. A drizzle of honey or a dusting of cinnamon on top can elevate the presentation. They’re lovely for celebrating family gatherings or a lazy weekend with friends.
As Dessert: These are perfect after dinner with a cup of tea or even a splash of Irish whiskey for the grown-ups. I like to plate them with a dusting of cocoa powder or a few decorative sprinkles to dress them up for special occasions.
For Cozy Snacks: Keep a few tucked away in an airtight container, and bring them out when you want something sweet but don’t want to fuss. They’re a hit at movie nights — and a little homemade comfort whenever needed. My traditions often include making a batch for holiday parties or giving them as handmade gifts wrapped in tissue paper. Honestly, they disappear in minutes in my house, and I love sharing that cozy, nostalgic feeling with friends and family.
Top Tips for Perfecting Your Irish Potatoes
Over the years, I’ve picked up some tricks to ensure these turn out just right every time. Here are my top tips:
Zucchini Prep: Not relevant here, but if you want to get creative with flavor variations, try adding a splash of lemon zest or a pinch of cinnamon for extra warmth. Just be careful not to overwhelm the delicate vanilla coconut flavor.
Mixing Advice: The key is gentle folding — overmixing can make the mixture dense instead of fluffy. And always keep your hands lightly floured or damp to prevent sticking when rolling the balls.
Swirl Customization: If you want a more marbled look, try lightly dusting the balls with colored sprinkles or cocoa and swirling them in your palms before coating. It makes for a prettier presentation and fun for kids to eat.
Ingredient Swaps: Use coconut sugar instead of powdered sugar for a more natural sweetness, or add a teaspoon of rum extract for a boozy twist. I’ve also tested chopped macadamia nuts instead of shredded coconut — adds crunch and richness. Just tweak the quantities for the best texture and flavor.
Baking Tips: Remember, these are best after chilling, so don’t skip that step. Also, keep an eye on your toasted coconut; it burns quickly. Keep stirring and remove from heat as soon as you see it turn golden.
Glaze Variations: If you want a shiny, decadent finish, melt some white or dark chocolate to drizzle over the top or dip the balls fully before chilling. For a peanut butter twist, stir in a spoonful into the melted chocolate or add a layer of nut butter inside the ball before rolling it in coconut. Trust me, experimenting is part of the fun — I’ve made batches with everything from crushed pretzels to cinnamon sugar, and honestly, they’ve all been delicious.
Storing and Reheating Tips
You’ll want to keep these Irish potatoes fresh and tasty for as long as possible. Here’s how I do it:
Room Temperature: They’re best enjoyed within 24 hours if kept in an airtight container. Just make sure to store them in a cool, dry place away from direct sunlight — the coconut coating can get sticky if it’s too warm.
Refrigerator Storage: Pop them in a sealed container — I like to use a glass airtight jar. They’ll last about 3-4 days and still taste great, especially after a quick chill in the fridge which lets the flavors meld together.
Freezer Instructions: For longer storage, freeze these once coated. Wrap each in plastic wrap or place in a freezer-safe container for up to 3 months. When ready, thaw in the fridge overnight and enjoy. I’ve tested this multiple times and found that the coconut coating stays crisp if you don’t re-freeze once thawed.
Glaze Timing Advice: If you’re adding a chocolate drizzle or a shiny glaze, do it right after they come out of the fridge or once they’ve cooled completely. This helps the coating set beautifully. If you add glaze beforehand, it might get soft or melt into the coconut, so plan accordingly.
Frequently Asked Questions
Final Thoughts
Honestly, Irish potatoes are like a warm hug wrapped in coconut. They’re simple, nostalgic, and endlessly customizable. I tested this recipe countless times, tweaking ingredients and techniques until I finally found that perfect balance of fluffy, rich, and toasted goodness. What makes it really special is how accessible it is — no fancy equipment, no complicated steps. Just good old-fashioned comfort food that tastes like a party in your mouth. I love serving these at family gatherings, sharing them with friends, or just having a little sweet treat for myself when I need a quick pick-me-up. Once you’ve made these, I bet you’ll see why they’ve stood the test of time. I can’t wait to hear how yours turn out! Feel free to drop a comment or share your own twists — happy baking!
Irish Potatoes
Ingredients
Method
- Preheat oven to 350°F.
- Add potatoes, cabbage, garlic, and chicken bouillon cubes to a large pot of water on the stove. Boil until potatoes are cooked, about 20 to 25 minutes.
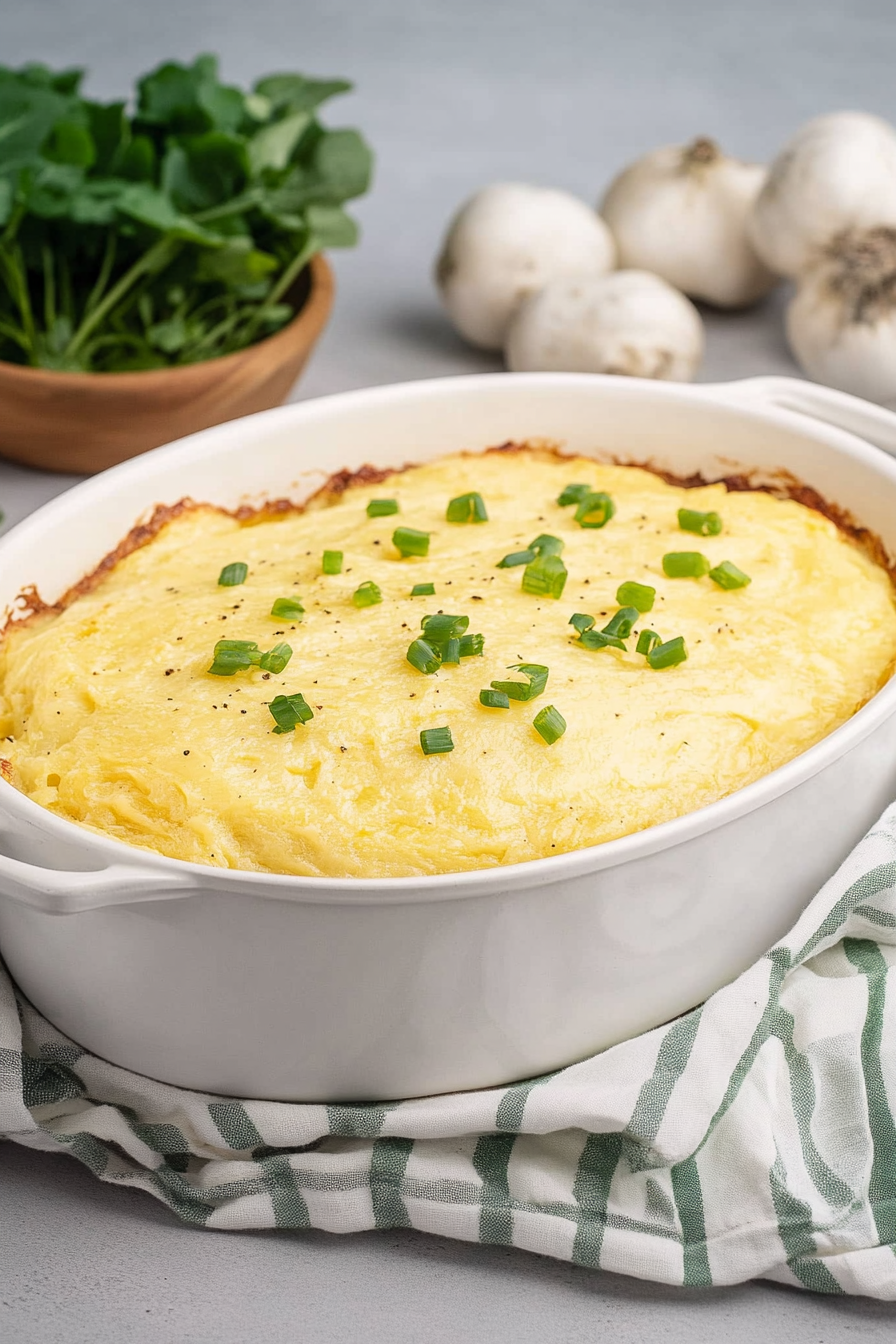
- Drain the pot. Add cream cheese, milk, butter, sour cream, salt, and pepper. Mash until smooth. Transfer to a greased 3-quart casserole dish. Cover.
- Bake for 45 minutes. Garnish with chopped green onions if desired.