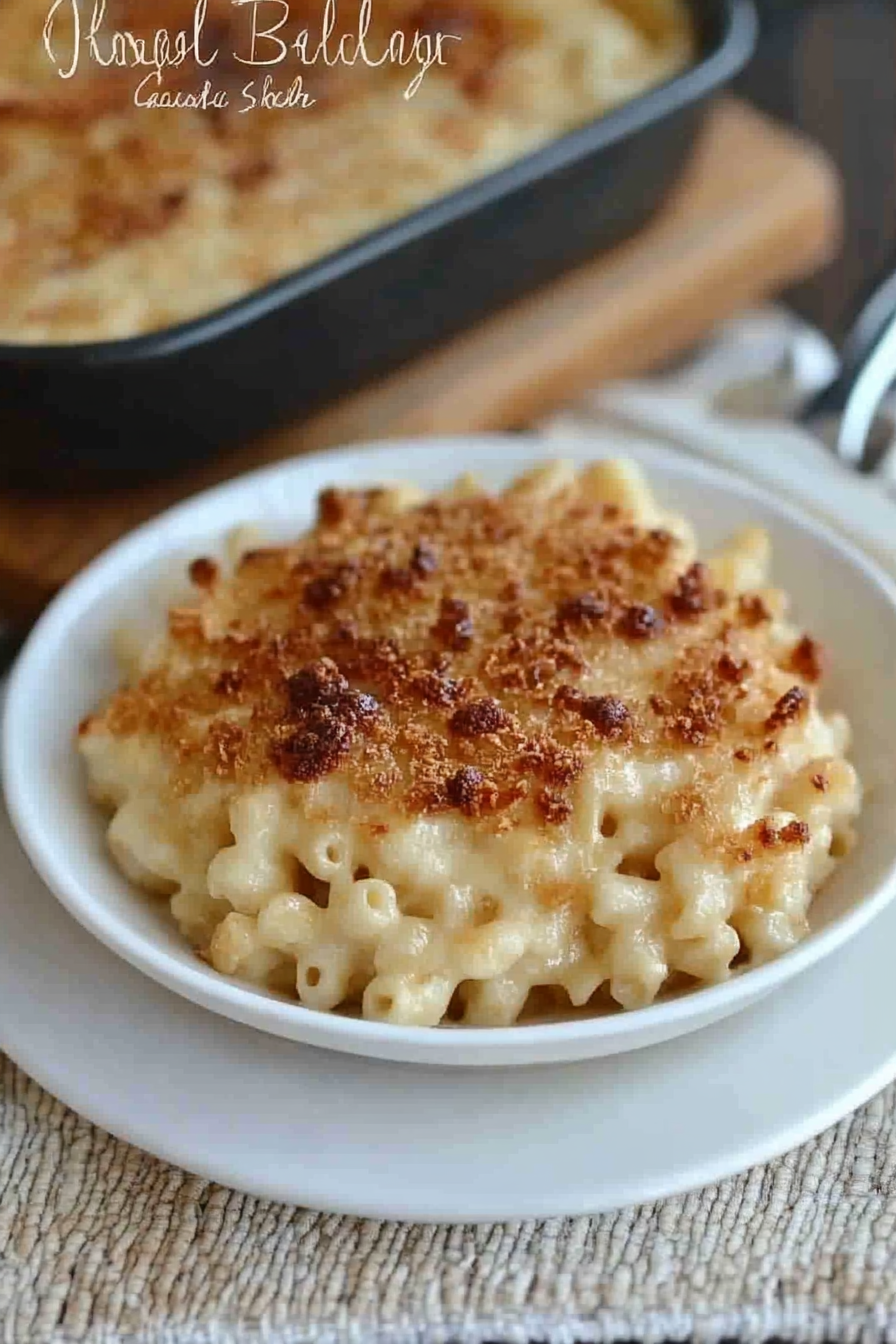
Savory Mac and Cheese with Gouda and Bacon
Oh, where do I even begin with mac and cheese? It’s more than just a dish in our house; it’s a feeling. It’s that cozy hug on a chilly evening, the triumphant cheer after a long week, or the reason my kids will actually clear their plates without a fuss. Honestly, when I think about comfort food, my mind immediately goes to a bubbling, golden-topped casserole of creamy, cheesy pasta. It’s like a culinary security blanket! I’ve tried a million versions over the years, from the super quick stovetop kind (which is great in a pinch, don’t get me wrong!) to more elaborate, gourmet affairs. But this baked mac and cheese? This is the one. It’s the recipe I come back to again and again, the one that always gets rave reviews, and the one that feels like pure, unadulterated happiness in a bowl. If you’ve ever dreamed of a mac and cheese that’s rich, velvety smooth, and has that perfect golden crust, you’re in the right place!
What is my ultimate creamy baked mac and cheese recipe?
So, what exactly makes this baked mac and cheese so special? Think of it as the ultimate upgrade to your childhood favorite, but without any fuss. It’s essentially macaroni pasta enveloped in a ridiculously creamy, homemade cheese sauce, then baked until it’s bubbly and golden brown on top. We’re talking about a serious cheese pull here! The “ultimate” part comes from a few simple techniques and ingredient choices that elevate it beyond your average boxed stuff. It’s not fancy, it’s not complicated, but it’s undeniably delicious. It’s the kind of dish that brings people together, that sparks conversation, and that leaves everyone feeling utterly satisfied. It’s comfort food at its finest, pure and simple.
Why you’ll love this recipe?
Honestly, there are so many reasons why this mac and cheese recipe has become my absolute go-to. First off, the *flavor*. It’s incredibly rich and cheesy, but not in an overwhelming way. The cheese sauce is perfectly balanced, creamy without being heavy, and just bursting with savory goodness. Every single bite is a little piece of heaven. Then there’s the *simplicity*. Despite being baked and having that beautiful golden crust, this recipe is surprisingly straightforward. I can whip up the sauce while the pasta is cooking, and then it’s just a matter of combining everything and popping it in the oven. It’s a lifesaver on busy weeknights when you want something truly satisfying without spending hours in the kitchen. Plus, it’s incredibly *cost-efficient*. You probably already have most of the ingredients in your pantry and fridge, and the ones you need to buy are generally budget-friendly. It proves that you don’t need expensive ingredients to create something truly spectacular. What I love most about this recipe, though, is its *versatility*. While it’s absolutely perfect on its own, it’s also a fantastic base for additions. Sometimes I’ll toss in some cooked broccoli or peas, or even some shredded chicken. It’s also a great way to use up leftover cheese in the fridge! It’s just a winner all around. I’ve seen people try to replicate this magic with other pasta dishes, but nothing quite hits the spot like a perfectly executed baked mac and cheese. It’s a classic for a reason, and this version is truly the best I’ve ever made.
How do I make my ultimate creamy baked mac and cheese?
Quick Overview
Making this dreamy mac and cheese is a breeze! You’ll simply cook your pasta, make a quick roux-based cheese sauce right in the same pot (less mess!), stir in your pasta and favorite cheeses, and bake until bubbly and golden. It’s straightforward, satisfying, and the results are absolutely spectacular. You really can’t mess this up!
Ingredients
For the Main Batter:
1 pound elbow macaroni (or your favorite short pasta shape)
1/2 cup (1 stick) unsalted butter
1/2 cup all-purpose flour
4 cups whole milk, warmed (this makes a creamier sauce!)
1 teaspoon salt, plus more for pasta water
1/2 teaspoon black pepper
1/4 teaspoon nutmeg (don’t skip this, it adds a subtle warmth!)
4 cups shredded sharp cheddar cheese (about 16 oz)
2 cups shredded Gruyere cheese (about 8 oz – for that nutty, melty goodness!)
Optional: A pinch of cayenne pepper for a little kick
For the Filling:
This recipe doesn’t really have a separate “filling” in the traditional sense, as the cheese sauce coats the pasta beautifully. However, if you’re feeling adventurous, you could add things like cooked bacon bits, caramelized onions, or sautéed mushrooms into the pasta mixture before baking.
For the Glaze:
We don’t use a traditional “glaze” here, but the top gets wonderfully crispy from the cheese and butter. For an extra crispy topping, you could always add a layer of panko breadcrumbs mixed with a tablespoon of melted butter on top before baking. This adds a fantastic textural contrast!
Step-by-Step Instructions
Step 1: Preheat & Prep Pan
First things first, get your oven preheated to 375°F (190°C). While it’s heating up, grab a sturdy 9×13 inch baking dish. I like to give mine a light grease with butter or cooking spray, just to ensure nothing sticks. It’s a small step, but it saves you from a potential scrubbing session later!
Step 2: Mix Dry Ingredients
You don’t really mix dry ingredients separately here, but we’ll make sure our flour is ready for the sauce. Have your 1/2 cup of all-purpose flour measured out and set aside. This will be the base for our roux.
Step 3: Mix Wet Ingredients
This is where the magic happens for our sauce! In the same pot you’ll cook your pasta (yes, we’re doing this all in one pot to minimize dishes!), melt the 1/2 cup of butter over medium heat. Once melted, whisk in the 1/2 cup of flour. Cook this mixture, whisking constantly, for about 1-2 minutes. This is your roux – it thickens the sauce and toasts the flour slightly, removing that raw flour taste. It should smell a little nutty. Then, *slowly* whisk in the warmed 4 cups of whole milk. Warming the milk first helps prevent lumps and makes for a silkier sauce. Keep whisking until the sauce starts to thicken, which should take about 5-8 minutes. It should be thick enough to coat the back of a spoon. Stir in the salt, pepper, nutmeg, and cayenne if you’re using it.
Step 4: Combine
Now for the cheesy goodness! Remove the pot from the heat. Gradually stir in your shredded cheddar and Gruyere cheeses, a handful at a time, stirring until each addition is melted and smooth before adding more. This gradual addition ensures a super creamy sauce without any graininess. Once all the cheese is melted and incorporated, stir in your cooked elbow macaroni. Make sure every single piece of pasta is coated in that glorious cheese sauce. If it seems a little too thick, you can add a splash more warm milk. If you’re adding any extra mix-ins like bacon bits, now’s the time to fold them in!
Step 5: Prepare Filling
As I mentioned, this recipe is more about the pasta and sauce combination. But if you wanted to add something, you’d prepare your additions here. For example, if you wanted to add sautéed mushrooms, you’d sauté them until tender and then stir them into the pasta and cheese mixture in the previous step.
Step 6: Layer & Swirl
Pour the cheesy pasta mixture into your prepared baking dish. If you opted for the panko topping, now is the time to sprinkle it evenly over the top. I don’t usually swirl anything here, as the cheese sauce is already so well-distributed. The goal is an even layer of cheesy pasta ready for baking!
Step 7: Bake
Pop that dish into your preheated oven. Bake for 20-25 minutes, or until the top is golden brown and the edges are bubbly and slightly crisp. You want to see that glorious cheese starting to caramelize just a bit. The smell that will waft through your kitchen at this point is just heavenly – pure mac and cheese bliss!
Step 8: Cool & Glaze
This is probably the hardest part: letting it rest! Once it comes out of the oven, let it sit for about 5-10 minutes before cutting into it. This allows the sauce to set up a little bit, making it easier to serve and preventing it from being too runny. If you added a panko topping, this resting period also helps it stay nice and crisp. There’s no traditional glaze, but this resting time is crucial!
Step 9: Slice & Serve
Cut your perfect mac and cheese into generous squares and serve it up warm. The cheese will be gooey, the pasta tender, and the top wonderfully crisp. It’s best served right away while it’s hot and bubbling!
What to Serve It With
This creamy baked mac and cheese is a star all on its own, but it also plays wonderfully with a variety of other dishes, making it perfect for any meal. For a delightful *Breakfast* option, imagine a small scoop alongside some crispy bacon and a perfectly poached egg. The richness of the mac and cheese is surprisingly satisfying to start the day, especially with a hot cup of coffee. For *Brunch*, it really shines. Serve larger portions as a side dish to roasted ham or a vibrant green salad. A crisp white wine or a sparkling mimosa would be lovely pairings. When I’m serving it as a main for dinner, I often pair it with something light and fresh to balance out the richness. A simple green salad with a tangy vinaigrette is perfect, or some roasted asparagus or green beans. It’s also fantastic with grilled chicken or steak. For *Cozy Snacks* or a casual get-together, it’s the ultimate crowd-pleaser. Just scoop it into small bowls or even ramekins. It’s hearty enough to be a meal in itself, but also a welcome addition to a potluck spread. My family also loves it alongside some homemade meatballs or a hearty chili. It’s truly a versatile dish that brings comfort and joy to any table, no matter the occasion!
Top Tips for Perfecting Your Mac and Cheese
I’ve made this mac and cheese more times than I can count, and through trial and error (and a few slightly lumpy sauce incidents!), I’ve picked up a few tricks that make all the difference. For the pasta, I always use elbow macaroni because it holds the sauce so well, but feel free to experiment with other short shapes like shells, rotini, or penne. Just make sure to cook it a minute or two less than the package directions, as it will continue to cook in the oven. When making the cheese sauce, remember to warm your milk first. It really does help create a smoother sauce and prevents those annoying lumps from forming. And when it comes to cheese, please, *please* shred your own! Pre-shredded cheeses are coated in anti-caking agents that can make your sauce grainy. Taking those extra two minutes to shred your cheddar and Gruyere will pay off big time in terms of texture and flavor. I always go for a sharp cheddar for a good punch of flavor and Gruyere for its incredible meltability and slightly nutty profile; it really elevates the whole dish. If you’re not a fan of Gruyere, a good quality Monterey Jack or a sharp provolone would also be delicious. For an even richer sauce, you could even add a splash of heavy cream along with the milk, but I find whole milk is plenty decadent on its own. Don’t be afraid to season generously! Salt and pepper are key, and that tiny pinch of nutmeg is a game-changer; it really brings out the cheesy flavor without making it taste like spice. If you like a little heat, a pinch of cayenne pepper is fantastic, but completely optional. When it comes to baking, watch it closely. Ovens can vary, and you want that beautiful golden-brown crust without burning. If the top is browning too quickly before the casserole is heated through, you can always loosely tent it with foil. And that resting period after baking? It’s crucial! It allows the sauce to thicken up and makes for cleaner, more satisfying servings. Trust me on this one – resist the urge to dig in immediately!
Storing and Reheating Tips
Leftovers? Yes, please! This baked mac and cheese is just as delicious, if not sometimes even better, the next day. If you have any that survives, let it cool completely first. Then, store it in an airtight container in the refrigerator for up to 3-4 days. It holds up really well. When you’re ready to reheat, you have a couple of great options. For individual portions, a microwave works well, just heat in 30-second intervals, stirring in between, until warmed through. Be careful not to overheat, as it can become a bit oily. For a larger portion or to get that lovely crisp top back, I prefer to reheat it in the oven. Transfer the leftover mac and cheese to an oven-safe dish, add a tiny splash of milk or cream (about 1-2 tablespoons), cover loosely with foil, and bake at around 350°F (175°C) for 15-20 minutes, or until heated through. Remove the foil for the last 5-10 minutes to crisp up the top again. If you’re adding a panko topping, you’ll definitely want to use the oven method to get it nice and crunchy. Freezing this mac and cheese is also an option, though the texture of the pasta can change slightly upon thawing. To freeze, portion it into freezer-safe containers or wrap individual servings tightly in plastic wrap and then foil. It should keep well for up to 2-3 months. Thaw overnight in the refrigerator and then reheat using the oven method described above. I don’t recommend freezing with a panko topping, as it will likely become soggy upon reheating. For any of these storage methods, I always wait until the mac and cheese is completely cooled before sealing it up.
Frequently Asked Questions
Final Thoughts
So there you have it – my absolute favorite, go-to recipe for creamy baked mac and cheese. It’s the kind of dish that just makes everything feel a little bit better. The combination of perfectly cooked pasta, that luscious, velvety cheese sauce, and the golden, bubbly crust is pure magic. It’s a testament to how simple, quality ingredients and a few thoughtful steps can create something truly spectacular. I genuinely believe this recipe is worth trying, especially if you’re looking for a comforting, satisfying meal that the whole family will adore. It’s proof that you don’t need to be a gourmet chef to make incredible food. If you enjoyed this, you might also love my recipe for [link to another pasta dish or comfort food recipe] or perhaps my [link to another cheesy dish recipe]. I can’t wait for you to try this mac and cheese and hear what you think! Please leave a comment below and let me know how yours turned out, or if you tried any fun variations. Happy baking!
Creamy Baked Mac and Cheese
Ingredients
Method
- Prepare macaroni according to package directions. Set aside.
- In large pot, melt butter over medium high heat. Add milk and bring to near boiling. Reduce heat to medium and sprinkle in flour. Whisk vigorously over medium heat for 1-2 minutes. Mixture should be thick and boiling. Slowly add cream, while whisking. Add salt, pepper, mustard and worcestershire. Reduce heat to low and stir for about 5 minutes.
- Shred gouda and cheddar cheeses. Add to the sauce and stir until thoroughly combined.
- Add cooked macaroni to cheese mixture. Pour into a greased 13x9 inch baking dish.
- Process bread slices into fine crumbs using a food processor. Mix crumbs with melted butter. Sprinkle over macaroni. Top with crumbled bacon.
- Bake uncovered in a 375°F oven for 25-30 minutes until golden and bubbly.