Tropical Poke Cake How to Make It Easy
There’s just something about a good poke cake that makes me feel like a kid again, sneaking bites before anyone else at the kitchen table. It’s that perfect combo of ease, nostalgia, and downright addictive flavor. I’ve lost track of how many times I’ve thrown one together last-minute for family gatherings or just a lazy weekend dessert. My kids ask for this all the time, especially when I sneak a handful of fresh berries or whip up a quick fruity glaze. Honestly, this one’s a lifesaver on busy nights—no fuss, no long prep, and it always disappears in minutes. I remember the first time I tried this—I was skeptical about the “poke” part, but the way it soaks up that sweetened condensed milk and toppings is pure magic. If you love cakes that are moist, flavorful, and just a little fun, then you’re in for a treat. Trust me, once you make this poke cake, it’ll become one of those recipes you keep in your back pocket forever.
What is poke cake?
Think of poke cake as a real-life cake-swimming pool, where after baking, you poke holes all over it—hence the name—and then pour in sweet liquids, syrups, or creams that seep into every sponge. It’s essentially a shortcut to a moist, flavorful dessert that’s more than the sum of its parts. The idea started as a way to jazz up simple box cakes in the 1980s, but over time, it’s become a beloved classic across many households. The fun part? You can fill those holes with almost anything—fruit compote, pudding, sweetened condensed milk, or even a splash of liqueur if you’re feeling fancy. Think of it as a versatile base that’s ripe for experimentation. The beauty is how effortlessly you can take a basic vanilla or yellow cake, poke it full of holes, and then watch it soak up goodness like a sponge. It’s cozy, nostalgic, and always delivers that perfect, melt-in-your-mouth bite.
Why you’ll love this recipe?
What I love most about this poke cake is how it feels like a little celebration in every forkful. The first time I made it, I was honestly just craving something sweet but didn’t want to put in the effort of a complicated dessert. This recipe is a game-changer—seriously, it’s so simple yet so impressive. The cake itself is soft and tender, with a rich, melt-in-your-mouth texture that gets even better after soaking up the sweet filling. Plus, it’s incredibly budget-friendly, using ingredients I always have in the pantry—think cake mix, condensed milk, and fresh fruit or toppings. I like to switch things up depending on the season: berries, citrus, even crushed cookies or candy bits. What’s great is that it’s versatile enough to serve for brunch, a casual family dinner, or a festive occasion. And the best part? It’s always a hit, whether I make a big dish for a crowd or just a small one for my family. Honestly, this has become my go-to when I want something quick, comforting, and a little nostalgic.
How do you make a poke cake?
Quick Overview
This poke cake comes together in just a few simple steps. First, you bake a classic vanilla or yellow cake—nothing fancy, just a store-bought mix works perfectly. Once it’s out of the oven and cooled a bit, you poke holes all over it using a skewer or a long straw. Then, you pour a sweet, creamy mixture—usually sweetened condensed milk blended with fruit juice or flavored syrup—over the top, letting it seep into every nook and cranny. After it’s soaked up that flavorful goodness, you add a layer of whipped cream, fruit, or frosting on top. The final touch? A drizzle of glaze or a sprinkle of crushed cookies for that extra wow factor. Honestly, it’s a simple, no-fuss dessert that looks beautiful and tastes even better. The magic lies in watching that filling soak into every bite. It’s perfect for when you want a satisfying treat without the complicated baking fuss.
Ingredients
For the Main Batter:
- 1 box yellow or vanilla cake mix (or homemade cake batter if you prefer)
- Eggs, oil, and water as called for on the box or your recipe
For the Filling:
- 1 can sweetened condensed milk (trust me, it makes it so rich!)
- 1/2 cup fruit juice or flavored syrup (like pineapple juice or lemon concentrate)
- Optional: a splash of vanilla or almond extract for extra flavor
For the Glaze:
- 1 cup powdered sugar
- 2-3 tablespoons milk or citrus juice
- Optional: a few drops of vanilla or a dash of cocoa for variation
Step-by-Step Instructions
Step 1: Preheat & Prep Pan
Set your oven to 350°F (175°C). Grease a 9×13-inch baking dish or line it with parchment paper for easy removal. This step helps the cake come out smooth and perfect—trust me, I’ve had my share of sticking cakes! Once preheated, you’re ready to mix.
Step 2: Mix Dry Ingredients
If you’re using a box mix, prepare it according to the package instructions. I usually do this in a large bowl, making sure to whisk together the dry ingredients until everything’s evenly distributed. Proper mixing helps everything bake evenly and avoids lumps. If you’re feeling adventurous, you can add a pinch of cinnamon or zest for extra flavor.
Step 3: Mix Wet Ingredients
In a separate bowl, whisk together eggs, oil, and water—or your homemade batter. I always do this until it’s smooth but don’t overmix, or the cake can turn a little dense. The smell of vanilla or citrus as it mixes always makes me smile.
Step 4: Combine
Pour the wet mixture into the dry ingredients and fold until just combined. No need to beat it vigorously; a few gentle folds do the trick. Pour the batter into your prepared pan, and smooth the top with a spatula. I like to tap the pan a few times on the counter to settle everything evenly.
Step 5: Prepare Filling
Mix the sweetened condensed milk with your chosen fruit juice or syrup in a bowl. Quick, simple, and sooo good. You can add a splash of vanilla or even a little almond extract here if you love extra flavor. This filling is rich and so creamy—once you pour it over the baked cake, it’ll seep into every crevice.
Step 6: Layer & Swirl
Bake the cake for about 25-30 minutes, until a toothpick inserted in the center comes out clean. While it’s still warm, poke holes all over the cake using a skewer or a thin straw. Then, slowly pour your sweetened milk mixture over the entire surface—don’t rush! Use a spoon to help it spread into the holes if needed. For extra fun, add dollops of whipped cream or fruit on top and swirl gently for a marbled look.
Step 7: Bake
Pop it back in the oven for an additional 10 minutes if you added extra toppings or whipped cream. Let it cool completely—this is key to setting everything in place. I usually make this a couple of hours ahead of time so it’s chilled and flavors meld. The house smells amazing during cooling—kind of like a vanilla dream.
Step 8: Cool & Glaze
Once cooled, mix your glaze ingredients until smooth. Drizzle it over the top, letting it cascade down the sides—this adds a shiny, beautiful finish and a little extra sweetness. If you want a more textured look, sprinkle crushed cookies or nuts on top before the glaze sets.
Step 9: Slice & Serve
Use a sharp knife to cut clean slices, making sure to wipe it clean between cuts for neatness. Serve chilled for an extra refreshing bite, or at room temperature if you prefer softer textures. This looks lovely on a cake stand with fresh berries or a sprig of mint for a special touch. My family loves it with a dollop of whipped cream or a scoop of vanilla ice cream—whatever makes you happy!
What to Serve It With
This poke cake is so versatile that it can pretty much go with anything. For breakfast, I love serving slices with a strong cup of coffee and a dusting of powdered sugar—trust me, it’s like a sweet awakening. For brunch, a fruit platter alongside it makes a stunning, crowd-pleasing combo. As a dessert after dinner, add a generous dollop of whipped cream or fresh berries on top. And on cozy nights, it’s excellent with a glass of cold milk or even a shot of liqueur if you’re feeling indulgent. I’ve tested this with everything from strawberries to pineapple, and honestly, each variation turns out fantastic. You can also get creative by layering in crushed cookies or candies for a fun crunch. My kids ask for this at family parties, and adults always ask for the recipe. It’s one of those comfort food desserts that brings everyone together around the table.
Top Tips for Perfecting Your Poke Cake
Over the years, I’ve learned a few tricks to make my poke cake even better. First, when I prepare the cake batter, I always double-check that I don’t overmix—it keeps the cake tender and light. I learned this the hard way after making a dense, chewy cake that just wasn’t right. For the holes, using a long skewer or chopstick works best—you want enough to hold the filling but not so deep that it tears the cake apart. When pouring the sweetened milk mixture, go slow and steady—patience pays off here because it helps the filling soak evenly. I’ve experimented with fruit juices—pineapple, lemon, and even coconut—and they all lend a unique twist. Just watch the amount; too much liquid can make the cake soggy, but a little extra moisture really boosts flavor. As for the glaze, I like to keep it thick enough to drip but not so runny that it runs off the edges. My personal favorite is a simple vanilla glaze, but a hint of cocoa powder or citrus zest can really elevate the flavor. And don’t forget to refrigerate the cake for a few hours—this gives the flavors time to meld beautifully. I tested adding Greek yogurt instead of some cream in the topping, and it turned out surprisingly creamy and tangy—give it a try next time! The key is to have fun with it and tweak it to your taste—after all, baking is about creativity and love.
Storing and Reheating Tips
This cake keeps surprisingly well. If you have leftovers (which is rare in my house!), store slices in an airtight container in the refrigerator for up to 3 days. It’s best to cover it loosely to prevent the glaze from drying out. I’ve found that leaving it out at room temperature for a couple of hours before serving helps if you like it softer—just keep it loosely covered so it doesn’t dry out. For longer storage, pop the whole cake in the freezer wrapped tightly in plastic wrap and then in foil. It’s good for up to 2 months, but I find that it’s best enjoyed within the first month. To reheat, I simply defrost it in the fridge overnight and let it come to room temp before slicing. If you want that luscious, fresh-made feel, adding an extra drizzle of glaze or a dollop of whipped cream before serving makes a real difference. I’ve also experimented with freezing individual slices with some wrapping, which makes for a quick, satisfying snack on a busy day. Just note that the texture changes slightly after freezing, but the flavor remains fabulous.
Frequently Asked Questions
Final Thoughts
If you haven’t yet tried a poke cake, I really encourage you to give this one a go. It’s one of those recipes that’s deceptively simple but always earns rave reviews. The way the filling seeps into every inch of the cake makes each bite so heavenly—and it’s one of those desserts that feels like a warm hug from your past. Over the years, I’ve shared this with friends, taken it to potlucks, and even adapted it into a mini version for brunch. Honestly, it’s become a beloved staple in my kitchen. The best part? It’s so forgiving—play around with different fruit, fillings, or toppings, and you’ll still end up with a winner. Plus, it’s fantastic for those days when you want something sweet but don’t have hours to spend baking from scratch. So, gather your ingredients, get a little messy, and prepare to wow everyone with this moist, flavorful treat. Happy baking! And I’d love to hear how yours turns out—leave a comment or share your own twist!
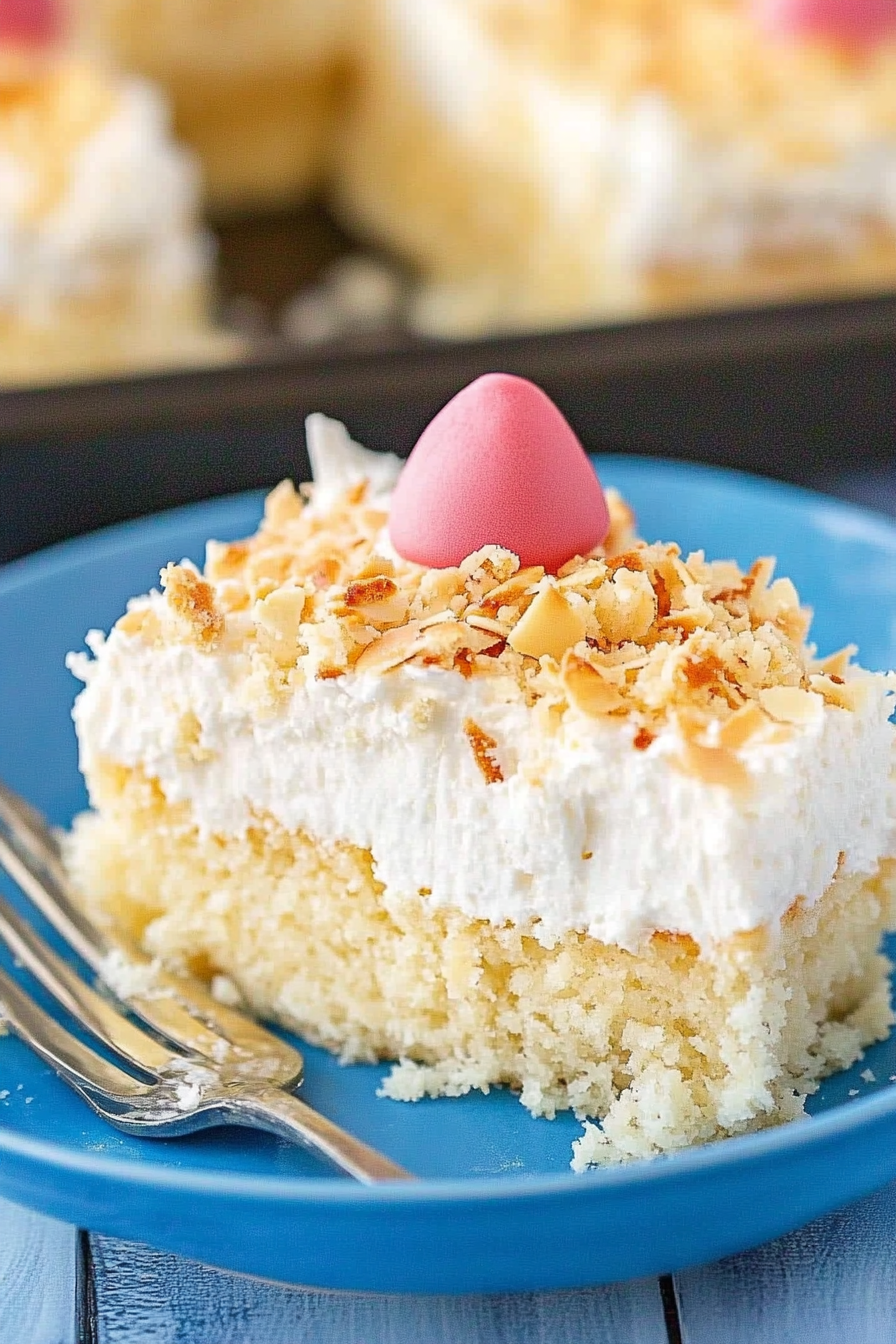
Tropical Fruit Poke Cake
Ingredients
Method
- Preheat oven to 350°F. Prepare a 9×13 inch cake pan with non-stick spray and line with parchment paper.
- Mix flour, sugar, baking powder, and salt together in a large bowl.
- In a separate bowl, whisk milk, vegetable oil, coconut extract, and eggs until well combined.
- Add wet ingredients to dry and mix until smooth. Stir in water until fully incorporated.
- Pour batter into the prepared pan and bake for 28-30 minutes. Let cool slightly.
- Poke holes all over the warm cake with a fork and pour sweetened condensed milk and cream of coconut over it. Allow to soak and cool completely.
- Whip heavy cream with powdered sugar and coconut extract until stiff peaks form. Spread over cooled cake and sprinkle with toasted coconut.