Easy Glazed Chicken with Mango Salad
There’s something about the warm, savory aroma of glazed teriyaki chicken that instantly takes me back to cozy family dinners and weekend takeout nights. I remember the first time I tried making it at home — I was pretty sure it would be complicated or require fancy ingredients, but wow, was I wrong! This recipe is honestly a lifesaver on busy nights when I want something that’s both flavorful and quick to whip up. My kids ask for this all the time, and honestly, I don’t blame them. It’s got that perfect combo of sweet, salty, and a little tang that just keeps you coming back for more. The best part? It’s so simple, and it fills your kitchen with that undeniable smell of caramelized soy and honey. Trust me, once you master this, it’ll become your go-to dinner whenever you want a little taste of Japan right in your own home. — and bonus? It’s way cheaper than ordering takeout! You’re going to love this one.
What is Teriyaki chicken?
Think of teriyaki chicken as the friendly, all-American spin on a Japanese classic. It’s essentially tender pieces of chicken coated in a glossy, flavorful sauce made from soy sauce, sugar, mirin (a sweet rice wine), and sometimes a splash of sake or honey. “Teriyaki” actually means “grilled or broiled under a glaze” in Japanese, which makes sense because the resulting dish is all about that shiny, sticky coating that’s super addictive. It’s a quick-cook dish — perfect for weeknights when you want something comforting but don’t want to spend hours in the kitchen. The beauty of it is how versatile and forgiving it is; you can serve it over rice, noodles, or even toss it into a stir-fry. Think of it as a lovely, savory-sweet dance of flavors that’s familiar but always exciting. And yes, it’s totally beginner-friendly, too!
Why you’ll love this recipe?
What I love most about this teriyaki chicken is how effortlessly it brings all those cozy, restaurant-quality flavors into my own kitchen. It’s honestly the kind of dish that makes you feel like a pro, even if it’s the first time you’re making it. The sauce? Oh wow — it’s thick, sticky, and punchy without being overpowering. Plus, the ingredients are super budget-friendly and easy to find, which is a huge win for me. I always do this when I have leftover chicken — toss it in the sauce and serve over steamed rice, and it’s like a whole new meal. I’ve even made this with boneless thighs, and it turns out even juicier! My kids ask for seconds, and my husband always comments on how “restaurant-like” it tastes. I especially love how flexible it is — want it spicier? Add a pinch of chili flakes. Feeling lazy? Use frozen chicken strips — it still works like a charm. Trust me on this one, this recipe hits all the right notes: flavorful, simple, and satisfying every single time.
How do I make Teriyaki Chicken?
Quick Overview
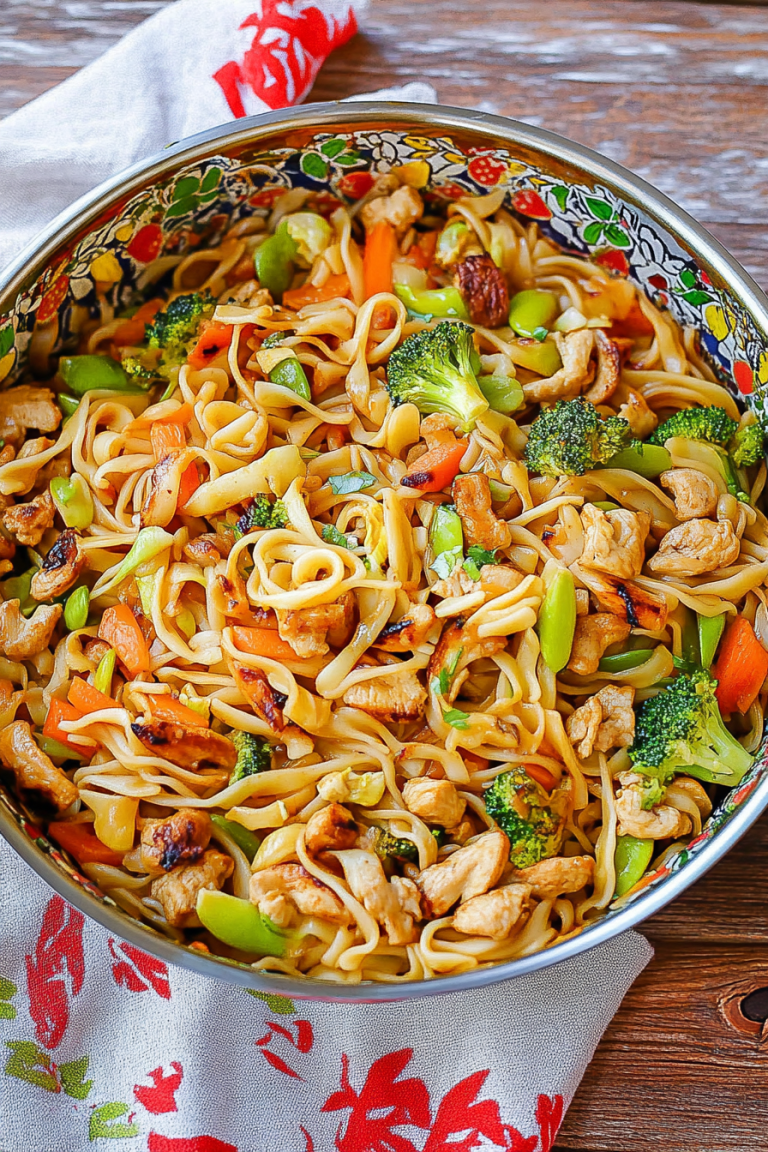
This recipe is pretty much foolproof. You start by making a simple, savory sauce — think soy, honey, garlic, and ginger — which bubbles away until it thickens into that irresistible glaze. Meanwhile, you cook your chicken until tender and lightly browned. Then, you toss them together, spoon the sauce over everything, and allow it to caramelize a bit in the pan. The final step is glazing or tossing the chicken in the sauce for maximum stickiness. It’s a straightforward process that’s done in about 30 minutes, and it’s honestly the kind of dish I whip up on busy weeknights — no fancy skills required!
Ingredients
For the main chicken: For the main chicken: For the main chicken: For the main chicken: For the main chicken: For the main chicken: For
– 1 ½ pounds boneless, skinless chicken thighs or breasts (I prefer thighs for extra juiciness), cut into bite-sized pieces
– Salt and pepper for seasoning
– 1 tablespoon vegetable oil or sesame oil for cooking
For the Teriyaki Sauce:
– ½ cup soy sauce or tamari for gluten-free version
– ¼ cup honey or brown sugar (trust me, honey gives it that beautiful gloss)
– 2 tablespoons rice vinegar or apple cider vinegar
– 2 teaspoons grated fresh ginger
– 2 cloves garlic, minced
– 1 tablespoon cornstarch mixed with 2 tablespoons water (for thickening)
– Optional: a teaspoon of sesame oil or chili flakes for extra flavor
For Serving:
– Steamed rice or noodles
– Sliced green onions for garnish
– Sesame seeds for an authentic touch
– Steamed broccoli or stir-fried veggies (because everything’s better with a little green)
Step-by-Step Instructions
Step 1: Preheat & Prep Pan
Heat a large skillet or wok over medium-high heat. While it warms up, season your chicken with a pinch of salt and pepper. Having everything prepped makes the process so much smoother — trust me, I’ve learned that the hard way! When your pan is hot, add the oil and let it heat until shimmering. Don’t overcrowd the pan; cook in batches if needed to get a nice sear.
Step 2: Mix Dry Ingredients
There’s not much dry mixing here, but I do like to get my sauces ready early. Combine soy sauce, honey, vinegar, ginger, and garlic in a small bowl — give it a quick whisk to blend everything well. This keeps your cooking flow smooth and prevents scrambling around the kitchen once the chicken is ready.
Step 3: Mix Wet Ingredients
Not much wet mixing either — just keep your sauce handy because you’ll pour it over the chicken once browned. That cornstarch slurry is what makes the sauce cling to the meat and turn gorgeous and glossy. I usually mix it in a small cup, stir well, and set aside.
Step 4: Combine
Add the chicken pieces into your hot pan and cook until they’re browned on all sides and cooked through — about 5-7 minutes. If you’re working with thighs, they might take a touch longer, but keep an eye on them so they don’t dry out. Once cooked, pour your prepared sauce over the chicken, stirring to coat everything evenly. Cook for another 2-3 minutes till the sauce thickens into that beautiful caramel glaze.
Step 5: Prepare Filling
In this case, the filling is cooked chicken, but if you want to jazz it up further, you can scoop some onto steamed rice or noodles, or even toss in some stir-fried veggies now for a full skillet meal. I love adding some sliced bell peppers or snap peas for color and texture.
Step 6: Layer & Swirl
If you’re feeling fancy, after pouring the sauce over the chicken, you can swirl in some extra honey or add a sprinkle of sesame seeds on top for that restaurant feel. Keep the heat medium-low so the sauce caramelizes without burning. I always swirl my pan gently to make a pretty pattern of sauce over the chicken pieces.
Step 7: Bake
If you want a slightly crispier finish, you can transfer everything to a preheated oven at 400°F (200°C) for 10 minutes after stovetop cooking. Alternatively, just keep an eye on the sauce as it thickens—if it’s bubbling nicely and looking shiny and sticky, you’re good!
Step 8: Cool & Glaze
Let the chicken rest for a few minutes off the heat, so it’s not super hot to bite into. Drizzle with a little fresh sesame oil or sprinkle sesame seeds immediately before serving for that crunchy, nutty contrast. And if your sauce got a little too thick, just splash in a teaspoon of hot water to loosen it up again.
Step 9: Slice & Serve
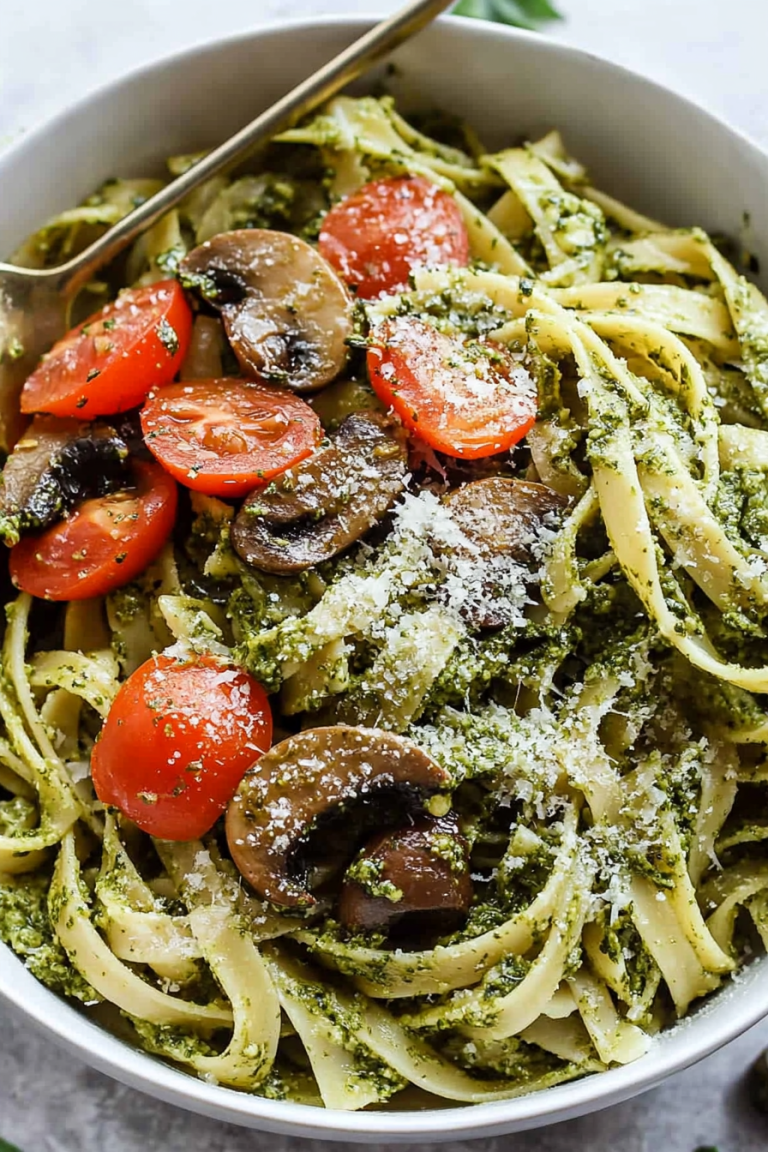
Serve this with a big heaping scoop of steamed rice, topped with chopped green onions and maybe a side of stir-fried greens or tempura vegetables. I swear, the aroma alone draws everyone to the table, and I always get asked for seconds. The sauce should be beautifully sticky and glossy — a little like a jewel on your plate.
What to Serve It With
Ok, so my favorite thing about this teriyaki chicken is how many ways you can serve it. It’s perfect for weeknights when you just want comfort food with zero fuss.
For Breakfast: I’ve tried reheating leftovers and scrambling a few eggs with bits of chicken and sauce — it’s like a savory breakfast bowl that’s surprisingly satisfying and filling.
For Brunch: Serve it over some soft, toasted brioche or baguette slices, topped with a fried egg and a sprinkle of sesame seeds. It’s a fancy twist that everyone loves!
As Dessert: Well, okay — maybe not dessert, but the sweet and savory sauce makes a great glaze for grilled pineapple or even drizzled over vanilla ice cream for an adventurous treat. Just saying!
For Cozy Snacks: Leftover chicken can be chopped and piled into lettuce wraps with a dollop of sriracha mayo or stuffed into pita pockets with crunchy vegetables for a quick, satisfying snack. I love turning this into a flexible lunch or light dinner. Plus, the smell alone makes the whole house smell amazing.
Top Tips for Perfecting Your Teriyaki Chicken
After making this recipe countless times, I’ve picked up a few tricks that make all the difference.
Zucchini Prep: Okay, I know zucchini isn’t in this dish but if you want to add some greens, slice them thinly and salt them lightly for 10 minutes before stir-frying. It pulls out excess moisture and keeps everything from becoming soggy.
Mixing Advice: Don’t overmix your sauce ingredients; just whisk them gently and set aside. Overmixing can introduce too much air and make the sauce uneven.
Swirl Customization: Want more color? Add a splash of orange juice or a sprinkle of red pepper flakes. Swirling the sauce in the pan before serving gives it a beautiful marbled look and extra flavor.
Ingredient Swaps: Not a soy fan? Coconut aminos work beautifully as a soy alternative. Rather honey? Use maple syrup — it adds a different but lovely flavor. The key is balancing sweetness and saltiness.
Baking Tips: If baking, always use a wire rack for even crispiness, and keep an eye on your sauce to prevent burning. A gentle simmer is best for that shiny, sticky coating.
Glaze Variations: For a smoky touch, toss in a dash of smoked paprika or chipotle powder. I’ve tried it and it’s surprisingly good! Just be cautious not to overpower the dish with too much spice.
This recipe has been a staple in my house because it’s so forgiving and adaptable. I’ve experimented with different cuts of chicken, and even with marinades for a different twist, but honestly, nothing beats the classic flavorful glaze I shared here. It’s all about balancing sweet and savory, and letting the ingredients do their thing. Trust me, once you get the hang of it, you’ll be making this on repeat, and so will your family!
Storing and Reheating Tips
This dish keeps really well, so don’t be afraid to make a double batch for leftovers. Store any extras in an airtight container in the fridge, and it’ll stay fresh for up to 3 days. When reheating, I like to do it gently on the stovetop over low heat, stirring occasionally to keep the sauce from drying out. If needed, splash in a tiny bit of water or chicken broth to loosen up the glaze. Freezing works too — just let it cool completely, then store in a freezer-safe bag or container for up to a month. To reheat, defrost overnight in the fridge and warm in a skillet or microwave. The sauce might lose a tad of its stickiness, but just give it a quick glaze with a little fresh honey or soy when reheating, and it’ll be just as good as fresh!
Frequently Asked Questions
Final Thoughts
This homemade teriyaki chicken really is a little piece of comfort in every bite. It’s simple, budget-friendly, and totally customizable. Whether you’re baking it for a weeknight dinner or serving it up at a weekend family gathering, it never fails to impress. The balance of sweetness and saltiness, combined with that beautiful glossy finish, makes it almost addictive. Plus, the house smells incredible while it cooks — that’s always a good sign! If you give it a try, I’d love to hear how yours turns out. Feel free to experiment and add your twist — maybe some pineapple chunks or a pinch of spice. Cooking should be fun, and this dish is proof that even the simplest ingredients can make magic happen. Happy cooking, friends — can’t wait to see your delicious creations!

Easy Teriyaki Chicken
Ingredients
Method
- Heat sesame oil in a large skillet over medium-high heat. Add chicken pieces and cook for about 4 minutes, flipping occasionally for even cooking.
- Add orange juice, teriyaki sauce, and black pepper to the skillet. Stir to combine and let simmer for 2 minutes. Remove from heat.
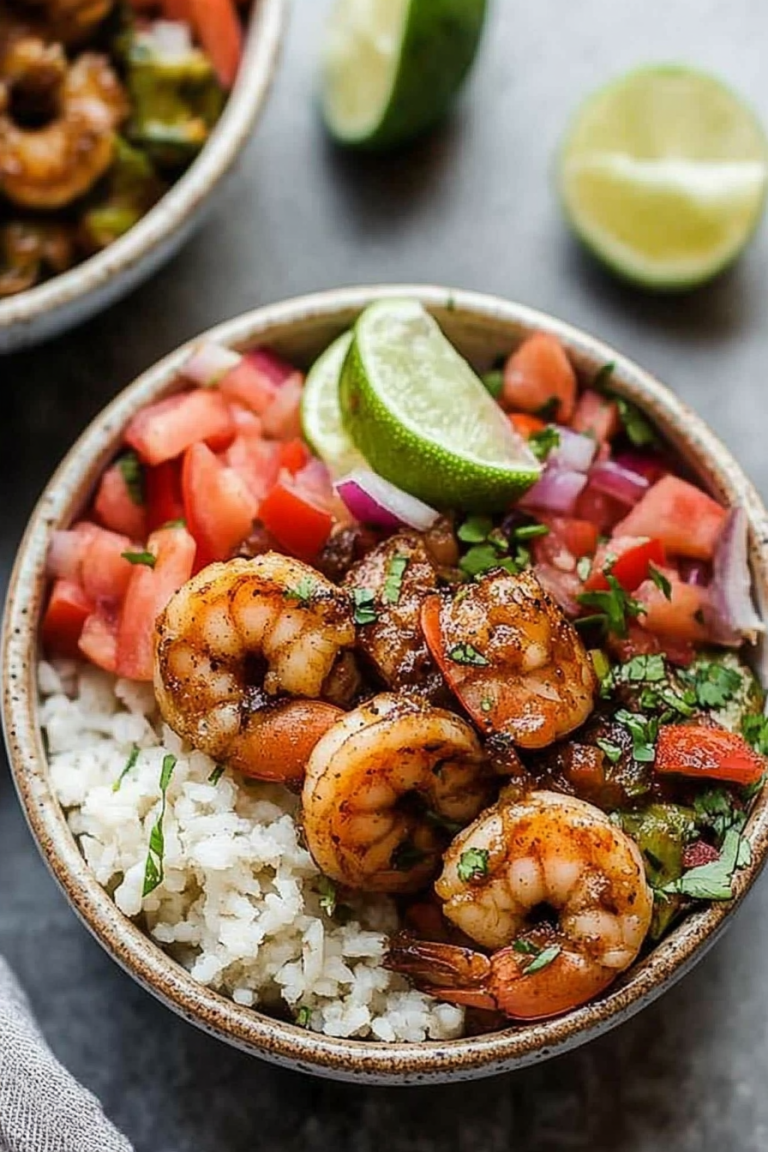
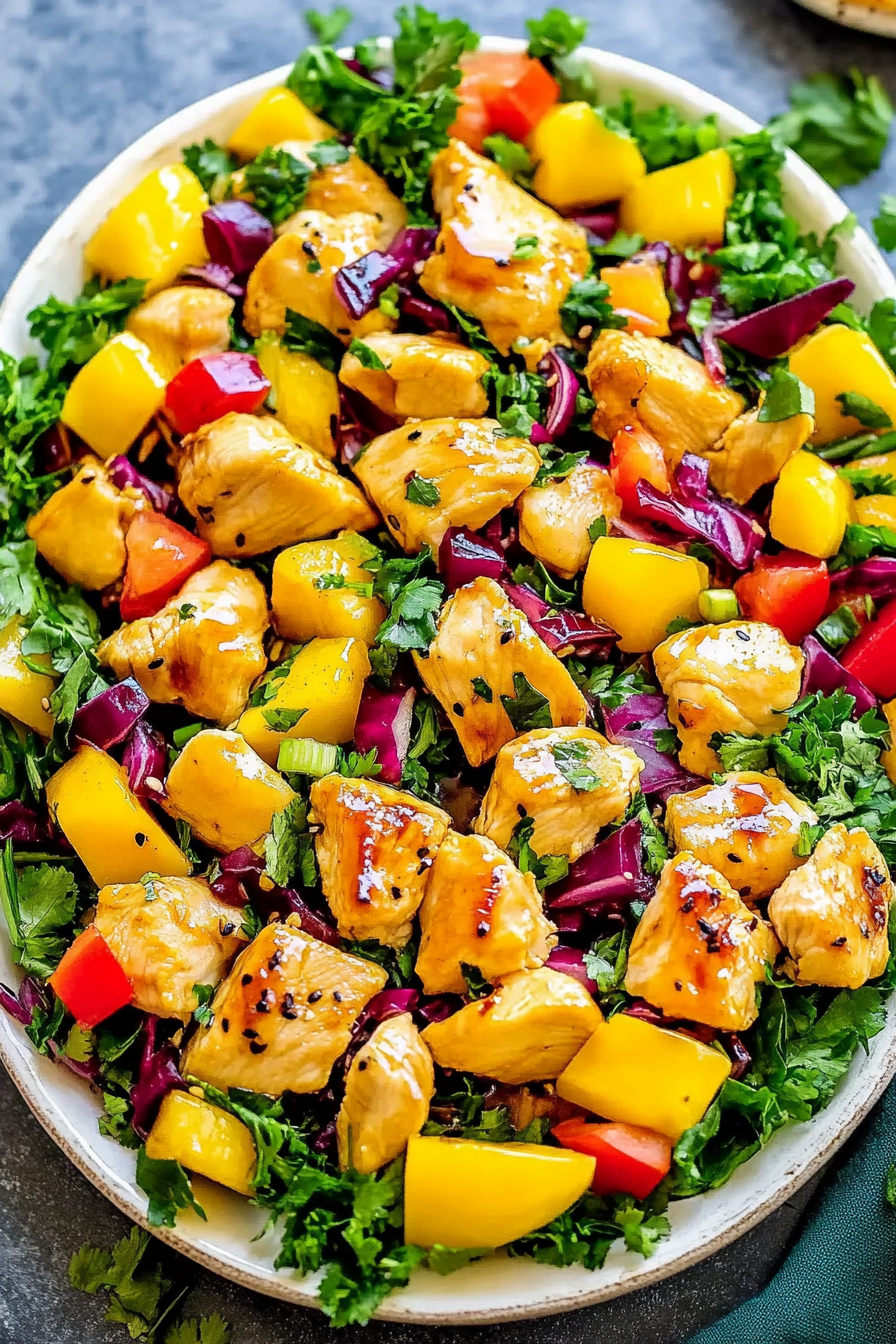
- Assemble the salad in a large bowl: add lettuce mix, diced mango, red onion, red bell pepper, cilantro, and cooked chicken. Drizzle with the pan sauce.
- Serve immediately for the freshest taste.