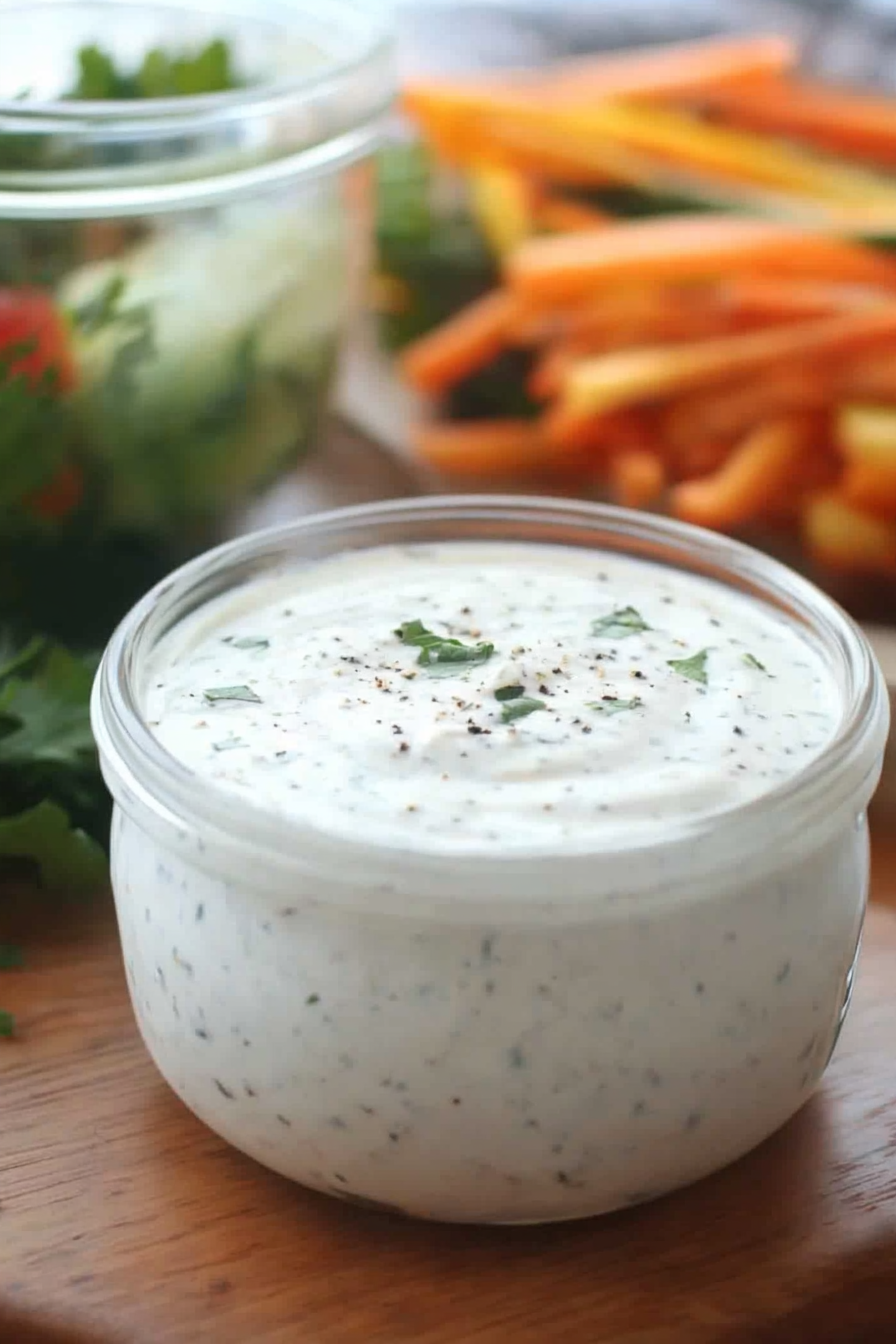
Easy Homemade Ranch Dressing Recipe
There’s just something about dipping crispy veggies or drizzling tangy ranch on a salad that makes everything taste so much better. I remember the first time I ever tasted homemade ranch dressing — I was in grade school, helping my mom mix up a batch in her tiny kitchen. The smell of fresh herbs, the creaminess of real buttermilk, and that punch of garlic and dill instantly became my obsession. Honestly, I can’t buy store-bought ranch anymore — it just doesn’t compare to that rich, fresh flavor at home. This recipe is my go-to, especially on busy nights when I want something quick, but tastes like I’ve spent hours in the kitchen. Plus, it’s crazy versatile — I toss it over salads, dunk chicken wings, or even use it as a dip for my kids’ veggie sticks. Trust me, once you try making your own, you’ll never go back to the jars in the grocery aisle again. It’s a game-changer, I promise! Am I sounding a little overenthusiastic? Well, I can’t help it — I truly love this stuff! Let me walk you through how I make my favorite homemade ranch dressing — the one everyone in my family asks for nonstop.
What is ranch dressing?
Think of ranch dressing as that creamy, herb-infused magic that turns a simple salad into a feast or makes humble chicken nuggets feel gourmet. It’s essentially a rich, tangy sauce made with buttermilk, mayonnaise, and a blend of herbs like dill, parsley, and chives. The name “ranch” actually comes from the California ranches where it was popularized — a bunch of cow and land owners who wanted a flavorful, cooling dip to serve with their grilled steaks and fresh veggies. Over the years, ranch has become a household staple across America, found in everything from lunchboxes to movie nights. The best part? It’s incredibly easy to make at home, and you can tweak the flavors to your liking — more garlic, extra dill, a hint of hot sauce if you like it spicy. Think of it as a blank canvas that’s full of flavor and texture, just waiting for you to personalize it.
Why you’ll love this recipe?
There are a few reasons I keep coming back to this homemade ranch dressing — it’s just so darn good, and it’s incredibly practical too. First off, the flavor? Oh, it’s packed with that perfect balance of tangy-richness and herbaceous brightness. My husband says it’s like a little bowl of summer in every bite. I’ll admit, sometimes I crave a zesty dip or a creamy drizzle at odd hours, and this recipe always hits the spot. What I love most about this is how simple it is — no complicated ingredients or fancy equipment needed. You probably already have everything in your fridge or pantry. Plus, it’s way cheaper than store-bought, and I know exactly what’s going into it. No weird preservatives or mystery flavors. And because it’s so adaptable, I use it in so many ways: as a salad dressing, a veggie dip, a sauce for grilled meats, or even a quick sandwich spread. The fact that it’s versatile makes it a real lifesaver on busy nights or when sudden guests drop by. Trust me, once you master this, it’s one of those recipes you’ll make over and over — comfort food, style.
How do I make homemade ranch dressing?
Quick Overview
This ranch dressing comes together in minutes, no special equipment needed. You just whisk your creamy base—mayonnaise and buttermilk—together with fresh herbs, garlic, and a splash of lemon juice or vinegar for brightness. The secret is balancing the herbs and acidity to get that perfect tang. I like to make a double batch because it keeps well for a few days in the fridge, and honestly, it’s better when it has a little time for the flavors to meld. The best part? Once you get the hang of it, you can customize every batch. Want it thicker for dipping? Use less buttermilk. Looking for extra garlic punch? Just add more. It’s so forgiving and forgiving makes it fun. I always do a taste test before I serve — trust me, the flavors develop as it sits, so it might taste a bit sharp initially, but mellow beautifully after an hour or two in the fridge.
Ingredients
For the Main Base:
– 1 cup mayonnaise (I like full-fat for richness, but light works if you prefer)
– 1/2 cup buttermilk (or make your own with milk and vinegar if you don’t have buttermilk handy)
– 1 tablespoon lemon juice or vinegar (for that tangy kick)
– 1 clove garlic, minced (or more if you love a punch of garlic!)
– 2 tablespoons fresh dill, chopped
– 2 tablespoons fresh parsley, chopped
– 1 tablespoon fresh chives, chopped
– Salt and pepper to taste
For More Flavor:
– A pinch of paprika or cayenne for spice
– A teaspoon honey or sugar for a hint of sweetness if you like
– Extra herbs if that’s your thing
Step-by-Step Instructions
Step 1: Preheat & Prep Pan
Honestly, you don’t even need a pan for this one! Just grab your favorite bowl and a whisk. It’s so quick to put together that I always get excited — feels like the easiest gourmet fix you’ll ever make. Chill your ingredients a bit if they’re warm, so the dressing stays nice and cold when served.
Step 2: Mix Dry Ingredients
As I said, you don’t need to do this step separately, but I like to make sure my herbs are fresh and chopped evenly. This helps distribute their flavor uniformly, and it also keeps my dressing looking pretty and vibrant. Plus, fresh herbs make such a difference — their aroma alone is enough to make my kitchen smell amazing.
Step 3: Mix Wet Ingredients
In a big bowl, whisk together mayonnaise, buttermilk, lemon juice, and garlic. It’s a silky, creamy mixture that’s easy to blend and smooth in texture. I always do this part first, then add the herbs and seasonings. If you feel like experimenting, try a splash of hot sauce for some extra zing — it’s really good if you like a spicy kick.
Step 4: Combine
Now, stir in the chopped herbs, salt, and pepper. Taste it — at this stage, it might be a little sharp or strong, but trust me, it mellows out after an hour or two in the fridge. I’ve learned this the hard way, but now I always let it sit covered before serving. This step is simple but the key to the freshest flavor!
Step 5: Prepare Filling
If you’re adding additional flavorings—like a dash of smoked paprika, a teaspoon of honey, or even a teaspoon of Dijon mustard—do it here. Mix it well. The beauty of homemade is that you can make it exactly how you like it, so don’t be shy with your favorite herbs or seasonings.
Step 6: Layer & Swirl
If you’re feeling fancy, pour some into a jar with a little extra chopped herbs and swirl gently for a marbled effect. It looks pretty, but honestly, I’m usually too hungry to fuss over presentation — just make sure the herbs are evenly distributed for that vibrant, fresh look.
Step 7: Bake
No baking needed here — just pop it in the fridge! If you want it thicker, add a bit more mayo and less buttermilk. It should stay creamy but still pourable. If it’s too thick, stir in a teaspoon more buttermilk until it reaches your preferred consistency.
Step 8: Cool & Glaze
If you like to top it with an extra sprinkle of herbs or a dash of paprika just before serving, do that when it’s chilled. The coolness enhances the flavor and gives it that classic ranch touch. If you’ve added any additional flavors or toppings, now’s the perfect moment.
Step 9: Slice & Serve
Serve your homemade ranch in a pretty bowl with a spoon or a dipping cup. I love pairing it with crunchy carrots, celery sticks, or crispy chicken wings. It’s also fantastic drizzled over a wedge salad or as a sandwich spread. Trust me, once you’ve made it, you’ll be reaching for the bottle less and less.
What to Serve It With
This ranch dressing is like that secret weapon in your kitchen arsenal. For breakfast, I love drizzling it over scrambled eggs or veggie-packed breakfast wraps. It makes mornings feel a little fancier. At brunch, I serve it as a side with crispy hash browns, fresh fruit, and maybe a mimosa or two — because why not? It’s the perfect cooling companion for spicy quesadillas or a spicy buffalo chicken dip, especially when hosting friends. And of course, for dinner, it’s my go-to dip for crispy chicken tenders or roasted sweet potato fries. I even stir some into potato salad for an extra herby punch. It’s become a household staple around here, especially when I want something quick yet full of flavor. My kids ask for this all the time — I think they’d dip everything in it if I let them. Honestly, I’ve even used it as a salad dressing, and it never fails to make greens taste so much more appealing. Plus, it keeps well in the fridge for about 3-4 days, so I often make a big jar on the weekend to last the busy week ahead. Nothing beats a homemade touch, right?
Top Tips for Perfecting Your Ranch Dressing
After making this a hundred times, I’ve picked up a few tricks, so I’ll share my secrets with you. First, always use fresh herbs — dried herbs just don’t cut it here unless you want a dull, flat flavor. When chopping herbs, do it finely but not so much that the leaves turn into a mash — you want them to stay vibrant and visible. If your ranch ends up a bit too tangy or thin, adjust by adding more mayo or a splash of olive oil for richness. Conversely, if it’s too thick, stir in a little more buttermilk until you reach that perfect pourable consistency. I’ve found that adding a touch of honey balances the acidity and adds a little warmth to the flavor, especially if you prefer a milder, rounded taste. If you’re feeling adventurous, try swapping out the dill for Thai basil or cilantro for a different flavor profile — it’s amazing how versatile this dressing can be. One mistake I used to make was overmixing — it can turn the dressing grainy. Trust me, fold gently and taste often to get it just right. Also, if you want a smoky twist, add a pinch of smoked paprika or chipotle powder for a little flair. This is one of those recipes that gets better with every batch, so don’t be afraid to tweak it until it’s your perfect blend.
Storing and Reheating Tips
Storing homemade ranch is super straightforward, and it keeps beautifully in the fridge for up to 4 days. I usually pour it into an airtight container or a jar with a tight lid — stainless steel or glass containers work best to keep it fresh and vibrant. Just make sure to give it a good stir before serving if it separates. If you want to keep it longer, you can freeze small portions in ice cube trays — perfect for adding a splash to soups or stews later. Just thaw in the fridge overnight before using. Keep in mind that mayonnaise-based dressings are best eaten within 3-4 days as they’re fresh and contain dairy. If you make it in advance, let it sit out for just 15 minutes before serving to take the chill off and let those flavors come alive. As for reheating, it’s best to keep it cold, but if you need to warm it slightly for a dip, do so gently in the microwave — just a few seconds until lukewarm, then stir well. Also, if you notice a slight separation after refrigerating, just give it a good whisk or stir — it’s totally normal and easily fixed.
Frequently Asked Questions
Final Thoughts
Making your own ranch dressing might just become the magic trick in your kitchen. It’s so simple, so flavorful, and endlessly adaptable. Once you taste this fresh, creamy version, you’ll wonder why you ever relied on store-bought nonsense. Plus, it’s a wonderful way to sneak in fresh herbs and control the ingredients — no preservatives or artificial flavors. I love how it elevates everything — salads, veggies, grilled meats, you name it. Honestly, I’ve made this so many times I’ve lost count, and each batch feels like a little celebration of freshness and flavor. My kids ask for seconds, my friends rave about it, and I can’t recommend it enough. Whether you’re in a rush or have a little more time to perfect it, this ranch dressing is a true family favorite I’m sure you’ll keep coming back to. Give it a try — I can’t wait to hear how yours turns out! And if you have any fun twists or secret ingredients, share them in the comments — I love learning new ways to enjoy this classic. Happy dipping and drizzling!
Homemade Ranch Salad Dressing
Ingredients
Method
- Whisk together the mayonnaise, sour cream, and buttermilk until smooth. Mix in the herbs and spices. Add lemon juice and whisk again. Chill before serving.