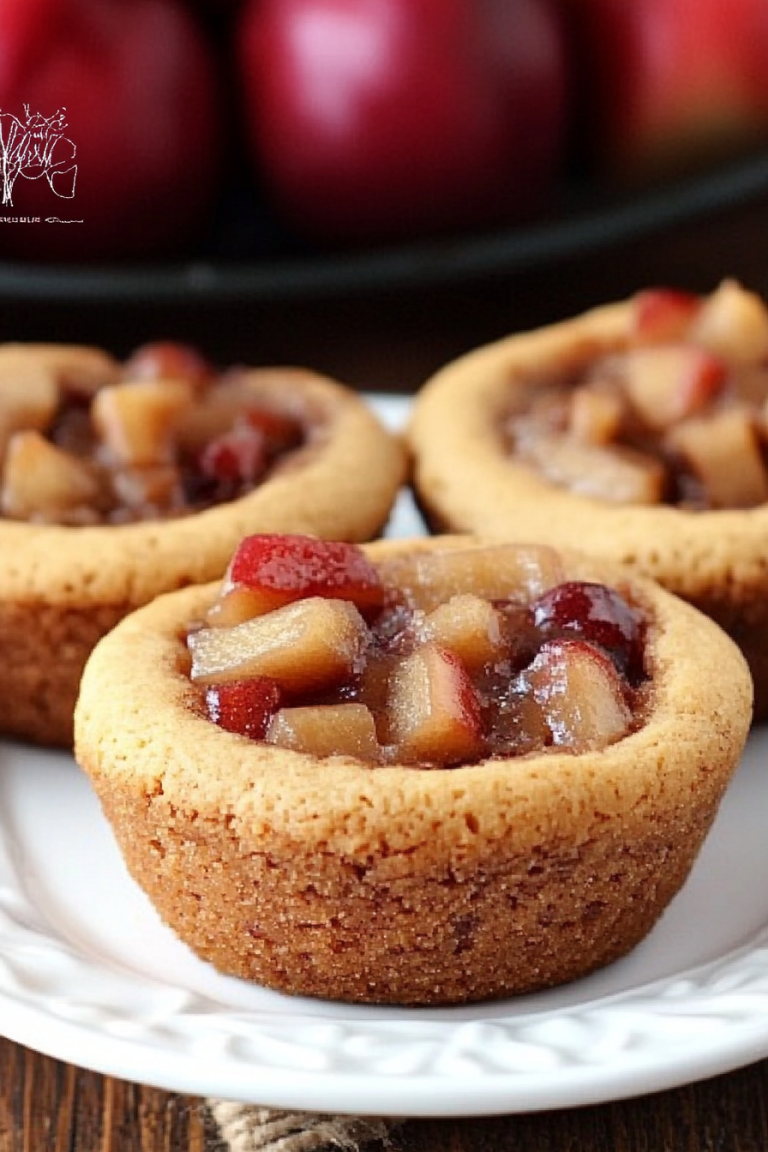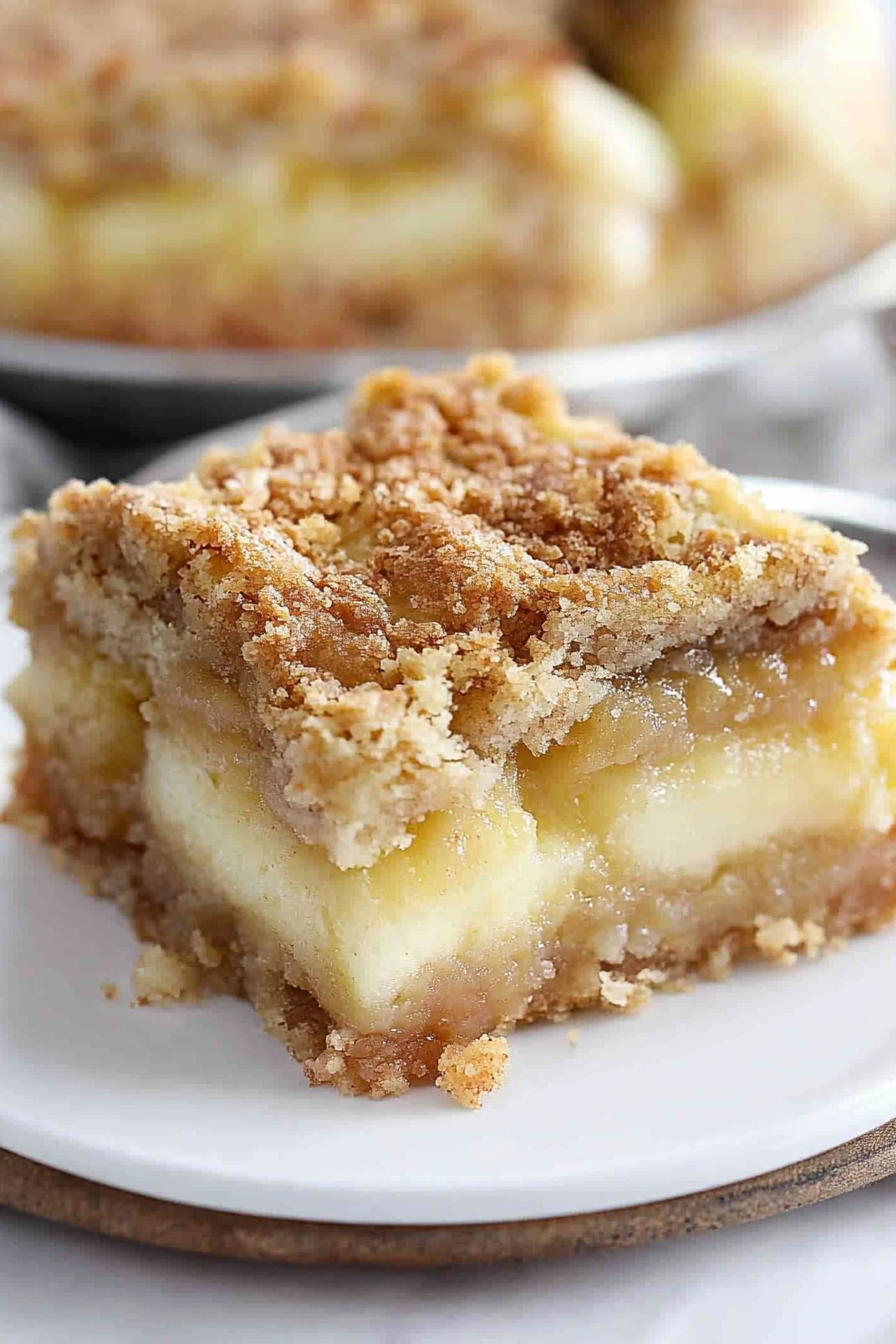
Easy Apple Cream Cheese Bars Delight
There’s just something about the smell of baked apples and cinnamon that instantly takes me back to my childhood kitchen—a place full of warmth, laughter, and a whole lot of baking. One of my absolute favorite treats to make have always been apple bars. They’re like a cozy blanket wrapped in flaky crust, packed with tender, sweet apples, and finished off with that perfect drizzle of glaze. Honestly, these apple bars are a bit of a nostalgia trip for me—yet they’re so simple and quick to whip up, it’s almost like baking magic. My kids ask for them all the time, especially after school or on lazy weekends. Plus, they’re perfect for using up those slightly overripe apples lurking in the fruit bowl. I’ve tested this recipe with everything from Granny Smiths to Honeycrisp, and trust me, they all turn out amazing. This is one of those recipes I consider a life-saver when I need a sweet treat but don’t want to spend hours in the kitchen. I love how they disappear in minutes at my house—so I better make a double batch next time! And believe me, once you get the hang of it, you’ll be making these apple bars as often as I do.
What is an Apple Bar?
Think of apple bars as a kind of hybrid between a crumbly cookie, a soft cake, and a flaky pastry—all in one delicious handheld treat! They’re essentially layered with a buttery crust, topped with a sweet apple filling, and finished with a sprinkle of cinnamon and sometimes nuts or oats for crunch. The name “apple bars” comes from their bar-shaped form, making them perfect for slicing and sharing. These bars are a real crowd-pleaser because they’re simple enough for a weeknight dessert but special enough for potlucks and picnics. They’re like a more portable, less messy version of apple pie—without all the fuss. Think of it as a slice of fall in every bite, and the best part? You don’t need a fancy pie crust or complicated techniques to pull them off. Just good quality apples, a few pantry staples, and some love—that’s all it takes to make these irresistible treats.
Why do you love this movie?
What I love most about these apple bars is how they strike that perfect balance between luscious fruit and satisfying crust. The apple filling is bursting with flavor—think of it as a warm, cinnamon-kissed medley of apples that’s soft but still a little tart, depending on what you use. And the crumbly crust? It’s buttery, golden, and just a little crisp around the edges, giving each bite nice texture. Plus, these bars are ridiculously easy to make! I’ve made them so many times that I’ve gotten the process down to just about 45 minutes from start to finish. They’re budget-friendly too—most of the ingredients are staples in my pantry anyway, and I love that I can toss in whatever apples I have on hand. They’re incredibly versatile as well: serve them warm with a scoop of vanilla ice cream, or cut them into little squares for a quick snack. Trust me, once you try these apple bars, they’ll become a go-to in your family — I promise, they’re impossible to resist.
How do I make Apple Bars?
Quick Overview
This recipe for apple bars is all about layering a buttery crust, a sweet apple filling, and a crumbly topping, then baking everything until golden perfection. It’s pretty much foolproof—no complicated techniques or fancy equipment required. The key is to keep the crust and crumb mixture slightly crumbly so they melt together during baking, creating that irresistible texture. The filling gets thickened with a little flour or cornstarch so it doesn’t run all over your pan, and you can punch up the cinnamon or add a dash of nutmeg if you’re feeling fancy. Once baked, I like to let them cool just enough for the filling to set but still warm enough to enjoy that gooey, fragrant bite. Then, I drizzle them with a simple glaze or dust them with powdered sugar for that extra touch of sweetness. These apple bars are perfect for making ahead or serving warm straight out of the oven. Easy, comforting, and honestly a total crowd-pleaser.
Ingredients
For the Main Batter:
– 1 ½ cups all-purpose flour (I always use unbleached—more flavor!)
– ½ cup granulated sugar
– ½ teaspoon baking powder
– ¼ teaspoon salt
– ½ cup unsalted butter (cold, cut into small chunks)
– 1 large egg (for binding the crust and topping)
– 1 teaspoon vanilla extract (because vanilla makes everything better!)
For the Filling:
– 3-4 medium apples (Granny Smith or Fuji work beautifully)
– 2 tablespoons granulated sugar (adjust depending on apple tartness)
– 1 teaspoon ground cinnamon
– 1 tablespoon lemon juice (keeps the apples from browning)
– 1 tablespoon all-purpose flour or cornstarch (for thickening)
– Optional: a handful of chopped nuts or raisins for extra texture
For the Glaze:
– ½ cup powdered sugar
– 1-2 tablespoons milk or cream (adjust for consistency)
– ½ teaspoon vanilla extract
– Optional: a splash of lemon juice or a sprinkle of cinnamon for flavor
Step-by-Step Instructions
Step 1: Preheat & Prep Pan
Set your oven to 350°F (175°C). Line a 9×9-inch square baking dish with parchment paper or lightly butter it—trust me, this makes the bars come out so much easier. If you’re feeling extra fancy, you can even spray it with nonstick spray, but I like parchment for minimal cleanup.
Step 2: Mix Dry Ingredients
In a large bowl, whisk together the flour, sugar, baking powder, and salt. This ensures everything’s evenly distributed—an important little trick I learned after messier batches!
Step 3: Mix Wet Ingredients
In a separate small bowl, beat the egg with vanilla. Then, add the cold butter chunks. Use a pastry cutter or your fingers to work the butter into the dry ingredients until it resembles coarse crumbs—like golden oats. I do this quickly because I want that crumbly texture, not a dough.
Step 4: Combine
Pour the wet mixture into the dry ingredients and gently fold to combine—don’t overmix! You want it slightly crumbly but hold together when pressed. Press two-thirds of this mixture into the prepared pan, forming an even crust. Chill your hands or dampen them a little—this helps keep everything neat and manageable.
Step 5: Prepare Filling
Peel and chop your apples into small, even pieces. Toss them with sugar, cinnamon, lemon juice, and flour. If you’re adding nuts or raisins, fold them in now. This filling should be juicy but not soupy—if it looks overly wet, add a touch more flour.
Step 6: Layer & Swirl
Spread the apple filling evenly over the crust. Then, crumble the remaining topping mixture over the apples. For extra prettiness, I like to sprinkle a little extra cinnamon or sugar on top. Using a knife or toothpick, swirl a little of the remaining crumbs into the filling for a marbled look — trust me, it makes for a prettier presentation!
Step 7: Bake
Bake in the preheated oven for 35-40 minutes, or until the top is golden brown and the filling is bubbly. Keep an eye on it after 30 minutes; if it starts getting too dark, cover loosely with foil. The house will smell incredible—best warning ever!
Step 8: Cool & Glaze
Let your apple bars cool in the pan for at least 15 minutes—this helps the filling set. While still warm, drizzle with your prepared glaze. If you want a more intense flavor, add a tiny dash of cinnamon or lemon zest to the glaze—it’s like a flavor boost in every bite.
Step 9: Slice & Serve
Use a sharp knife to cut into squares. Serve warm or at room temperature, maybe with a dollop of whipped cream or a scoop of vanilla ice cream on the side. Sometimes I sprinkle a little extra cinnamon on top for presentation—enough to make it look homey but still fancy enough for guests. Whatever the occasion, these bars are a guaranteed hit!
What to Serve It With
These apple bars are so versatile that they pretty much go with anything. For breakfast, I love pairing them with a strong cup of coffee or tea—trust me, the aroma alone kicks off a good day. You can also serve them as a brunch dessert, maybe with a side of Greek yogurt and fresh fruit. When it’s time for dessert, a scoop of vanilla or cinnamon ice cream takes them to a whole new level. And if you’re just craving a cozy snack, warm them up a little, sprinkle with powdered sugar, and curl up with a good book. My family loves enjoying these after a busy day, and I often make a tray to take to picnics—it’s a portable, crowd-pleasing treasure.
Top Tips for Perfecting Your Apple Bars
Over the years, I’ve learned a few tricks that make all the difference. First, when prepping apples, I always toss them with lemon juice to block browning. It also adds a nice tang. Too many apples can make the filling soupy—so stick to the measurements, and if it seems too runny before baking, just sprinkle in a little more flour or cornstarch. To keep the crust crumbly and tender, don’t overwork the dough; just press it into the pan and pop it in the oven. Want a deeper cinnamon flavor? Mix a pinch into the apple filling or dust the top before baking. When swirling the crumbs into the filling, use a toothpick or skewer for patterning that looks pretty and homemade. I tested this with almond flour, and it made the crust a little nuttier and richer—I highly recommend experimenting if you like variations. Also, if your oven runs hot, keep an eye on the baking time; I’ve found that they’re done right around 38 minutes in my oven but might take a tad longer or shorter depending on yours. And don’t forget to cool thoroughly before glazing—hot bars and glaze don’t mix well, and you want that glossy finish to stick perfectly.
Storing and Reheating Tips
These apple bars stay pretty well if stored properly. If you plan to eat them the same day, leave them at room temperature in an airtight container for up to 2 days. If you want to keep them longer, pop them in the fridge—just make sure they’re covered tightly with plastic wrap or foil. They’re great cold or gently reheated in the microwave for about 15-20 seconds until warm—sometimes I even microwave a piece and then put a bit of vanilla ice cream on top for an instant, cozy dessert. For longer storage, freezing works beautifully—wrap individual bars in plastic wrap and then foil. They’ll stay fresh for up to 3 months. To thaw, leave them at room temp or pop them in the fridge overnight. Even after freezing, they’re still moist, tender, and just as delicious—trust me, I’ve tested this a million times. Keep the glaze separate if you can; add it just before serving to keep that shiny finish intact.
Frequently Asked Questions
Final Thoughts
If you’re on the hunt for a comforting, easy-to-make sweet treat with a touch of fall-in-a-bite magic, these apple bars are an absolute must-try. They combine the soft sweetness of apples, the crunch of streusel topping, and the warmth of cinnamon, all wrapped in a buttery crust that’s just the right amount of crumbly. Over the years, I’ve made them for loved ones, for school bake sales, and honestly, just because I needed a quick sugar fix—I’ve never had a batch that didn’t disappear almost instantly. What makes them so special is how approachable they are; I promise, even if you’re new to baking, you’ll have no trouble pulling these off. Plus, they give you the cozy feeling of autumn no matter the season. I always say, a good apple bar is more than just a dessert—it’s a little burst of happiness you can share with your family and friends. So go ahead, gather those apples and get baking. Can’t wait to hear how yours turns out!
Sweet Apple Pie Bars
Ingredients
Method
- Preheat oven to 350°F. Grease a 9x13 inch baking dish and set aside.
- In a large bowl, combine flour, brown sugar, oats, cinnamon, baking powder, and baking soda.
- Pour melted butter over the dry ingredients and stir until crumbly.
- Reserve one-third of the crumb mixture for topping.
- Press the remaining crumb mixture firmly into the bottom of the prepared dish.
- In a separate bowl, toss sliced apples with a tablespoon of flour and cinnamon.
- Spread the apple mixture evenly over the crust.
- Sprinkle the remaining crumb mixture over the apples.
- Bake for 55-65 minutes until golden brown and bubbly.
- Allow to cool before slicing and serving.