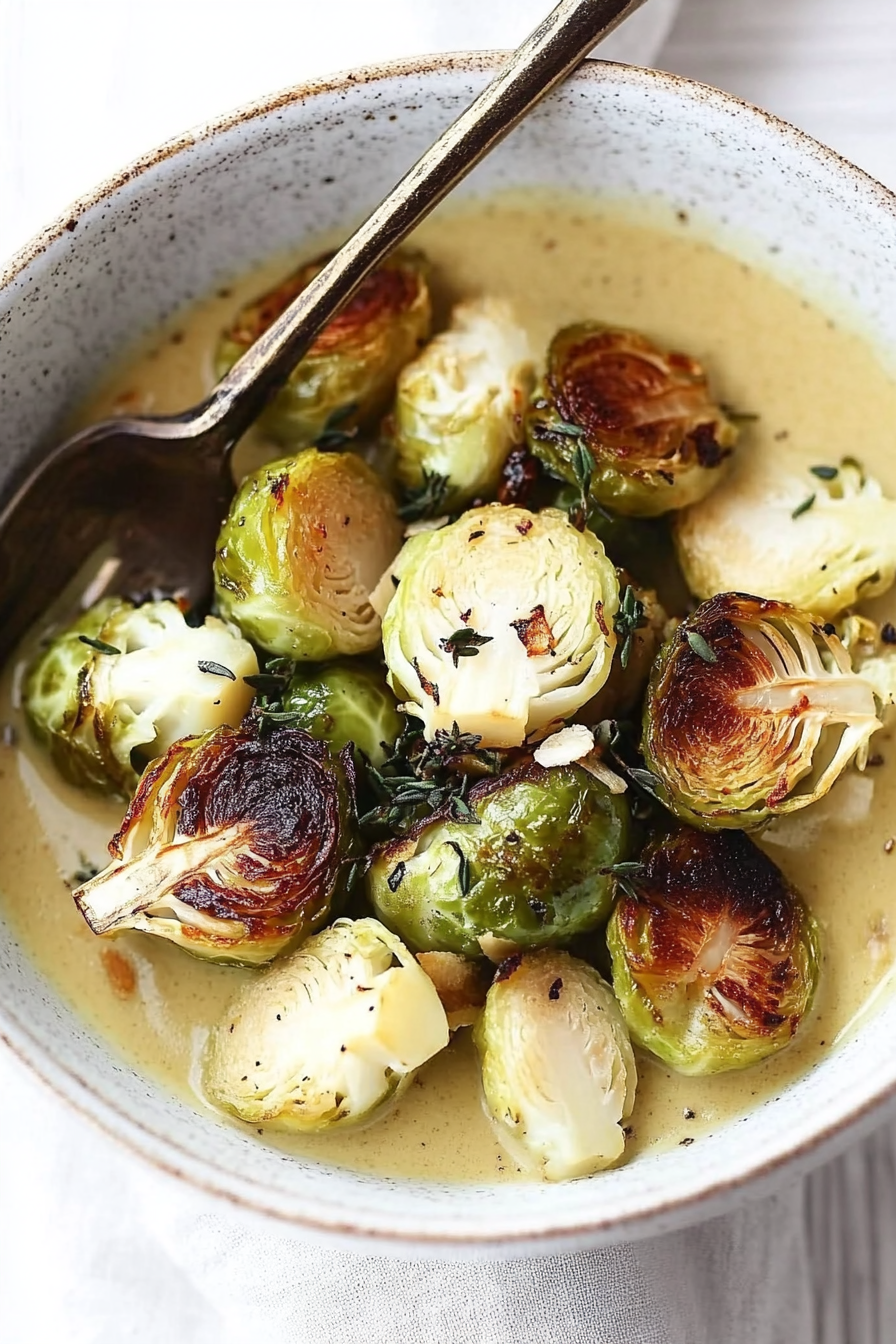
Easy Roasted Sprouts & Cauliflower Soup
Okay, confession time: I used to be one of *those* people. You know, the ones who’d eye Brussels sprouts with suspicion, remembering those bitter, mushy versions from childhood that tasted suspiciously like sadness. But then, something magical happened. I discovered the transformative power of roasting. And not just any roasting, but *this* specific way of roasting sprouts that turns them into little flavor bombs. Seriously, these roasted sprouts are so good, my kids, who normally wouldn’t go near a green vegetable if it were served with pizza, now ask for them. It’s a miracle, I tell you! If you’re looking for a side dish that’s incredibly simple yet delivers a punch of flavor, and one that will make even the pickiest eaters ask for seconds, then you’ve come to the right place. Forget everything you thought you knew about this humble little vegetable; we’re about to change your mind, one crispy, caramelized bite at a time.
What is Roasted Sprouts?
So, what exactly are we talking about when I say “roasted sprouts”? It’s pretty much exactly what it sounds like: Brussels sprouts that have been tossed with a little bit of oil, some seasoning, and then roasted in a hot oven until they’re tender on the inside and gloriously crispy and a little bit charred on the outside. Think of it as a magical transformation – the high heat caramelizes their natural sugars, mellowing out any bitterness and bringing out this amazing, nutty, slightly sweet flavor. It’s essentially taking a vegetable that some people shy away from and making it irresistible. It’s not complicated, it’s not fussy, and it’s definitely not your grandma’s boiled sprouts (no offense to grandmas, but this is a game-changer!). It’s just pure, unadulterated deliciousness.
Why you’ll love this recipe?
There are so many reasons why this roasted sprouts recipe has become a staple in my kitchen, and I just know you’re going to love it too. First off, the flavor is just out of this world. The roasting process brings out this incredible nutty sweetness, and when you add just a touch of salt and pepper, maybe a little garlic powder, you get this perfect balance. They’re tender on the inside, with those addictive crispy edges that you just can’t get enough of. And speaking of addiction, they’re surprisingly healthy, too! They’re packed with vitamins and fiber, which is always a win in my book. What I also adore about this recipe is its sheer simplicity. I mean, we’re talking about five ingredients, tops, and about ten minutes of hands-on time. It’s a lifesaver on busy weeknights when you need a quick, healthy side that doesn’t feel like a chore. Plus, they’re ridiculously budget-friendly. Sprouts are usually pretty inexpensive, and the other ingredients are pantry staples. And the versatility! You can serve these with almost anything – chicken, fish, steak, pasta, you name it. They’re great as a simple side, but you can also jazz them up with a balsamic glaze or some crispy bacon if you’re feeling fancy. Honestly, it’s the closest thing to a perfect side dish I’ve ever found, and I’ve tried a lot!
How do I make Roasted Sprouts?
Quick Overview
This recipe is all about simplicity and letting the oven do the work. We’ll trim and halve our sprouts, toss them with olive oil and seasonings, and then roast them at a high temperature until they’re perfectly tender and crispy. It’s a straightforward process that takes minimal effort but yields maximum flavor. The key is the high heat, which is what creates those irresistible crispy edges and caramelizes the natural sugars in the sprouts.
Ingredients
For Roasted Sprouts:
1.5 pounds Brussels sprouts: Look for sprouts that are firm and bright green. Avoid any that are yellowing or have loose leaves, as they might be past their prime. Trim off any tough outer leaves and the very end of the stem.
2 tablespoons olive oil: Extra virgin olive oil is great for flavor, but any good quality olive oil will work.
1/2 teaspoon salt: Or to taste. Don’t be shy with the salt; it really helps bring out the flavors.
1/4 teaspoon black pepper: Freshly ground is always best!
Optional additions: 1/2 teaspoon garlic powder, a pinch of red pepper flakes for a little kick, or a drizzle of balsamic glaze after roasting.
Step-by-Step Instructions
Step 1: Preheat & Prep Pan
First things first, crank your oven up to 400°F (200°C). While it’s heating, grab a large baking sheet. You want to give those sprouts plenty of room to breathe so they roast rather than steam. If you have a large pan, great! If not, you might need two smaller ones. I usually line mine with parchment paper for super easy cleanup, but you can also just grease it lightly with a little extra oil or cooking spray. Trust me, the cleanup difference is immense!
Step 2: Trim and Halve the Sprouts
Now for the sprouts themselves. Grab your sprouts and give them a quick rinse under cool water. Pat them dry really well with a clean kitchen towel or paper towels – this is actually important for getting them crispy. Then, you’re going to trim off the little woody end of the stem. Don’t cut off too much, just the tough part. Next, slice each sprout in half lengthwise, right through the stem. If you have any really large ones, you can quarter them, but halves are usually perfect. This helps them cook evenly and gives you more surface area for that delicious caramelization.
Step 3: Season the Sprouts
Place your trimmed and halved sprouts in a large bowl. Drizzle them generously with the olive oil. Now, sprinkle over your salt, pepper, and any other seasonings you’re using, like garlic powder or red pepper flakes. Use your hands to toss everything together really well. You want to make sure every single sprout gets coated in the oil and seasonings. This is where the magic really starts to happen! I always do this with my hands because I feel like I can get them all coated more thoroughly than with a spoon.
Step 4: Arrange on Baking Sheet
Spread the seasoned sprouts out in a single layer on your prepared baking sheet. This is super important – if they’re piled on top of each other, they’ll steam instead of roast, and you won’t get those coveted crispy bits. Give them some space! You should be able to see a little bit of the baking sheet between most of them. If they’re too crowded, just use a second baking sheet. It’s worth the extra pan!
Step 5: Roast to Perfection
Pop that baking sheet into your preheated oven. Now, here’s the part that requires a little patience, but it’s worth it. You’re going to roast them for about 20 to 30 minutes. The exact time will depend on your oven and the size of your sprouts. About halfway through, around the 10-15 minute mark, I like to give the pan a good shake or use a spatula to flip the sprouts. This ensures even browning. You’re looking for them to be tender when you poke them with a fork, and have beautiful golden-brown, crispy edges. Some pieces might get wonderfully dark and almost burnt-looking – those are the best ones, trust me!
Step 6: Check for Doneness
Once they look gorgeously caramelized and are fork-tender, they’re ready to come out. Don’t be afraid if some pieces are darker than others; that’s part of their charm and flavor. The leaves on the edges should look a little crispy and maybe even slightly browned. If you’re unsure, just take a bite of one – they should be tender but not mushy.
Step 7: Serve Immediately (or Glaze!)
These roasted sprouts are best served hot, straight from the oven. You can serve them just as they are, or if you want to add an extra layer of flavor, now’s the time for a drizzle of balsamic glaze. It adds a lovely sweet and tangy counterpoint to the nutty sprouts. Just make sure to drizzle it over right before serving so it doesn’t make the sprouts soggy.
What to Serve It With
Honestly, these roasted sprouts are so versatile, they feel like they belong with practically any meal you can dream up! For breakfast, I love serving them alongside some crispy bacon and a perfectly poached egg. The savory sprouts cut through the richness of the egg beautifully. For a more substantial brunch spread, they are fantastic alongside some ham, scrambled eggs, and maybe even a mini frittata. They add a much-needed pop of green and freshness to the table. As for dessert? Well, that’s a bit of a stretch, but if you’re having a very savory dessert course, perhaps with some cheese, they could work! More realistically, they are the absolute best side dish for a cozy dinner. They pair perfectly with roasted chicken or turkey – you know, those Sunday dinners that make the whole house smell amazing. Steak is another winner; the char on the sprouts complements the grill marks on the steak so well. And don’t forget pasta nights! A simple lemon pasta or a creamy alfredo gets an instant upgrade with a generous helping of these crispy little gems. My family has a tradition of making them with pork tenderloin, and it’s just a match made in heaven. The slight sweetness of the sprouts balances the savory pork so perfectly. Seriously, get creative – they’re hard to mess up!
Top Tips for Perfecting Your Roasted Sprouts
Over the years, I’ve made these roasted sprouts more times than I can count, and I’ve definitely learned a few tricks that take them from good to absolutely phenomenal. First off, when it comes to the sprouts themselves, **freshness is key**. Always choose sprouts that are firm, compact, and have a vibrant green color. If they’re starting to look a bit yellow or droopy, they might be past their best. Also, **don’t skip drying them thoroughly** after washing! Moisture is the enemy of crispiness. I learned this the hard way when I first started making them and ended up with more steamed than roasted sprouts. A good pat-down with paper towels makes all the difference. When it comes to seasoning, **don’t be afraid to experiment**. While salt and pepper are great, I’ve found that a little garlic powder or even a pinch of smoked paprika can add a wonderful depth of flavor. For those who like a little heat, red pepper flakes are your best friend here. The most crucial tip, though, is **giving them space on the baking sheet**. Seriously, this is non-negotiable if you want crispy sprouts. If they’re crammed together, they’ll steam. If you have a lot of sprouts, just use two baking sheets. It’s so worth it! I also like to **give the pan a good shake or stir halfway through** baking. This ensures that all sides of the sprouts get nicely browned and caramelized. And a final little trick I’ve picked up: **if you’re using a really good quality balsamic vinegar, you can reduce it down on the stovetop to make your own balsamic glaze**. It’s super easy and tastes so much better than store-bought. Just simmer about a cup of balsamic vinegar in a small saucepan over medium-low heat until it has reduced by about half and coats the back of a spoon. Let it cool slightly before drizzling!
Storing and Reheating Tips
Now, I’ll be honest, these roasted sprouts are usually gobbled up in minutes in my house, so I rarely have leftovers. But when I do, here’s how I handle them to keep them tasting as good as possible. For storing, the best method is to let them cool down completely at room temperature first. Once they’re cooled, transfer them to an airtight container. They’ll keep well in the refrigerator for about 3-4 days. If you’ve drizzled them with balsamic glaze, try to do that *after* reheating if possible, or be aware that the glaze might make them a bit softer. When it comes to reheating, I’ve found that the oven is your best friend for maintaining that delightful crispiness. Spread the sprouts out on a baking sheet and pop them back into a moderately hot oven (around 350°F or 175°C) for about 5-10 minutes, or until they’re heated through and regaining some of their crispness. Microwaving is an option for speed, but they will inevitably lose some of their texture and can become a bit mushy, which is the opposite of what we’re going for! If you absolutely must use the microwave, heat them in short bursts, stirring in between, and be prepared for a softer sprout. I’ve also successfully reheated them in a skillet over medium heat with a touch of oil, stirring frequently, which helps bring back some of the crisp. If you’re planning to freeze them, I’d recommend doing so *before* adding any glaze. Let them cool completely, spread them in a single layer on a baking sheet and freeze until solid, then transfer to a freezer-safe bag or container. They should last for about 2-3 months in the freezer. Thaw them overnight in the refrigerator before reheating, ideally in the oven.
Frequently Asked Questions
Final Thoughts
I really hope you give these roasted sprouts a try. They’ve genuinely changed my mind (and my kids’ minds!) about this incredible vegetable, and I think they have the power to do the same for you. The simplicity, the incredible flavor, the crispy edges – it all just comes together to create a side dish that’s both impressive and incredibly easy to make. They’re proof that healthy food can be absolutely delicious and that even the most misunderstood ingredients can shine with the right preparation. If you love this recipe, you might also enjoy my recipe for crispy roasted broccoli, or perhaps my lemon herb roasted potatoes for another easy veggie side. Don’t be afraid to experiment with your own seasonings and toppings – that’s part of the fun! I can’t wait to hear how yours turn out, so please leave a comment below and share your thoughts, or let me know what toppings you loved. Happy cooking!
Roasted Brussels Sprouts and Cauliflower Soup
Ingredients
Method
- Preheat the oven to 450F.
- Line a large baking sheet with foil and spray with oil. Place cauliflower and halved Brussels sprouts on the baking sheet, drizzle with olive oil, and roast for 25 minutes, tossing halfway until slightly browned.
- Meanwhile, melt the butter in a large sauce pan over low heat, add chopped shallots, and cook until translucent about 5 minutes. Add salt and vegetable broth, then simmer for 5 minutes.
- Remove the roasted vegetables from the oven, reserve about 1 cup for topping, and keep warm. Transfer the rest to the pot and simmer for 2 minutes.
- Transfer the soup in batches to blender and blend until smooth. Serve in bowls topped with reserved roasted vegetables and black pepper.