Easy Roasted Garlic White Bean Soup
Okay, so you know those nights, right? The ones where the clock is ticking, everyone’s hungry, and the thought of actually cooking a full meal feels… well, a bit much? This creamy white bean and lemon pasta bake is my absolute lifesaver for those evenings. It’s honestly one of those recipes that just screams comfort, but in a way that feels surprisingly light and bright, not heavy and sleepy. I remember first throwing this together on a whim a few years back, trying to use up a can of cannellini beans that had been sitting in my pantry, and it turned into an instant family favorite. My husband still raves about it, and the kids, who are usually pretty picky, gobble it up without a fuss. It’s kind of like a super-fancy, ridiculously easy cousin to a mac and cheese, but with way more depth and a zesty kick that just makes you happy. If you love a good pasta dish but want something a little different, something that feels special without requiring a culinary degree, you’ve got to try this. It’s honestly my secret weapon for busy weeknights, and a true testament to how magical simple white beans can be.
What is Creamy White Bean & Lemon Pasta Bake?
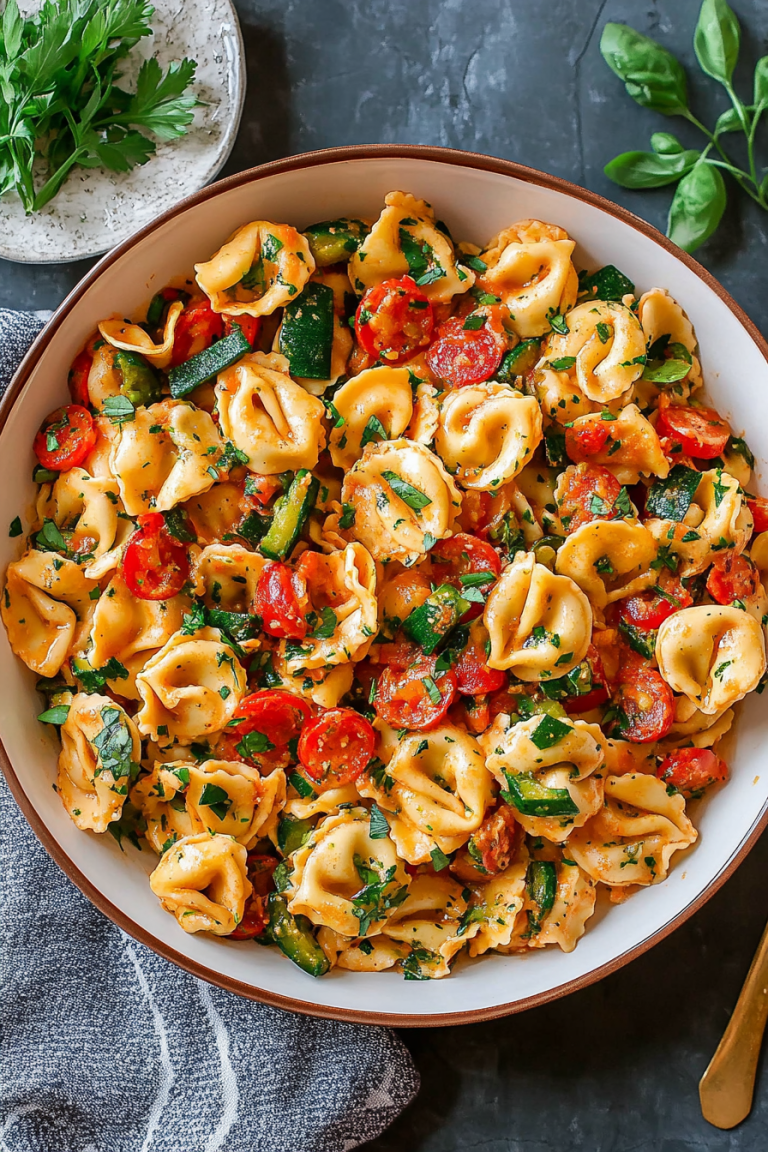
So, what exactly *is* this magical concoction I keep raving about? Think of it as a cozy, baked pasta dish where tender pasta is enveloped in a luxuriously creamy sauce, studded with soft, buttery white beans, and brightened up with a generous squeeze of fresh lemon. The “white bean” part isn’t just for texture; they add this wonderful, subtle earthiness and a protein boost that makes it feel more substantial. It’s baked in the oven until the top is golden and bubbly, creating those irresistible crispy bits around the edges. It’s essentially a one-pan wonder that tastes like you slaved over it for hours, but in reality, it comes together with minimal fuss. The name just captures it perfectly – it’s creamy, it’s built around those humble yet mighty white beans, and the lemon is the star that cuts through the richness and brings everything to life. It’s the kind of dish that feels both incredibly comforting and refreshingly vibrant all at once.
Why you’ll love this recipe?
Honestly, where do I even begin? This recipe has become a staple in my kitchen for so many reasons, and I have a feeling it’s going to become one of yours too. First off, the **flavor** is just out of this world. You get that creamy, comforting base from the sauce, but the lemon juice and zest really sing, cutting through the richness and adding this incredible brightness. The white beans themselves have a mild, slightly nutty flavor that complements everything beautifully. Then there’s the **simplicity**. I’m not kidding when I say this is a lifesaver on busy nights. You can prep most of it while the pasta is cooking, and then it just bakes itself in the oven. No complicated sauces, no endless stirring. It’s the kind of meal that feels impressive but is genuinely achievable for any home cook, even if you’re not exactly a kitchen wizard. Plus, it’s incredibly **cost-efficient**. Canned white beans are super affordable, pasta is a pantry staple, and the other ingredients are common and won’t break the bank. It’s a hearty meal that feeds a crowd without costing a fortune. And the **versatility**! Oh my goodness, you can switch things up so easily. Add some wilted spinach, a sprinkle of red pepper flakes for a little heat, or even some cooked chicken or shrimp. It’s also fantastic the next day – if there are any leftovers, which is a rare occurrence in my house! What I love most about this recipe, though, is that it feels like a warm hug. It’s satisfying, wholesome, and just makes everyone feel good. It’s definitely a step up from your average pasta dish, offering a delightful creamy texture and a bright, zesty finish that’s truly addictive.
How do I make a creamy white bean and lemon pasta bake?
Quick Overview
This pasta bake is all about creating a luscious, creamy sauce that coats every piece of pasta and melds perfectly with tender white beans, all finished with a bright lemon zing. You’ll cook your pasta until it’s just shy of al dente, then toss it with a simple yet flavorful cream sauce, garlic, herbs, and those wonderful white beans. Everything gets layered into a baking dish and baked until golden and bubbly. It’s straightforward, requires minimal active cooking time, and the result is a dish that’s both elegant and wonderfully comforting. Trust me, the hardest part will be waiting for it to come out of the oven!
Ingredients
For the main pasta & beans: For the Pasta & Beans: For the Main Pasta & Beans: For the Main Past
1 pound pasta (penne, rigatoni, or shells work beautifully)
2 (15-ounce) cans cannellini beans, rinsed and drained
2 tablespoons olive oil
3 cloves garlic, minced
1 teaspoon dried Italian seasoning (or a mix of oregano and basil)
Salt and freshly ground black pepper to taste
For the Creamy Sauce:
2 tablespoons butter
2 tablespoons all-purpose flour
2 cups milk (whole milk gives the creamiest result, but 2% works too)
1/2 cup grated Parmesan cheese
1/4 cup fresh lemon juice (about 1 large lemon)
1 tablespoon lemon zest
1/4 cup chopped fresh parsley, plus more for garnish
For the Topping (Optional, but highly recommended!):
1/4 cup panko breadcrumbs
1 tablespoon melted butter
Step-by-Step Instructions
Step 1: Preheat & Prep Pan
First things first, get your oven preheated to 375°F (190°C). While that’s warming up, grab a 9×13 inch baking dish. You don’t need to grease it specifically for this recipe, as the sauce is quite rich, but it’s never a bad idea to give it a quick wipe down just to be sure.
Step 2: Mix Dry Ingredients
In a large bowl, combine your cooked pasta and the rinsed cannellini beans. Drizzle everything with the olive oil, add the minced garlic, Italian seasoning, a good pinch of salt, and plenty of freshly ground black pepper. Give it a good toss to coat everything evenly. This step ensures the beans and pasta are already seasoned before hitting the sauce, which is a little trick I learned that really boosts the overall flavor.
Step 3: Mix Wet Ingredients (Sauce Base)
Now, let’s make that glorious sauce! In a medium saucepan, melt the butter over medium heat. Once it’s melted and a little foamy, whisk in the flour. Cook this mixture, whisking constantly, for about 1 to 2 minutes. This is called a roux, and it’s what will thicken our sauce beautifully. It shouldn’t turn brown, just lightly golden.
Step 4: Combine Wet & Dry
Slowly whisk in the milk, a little at a time, making sure to get rid of any lumps. Keep whisking until the sauce begins to thicken. Once it’s smooth and has reached a nice, coating consistency (it should coat the back of a spoon), stir in the grated Parmesan cheese, fresh lemon juice, and lemon zest. Keep stirring until the cheese is melted and everything is well combined. This is where the magic starts to happen! Taste it and adjust salt and pepper if needed. Stir in the chopped fresh parsley.
Step 5: Prepare Filling
This step is already mostly done as we’ve combined the pasta and beans in Step 2 and the sauce in Step 4. The filling is essentially the combination of the seasoned pasta and beans with the creamy lemon sauce.
Step 6: Layer & Swirl
Pour the creamy lemon sauce over the pasta and bean mixture in the large bowl. Toss everything gently but thoroughly until every piece of pasta and every bean is coated in that luscious sauce. Then, transfer this delicious mixture into your prepared baking dish. Make sure it’s spread out evenly.
Step 7: Bake
For the optional topping, mix the panko breadcrumbs with the melted butter in a small bowl, then sprinkle this mixture evenly over the top of the pasta bake. This adds a delightful crunch that I absolutely love. Place the baking dish into your preheated oven and bake for 20-25 minutes, or until the sauce is bubbling around the edges and the topping (if using) is golden brown. You want to see those lovely golden hues and hear that gentle sizzle – that’s the sound of pure comfort!
Step 8: Cool & Glaze
Once it’s out of the oven, let it rest for about 5-10 minutes. This is crucial! It allows the sauce to set up just a bit, making it easier to serve and preventing it from being too runny. While it’s resting, you can finely chop a little extra fresh parsley for garnish. The “glaze” in this case is the beautiful, bubbly sauce itself, so no separate glaze is needed.
Step 9: Slice & Serve
Cut yourself a generous portion, making sure to get a good mix of pasta and beans. Garnish with that extra fresh parsley. Serve it hot and watch it disappear! This dish is so satisfying on its own, you really don’t need much else.
What to Serve It With
This creamy white bean and lemon pasta bake is pretty much a complete meal in itself, but it also plays wonderfully with a few simple additions. For **breakfast**, I know this might sound unusual, but a small, warm portion the next morning is *divine*. It’s hearty and savory, and the lemon makes it feel less heavy than a typical breakfast. Pair it with a strong cup of coffee, and you’re set for the day. For a delightful **brunch** spread, serve it alongside some fresh fruit salad, maybe some crispy bacon or sausages, and a light quiche. It adds a wonderfully creamy, comforting element to a more elaborate meal. As a more refined **dessert** option (yes, really!), if you happen to have any leftovers, a small, warm bowl can be surprisingly satisfying after a lighter main course. It hits that creamy, savory craving perfectly. And for those ultimate **cozy snacks**, this pasta bake is just perfection. It’s the kind of dish that warms you from the inside out. Serve it with a simple side salad dressed with a light vinaigrette to balance the richness. My family loves having this on a chilly evening with a side of crusty bread for dipping into any leftover sauce – it’s pure bliss!
Top Tips for Perfecting Your Creamy White Bean & Lemon Pasta Bake
I’ve made this dish more times than I can count, and over the years, I’ve picked up a few little tricks that I think make all the difference. When it comes to the **Zucchini Prep**, well, there isn’t any zucchini in this recipe, but if you were thinking of adding some, I’d say grate it finely and make sure to squeeze out as much moisture as possible. For the pasta itself, make sure you cook it until it’s *al dente*, or even a minute less than al dente. It will continue to cook in the oven, and you don’t want mushy pasta! In terms of **Mixing Advice**, the key is to be gentle. You want to coat everything evenly without breaking up the pasta too much. For the sauce, don’t rush the roux; cooking it for a minute or two helps develop its nutty flavor and ensures your sauce is smooth. If your sauce seems a bit too thick, don’t panic! Just whisk in a tablespoon or two of milk until you reach your desired consistency. When it comes to **Swirl Customization**, while this recipe isn’t swirled like a cake, if you were to add something like a pesto or a sun-dried tomato paste for an extra layer of flavor, I’d recommend dolloping it in and then giving it a few gentle swirls with a knife or skewer before baking for a beautiful marbled effect. For **Ingredient Swaps**, if you can’t find cannellini beans, great northern beans or even chickpeas would work well, though they’ll have a slightly different texture and flavor. For the milk, I’ve tested this with a good quality almond milk when I ran out of dairy, and surprisingly, it still came out creamy and delicious! Just be aware that non-dairy milks might alter the flavor profile slightly. For **Baking Tips**, always keep an eye on it. Ovens can be so different, so start checking around the 20-minute mark. If the top is browning too quickly before the sauce is bubbling, you can always loosely tent it with foil. My biggest **Glaze Variations** tip is not to skip the lemon zest! It adds a floral, bright aroma that elevates the entire dish. If you’re not a huge fan of lemon, you can reduce the amount slightly, but I’d advise against leaving it out entirely, as it’s crucial for balancing the creaminess. And for the optional breadcrumb topping, using panko gives it that lovely, airy crispness compared to regular breadcrumbs.
Storing and Reheating Tips
This pasta bake is fantastic for leftovers, which is always a win in my book. If you have any that made it through the initial meal (a rare occurrence at my house!), storing it properly is key. For **Room Temperature** storage, it’s best to let it cool down completely before covering it. Once cooled, you can cover the baking dish tightly with plastic wrap or transfer portions into airtight containers. It should be fine at room temperature for about 2 hours, but I always recommend refrigerating leftovers sooner rather than later for food safety. **Refrigerator Storage** is where this dish really shines for leftovers. Once completely cooled, cover the baking dish tightly with foil or plastic wrap, or transfer portions to airtight containers. It will stay delicious in the fridge for up to 3-4 days. The flavors actually meld even more overnight, making it taste even better on the second day! For **Freezer Instructions**, if you want to make a double batch to freeze for a future busy week, it freezes really well. Let it cool completely, then cover the baking dish tightly with a couple of layers of plastic wrap and then a layer of aluminum foil. Alternatively, portion it into freezer-safe containers. It should last in the freezer for up to 2-3 months. When you’re ready to use it, thaw it overnight in the refrigerator. For reheating, **Glaze Timing Advice** is simple: it’s best to reheat the pasta bake *without* the optional breadcrumb topping if you’ve frozen it, as the topping can get soggy. Once thawed, you can reheat it in a 350°F (175°C) oven until heated through, usually about 20-30 minutes. If the top looks a little dry, you can add a splash of milk or cream before reheating. If you’re just reheating a single portion, the microwave is your friend – cover it loosely and microwave on medium power until heated through, stirring halfway.
Frequently Asked Questions
Final Thoughts
So there you have it – my beloved creamy white bean and lemon pasta bake. It’s a recipe that truly embodies what I love about cooking: simple ingredients coming together to create something so incredibly comforting and delicious. It’s proof that you don’t need fancy techniques or exotic items to make a meal that feels special. The humble white bean, often overlooked, is the star here, providing creaminess and substance without being heavy. The bright lemon cuts through that richness, making every bite feel fresh and vibrant. I really hope you give this one a try. It’s become such a go-to for me, a real hug in a dish that always makes my family happy. If you love this recipe and are looking for more comforting, yet surprisingly easy meals, you might also enjoy my One-Pan Lemon Herb Roasted Chicken or my Speedy Creamy Tomato Soup. They share that same spirit of simple, flavorful, feel-good food. I can’t wait to hear how yours turns out and what you think! Please leave a comment below with your thoughts, any variations you tried, or even just to say hello. Happy baking!
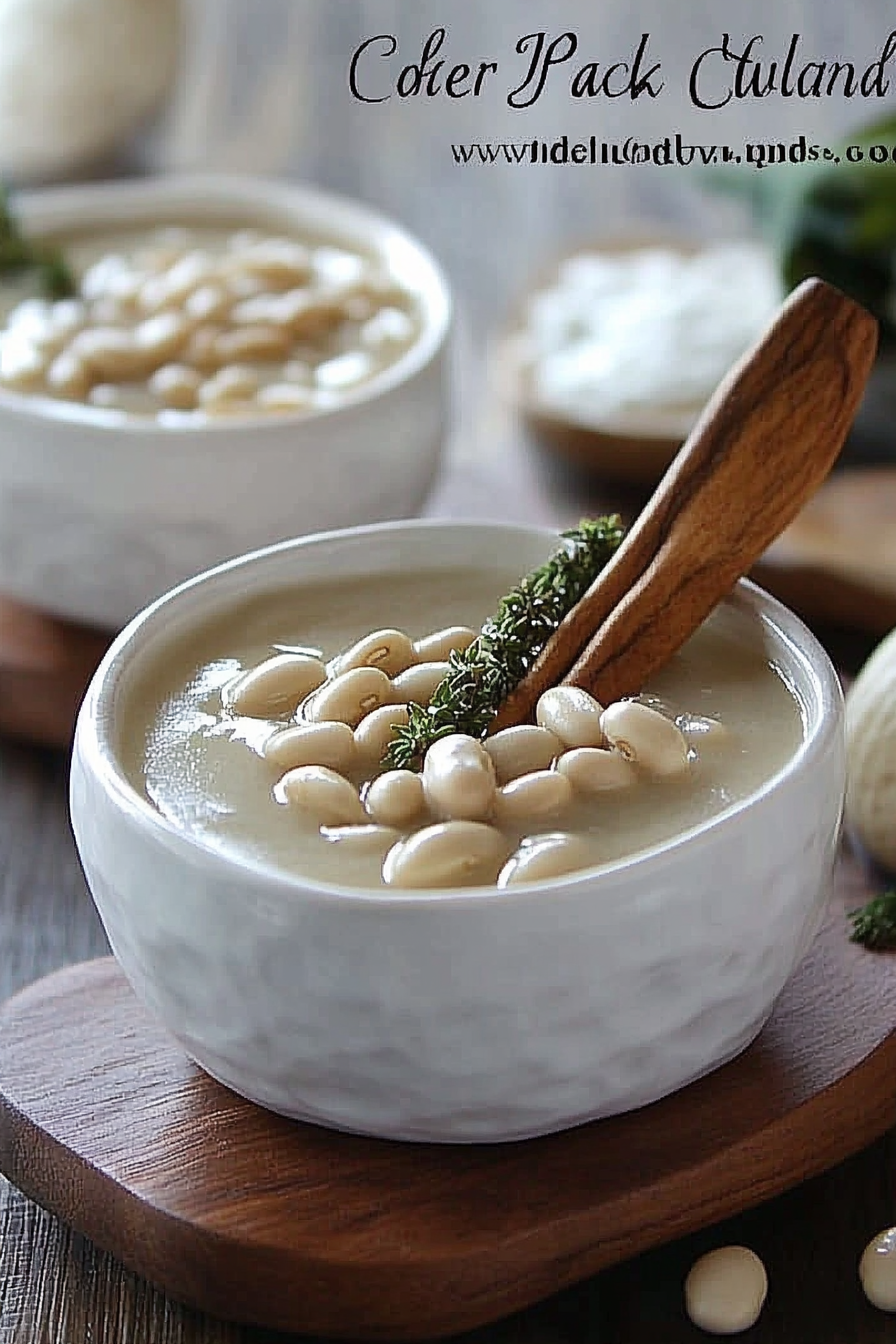
Creamy White Bean and Garlic Soup
Ingredients
Method
- Place beans, 3 cloves of garlic, water, and sage leaves in the crockpot; cover and cook on HIGH for 4 hours until beans are soft. Do not add salt at this stage.
- Meanwhile, preheat oven to 400°F. Place remaining garlic cloves in the center of aluminum foil, cover with olive oil and a pinch of salt, then seal tightly and roast in the oven for 25-30 minutes until soft and golden.
- Remove roasted garlic from oven and set aside until beans are cooked. When beans are soft, add bouillon and stir until dissolved. Transfer some beans, liquid, and roasted garlic to a blender and blend until smooth.
- Pour blended mixture back into the crockpot. Repeat blending remaining beans and garlic until desired creamy texture is achieved. Use an immersion blender if available for convenience.
- Taste and adjust salt and pepper as needed. Serve hot, garnished with fresh sage leaves and whole roasted garlic cloves if desired.