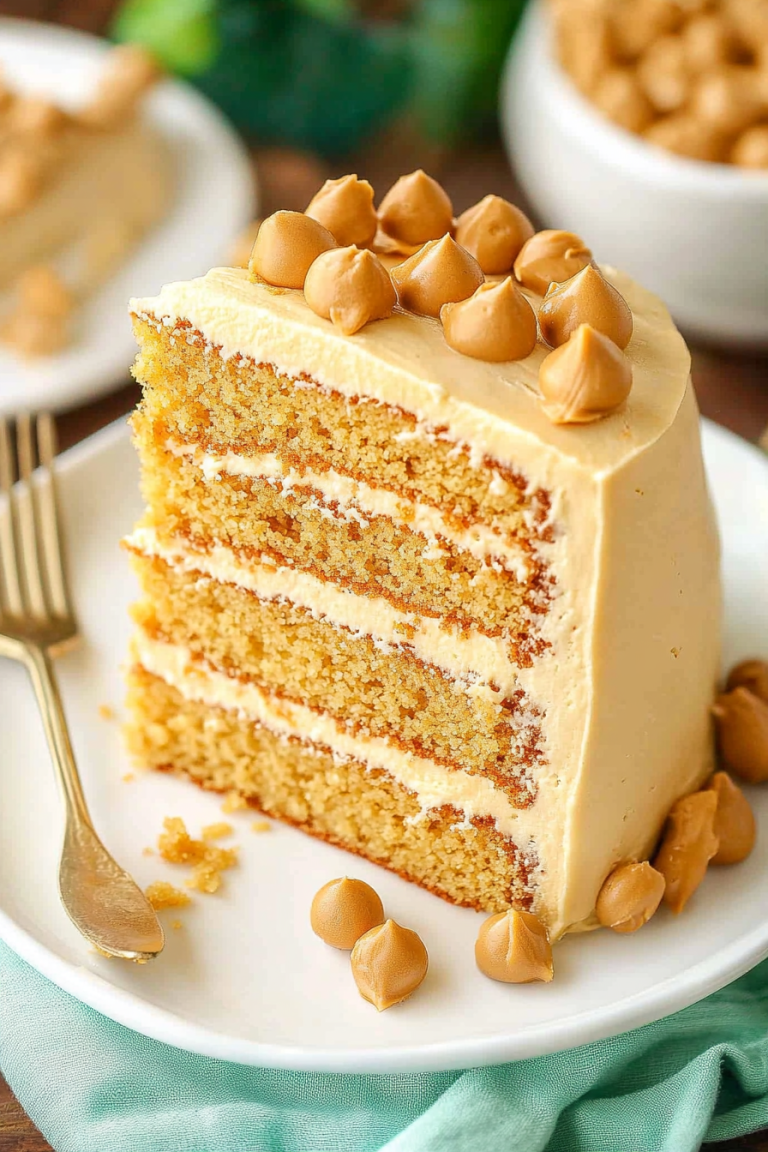
Bright Spring Cake Tutorial: Easy Daffodil Design
I still remember the first time I saw a daffodil-inspired cake—it was at a spring family gathering, and honestly, it took my breath away. The vibrant yellow blooms made entirely out of buttery frosting sitting atop a simple vanilla sponge. That day, I vowed I’d learn how to make my own daffodil cake, and believe me, it’s become one of my most-loved dessert traditions. It’s funny how something so cheerful-looking can be so easy to whip up. My kids ask for this all the time, especially when spring’s about to arrive—I guess it’s my little edible tribute to nature’s most cheerful flower. Plus, it’s a hit with guests—everyone’s always asking for the recipe. Trust me, once you master this, it’ll be a standout centerpiece for birthdays, brunches, or just a rainy Sunday afternoon treat. It’s simple, pretty, and tastes just as wonderful as it looks. Ready to bring a little sunshine to your kitchen? Let’s go!
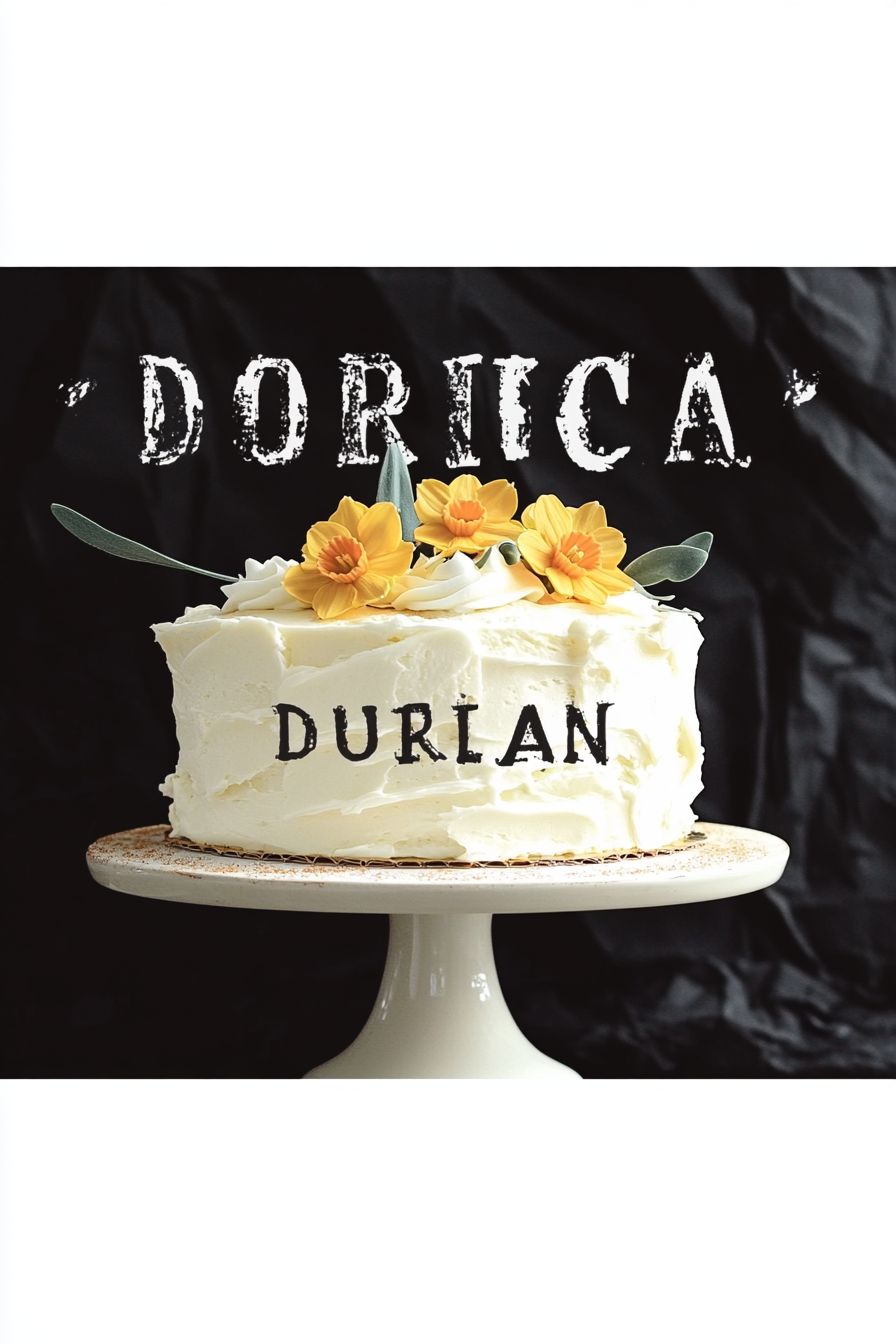
What is a daffodil cake?
Think of daffodil cake as a cheerful, celebration-worthy dessert that combines a soft, moist vanilla sponge with bright, floral-inspired decorations. Its name comes from the lovely yellow flowers that bloom in early spring—hence, the vibrant, sunny aesthetic. But it’s not just about looks—this cake has a tender crumb, a subtly sweet flavor, and a playful swirl of frosting that mimics the delicate petals of a daffodil. It’s essentially a cake that brings the outdoors inside, making any occasion feel like a breath of fresh spring air. The beauty of daffodil cake is that it’s approachable for home bakers—no fancy tools or hard-to-find ingredients. If you’re new to cake decorating, don’t sweat it; the charm is in the simplicity. With just a few basic ingredients and a little patience, you can create a masterpiece that’ll wow everyone at the dessert table.
Why you’ll love this recipe?
What I love most about this daffodil cake is how it turns a simple vanilla sponge into something so special and uplifting. The flavor is light, buttery, with just enough sweetness to satisfy a craving, but not so much that it’s overwhelming. The baking process is straightforward—I’ve tested this recipe a dozen ways, and it never fails. Plus, it’s budget-friendly, usually requiring ingredients I already keep on hand, like eggs, flour, and sugar. The real magic, though, is in the decoration. Those little yellow frosting flowers look intricate but are surprisingly easy to make once you get the hang of piping. It’s perfect for springtime celebrations, Mother’s Day, or even just a cozy family dessert on a rainy Tuesday. And trust me, once you see how pretty it looks on the platter, you’ll be tempted to turn every cake into a floral masterpiece. The versatility is another win—I’ve even tried swapping out the vanilla for lemon zest or adding a few blueberries for a fruity twist, and it worked beautifully.
My kids always ask for seconds because, let’s face it, it not only tastes good but it’s just so darn pretty. This cake also brings back memories of weekend baking sessions with my mom, where we’d spend hours decorating and tasting. That warm, nostalgic feeling makes every slice taste even sweeter. If you’re looking for a show-stopper that’s simple enough for a beginner, but pretty enough to impress, then this daffodil cake is your new go-to. Honestly, once you make it, you’ll find yourself coming back to it over and over—not just for the looks, but for the comfort and cheer it brings to your table.
How do I make a daffodil cake?
Quick Overview
This daffodil cake is surprisingly easy to make, even if you’re new to baking or decorating. The process involves baking a fluffy vanilla sponge, preparing a smooth buttercream, and then piping edible yellow flowers that resemble daffodils on top. You don’t need fancy tools—just a piping bag with a star tip and a steady hand. The best part? The whole thing comes together in under two hours, and the decorating can be as simple or as elaborate as you like. It’s a forgiving recipe that’s perfect for making ahead or customizing for different occasions. Once you taste that first slice, with its tender crumb and sweet floral look, you’ll see why it’s become a family favorite in my kitchen.
Ingredients
For the Main Batter:
- 2 cups all-purpose flour (I like unbleached for better flavor)
- 1 ½ teaspoons baking powder (fresh, please!)
- ½ teaspoon salt
- ¾ cup unsalted butter, softened (trust me, good butter makes a difference)
- 1 cup granulated sugar
- 3 large eggs
- 1 teaspoon vanilla extract
- 1 cup whole milk (or almond milk for a dairy-free version—works well!)
For the Filling:
- 1 cup butter, softened
- 3-4 cups powdered sugar (adjust for sweetness and texture)
- 1 teaspoon vanilla extract
- 2-3 tablespoons milk or cream
- Yellow food coloring (or natural alternatives like turmeric, but food coloring gives the most vivid petals)
For the Glaze:
- ½ cup powdered sugar
- 1-2 teaspoons lemon juice or milk (adjust for thickness)
- Optional: a few drops of yellow or green food coloring for extra pop
Step-by-Step Instructions
Step 1: Preheat & Prep Pan
Heat your oven to 350°F (175°C). Grease your cake pan generously, and line it with parchment paper for easy removal. I usually use a 9-inch round pan—it’s perfect for a tall, impressive cake. Plus, I always double the recipe if I want to make a layered cake—more layers mean more flowers to decorate!
Step 2: Mix Dry Ingredients
In a bowl, sift together the flour, baking powder, and salt. This step keeps your cake light and airy. I do this first to make sure everything’s evenly distributed. Set aside for now.
Step 3: Mix Wet Ingredients
In a stand mixer or with a hand whisk, beat the softened butter and sugar until pale and fluffy—it takes about 3-4 minutes. Add eggs one at a time, mixing well after each addition. Stir in vanilla. I’ve tested this with a splash of almond extract, and it’s surprisingly good—adds a little nuttiness if you’re feeling fancy!
Step 4: Combine
Gradually add the dry ingredients to the wet mixture, alternating with the milk—start and end with flour. Mix just until combined; overmixing makes the cake dense, and nobody wants that. The batter should be smooth and pourable but not runny. It’s a good idea to scrape the sides halfway through to get everything evenly mixed.
Step 5: Prepare Filling
For the frosting, beat butter until creamy. Gradually add powdered sugar, vanilla, and milk, mixing on low at first, then increasing speed. If you want the flowers to really pop, tint a portion of the frosting with yellow food coloring. I like to make a batch of just yellow frosting for the petals and a little plain white or pale yellow for the center—the contrast really makes it special.
Step 6: Layer & Swirl
Pour the batter into your prepared pan, smoothing the top. Bake for about 30-35 minutes, or until a toothpick inserted in the center comes out clean. Let it cool in the pan for 10 minutes, then transfer to a wire rack to cool completely. Once cooled, slice and spread a thin layer of frosting between layers if you’re making a layered cake. Otherwise, just frost the top and sides.
Step 7: Bake
While your cake is baking, get your piping bag ready. Fit it with a star tip—this is what makes those beautiful petals. Practice piping some flowers on a piece of parchment first if you’re new to decorating. When the cake is cool, pipe daffodil-like blossoms all around, starting from the center and swirling outward. For a natural look, vary the size of the flowers and make some with longer petals.
Step 8: Cool & Glaze
Once decorated, if you want a shiny finish, mix your glaze ingredients and drizzle it over the flowers. Let it set for about 10-15 minutes. The glaze adds a lovely, slightly tangy sweetness that balances the buttery frosting and brings everything together.
Step 9: Slice & Serve
Use a serrated knife to cut clean slices—waiting until the cake’s fully cooled is key to avoiding crumbs everywhere. I love serving this with a cup of tea or a glass of sparkling wine for brunch. For an extra touch, sprinkle some edible gold dust on the petals—I swear, it looks fancy but is so easy to do.
What to Serve It With
This bright, cheerful daffodil cake is a natural for brunch tables, spring picnics, or garden parties. For breakfast, pair it with a light coffee or herbal tea—trust me, it’s gentle enough to start your day. During brunch, add fresh fruit like strawberries or blueberries on the side—vivid colors complement those edible flowers beautifully. As a dessert, a scoop of vanilla ice cream or a dollop of whipped cream adds contrast and richness, especially if you add a hint of lemon zest to the frosting. If you’re just craving a cozy snack, a slice with a glass of cold milk feels nostalgic and satisfying. I often set this on the center of my family table during Easter or Mother’s Day brunch—it’s a crowd-pleaser and the kids love helping decorate the top with extra flowers or little sprinkles. Its visual appeal makes it an instant conversation starter, and I’ve even used leftover petals of a real daffodil to inspire the frosting design!
Top Tips for Perfecting Your Daffodil Cake
Over the years, I’ve learned a few tricks that make this cake come out just right every single time. First off, don’t skimp on butter and eggs—rich, fresh ingredients make all the difference in the crumb. When you’re mixing the wet ingredients, make sure they’re at room temperature; it helps everything blend smoothly and results in a lighter batter. For those little flowers, practice piping on parchment until you’re comfortable—perfect petals aren’t about perfection but about natural variation, which makes it charming. When tinting your frosting, start with a few drops of color and build gradually—you can always add more, but it’s hard to lighten once it’s too dark. About baking, keep an eye on it after 30 minutes, especially if your oven runs hot; every oven is a bit different. To test doneness, insert a toothpick in the center—if it comes out clean, you’re golden. The glaze makes a lovely finish, but I’ve also experimented with dusting powdered sugar or adding a drizzle of honey just before serving. Keep the decorated cake covered loosely with plastic wrap if you’re not serving immediately; it preserves the frosting without smudging the flowers. And remember, sometimes the best part of this process is just relaxing and having fun—no stress, only flowers!
Storing and Reheating Tips
This cake keeps surprisingly well—just store it properly to enjoy leftovers. If you plan to eat it the same day, keep it covered at room temperature for up to two days. I like to place it on a cake dome or under a glass cover—it keeps everything fresh and prevents the flowers from drying out. For longer storage, pop it in the fridge—wrap the cake loosely with plastic wrap or store in an airtight container. It’s best to bring it back to room temperature before serving—the frosting looks softer and the flavors come alive. If you want to freeze, double-wrap the whole cake or slices in plastic wrap, then place in an airtight container for up to three months. Thaw overnight in the fridge, then let it sit at room temperature for about 30 minutes before serving. If you’ve added a glaze, it’s best to add it fresh; but if you must, just re-glaze gently after thawing. Overall, this cake’s beauty is in its freshness, but a well-wrapped piece can happily sit for a few days, making it perfect for party leftovers or make-ahead treats.
Frequently Asked Questions
Final Thoughts
This daffodil cake has truly become a symbol of spring in my home. Its cheerful look, combined with a soft, buttery crumb and just the right hint of floral sweetness, makes it a showstopper that’s surprisingly easy to pull off. I love that it’s versatile—you can customize the colors, add different flavors, or even make it gluten-free. The best part? The smile on my kids’ faces when I bring this out, or the way my guests light up when they see those tiny piped flowers. Baking it is almost therapeutic, and decorating it feels almost like creating little edible flowers in the kitchen. If you’ve never tried piping flowers before, don’t worry—the secret is just giving it some gentle pressure and having fun with it. I promise, once you see the beautiful, sunlit petals appear, you’ll be hooked. Happy baking! I can’t wait to hear how your daffodil cake turns out—be sure to share your photos and your own decorating tips. Enjoy every slice!
Daffodil Lemon Cake
Ingredients
Method
- Preheat oven to 350°F. Grease and flour a 9-inch round cake pan.
- In a large bowl, whisk together flour and sugar. Add melted butter, eggs, milk, lemon zest, and lemon juice. Mix until smooth.
- Pour batter into prepared pan and bake for 40-45 minutes, until a toothpick inserted comes out clean.
- Allow cake to cool completely before frosting.
- Decorate with edible daffodils or lemon slices as desired.