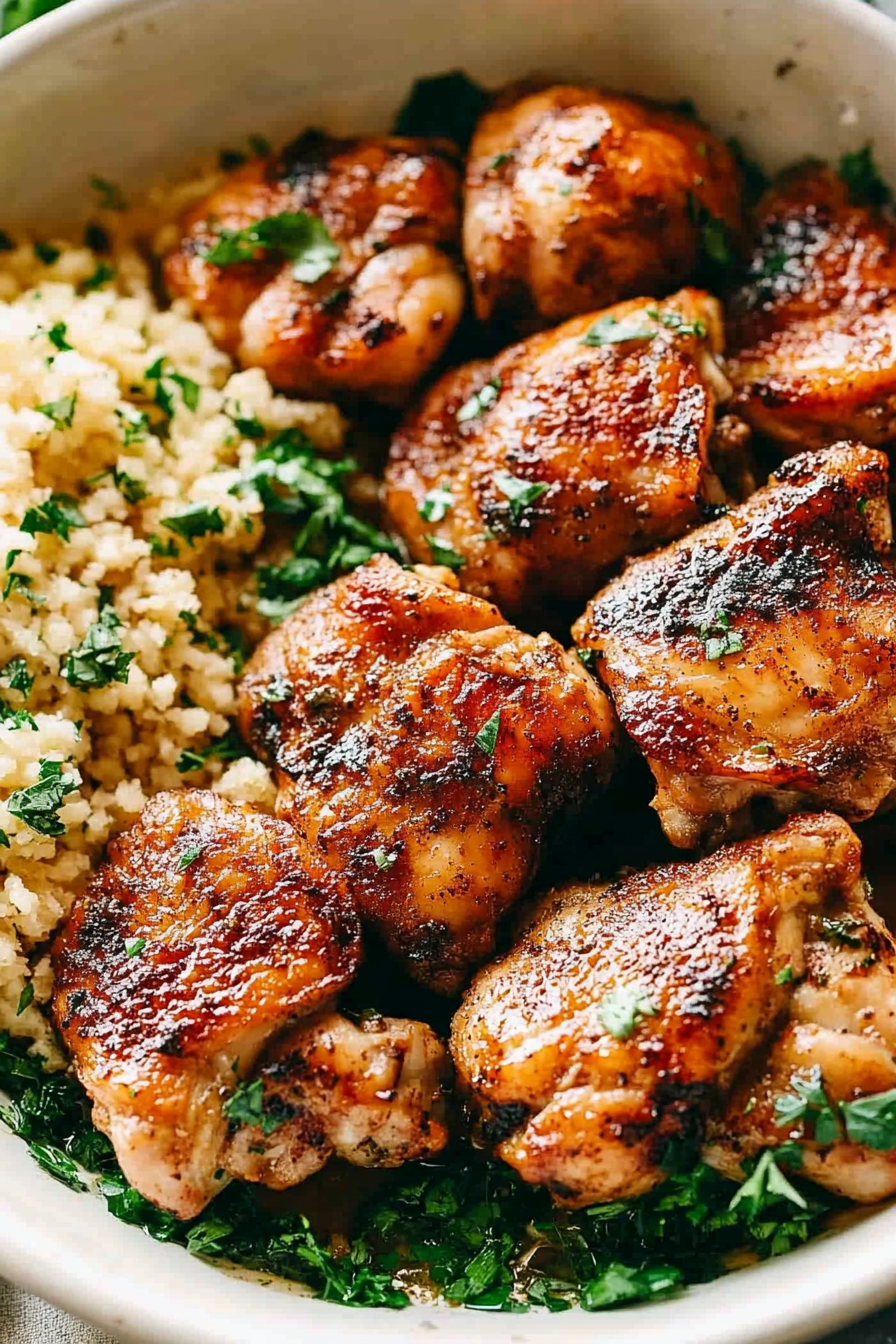
Easy Pan-Seared Chicken Thighs Recipe
There’s just something about chicken thighs — they’re like the warm blanket of the poultry world. Juicy, tender, and so flavorful that I always do a little happy dance when I pull them out of the oven. I remember one particular evening, after a busy day, I shoved some thighs in the oven with a sprinkle of herbs and a splash of olive oil, and the smell alone brought everyone to the table before even sitting down. It’s funny how simple ingredients can turn into such a showstopper, right? This recipe has become my go-to when I want something comforting but effortless. My kids ask for it all the time, and honestly, I don’t blame them — it’s that good. Plus, chicken thighs are pretty forgiving, so even if you’re a kitchen newbie, you’re gonna nail this. Trust me — this dish is a lifesaver on busy nights or when you just wanna feel cozy in your own kitchen. Let’s get cooking!
What is chicken thigh?
Think of chicken thighs as the rich, flavorful part of the chicken that’s often overlooked in favor of the leaner breast. They’re essentially the muscle part of the leg, and it’s loaded with natural fat, which makes everything they touch taste like heaven. The name “thighs” is pretty straightforward — it’s the lower part of the chicken’s leg, and in culinary terms, it’s celebrated for its moistness and ability to soak up flavors like a sponge. Whether roasted, braised, or grilled, chicken thighs are incredibly versatile. They’re perfect for those nights when you want something indulgent but fuss-free. I love that they stay juicy even if you forget about them for a few extra minutes in the oven — that’s my kind of peace of mind! Think of them as the comfort food of poultry, and honestly, I can’t imagine cooking without them. They make everything taste better, especially when seasoned with a few staple ingredients you probably already have.
Why you’ll love this recipe?
What I love most about this recipe is how it hits all the right notes — it’s bursting with flavor, super easy to pull together, and friendly to most budgets. The smell alone will make your kitchen feel like a cozy bizzeria! The secret here is simple: season generously, sear like you mean it, and finish in the oven — that’s all. No complicated marinades or fancy ingredients needed. Plus, chicken thighs are forgiving, so even if you’re not a seasoned pro, you’ll end up with a perfectly crispy outside and tender, juicy meat inside. I’ve made this dozens of times and each time, it’s just as satisfying as the first. What’s even better? You can switch up the seasonings to suit your mood or what’s in the pantry — garlic and paprika? Sure. Lemon and herbs? Absolutely. It’s a blank canvas that never disappoints.
And I’ve got to say, these chicken thighs make a great weeknight dinner but also shine at weekend gatherings. Pair them with a crisp salad, some roasted veggies, or even mashed potatoes — it’s all about making it your own. They’re also budget-friendly, which I always appreciate because, let’s face it, great ingredients shouldn’t break the bank. Honestly, I recommend keeping a pack in the fridge for whenever you need a quick, satisfying meal — they’re just so versatile.
How do I make chicken thighs that make me smile?
Quick Overview
This recipe is what I call “set it and forget it” — sear the chicken thighs skin-side down in a hot skillet until crispy, then toss in some garlic and herbs for flavor, and finish cooking them in the oven. It’s a straightforward process that results in irresistibly crispy skin and juicy, tender meat. The best part? You get a flavor punch without any fuss, and cleanup is a breeze since you’re starting on the stovetop and finishing in the oven. Trust me, once you try this, it’ll become a staple in your recipe arsenal, especially on nights when you want something flavorful but don’t want to spend hours in the kitchen.
Ingredients
For the Chicken Thighs: For the Thighs: For the Thighs: For the Thighs: For the Thighs:
– 4-6 bone-in, skin-on chicken thighs (or skinless if you prefer leaner) — I swear by organic or pasture-raised for the best flavor.
– Salt and freshly ground black pepper
– 2 tablespoons olive oil or vegetable oil
– 4 cloves garlic, minced (or more if you love garlic!)
– 1 teaspoon smoked paprika (for that beautiful smoky flavor)
– 1 teaspoon dried thyme (or rosemary if you like a piney aroma!)
– Optional: a squeeze of fresh lemon for brightness
For the Garnish & Extras:
– Fresh herbs like parsley or cilantro — sprinkle on top before serving
– A splash of balsamic vinegar or chicken broth to deglaze the pan and boost flavor
Step-by-Step Instructions
Step 1: Preheat & Prep Pan
Set your oven to 400°F (200°C). Pat the chicken thighs dry with paper towels — this step is key to getting crispy skin. Season generously with salt and pepper on both sides. Heat your skillet over medium-high heat, add the oil, and let it shimmer. That’s when you toss in the thighs skin-side down and listen to that satisfying sizzle. Don’t overcrowd the pan — work in batches if needed. This initial sear is what creates that gorgeous crispy exterior we all love.
Step 2: Mix Dry Ingredients
In a small bowl, mix the smoked paprika, thyme, and a pinch of salt. This blend is what gives the chicken that irresistible aroma and depth of flavor. You’ll sprinkle this mixture over the skin side of the thighs before searing — trust me, it makes a difference!
Step 3: Mix Wet Ingredients
If you’re using garlic and lemon, have them ready nearby. Mince the garlic finely so it melts into the pan during cooking. You can also toss in a splash of olive oil or chicken broth once you flip the chicken to keep it moist and flavorful.
Step 4: Combine
Once the skin is golden and crispy (about 5-7 minutes), flip the thighs over and add garlic and herbs to the pan. This is the moment to pour in any liquids, like broth or lemon juice, to infuse even more flavor. Then, transfer the whole skillet to the oven. Many pans are oven-safe — if yours isn’t, transfer everything to a baking dish. It’s like a warm hug — the oven will do all the work for perfect, juicy thighs.
Step 5: Prepare Filling (Optional)
If you want to turn this into more of a one-pan meal, throw in some sliced vegetables or potatoes around the chicken, season them well, and let everything cook together. It’s a great way to make a full dinner with minimal cleanup.
Step 6: Layer & Swirl
If you’re feeling fancy, after searing, you can swirl the pan to create a beautiful marbling effect or use a spoon to baste the chicken with its flavorful juices. Trust me, these little touches make a difference!
Step 7: Bake
Bake in the oven for 20-25 minutes, or until the internal temperature hits 165°F (75°C). If you’re unsure, a quick juice-test by piercing the thickest part works wonders. The skin should be crisp, and the meat tender and juicy.
Step 8: Cool & Glaze
Let the chicken rest for a few minutes after coming out of the oven — this helps seal in the juices. If you want, brush on a little honey or glaze of your choice for extra sweetness or shine. The heat of the chicken will make the glaze sticky and glossy — yum!
Step 9: Slice & Serve
Serve hot with a sprinkle of fresh herbs on top. Pair with your favorite sides, and watch everyone ask for seconds. Trust me, nothing beats the aroma of crispy, flavorful chicken thighs—my go-to cozy dinner.
What to Serve It With
Since this dish has a beautiful savory richness, it pairs well with lots of different sides. For a quick breakfast twist, I love serving these with scrambled eggs and toasted bread — kind of like a lazy brunch. In the afternoon, a crisp green salad or roasted vegetables balances the hearty meat perfectly. If you’re aiming for a cozy dinner, mashed potatoes or buttered noodles are divine companions, soaking up all those flavorful juices. I even love tossing leftover chicken into a grain bowl with hummus and veggies for a casual lunch. And of course, fresh bread to mop up the pan juices? Always a yes. This dish really adapts to whatever you crave or have on hand, making it a staple in my house for good reason.
Top Tips for Perfecting Your Chicken Thighs
With a bit of practice, you’ll master this in no time. Here are my top tips, straight from my kitchen:
- Zucchini Prep: If you decide to add zucchini slices or other veggies, remember to salt them lightly and let them drain for a few minutes. Moisture is the enemy of crispy skin, after all!
- Mixing Advice: Be careful not to overmix your seasoning or marinade. A gentle sprinkle of herbs and spices is enough — let the high heat and searing do their magic.
- Swirl Customization: For visual interest, use a toothpick or skewer to create gentle marbled swirls in the meat or even add a few slices of lemon or fresh herbs in during baking for bursts of flavor.
- Ingredient Swaps: No paprika? No problem. Smoked paprika adds a smoky depth, but sweet paprika works fine too. Want extra zest? Toss in some chili powder or cumin for a smoky kick.
- Baking Tips: For extra crispy skin, broil the thighs for 2-3 minutes at the end, but keep a close eye to prevent burning. And don’t forget the resting step — it’s like giving the juices a chance to settle, making every bite juicy!
- Glaze Variations: Honey, balsamic reduction, or even a splash of soy sauce can make your chicken shimmer and add a new flavor dimension. Brush it on during the last 5 minutes of baking or right before serving.
Honestly, I’ve learned a lot from making these so many times — like how to perfectly sear without burning, or how a squeeze of lemon at the end brightens everything up. Each tweak makes the dish better in my eyes, so don’t hesitate to experiment. That’s part of the fun!
Storing and Reheating Tips
This dish keeps really well, which makes leftovers a real treat. Keep the cooked chicken in an airtight container in the fridge for up to 3 days. To reheat, do so gently in the oven at 350°F (175°C) or in a skillet over low heat — avoid the microwave if you can, as it can make the skin less crispy. If you glazed the thighs, reheat uncovered so the glaze stays glossy and doesn’t get watery. For freezing, let the chicken cool completely, wrap tightly in foil or a freezer-safe bag, and stash for up to a month. Thaw in the fridge overnight, then reheat as described. Just a quick tip: if you’re reheating after freezing, add a splash of chicken broth or water to help keep things moist. The aroma and flavor might be slightly different, but trust me — it’s still fantastic. This way, you can enjoy a quick, satisfying meal even on your busiest days.
Frequently Asked Questions
Final Thoughts
Honestly, these chicken thighs have earned a permanent spot in my dinner rotation. They’re forgiving, insanely tasty, and make the kitchen smell like a cozy restaurant. The crispy skin, the juicy meat, the versatility — I could go on and on. Whether you’re cooking for a family dinner or just craving something satisfying after a long day, this recipe checks all the boxes. Plus, once you get the hang of searing and oven finishing, every batch becomes easier and more delicious. I encourage you to try different seasonings, experiment with glazes, and make it your own. It’s so rewarding to nail a dish that feels like a warm hug — and your loved ones will thank you for it. Happy cooking, and I can’t wait to hear how yours turns out! Drop a comment below or share a photo — I love seeing your creations!
Garlic Herb Chicken Thighs
Ingredients
Method
- Season the chicken thighs with salt, black pepper, garlic powder, thyme, and rosemary.
- Heat olive oil in a skillet over medium-high heat.
- Add chicken thighs to the skillet and cook for 6-7 minutes on each side until golden brown and cooked through.
- Remove from heat and let rest for a few minutes before serving.