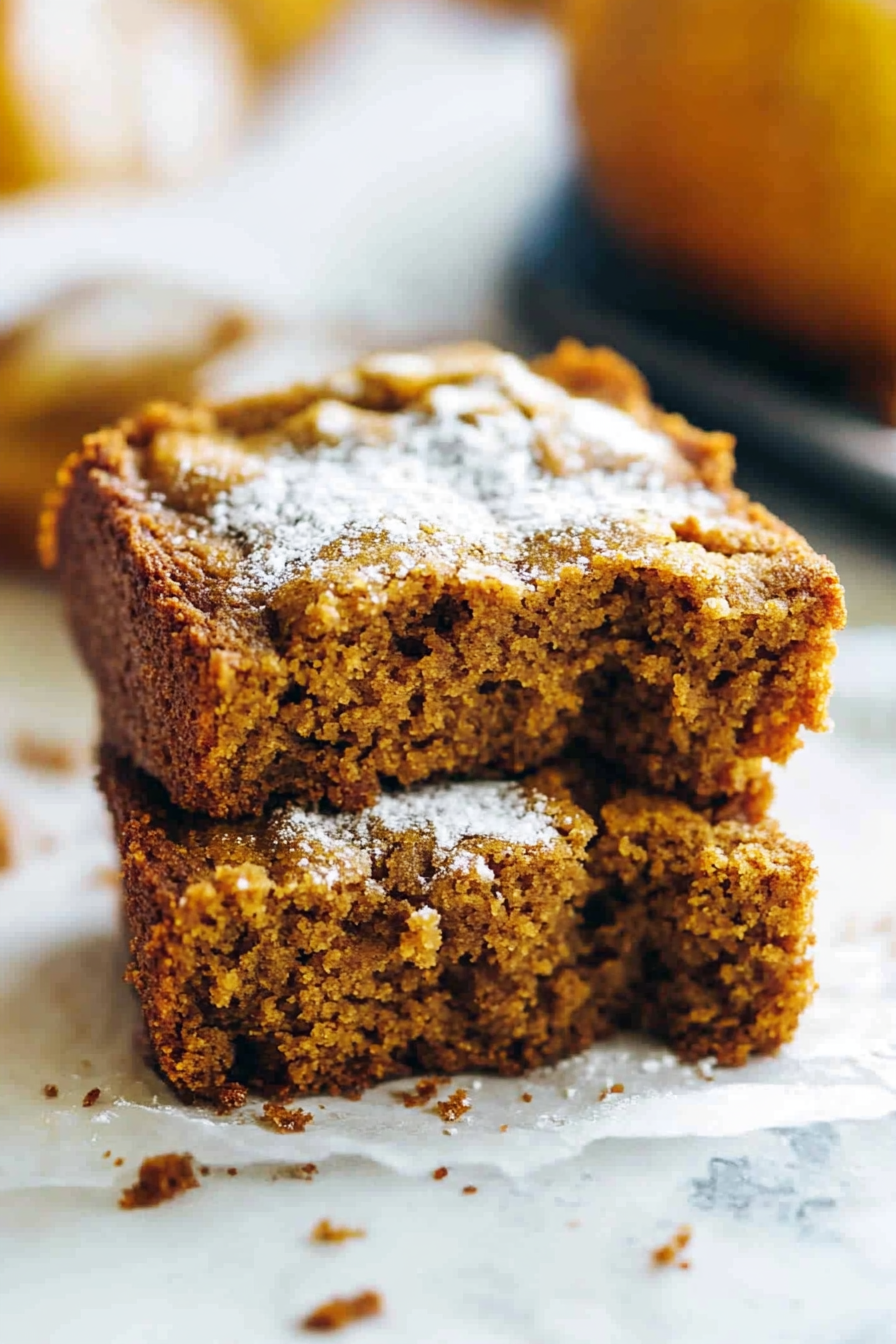
Easy Autumn Spice Bread Recipe
There’s something about the smell of fresh-baked pumpkin bread wafting through my kitchen that immediately feels like a warm hug in the middle of a busy day. I remember my grandma making this when I was little—her kitchen always smelled like cinnamon and sugar, and I’d be eagerly sneaking bites while still warm. Over the years, I’ve tinkered with her recipe, trying to make it just a tad richer and more moist, and trust me, this pumpkin bread has become a household staple. It’s the kind of treat that’s just perfect when you want something sweet but not overly heavy, especially with a steaming cup of coffee or tea. Honestly, I could tell you I’ve made it dozens of times—and I have—and every single batch disappears in minutes. It’s like that secret family love in every slice. Whether you’re craving a cozy breakfast, a quick snack, or an easy dessert, this pumpkin bread is your new best friend. So, let’s get into it—I can’t wait to share all my tips!
What is pumpkin bread?
Think of pumpkin bread as a moist, spiced loaf that’s a little bit cake, a little bit bread, and completely comforting. It’s essentially a quick bread—meaning no yeast, no kneading, just straightforward mixing and baking—that harnesses the natural sweetness and earthiness of pumpkin. Its origins aren’t exactly clear, but it’s become a beloved fall tradition across many families. The name itself, “pumpkin bread,” hints at the focus: tender, flavorful, and topped with warm spices like cinnamon, nutmeg, and cloves. What makes it truly special is how versatile it is—you can enjoy it plain, dusted with powdered sugar, or topped with a smear of cream cheese. My favorite part? Warming up a slice on chilly mornings or sharing it with friends over coffee. This bread is friendly, forgiving, and endlessly customizable—so don’t be surprised if you find yourself making it all year round!
Why you’ll love this recipe?
Honestly, I keep coming back to this pumpkin bread because it’s just one of those recipes that’s easy to fall in love with. What I love most about this is the incredible flavor—rich, spiced, and not overly sweet, it hits all the right notes. The smell alone makes the house feel cozy and festive; it’s a total crowd-pleaser and the first thing my kids ask for when the weather turns cooler. Plus, it’s a breeze to make—no complicated techniques or fancy gadgets needed. Just whisk, fold, pour, and bake. It’s also budget-friendly since all the ingredients are staples I usually keep on hand: canned pumpkin, flour, sugar, and spices. And, the best part? This bread is versatile enough for breakfast, a quick snack, or even a light dessert. You can dress it up with nuts, dried cranberries, or even chocolate chips if you want to elevate it further. Trust me on this one—once you try it, it’ll become a family favorite.
How do you make pumpkin bread?
Quick Overview
This pumpkin bread recipe is as straightforward as it gets. You start by mixing your dry ingredients—flour, spices, baking soda—then whisk together your wet ingredients—pumpkin, eggs, oil, and sugar. Gently fold everything together just until combined. The secret is not to overmix, or your bread can get dense. I like to prepare my filling (more on that later), swirl it in, and then bake until it’s perfectly moist and golden. A quick bake in the oven, and you’re rewarded with a warm, fragrant loaf that’s just begging to be sliced. It’s honestly one of those recipes that makes you feel like a culinary wizard with very little effort, and the results? Just divine. So, preheat that oven, gather your ingredients, and let’s make something wonderful!
Ingredients
For the Main Batter:
- 1 3/4 cups all-purpose flour (I always opt for a good quality brand, just for that extra fluffiness)
- 1 teaspoon baking soda
- 1 teaspoon ground cinnamon
- 1/2 teaspoon ground nutmeg
- 1/4 teaspoon ground cloves
- 1/2 teaspoon salt
- 1 cup sugar (regular or brown sugar works beautifully)
- 1/2 cup vegetable oil or melted butter (I tested both—both work, but butter gives it a richer flavor)
- 2 large eggs, at room temperature
- 1 1/4 cups canned pumpkin (homemade or canned—either works great)
- 1 teaspoon vanilla extract
For the Filling:
- 4 oz cream cheese, softened
- 1/4 cup powdered sugar (add more for sweetness if desired)
- 1 teaspoon vanilla extract
- A handful of chopped pecans or walnuts (optional but adds great texture)
For the Glaze:
- 1 cup powdered sugar
- 2-3 teaspoons milk or cream
- Half a teaspoon vanilla or cinnamon (for extra flavor)
Step-by-Step Instructions
Step 1: Preheat & Prep Pan
I always start by preheating my oven to 350°F (175°C). Then, I grease my loaf pan generously with butter or non-stick spray and line it with parchment paper if I want an easy release—that’s my little secret for neat slices! Keep the pan ready so you’re not scrambling during mixing.
Step 2: Mix Dry Ingredients
In a large bowl, whisk together the flour, baking soda, spices, and salt. I do this first to make sure everything is evenly distributed—especially the spices, so every bite has that cozy flavor. It’s a quick step but makes a big difference in how evenly the bread bakes.
Step 3: Mix Wet Ingredients
In a separate bowl, whisk together the sugar, oil, eggs, pumpkin, and vanilla. The mixture should be smooth, slightly frothy, and fragrant—trust me, your kitchen will smell amazing at this point! I’ve tested using maple syrup instead of sugar, and it added a subtle depth, but regular sugar works perfectly.
Step 4: Combine
Pour the wet mixture into the dry ingredients and gently fold with a spatula just until there are no streaks of flour. Be careful not to overmix—that’s how you end up with a dense loaf. Stir just enough so everything looks moist and combined.
Step 5: Prepare Filling
While the batter is coming together, beat the softened cream cheese with powdered sugar, vanilla, and chopped nuts if you’re using them. It should be creamy but firm enough to dollop—kind of like a thick frosting. I love adding nuts here for that little crunch in the middle.
Step 6: Layer & Swirl
Pour half of the batter into your prepared loaf pan. Drop spoonfuls of the cream cheese mixture on top, then cover with the remaining batter. Use a toothpick or skewer to swirl gently—think of it as marbling a cake. Don’t overdo it—you want a nice pattern, not a muddy swirl. Just enough to see some pretty streaks when you slice it!
Step 7: Bake
Pop it into your preheated oven and bake for about 55-65 minutes. Check for doneness by inserting a toothpick into the center; if it comes out clean, you’re good! Keep in mind, ovens vary—my friend’s oven takes closer to 70 minutes, so patience is key. Cover with foil if it browns too quickly on top but isn’t cooked inside.
Step 8: Cool & Glaze
Let the bread cool in the pan for at least 15 minutes, then transfer to a wire rack. I like waiting until it’s just warm to pour on the glaze—this way it seeps into all those nooks and crannies. Mix powdered sugar with milk and vanilla, and drizzle generously. If you want more spice, a dusting of cinnamon or nutmeg on top works beautifully!
Step 9: Slice & Serve
Use a sharp serrated knife for clean slices—this bread is moist and flaky, so gentle is better. I love serving it slightly warm, maybe with a dollop of whipped cream or a smear of butter. Honestly, it’s just irresistible. And leftovers? Well, they’re gone in no time—my secret is to wrap it tightly and enjoy it over the next few days, if it lasts that long!
What to Serve It With
This pumpkin bread is so versatile, I like to think of it as a culinary chameleon. For breakfast, I slice it thin and serve it with a robust cup of coffee or a spicy chai latte. It’s amazing toasted with a little butter melting into all those soft crumbs. My kids love it as an afternoon snack—slightly warmed with a glass of milk or hot cocoa. That little cream cheese swirl gives it a tangy layer that balances the sweetness, making it almost like a dessert bread. If I’m hosting brunch, I’ll add a dusting of powdered sugar on top or a spoonful of whipped mascarpone. At dinner parties, I like to serve it cut into small squares with a drizzle of caramel or honey for a more decadent touch. I’ve also made mini muffins with leftover batter (bake at 350°F for about 20 minutes)—perfect for school lunches or on-the-go snacks. Whatever the occasion, this pumpkin bread always feels cozy and special—just like a hug in every bite.
Top Tips for Perfecting Your Pumpkin Bread
Over the years, I’ve learned a few tricks that make this bread turn out perfectly every time. First, be sure to drain excess moisture from your grated zucchini if you choose to add it—I tested it and it made the bread a little too wet, so squeezing out that extra water is a lifesaver. When mixing the wet ingredients, don’t overwhisk; just combine until smooth—overmixing can make the bread dense and tough. Swirling the filling is a game-changer—you want pretty, visible streaks, not a muddy swirl, so go slow and use a gentle hand. If you want to jazz things up, try substituting apple sauce for oil—this makes it even moister and a bit lighter. For a gluten-free version, swap out the flour with a blend of almond and oat flour, but expect a slightly denser crumb. When baking, position your rack in the center, and keep an eye on the top—cover with foil if it browns too fast. I first thought I needed a super hot oven to get that golden exterior, but I’ve found 350°F works perfectly without burning. And the glaze? Trust me, a quick mix of powdered sugar with a splash of vanilla and milk creates the perfect drizzle—it’s addictive! I’ve added a pinch of cinnamon to mine for extra warmth, and that little dash elevates the entire loaf.
Years of baking this have taught me patience, and that sometimes a shorter or longer baking time depends on your oven’s quirks. Always test with a skewer or toothpick—it’s the ultimate trick to knowing when it’s just right. And don’t forget, this bread is best enjoyed the day it’s made, but if you need to store it, keep it airtight and reheat slightly before serving for that just-baked experience.
Storing and Reheating Tips
This pumpkin bread keeps surprisingly well, especially if you wrap it tightly. If I’m planning to eat it within two days, I just leave it covered on the counter, wrapped in foil or plastic wrap—just make sure it’s not humid or hot, or it might get a little sticky. For longer storage, I pop it into an airtight container or zipper bag and refrigerate for up to a week. Just note that refrigeration can sometimes dry out the bread, so I recommend reheating slices in the microwave for about 10-15 seconds until warm. For truly leftovers, the freezer is your friend—wrap the loaf tightly in plastic wrap and then foil, and it’ll keep for up to three months. When ready to enjoy, let it thaw at room temperature or warm it slightly in the oven. I’ve found that adding the glaze right before serving keeps it fresh and shiny. Speaking of glaze, if the bread has been stored and you want that glossy finish, a quick re-dusting with powdered sugar or a fresh glaze will do wonders. The key is to keep it moist, flavorful, and appealing each time you serve it.
Frequently Asked Questions
Final Thoughts
If you’re looking for a cozy, dependable recipe that fills your house with warm spices and happiness, this pumpkin bread is calling your name. Over the years, I’ve tested it with various tweaks, but what stays constant is how much everyone loves the comforting aroma and soft crumb. It’s a peaceful, almost meditative process to mix, swirl, and bake—an act of love that someone special will surely notice. Plus, it’s endlessly adaptable: add chocolate chips, swap out nuts, or even incorporate a swirl of caramel or cream cheese for a fancy twist. Every time I bake it, I remember how baking a loaf can turn a simple day into a celebration. So, take your time, enjoy the process, and don’t be surprised if this becomes a favorite in your home too. Happy baking, and I’d love to hear how yours turns out—drop a comment below or share your variations! Cooking is about joy, and this pumpkin bread is pure, heartfelt joy in every slice.
Pumpkin Bread
Ingredients
Method
- Preheat the oven to 350 degrees F. Whisk eggs, oils, and sugar until smooth. Add pumpkin, milk, and water, whisk until combined.
- Stir in flour, baking soda, salt, and cinnamon until just combined.
- Divide batter into two 9x5 inch loaf pans lined with parchment paper. Bake for 35 minutes, then brush with melted butter, sprinkle with turbinado sugar, and bake an additional 5-10 minutes until golden and a toothpick comes out clean.
- Cool slightly before slicing. Store in refrigerator.