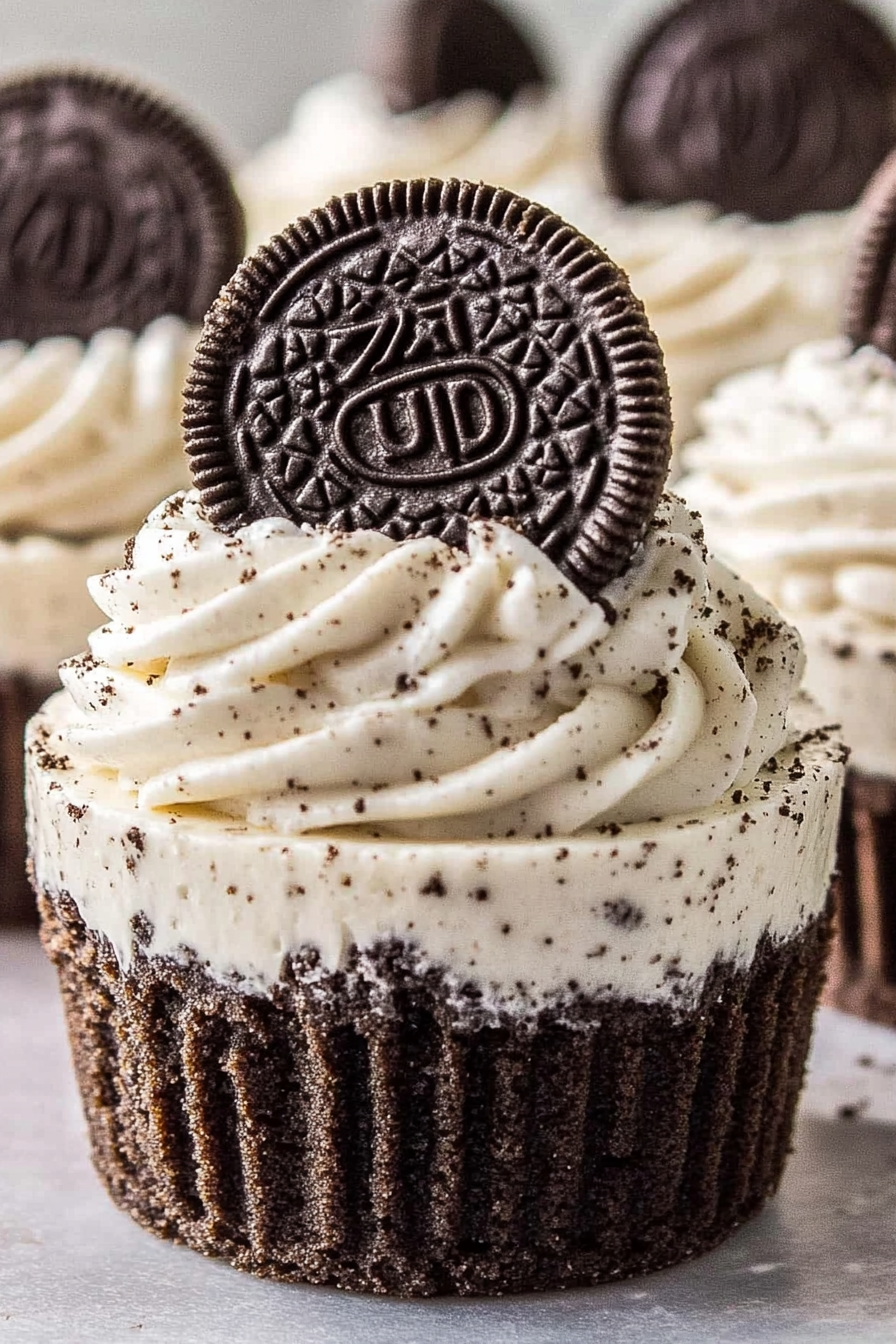
Tiny Oreo Cheesecakes How to Make Them
There’s just something about these Oreo cheesecakes that make me smile every single time. Maybe it’s the nostalgic crunch of those beloved cookies, or the way they melt into a silky, rich cream cheese filling—like a little piece of childhood wrapped up in a fancy dessert. I always do this when I need something quick, impressive, and downright addictive. My kids ask for this all the time, and honestly, it’s become my go-to when friends pop by unexpectedly or I want to impress at a potluck. What I love most about these Oreo cheesecakes is how easily they come together—no fancy equipment or long baking hours needed. Plus, you can customize the toppings or fillings to match whatever mood you’re in. Trust me, once you try this recipe, it’ll be your new family classic, too—perfect for those nights when you want something sweet but don’t feel like breaking out the mixer for a triple-layer like a bakery. It’s comfort, convenience, and a whole lot of chocolatey goodness all in one tiny little slice!
What is oreo cheesecake?
Think of Oreo cheesecakes as the divine crossover between your favorite chocolate cookies and the creamy, tangy world of cheesecake. It’s essentially a super indulgent dessert where crushed Oreos form the crust and are folded into the filling, giving each bite a delightful crunch and chocolatey punch. The name says it all—“Oreo” because, well, that’s the star of the show, and “cheesecake” because underneath that crunchy, cookie-laden top is a creamy, smooth, slightly tangy cheese base. The best part? It’s a no-bake dessert! I love tossing this together on busy nights or when I want something that looks fancy but is totally laid-back. It’s like taking a shortcut to chocolate heaven without sacrificing flavor. Think of it as a mashup that makes everyone’s taste buds sing—kind of like how a perfect brownie and a cheesecake get together for coffee on a Sunday morning. And honestly, no one ever guesses how easy it is to pull off!
Why you’ll love this recipe?
What I love most about these Oreo cheesecakes is how ridiculously versatile they are. They’re a total crowd-pleaser—and I don’t say that lightly. The flavor profile is rich, creamy, with that signature Oreo crunch in every bite; it’s a perfect balance of sweet and tangy. Plus, it’s simple to make, which means you don’t need any fancy skills or hours standing in the kitchen. Just a handful of ingredients, a little patience, and bam—you’ve got yourself a show-stopping dessert. Budget-wise, it’s super friendly—I always keep Oreos and cream cheese on hand because they’re cheap and last forever. And the best part? You can customize it so easily. Want to make it vanilla, add some peanut butter, or top it with fresh berries? Go for it! I’ve tested this with almond milk and, surprisingly, it made it even creamier. It’s a lifesaver on busy nights when I want something homemade but don’t want to slave away. This dish also travels well, so it’s fantastic to bring to family gatherings or backyard barbecues—you can make it days ahead, and it only gets better with time.
How do you make Oreo Cheesecakes?
Quick Overview
If there’s one thing I’ve learned from making these countless times, it’s that they come together much faster than a baked cheesecake. No oven needed—just a sturdy pan, a mixing bowl, and a bit of patience for chilling. You’ll crush Oreos for the crust, create a luscious cream cheese filling, layer the two in a pan, and then chill until set. It’s a straightforward process that yields impressively professional-looking desserts in under an hour of active prep, plus chilling time. I always say, this is a perfect recipe for when you’re short on time but still want to surprise everyone with something rich, chocolatey, and totally addictive.
Ingredients
What is the recipe for the main cheesecake?
– 24 Oreo cookies (regular or double-stuffed, your choice)—pulled apart or crushed into fine crumbs.
– 16 oz (450g) cream cheese, softened—full fat for the best flavor.
– 1 cup (200g) granulated sugar—trust me, don’t skimp on this.
– 1 teaspoon vanilla extract—pure vanilla makes a difference.
– 1 cup (240ml) heavy cream or full-fat milk—tested both, love them equally in this recipe.
– 2 tablespoons lemon juice or apple cider vinegar—just a touch for tang.
For the Filling:
– 8 more Oreos chopped up for mixing in
– Optional: mini chocolate chips, peanut butter swirl, or caramel for extra flavor
For the Glaze:
– ½ cup chocolate ganache or melted chocolate—smooth, shiny, and decadent
– Optional: whipped cream or sprinkles for topping
Step-by-Step Instructions
Step 1: Preheat & Prep Pan
Start by lining a 9-inch springform pan with parchment paper or lightly greasing it. No need to preheat the oven because this is a no-bake magic trick. Just get your pan ready to go—they’ll thank you when it’s time to serve!
Step 2: Mix Dry Ingredients
Crush your Oreos into fine crumbs—either blitz in a food processor or put them in a sealed bag and crush with a rolling pin. Mix the crumbs with a little melted butter or melted coconut oil if you want it extra rich. Press this mixture firmly into the bottom of the pan to form a sturdy crust. Chill it in the fridge while you prepare your filling.
Step 3: Mix Wet Ingredients
In a large bowl, beat your softened cream cheese until smooth and creamy—this only takes a couple of minutes with a hand mixer or a vigorous whisk. Add in sugar, vanilla, and lemon juice, blending until well combined. Then, whip your heavy cream until soft peaks form. Gently fold the whipped cream into your cream cheese mixture—this keeps it fluffy and light!
Step 4: Combine
Incorporate the chopped Oreos and any extras like mini chocolate chips or peanut butter. Be gentle—you want even distribution without losing all that airy volume from your whipped cream.
Step 5: Prepare Filling
Scoop the filling onto your crust, smoothing it out with the back of a spoon or offset spatula. Add a few extra Oreos on top, pressing them in slightly for a professional look. For a marbled effect, spoon some of the remaining filling on top and swirl with a toothpick or skewer.
Step 6: Layer & Swirl
Layer the filling evenly. For a prettier presentation, do a quick swirl pattern on top before chilling. This is where patience pays off—I promise, it looks gorgeous once set.
Step 7: Bake
Actually, you don’t bake! Just pop it in the fridge for at least 4 hours—overnight is even better. The cold enhances the texture and flavor. I’ve taken it out after just a few hours and still loved the consistency, but waiting ensures the flavors meld beautifully.
Step 8: Cool & Glaze
If you’re using chocolate glaze, gently heat your chocolate until smooth, then pour over the chilled cheesecake. Let it set in the fridge for another 15-20 minutes. The smell alone when you warm the chocolate is enough to make anyone’s mouth water. If you prefer a no-glaze version, a dusting of powdered sugar or some fresh berries works beautifully too.
Step 9: Slice & Serve
Use a hot knife to cut neat slices—dip it in warm water and wipe after each cut for clean edges. Serve straight from the fridge with a dollop of whipped cream or a few extra Oreos on top. This is best enjoyed chilled to keep it firm and creamy. Trust me, it disappears in minutes at my house!
What to Serve It With
These Oreo cheesecakes scream for a little extra indulgence, whether it’s a casual family dessert or a fancy dinner. For breakfast or brunch, try pairing a slice with a hot coffee or a glass of cold milk. The combo of creamy cheesecake and a crisp bottom crust is perfect with a light latte or even a cold brew in the summer. When I serve this at brunch, I like to add a few fresh berries and a sprinkle of crushed Oreos for a beautiful, colorful presentation—my kids think it’s the prettiest thing ever! For a simple dessert after dinner, just add a drizzle of caramel or extra chocolate sauce, maybe a sprig of mint if you’re feeling fancy. It’s also great as a casual snack—let it set in the fridge, cut into squares, and serve with glasses of cold milk. Honestly, I’ve made this for birthday parties, holiday gatherings, and even just because—the smiles are always priceless. It’s comfort food at its best, and everyone leaves with a happy, satisfied belly.
Top Tips for Perfecting Your Oreo Cheesecake
Over the years, I’ve picked up quite a few tricks to make this recipe even better. For one, don’t skip chilling—these cheesecakes really need time to set and develop that creamy texture. Use full-fat cream cheese; it’s worth it for the richness. When crushing Oreos, I’ve learned that a food processor creates the most even crumbs, but I’ve also used a sealed bag and a rolling pin—both work just fine. If you want a crust that’s extra crunchy, add some crushed graham crackers or chopped nuts into your crust mixture—trust me, it adds a nice dimension. When folding whipped cream into your filling, do this gently to keep it light. I also tested using cookie crumbs in the filling—big mistake if you overmix, they can sink and mess with the texture. As for toppings, go wild! Chocolate ganache is my go-to because it’s glossy and rich, but white chocolate, fruit compote, or even marshmallow fluff add fun variations. And don’t forget to check your oven—oh wait, no oven! Just patience, a little chill time, and this dessert will be a showstopper every single time. I’ve learned from my mistakes—like rushing the chilling process or overmixing—and now I always get perfect slices with that beautiful, smooth top and crunchy crust. It’s those little details that make every batch better than the last!
Storing and Reheating Tips
This cheesecake keeps surprisingly well, which is a blessing when I want to prepare it ahead of time. Cover it tightly with plastic wrap or store in an airtight container in the fridge for up to 3 days. If you want to keep the topping pristine, wait until just before serving to add the glaze or extra toppings. Freezing works perfectly—wrap it tightly in plastic wrap and then foil, and it can stay good for up to a month. Just thaw in the fridge overnight before slicing. I’ve learned that if you freeze it, the texture stays great, but I always add the glaze fresh after thawing to keep that shiny, luscious look. Reheating isn’t necessary—this is best served cold. That said, if it’s been in the fridge for a couple of days and the cheese feels a little stiff, let it sit at room temp for 10 minutes before slicing—trust me, it makes a difference. For leftovers, I recommend slicing into individual portions and keeping in a covered container—makes snacking a breeze! And when you do serve it again, just give the top a quick sprinkle of Oreos or a drizzle of chocolate syrup for that extra-wow effect.
Frequently Asked Questions
Final Thoughts
If you’ve stuck around this long, I hope I’ve convinced you that Oreo cheesecakes are the perfecting balance of effortless and indulgent. They aren’t just a dessert—they’re a way to share happiness in every slice. Whether it’s a casual weeknight treat or the star of your next gathering, these cheesecakes never disappoint. I love how adaptable they are—sweet, tangy, crunchy, smooth—everything you want in a memorable dessert. Plus, they’re a hit with kids and adults alike, which makes them a real keeper. So go ahead, grab those Oreos, whip up that cheesecake, and let the magic happen. And seriously, I can’t wait to hear how yours turns out—share your variations and stories below! Happy baking, friends—and get ready for the looks of amazement when you serve this!
Chocolate Peanut Butter Cup Cheesecake
Ingredients
Method
- Preheat the oven to 325°F. Combine graham cracker crumbs and melted butter, press into a springform pan's base. Bake for 10 minutes.
- In a large mixing bowl, beat cream cheese and sugar until smooth. Mix in eggs one at a time. Fold in melted chocolate and peanut butter until well combined.
- Pour filling over the prepared crust. Place mini peanut butter cups evenly on top. Bake for 50 minutes.
- Cool to room temperature, then refrigerate for at least 4 hours or overnight before serving.