Velvet Chocolate Cheesecake Bars Recipe
I still remember the first time I tasted something that felt like a dream and a comfort all at once — it was a velvety, slightly tangy, decadently rich red velvet cheesecake. Honestly, it was like discovering a new way to enjoy my favorite childhood red velvet cake, but with a creamy, smooth twist. Since then, this recipe has become my go-to when I want to wow friends or just indulge myself after a long week. It’s surprisingly simple, yet it looks so elegant on the table, with that perfect swirl of crimson and white. My kids ask for it all the time—say it’s their absolute favorite dessert—and I love how it feels special but doesn’t require hours in the kitchen. Plus, the smell when baking? Oh, it’s pure holiday magic. This one’s a lifesaver on busy nights or when you want to celebrate something sweet without turning on the oven for hours. Trust me, once you make this, it’ll become a beloved staple in your dessert lineup, just like it is in mine.
What is Red Velvet Cheesecake?
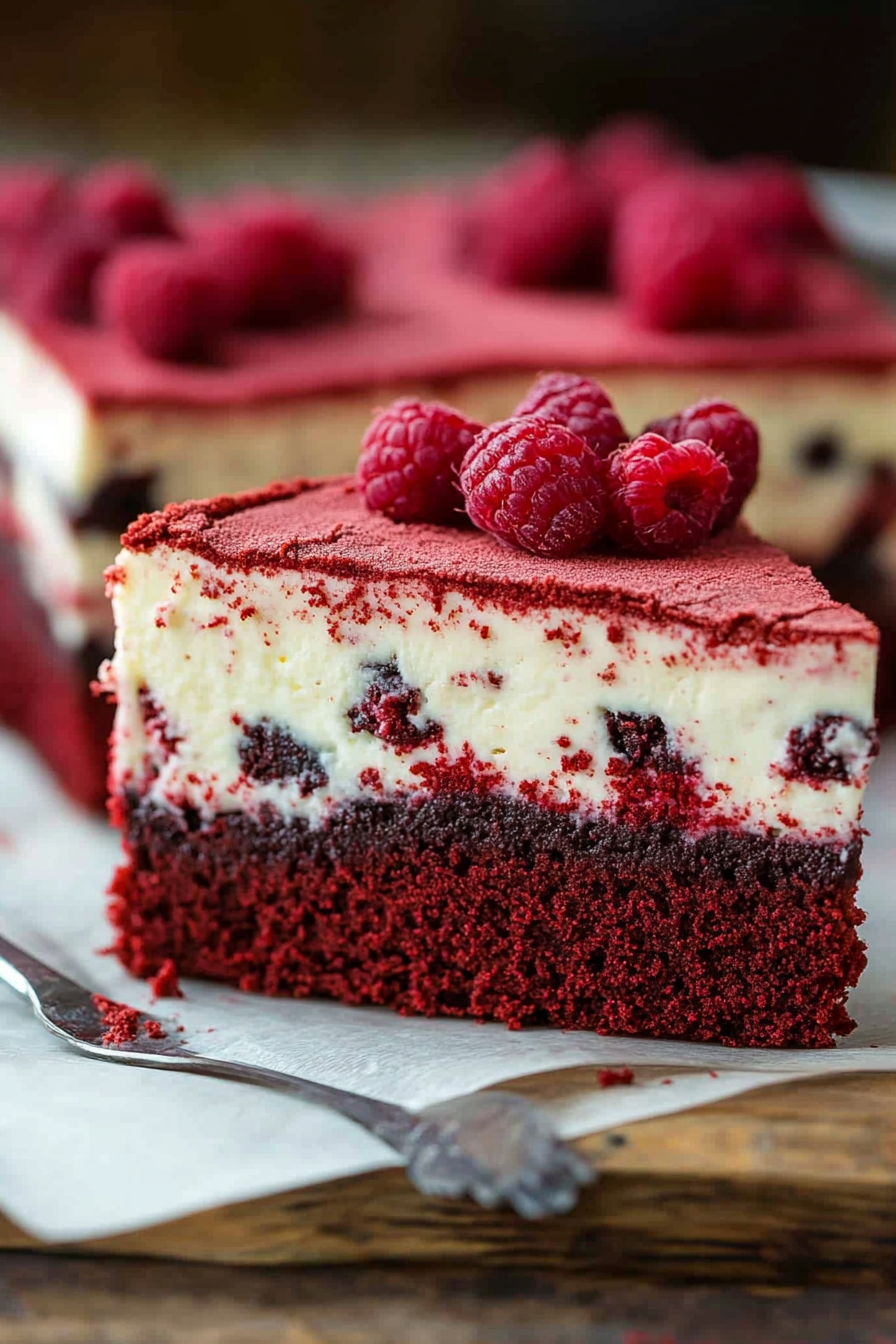
Think of a bold, striking red velvet cake — but turned into a luscious, dense cheesecake with a hint of tanginess that makes it all the more irresistible. It’s essentially a marriage of two beloved desserts: the vibrant, cocoa-rich red velvet cake and the silky, rich cheesecake. The “red velvet” part brings that signature deep crimson color and subtle cocoa flavor, while the cheesecake adds that creamy, smooth texture that just melts in your mouth. The stunning visual swirl of red and white on top makes it feel like a festive centerpiece, perfect for holidays, birthdays, or just because you deserve something special. Its name, “red velvet,” nods to that luxurious, velvety crumb of the classic cake, but here, it’s elevated with a cheesecake twist that’s guaranteed to wow everyone. Think of it as the elegant cousin of your regular cheesecake — a little more vibrant, a lot more fun, and utterly delicious.
Why you’ll love this recipe?
What I love most about this red velvet cheesecake is how it manages to be fancy and approachable all at once. The flavor? Pure indulgence. You get that signature tang of cream cheese balanced perfectly with the rich cocoa and a hint of vanilla— and that beautiful splash of red makes every bite feel like a celebration. The best part? It’s surprisingly easy to make. No over-complicated ingredients or fancy techniques, just straightforward prep followed by a gentle bake. I’ve made this countless times, and each time it turns out just as stunning and delicious. Plus, it’s budget-friendly since you probably already have most of these ingredients in your pantry. This cheesecake is versatile too — serve it chilled for a decadent finale after dinner, or slice it into smaller pieces for a fancy brunch treat. Honestly, what I love most about this is how it’s become a family favorite, and my kids ask for it as their birthday cake replacement. It’s become a kind of tradition now, and honestly, I don’t mind one bit. The aroma coming from the oven when it’s baking alone is enough to make everyone smile. And trust me, once you taste that first bite, you’ll understand why I keep making it — it’s just that good.
How do I make Red Velvet Cheesecake?
Quick Overview
This recipe combines a rich, velvety crust with a vibrant, creamy filling, layered with a swirl of deep red color that screams celebration. The process is pretty straightforward: you start with a simple graham cracker crust, whip up a tangy cream cheese batter flavored with cocoa and vanilla, then fold in bright red food coloring, and bake it gently. I love how easy it is to create those stunning swirls, and once it’s baked and cooled, a quick glaze or dusting adds the perfect finishing touch. This cheesecake is perfect to prepare ahead of time, and the longer it sits, the better the flavors meld. It’s truly a showstopper that uses common ingredients but tastes like a masterpiece.
Ingredients
For the Main Batter:
• 2 cups graham cracker crumbs — I love using honey graham crackers for extra flavor but you can swap in digestive biscuits if you’re outside the US.
• 1/2 cup melted unsalted butter — to bind everything together.
• 2 tablespoons sugar — just enough to sweeten the crust.
For the Filling:
• 24 oz (about 3 cups) cream cheese, softened — softness is key, so leave it out a few hours before or microwave it for 10 seconds.
• 1 cup granulated sugar — balancing the tang.
• 3 large eggs — for richness and structure.
• 1 teaspoon vanilla extract — for that warm aroma.
• 2 tablespoons unsweetened cocoa powder — for that classic red velvet flavor.
• Red gel food coloring — a little goes a long way, trust me.
For the Glaze (optional but beautiful):
• 1/2 cup sour cream
• 2 tablespoons powdered sugar
• A splash of vanilla
Step-by-Step Instructions
Step 1: Preheat & Prep Pan
Set your oven to 325°F (160°C). Line a 9-inch springform pan with parchment paper and lightly grease the sides. This makes it so much easier to remove the cheesecake cleanly — no sticking, no fuss.
Step 2: Mix Dry Ingredients
Combine the graham cracker crumbs, sugar, and melted butter in a bowl. Mix until all the crumbs are evenly coated and resemble wet sand — this is what gives your crust its tender crunch.
Step 3: Mix Wet Ingredients
In a large bowl, beat the softened cream cheese until smooth and creamy. I do this on low speed so it doesn’t get too airy. Then, add sugar, vanilla, and cocoa powder, mixing just until incorporated. It should be silky and slightly fluffy, but don’t overmix — a little lumps are okay, they’ll melt in the oven.
Step 4: Combine
Beat in the eggs one at a time, making sure each is fully blended before adding the next. Add a few drops of red gel food coloring — I start with a little and keep adding until it’s a deep, vibrant red. Remember, the color intensifies as it bakes, so don’t go overboard at first.
Step 5: Prepare Filling
Pour about two-thirds of the batter into your crust-lined pan. Then, drop spoonfuls of the remaining batter on top. Use a toothpick or a skewer to swirl the two together, creating that beautiful marbled effect. Don’t overdo it; you want the swirl to be visible but not completely mixed.
Step 6: Layer & Swirl
For a more dramatic look, alternate dollops of batter— one plain, one with more red dye — and swirl gently. It will look like a painter’s canvas, and the visual payoff is totally worth it.
Step 7: Bake
Place in the oven and bake for about 55-60 minutes, or until the edges are set but the center still jiggles slightly. If you gently tap the pan, it should have a slight wobble. Keep an eye on it after 50 minutes — ovens vary! Once baked, turn off the oven and let it cool inside for an hour. This prevents cracks and allows the cheesecake to set perfectly.
Step 8: Cool & Glaze
Remove the cheesecake from the oven and cool completely at room temperature. Then, chill it in the fridge for at least 4 hours or overnight. If you’re using the glaze, mix sour cream, sugar, and vanilla, spread it over the chilled cheesecake, then return to the fridge for another half-hour.
Step 9: Slice & Serve
Use a warm, sharp knife to cut neat slices — wiping it clean between cuts for a perfect look. Serve chilled, maybe topped with a few fresh berries or edible gold dust for that extra wow factor.
What to Serve It With
This red velvet cheesecake is a showstopper on its own, but I love pairing it with a simple dollop of whipped cream, a handful of fresh strawberries, or even a drizzle of chocolate ganache if I want a richer finish. For breakfast or brunch, I’ve served it with a robust cup of black coffee or a sweet iced latte, balancing that decadent flavor with a bit of bitterness. My family often requests it for birthday celebrations—sometimes I add a layer of cream cheese frosting on top for a more classic look, though I think it tastes just perfect plain. For a more casual vibe, I’ll cut smaller slices and serve with a side of hot tea or sparkling water with lemon. The slight tang of the cream cheese combined with the sweetness and cocoa is just what you need after a long day. Honestly, this cheesecake seems to make any occasion special, and I promise—once you try it, you won’t go back to plain old cheesecake or store-bought cake. It’s just too pretty and too delicious.
Top Tips for Perfecting Your Red Velvet Cheesecake
Over the years, I’ve learned a few tricks that make all the difference when making this beauty. First, always soften your cream cheese thoroughly — no lumps, please! I’ve made the mistake of rushing this step and ending up with lumps in the batter, which can crack in the oven. Trust me, patience here pays off. Second, don’t overmix once you start adding eggs; overbeating can lead to cracks or a dense texture. Just fold gently and stop as soon as everything looks combined. Regarding the red color, I’ve tested gel vs. liquid food coloring, and gel always gives me more vibrant, consistent results without thinning out the batter. Personal tip: I sometimes add a teaspoon of vinegar to enhance that tangy cheesecake flavor, which complements the cocoa beautifully. When it comes to baking, every oven is different. I recommend setting a timer, but also gently checking the wobble test — that’s key for perfect doneness. If you see cracks forming, a quick water bath or covering with foil can save the day. And for the glaze, I find that applying it just before serving keeps it fresh and bright. A little vanilla or lemon zest in the glaze can add a delightful extra layer of flavor if you want to get fancy. Honestly, I’ve tested plenty of tweaks, and this recipe never fails to get rave reviews. It’s all about patience, gentle handling, and a bit of love!
Storing and Reheating Tips
This cheesecake is easy to store and keeps beautifully. Once chilled and set, you can cover it tightly with plastic wrap or store it in an airtight container in the fridge for up to 4 days — if it lasts that long! I’ve found that letting it sit at room temperature for about 10 minutes before slicing makes it even creamier and easier to cut. If you want to keep it longer, see my freezer tips: wrap it well in plastic, then foil, and freeze for up to a month. When you’re ready for a slice, thaw it overnight in the fridge — do not rush this or it might develop condensation. For reheating, I personally prefer to keep it cold or slightly chilled — that’s when it’s at its creamiest. The glaze, if added, is best applied just before serving, so it stays fresh and glossy. A quick tip: if the top gets a little dull after storing, a brief re-broil can help restore that shiny finish, but use caution! Overall, this cheesecake’s the kind that tastes just as good the next day, maybe even better as the flavors meld overnight.
Frequently Asked Questions
Final Thoughts
If I could pass through my screen and hand you a slice, I would — because this red velvet cheesecake truly feels like a celebration in every bite. It’s an indulgent, gorgeous dessert with that perfect balance of tang and chocolate, topped with a swirl of vibrant red that just makes everything feel a little more festive. What I love most about it is how reliable it is — once you master the basics, it’s a foolproof showstopper for birthdays, holidays, or just a cozy weekend treat. Plus, it’s surprisingly forgiving; a crack here or a swirl there doesn’t ruin it. I encourage you to experiment with the color, toppings, or even flavoring — maybe add a splash of peppermint or a dash of cinnamon for a seasonal twist. No matter how you adapt it, I have no doubt this red velvet cheesecake will become a beloved fixture in your dessert repertoire. I can’t wait to hear how yours turns out — share your photos and stories in the comments below. Happy baking, friends — and don’t forget to savor every delicious, velvety bite!
Red Velvet Cheesecake Bars
Ingredients
Method
- Preheat oven to 350°F. Line a 9x13-inch pan with foil and spray with cooking spray.
- Mix butter, egg, and cake mix in a bowl until a thick dough forms. Press into the bottom of the prepared pan.
- Beat cream cheese until smooth. Mix in sugar, egg, sour cream, and vanilla until no lumps remain. Stir in chocolate chips. Pour over the red velvet layer.
- Bake for 30-40 minutes until edges turn brown and center jiggles slightly. Cool completely then chill for at least 4 hours before slicing.