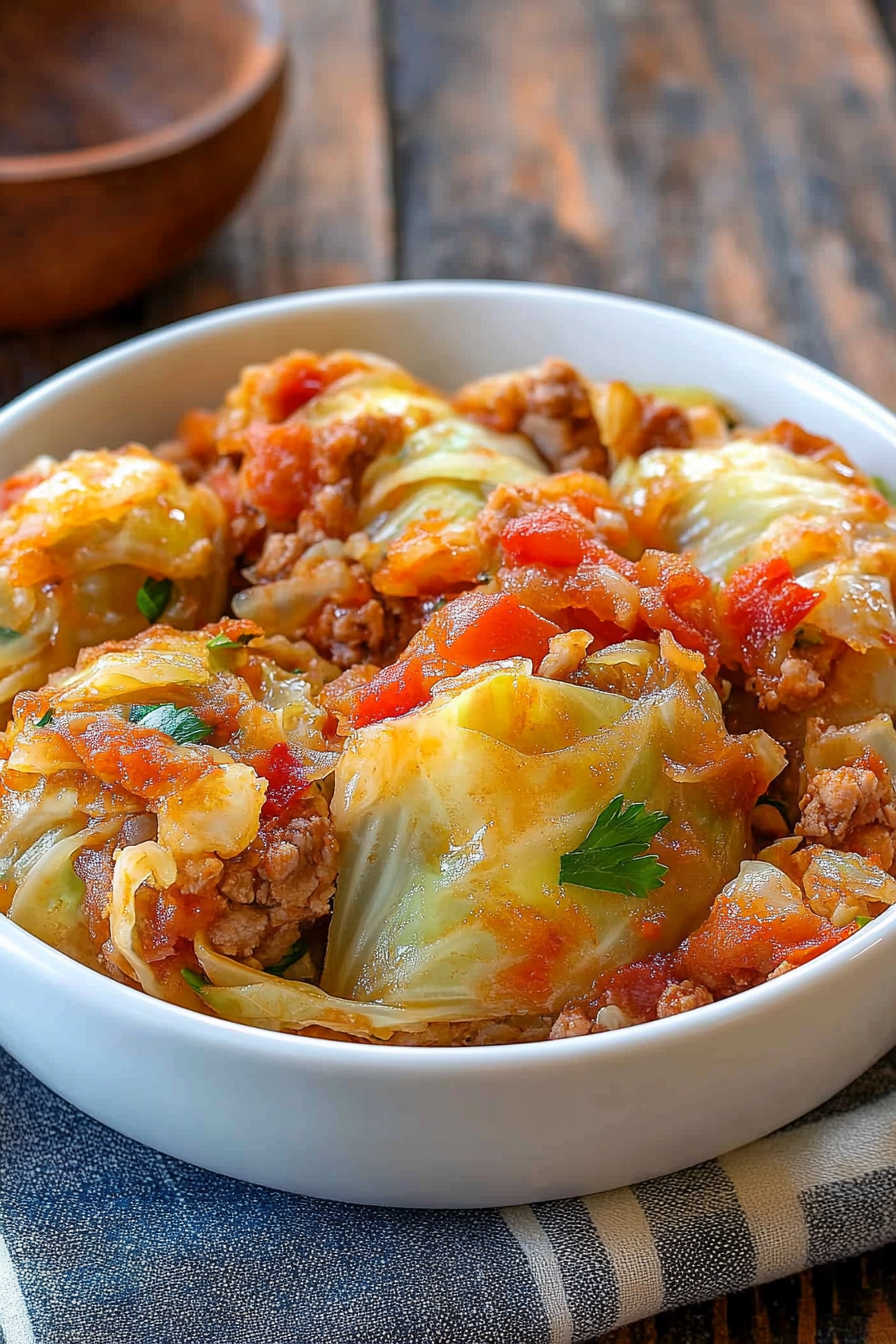
Stacked Cabbage Rolls How to Make Them
You know those nights, right? The ones where you’re staring into the fridge, and your brain is just… blank. You want something delicious, something comforting, something that feels like a hug on a plate, but the thought of a complicated recipe feels like climbing Mount Everest. That’s exactly when I turn to my absolute favorite cabbage rolls. They’re not just any cabbage rolls; they’re the ones my family begs for, the ones that make the house smell like pure happiness, and honestly, they’re way simpler than you might think. Forget those hours spent wrestling with cabbage leaves or dealing with a mushy filling. This version is all about rich flavor, tender cabbage, and a luscious sauce that just sings. It’s kind of like a simpler, more satisfying cousin to a classic lasagna, but with that wonderful, earthy cabbage goodness. I’ve tweaked and tinkered with this recipe for years, and it’s finally at that point where it’s just *right*. I can’t wait for you to try it.
What are some of the best Cabbage Rolls?
So, what exactly are we talking about when I say “cabbage rolls”? At its heart, it’s pretty straightforward: tender, blanched cabbage leaves are lovingly wrapped around a savory filling, and then they’re gently simmered in a delicious, often tomato-based sauce. Think of it as a little parcel of comfort. My version isn’t the super-traditional Eastern European style, though I have tons of love for those too! This one leans a bit more into a hearty, savory meat and rice filling, all bathed in a rich, slightly sweet, slightly tangy tomato sauce that’s just ridiculously good. It’s essentially a way to take simple, humble ingredients and transform them into something truly special. No fancy techniques required, just good old-fashioned home cooking that tastes like it came straight from your grandma’s kitchen, even if you’ve never made them before.
Why you’ll love this recipe?
Honestly, the list is pretty long, but let me try to narrow it down. First off, the flavor. Oh, the flavor! You get that delicate sweetness from the perfectly cooked cabbage, the savory depth from the seasoned ground meat and rice filling, and then that incredible tomato sauce just ties it all together. It’s a symphony of textures and tastes that hits all the right notes. Then there’s the simplicity. I know, I know, “cabbage rolls” can sound intimidating. But I promise you, this recipe breaks it down so easily. You’ll be surprised at how quickly you can get these assembled, especially once you get the hang of wrapping. It’s genuinely a lifesaver on busy weeknights when you want a home-cooked meal without the fuss. And let’s talk budget! These are wonderfully cost-effective. Cabbage is usually super affordable, and the other ingredients are pantry staples. You get a huge amount of deliciousness for very little cost, which is always a win in my book. Plus, they’re so versatile. Serve them as a main course, pack leftovers for lunch, or even freeze them for later. What I love most, though, is that they feel like a special occasion meal without the effort. It’s the kind of dish that makes you feel accomplished and satisfied. Compared to something like a pot roast that takes hours, these hit that sweet spot of satisfying and achievable.
How do you make Cabbage Rolls?
Quick Overview
The magic of this recipe lies in its straightforward approach. We’ll quickly blanch the cabbage to make it pliable, mix up a super flavorful filling, assemble our little rolls, and then let them do their thing in a rich tomato sauce until everything is tender and delicious. It’s less about complicated steps and more about layering simple flavors. The beauty is in the hands-on part – the rolling – which is actually kind of meditative once you get into it. You’ll end up with a beautiful pan of comfort food that looks as good as it tastes.
Ingredients
For the Main Rolls:
1 large head of green cabbage (about 2-2.5 lbs)
1 lb ground beef (80/20 is my go-to for flavor)
1/2 cup uncooked white rice (long grain is great here)
1 medium onion, finely chopped
2 cloves garlic, minced
1 large egg, lightly beaten
1/4 cup milk (any kind works!)
1 teaspoon salt
1/2 teaspoon black pepper
1/4 teaspoon dried thyme (optional, but I love it!)
For the Tomato Sauce:
1 (28 ounce) can crushed tomatoes
1 (15 ounce) can tomato sauce
1/4 cup packed brown sugar (adjust to your sweetness preference)
2 tablespoons Worcestershire sauce
1 tablespoon apple cider vinegar (just a touch for brightness!)
1/2 teaspoon salt
1/4 teaspoon black pepper
1/4 cup water or beef broth (if the sauce seems too thick)
Step-by-Step Instructions
Step 1: Preheat & Prep Pan
First things first, get your oven preheated to 375°F (190°C). While it’s warming up, grab a large pot and fill it with water, adding a generous pinch of salt. Bring that to a rolling boil. You’ll also need a 9×13 inch baking dish or a large, oven-safe pot (like a Dutch oven) for assembling your cabbage rolls.
Step 2: Prepare the Cabbage
Now for the cabbage. Carefully remove the outer, wilted leaves. You’re aiming for about 10-12 large, intact leaves. Cut out the tough core from each of these leaves; this makes them easier to roll later. Don’t worry if a few leaves tear a little, you can patch them up or use smaller pieces. Once you’ve got your core removed, gently place the leaves into the boiling water. Let them simmer for about 3-5 minutes, just until they start to soften and become pliable. You don’t want them mushy, just bendy! Carefully lift them out with tongs and lay them on a plate or clean kitchen towel to cool and drain a bit. The rest of the cabbage can be chopped up and added to the sauce later if you like!
Step 3: Mix the Filling
In a large bowl, combine the ground beef, uncooked rice, finely chopped onion, minced garlic, beaten egg, milk, salt, pepper, and thyme (if you’re using it). Now, this is important: use your hands! Gently mix everything together until it’s just combined. You don’t want to overmix, or your filling can get tough. Think of it as coaxing the ingredients to get acquainted, not wrestling them into submission.
Step 4: Assemble the Rolls
Grab one of your softened cabbage leaves. Lay it flat on your work surface. Spoon about 1/2 cup of the filling onto the wider end of the leaf. Fold the sides of the cabbage leaf inward over the filling, and then starting from the end with the filling, roll it up tightly, just like you would a burrito. If your leaf is a bit small or torn, don’t sweat it! Just use smaller pieces of cabbage or overlap them to make sure all that delicious filling is tucked in. Place the rolled cabbage roll, seam-side down, in your prepared baking dish or pot.
Step 5: Prepare the Sauce
In a separate bowl, whisk together the crushed tomatoes, tomato sauce, brown sugar, Worcestershire sauce, apple cider vinegar, salt, and pepper. If you have any leftover chopped cabbage from preparing the leaves, now’s the time to stir it into the sauce – it adds great texture and flavor! If the sauce seems a little too thick for your liking, you can stir in 1/4 cup of water or beef broth.
Step 6: Layer and Pour
Arrange your cabbage rolls snugly in the baking dish or pot, seam-side down. Don’t worry if they’re packed in there; this helps them hold their shape. Pour the prepared tomato sauce evenly over the top of the cabbage rolls, making sure to get into all the nooks and crannies. You can also add any chopped cabbage you prepared directly into the sauce.
Step 7: Bake Until Tender
Cover your baking dish tightly with aluminum foil or the lid of your pot. Pop it into the preheated oven and bake for about 1 hour. After an hour, carefully remove the foil or lid and bake for another 15-20 minutes, or until the sauce is bubbly and the cabbage rolls are tender. You can test for tenderness by gently poking one with a fork. If it yields easily, they’re ready!
Step 8: Rest and Serve
This is a tough step, but trust me, it’s worth it. Let the cabbage rolls rest for about 10 minutes after they come out of the oven. This allows the flavors to meld and the rolls to firm up slightly, making them easier to serve. Ladle them into bowls with plenty of that glorious sauce spooned over the top. The smell at this stage is just incredible!
Step 9: Slice and Serve
No real slicing needed here, as they’re individual rolls. Just carefully scoop them out with a spoon and a spatula, making sure to get a good amount of sauce with each serving. The visual is beautiful – those tender, slightly caramelized edges of the cabbage, the rich red sauce, and the promise of a hearty meal. Serve them warm and watch them disappear!
What to Serve It With
These cabbage rolls are practically a meal in themselves, but they play so nicely with a few simple additions. For a truly comforting breakfast or brunch, I love serving them with a dollop of sour cream or Greek yogurt – the coolness is a lovely contrast to the rich sauce. A sprinkle of fresh parsley on top always makes them look extra inviting. If you’re looking for something heartier for brunch, a side of crusty bread is essential for soaking up every last drop of that sauce. Honestly, I’ve even made a mini-batch for myself as a satisfying, almost dessert-like treat (don’t judge!) by leaning into the slightly sweet sauce with a tiny bit more brown sugar. For cozy, casual dinners, they are fantastic all on their own, but if you want a bit more, a simple side salad with a light vinaigrette can cut through the richness beautifully. My kids love them with a side of mashed potatoes, though I often find myself just eating extra sauce with a spoon. Family tradition often involves serving them alongside a bit of Polish kielbasa if we’re feeling fancy, but that’s totally optional!
Top Tips for Perfecting Your Cabbage Rolls
Over the years, I’ve picked up a few tricks that make these cabbage rolls absolutely foolproof. First, when you’re prepping the cabbage leaves, don’t over-boil them. They should be flexible, not limp and falling apart. Just a few minutes in boiling water is all you need. For the filling, remember that using your hands to mix is key. It lets you feel when everything is just incorporated, preventing a tough texture. And don’t be afraid to season generously – the cabbage itself is mild, so the filling and sauce need to pack a flavor punch! When it comes to assembling, if a leaf tears, just use a smaller piece of cabbage to patch it up or overlap two pieces. Nobody will ever know, and all that deliciousness will stay tucked inside. I’ve also found that the type of rice matters a little; a standard long-grain white rice works best because it cooks up fluffy and doesn’t get gummy. Using a mix of ground beef and pork can also add extra depth of flavor, but honestly, just good quality beef is fantastic. For the sauce, taste and adjust! If you prefer it sweeter, add a touch more brown sugar. If you like it tangier, a little extra vinegar can do the trick. My favorite glaze variation? Sometimes I’ll stir a tablespoon of Dijon mustard into the sauce before baking for a subtle kick. Baking time can vary slightly depending on your oven, so always test for tenderness. If your rolls aren’t quite tender enough after an hour, just pop them back in, covered, for another 15-20 minutes. Trust me on this one: the resting period after baking is crucial. It’s tempting to dive right in, but giving them those 10 minutes makes a world of difference in how they hold together.
Storing and Reheating Tips
These cabbage rolls are wonderfully forgiving when it comes to storage, which is why they’re a favorite for meal prep. If you have leftovers, let them cool down to room temperature before storing. You can keep them in the baking dish, covered tightly with plastic wrap or foil, in the refrigerator for up to 3-4 days. They actually often taste even better the next day as the flavors have more time to meld! For longer storage, freezing is a fantastic option. Once cooled, you can portion them into freezer-safe containers or wrap them individually in plastic wrap and then foil. They’ll keep well in the freezer for up to 2-3 months. When you’re ready to reheat, thaw them in the refrigerator overnight if frozen. Then, you can gently reheat them in a covered baking dish in a 350°F (175°C) oven until heated through, about 20-30 minutes. You can also reheat individual portions in the microwave, but I find the oven gives the best texture, especially to the sauce. If you’re reheating them after they’ve been refrigerated and the sauce seems a bit thick, you can add a tablespoon or two of water or broth to loosen it up before reheating. I usually wait to add the sauce until just before serving if I know I’m storing them, but it’s not strictly necessary; they reheat beautifully with the sauce on.
Frequently Asked Questions
Final Thoughts
There you have it – my go-to recipe for cabbage rolls that are packed with flavor, incredibly satisfying, and surprisingly manageable for a weeknight dinner. I truly believe that comfort food shouldn’t be complicated, and this recipe is the perfect example. It’s that heartwarming dish that makes everyone at the table smile, and the fact that you can make it ahead or freeze portions for later is just the icing on the cake (or, well, the sauce on the cabbage roll!). I hope you give these a try and that they become as much of a cherished favorite in your home as they are in mine. If you love this kind of hearty, delicious cooking, you might also enjoy my recipe for {Link to another recipe, e.g., “Slow Cooker Pot Roast”}. I’d be absolutely thrilled to hear how yours turn out! Don’t hesitate to leave a comment below with your thoughts, any tweaks you made, or even just to say hello. Happy cooking!
Hearty Stuffed Cabbage Rolls
Ingredients
Method
- Preheat oven to 350°F. Slice cabbage into strips and spread in the bottom of a greased baking dish.
- In a skillet, cook ground beef and chopped onion until browned. Drain excess fat.
- Add rice, chili powder, garlic powder, salt, and pepper to the skillet with beef and onion. Mix in crushed tomatoes and stir well. Spread mixture over cabbage in baking dish.
- Mix together tomato sauce, sugar, and vinegar. Pour over the casserole. Cover with foil and bake for 90 minutes.
- Uncover and let rest for 5-10 minutes before serving.