Savory Meat Calzone Recipe: Easy Italian Delight
Okay, so confession time. There are certain foods that just *feel* like home, right? For me, one of those things has always been a perfectly made meat calzone. Not those sad, floppy imitations you sometimes get from a takeout place, but the real deal – golden brown, slightly crispy crust, stuffed to the brim with savory goodness. It’s funny, I was just telling my sister the other day about the first time my Nonna made these for me. I must have been about seven, and the smell wafting from her tiny kitchen was just intoxicating. She’d always use that cast iron pan she inherited from *her* mom, and the way the crust would puff up… pure magic. It’s funny how a simple calzone can unlock such vivid memories. This recipe, my friends, is my ode to those moments, and trust me, it’s a game-changer for weeknight dinners and even impresses guests at potlucks. It’s way better than your average pizza, and frankly, a lot more satisfying!
What is a meat calzone?
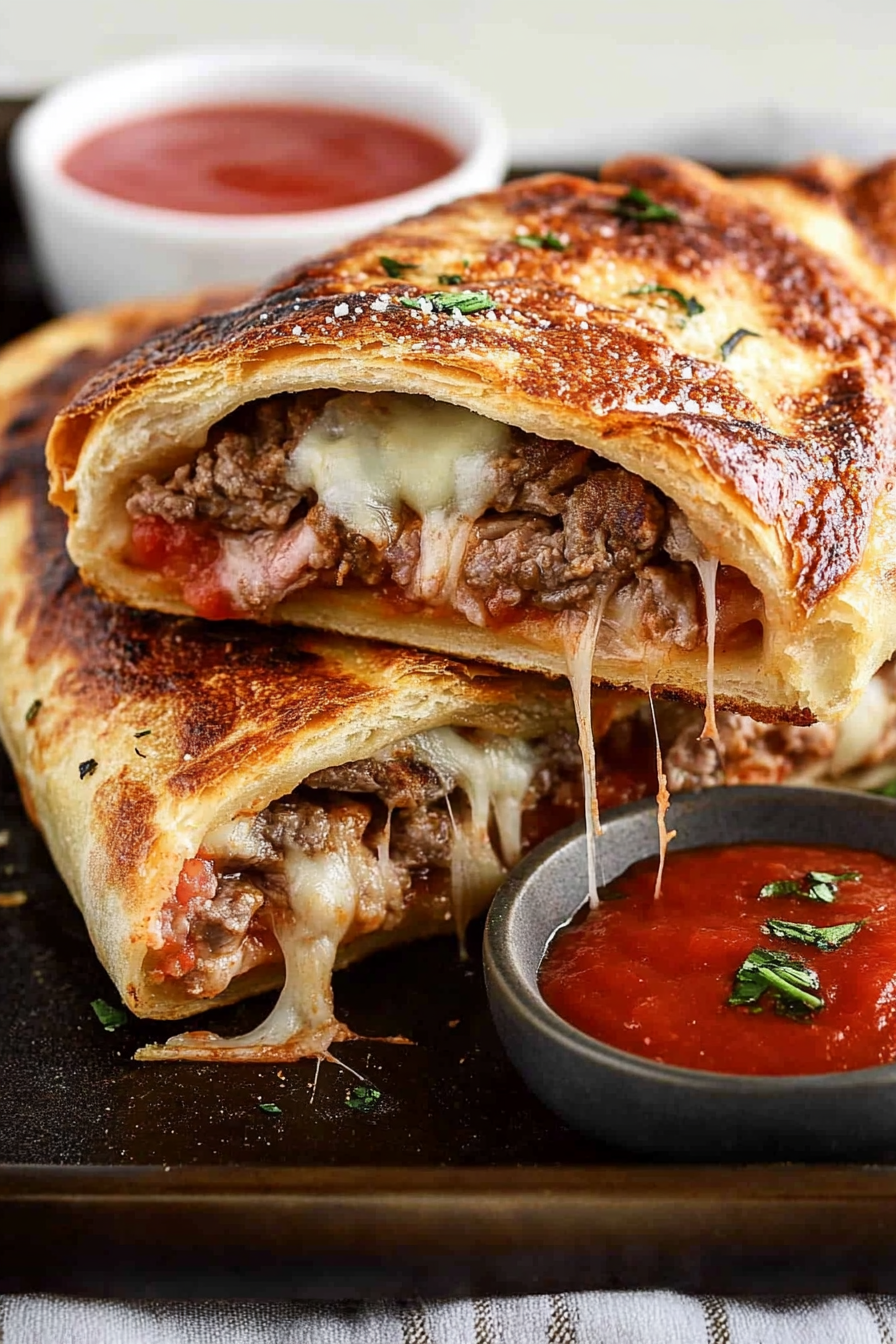
So, what exactly is this delightful package of deliciousness? Think of a meat calzone as pizza’s cooler, more portable cousin. It’s basically a folded pizza pocket, where your favorite pizza fillings are tucked inside a dough and baked until golden. The “meat” part just means we’re loading it up with all sorts of savory, delicious meats – usually a mix of ground beef, sausage, maybe even some pepperoni for an extra kick. Unlike a rolled-out pizza, the calzone dough is sealed around the filling, creating this incredible enclosed parcel of flavor. It’s fantastic because all those juices from the meat and cheese stay trapped inside, making every single bite an explosion of savory perfection. It’s less messy than a slice of pizza, and honestly, I think it holds the fillings even better. It’s a classic for a reason!
Why you’ll love this recipe?
Honestly, there are so many reasons I keep coming back to this meat calzone recipe, and I just know you’re going to feel the same way. First off, the flavor is absolutely out of this world. You get that satisfying chew of the crust, the rich, savory depth of the seasoned meats, the melty, gooey cheese, and then that hint of sweetness from the tomato sauce. It’s a symphony in your mouth! But what I love most, especially on those crazy busy weeknights, is how surprisingly simple it is. Seriously, once you get the dough down (and I’ve got some tips for that!), the rest is a breeze. And it’s so cost-effective! You’re using pantry staples and simple ground meats, which means you can feed a crowd without breaking the bank. Plus, it’s incredibly versatile. Don’t feel like ground beef? Swap it for Italian sausage! Want a spicier kick? Toss in some jalapeños! You can customize it endlessly. It’s this perfect balance of comfort food and something a little bit special. It’s way more satisfying than just ordering a pizza, and the pride you feel when you pull these golden beauties out of the oven? Priceless. It’s truly a lifesaver.
How do I make a meat calzone?
Quick Overview
The magic of these meat calzones lies in their straightforward assembly. We’ll start by making a simple, foolproof dough that’s easy to work with. Then, we’ll whip up a quick, flavorful meat filling. The key is in how we assemble them: a generous scoop of filling, folded, sealed, and then baked to golden perfection. It’s a process that’s less about complex techniques and more about good, honest ingredients coming together. You’ll be amazed at how quickly these come together, making them perfect for a delicious, satisfying meal any night of the week.
Ingredients
For the Dough:
You’ll need about 3 cups of all-purpose flour, plus more for dusting. I always recommend using a good quality flour; it really does make a difference. You’ll also need 1 teaspoon of salt to bring out the flavors. For the wet ingredients, 1 cup of warm water is essential. Make sure it’s not too hot, or it’ll kill the yeast! And of course, 2 teaspoons of active dry yeast. I like to let the yeast bloom for about 5-10 minutes in the warm water until it’s frothy; it’s my little check to make sure it’s alive and kicking. Lastly, 2 tablespoons of olive oil adds a nice richness and helps with the texture.
For the Filling:
Here’s where the flavor really shines! I usually start with 1 pound of ground beef and about ½ pound of Italian sausage (mild or hot, depending on your mood!). The combination is just unbeatable. Then, for our sauce base, we need 1 cup of your favorite marinara sauce – store-bought is perfectly fine, but if you have a homemade batch, even better! I also love adding about 1 cup of shredded mozzarella cheese and ½ cup of grated Parmesan cheese right into the filling. It makes everything so gooey and delicious. For seasoning, a pinch of garlic powder, onion powder, and maybe a little dried oregano goes a long way. And of course, salt and black pepper to taste. Some people like to add chopped onions or bell peppers, which is great, but I like to keep the meat front and center for this version.
For the Glaze:
This is optional, but highly recommended for that beautiful golden sheen! I usually just whisk together 1 egg with 1 tablespoon of water. It’s super simple and gives the calzones that professional bakery look. Sometimes, if I’m feeling fancy, I’ll sprinkle a little extra Parmesan or some sesame seeds on top before baking.
Step-by-Step Instructions
Step 1: Preheat & Prep Pan
First things first, let’s get that oven ready. You’ll want to preheat your oven to 400 degrees Fahrenheit (200 degrees Celsius). While the oven is heating up, lightly grease a large baking sheet or line it with parchment paper. This prevents sticking and makes cleanup a breeze. If you’re using a baking stone, make sure it’s in the oven as it preheats so it gets nice and hot.
Step 2: Mix Dry Ingredients
In a large mixing bowl, whisk together the 3 cups of all-purpose flour and 1 teaspoon of salt. This just ensures everything is evenly distributed. No one wants a salty bite!
Step 3: Mix Wet Ingredients
In a separate bowl or a measuring cup, combine the warm water with the active dry yeast. Let it sit for about 5-10 minutes until it becomes frothy. This tells you your yeast is active and ready to work its magic. Then, stir in the 2 tablespoons of olive oil.
Step 4: Combine
Now, pour the wet ingredients into the bowl with the dry ingredients. Mix everything together with a spoon or your hands until a shaggy dough forms. Then, turn the dough out onto a lightly floured surface and knead it for about 5-7 minutes until it’s smooth and elastic. You can also use a stand mixer with a dough hook for this part. The dough should be slightly sticky but manageable. If it’s too sticky, add a little more flour, a tablespoon at a time. Place the dough in a lightly oiled bowl, cover it with a clean kitchen towel or plastic wrap, and let it rise in a warm place for about 1 hour, or until it has doubled in size.
Step 5: Prepare Filling
While the dough is rising, let’s get that delicious filling ready. In a large skillet over medium heat, brown the ground beef and Italian sausage, breaking it up with a spoon as it cooks. Drain off any excess grease. Stir in the marinara sauce, garlic powder, onion powder, and oregano. Season with salt and pepper to taste. Let it simmer for about 5-10 minutes to allow the flavors to meld together. Once it’s cooked, stir in the shredded mozzarella and Parmesan cheese. Mix until the cheese is mostly melted and well combined. Set aside to cool slightly – you don’t want it piping hot when it goes into the dough!
Step 6: Layer & Swirl
Once the dough has risen, punch it down gently. Divide the dough into 4 equal portions. On a lightly floured surface, roll out each portion into a rough circle, about 8-10 inches in diameter. Don’t worry about making it perfectly round; rustic is good! Spoon about ¼ of the filling onto one half of each dough circle, leaving a border of about ½ inch. Make sure not to overfill, or it’ll be tricky to seal. Then, carefully fold the other half of the dough over the filling, creating a semi-circle. Crimp the edges firmly with your fingers or a fork to seal. This is super important to keep all that yummy goodness inside!
Step 7: Bake
Carefully transfer the assembled calzones to your prepared baking sheet. Using a sharp knife, cut a few small slits in the top of each calzone to allow steam to escape. This helps prevent them from bursting. Brush the tops with the egg wash (egg and water mixture) for that beautiful golden-brown finish. Place the baking sheet in the preheated oven and bake for 20-25 minutes, or until the crust is golden brown and puffed up, and the filling is bubbly.
Step 8: Cool & Glaze
Once they’re baked to perfection, remove the calzones from the oven and let them cool on the baking sheet for about 5-10 minutes before serving. This allows the filling to set slightly and prevents you from burning your mouth (trust me, I’ve done it!). If you didn’t use the egg wash, you can drizzle a little extra marinara or a dollop of ricotta cheese on top now. But honestly, they’re perfect as is!
Step 9: Slice & Serve
Serve your glorious meat calzones warm. They’re delicious on their own, or you can serve them with a side salad and some extra marinara sauce for dipping. Get ready for happy sighs and possibly some requests for seconds!
What to Serve It With
These meat calzones are pretty much a meal in themselves, but I love pairing them with a few things to make the whole experience even more special. For a casual family dinner, a simple, crisp green salad with a light vinaigrette is perfect. It cuts through the richness of the calzone beautifully. My kids adore having them with some extra marinara sauce on the side for dipping – it’s like a grown-up version of chicken nuggets for them! If you’re looking for something a bit more substantial, some oven-baked fries or even a small portion of pasta with a light garlic and oil sauce works wonders. For game nights or parties, they’re fantastic served as appetizers with a variety of dips, like a creamy ranch or a spicy aioli. And you know, sometimes, after a long day, all I want is a warm calzone and a glass of red wine. It’s pure comfort. The key is to keep the sides simple so the calzone truly shines!
Top Tips for Perfecting Your Meat Calzones
Over the years, I’ve definitely learned a few tricks that make these calzones absolutely perfect every single time. First, when it comes to the dough, don’t be afraid to knead it well. A good, elastic dough is what gives you that wonderful chewy-crisp crust. I’ve learned that if the dough feels too stiff, adding just a tiny bit more water during kneading can make a world of difference. Also, letting the dough rise properly in a warm spot is crucial; it’s what gives it that lovely airy texture. For the filling, draining the meat well is non-negotiable. Nobody wants a greasy calzone! I learned that lesson the hard way after one particularly messy batch early on. Make sure the filling isn’t too wet either; a good simmer for the sauce helps thicken it up perfectly. When you’re sealing the calzones, take your time and really pinch those edges shut. I sometimes even do a double crimp – folding the edge over itself – to be extra sure. It’s those little steps that prevent any sneaky filling leaks. If you find your calzones are browning too quickly on top before the inside is cooked, just loosely tent them with aluminum foil for the last 10 minutes of baking. And for the egg wash, a thin, even coat is best. Too thick and it can become a bit rubbery. I’ve experimented with just using milk or even just butter for the wash, but the egg wash really does give you that gorgeous, professional-looking shine. Lastly, always, always let them rest for a few minutes before cutting. That steam inside is super hot, and patience really does pay off!
Storing and Reheating Tips
These meat calzones are so good, you might actually have leftovers (though I wouldn’t count on it!). If you do find yourself with some, storing them properly is key to enjoying them later. For short-term storage, once they’ve cooled down completely, wrap them tightly in plastic wrap or place them in an airtight container at room temperature for up to a day. They’re surprisingly good at room temp! If you want to keep them longer, the refrigerator is your best friend. Wrapped well in foil or in an airtight container, they’ll stay delicious for about 3-4 days. For longer storage, freezing is the way to go. Let them cool completely, then wrap each calzone individually in plastic wrap, followed by a layer of aluminum foil. You can also place them in a freezer-safe bag or container. They’ll keep well in the freezer for up to 2-3 months. When you’re ready to reheat, there are a few methods that work best. For refrigerated calzones, the oven is ideal. Pop them on a baking sheet at around 350°F (175°C) for 10-15 minutes, or until heated through and the crust is crisp again. If they seem a bit dry, a spritz of water before baking can help. For frozen calzones, you can go straight from the freezer to the oven, but you’ll need to add a bit more time, probably 20-30 minutes, and you might want to loosely cover them with foil initially to prevent over-browning. Microwaving is also an option, but it can sometimes make the crust a bit soft. If you must use the microwave, heat them in short bursts until warmed through. For the best texture, though, the oven is always my go-to!
Frequently Asked Questions
Final Thoughts
So there you have it, my ultimate meat calzone recipe! I truly hope you give this a try. It’s more than just a recipe to me; it’s a piece of my family history and a guaranteed way to bring smiles to the table. The combination of that perfectly baked dough, the savory, cheesy filling, and the sheer joy of biting into a warm calzone is just unbeatable. It’s proof that simple, honest ingredients, prepared with a little bit of love, can create something truly extraordinary. Whether you’re looking for a comforting weeknight meal or a show-stopping dish for friends, these calzones deliver every single time. If you enjoy this, you might also love my recipe for classic Margherita pizza or my easy stromboli. They share that same comforting, Italian-inspired spirit! I can’t wait to hear what you think, so please leave a comment below with your thoughts, any variations you tried, or how your family enjoyed them. Happy baking, and enjoy every delicious bite!
Classic Beef Calzone
Ingredients
Method
- Preheat oven to 400°F. Line a baking sheet with parchment paper.
- In a skillet, cook ground beef over medium heat until browned. Season with Italian seasoning, salt, and pepper.
- Roll out pizza dough into a 12-inch circle. Spread cooked beef evenly over half of the dough.
- Sprinkle shredded mozzarella and Parmesan cheese over the beef.
- Fold the dough over to cover the filling and pinch edges to seal.
- Brush the top with beaten egg.
- Bake for 20-25 minutes or until golden brown.