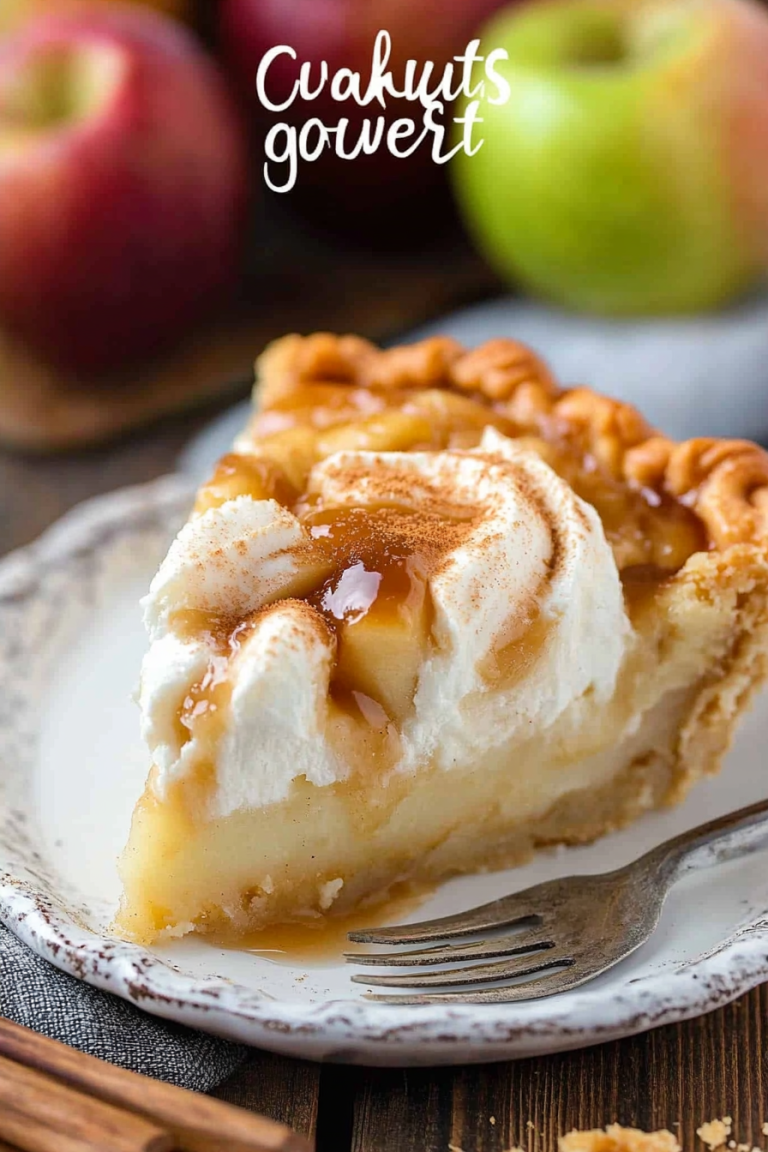
Simple Scandinavian Apple Pie Recipe
There’s something truly cozy about a warm slice of Swedish apple pie, especially on a chilly afternoon when the house smells like inviting cinnamon and sweet, tart apples. I remember visiting a little café in Stockholm and biting into one of these pies—every bite felt like a hug from an old friend. Since then, it’s become one of my go-to desserts whenever I crave comfort food that’s both simple and deeply satisfying. It’s kind of like an apple crisp’s sophisticated cousin—less fuss, more flavor—and I swear my family asks for it all the time. This recipe is a lifesaver on busy nights when I want something homemade, but don’t want to spend hours in the kitchen. Plus, the ingredients are usually staples in my pantry and fridge, making it budget-friendly too. Trust me, once you try this Swedish apple pie, it’ll be a regular in your dessert rotation. It’s just that good.
What is Swedish Apple Pie?
Swedish apple pie, or “Äppelpaj,” is a delightful dessert from Sweden that showcases the bright, crisp flavor of apples paired with a buttery, crumbly topping. Think of it as a cross between a classic American apple crisp and a tart, but with its own unique Nordic charm. The filling usually involves sliced apples tossed with a little sugar, cinnamon, and sometimes a splash of vanilla—simple ingredients that let the fruit shine. The topping features a blend of butter, sugar, and flour, which creates that perfect golden crumble on top. It’s essentially a celebration of apples at their prime, transformed into something warm, comforting, and irresistibly cozy. You can serve it with vanilla ice cream, whipped cream, or even a drizzle of caramel—whatever makes it feel like a treat. And the best part? It’s straightforward enough for beginners but sure to impress seasoned bakers alike.
Why you’ll love this recipe?
I get a rush of nostalgia when I think about this Swedish apple pie. There’s a reason it’s become a household favorite—
- Flavor:What is the combination of tart apples with warm cinnamon and a buttery crumble?
- Simplicity: Honestly, it’s so easy to throw together. The ingredients are basic, and it comes together quickly—perfect for last-minute dessert cravings or cozy family nights.
- Cost-efficient: No fancy ingredients here—just apples, sugar, flour, butter. It’s a friendly recipe for your wallet but feels indulgent.
- Versatility: You can serve it warm or at room temperature. Add a scoop of vanilla ice cream, a dollop of whipped cream, or even a drizzle of caramel for extra wow factor. It’s adaptable to any occasion, from casual weeknights to holiday dinners.
What I love most about this is how it makes my kitchen smell like fall in Sweden, and how my kids ask for it almost every week. Plus, it’s a perfect way to use up those lingering apples at the bottom of the fruit bowl. Over the years, I’ve made some tweaks—tested different types of apples, played with the crumb topping—to make it just right. Trust me, once you make your first batch, you’ll see what I mean. It’s a cozy, nostalgic dessert that’s hard to beat.
How to Make Swedish Apple Pie
Quick Overview
This Swedish apple pie comes together in three easy parts: prepping your apples, mixing the buttery crumb topping, and then layering everything in your baking dish. The whole process is straightforward, and I promise it’s nearly impossible to mess up. The secret is to keep the topping nice and crumbly—don’t overmix—and to slice your apples uniformly so they cook evenly. Once assembled, a quick bake at around 350°F (180°C) transforms raw ingredients into something golden and irresistible. My favorite part? The smell as it bakes—it’s pure hygge in a pan. And if you’re short on time, you can even assemble it ahead and bake when needed. This one’s a foolproof recipe that’s perfect for sharing with family, friends, or just savoring alone with a good book.
Ingredients
For the Main Batter:
– 1 1/2 cups all-purpose flour (I always choose a good-quality brand for better crumble consistency)
– 1/2 cup granulated sugar
– 1/2 teaspoon salt
– 1 teaspoon baking powder (not always required but perks up the crumb)
– 1/2 cup cold unsalted butter (cut into small cubes; I do this in advance for easy mixing)
For the Filling:
– 4 to 5 large apples (Fuji, Honeycrisp, or Granny Smith—whatever you love)
– 1/4 cup granulated sugar
– 1 teaspoon ground cinnamon
– 1 teaspoon vanilla extract (optional but adds warmth)
– Juice of half a lemon (keeps apples from browning and adds a nice tang)
For the Glaze:
– A little melted butter for brushing before baking (optional but gives the top a lovely sheen)
– Powdered sugar or caramel sauce for serving (totally optional but makes it dessert-worthy)
Step-by-Step Instructions
Step 1: Preheat & Prep Pan
First, I always preheat my oven to 350°F (180°C). I like to line my baking dish with parchment or give it a light butter coating—trust me, this helps with easy serving later. I use a 9-inch round or square dish for a cozy portion or a larger baking pan if I’m baking for a crowd. Let it sit while you prepare your apples and topping.
Step 2: Mix Dry Ingredients
In a bowl, I whisk together the flour, sugar, salt, and baking powder. This ensures even distribution of all those dry bits, which is super important for a uniform crumb. It’s a quick step but makes a big difference—it’s the foundation for that perfect buttery topping.
Step 3: Mix Wet Ingredients
Next, I work on the apples. I peel (if I want a cleaner look) and cut them into thin slices or small cubes, depending on my mood. Toss them with lemon juice, sugar, cinnamon, and vanilla in a big bowl. I love seeing the apple slices glisten with cinnamon; it already smells incredible. Let them sit a few minutes so the flavors meld.
Step 4: Combine
Cut the cold butter into the flour mixture using a pastry cutter, fork, or my fingers—whatever’s handy. The goal is to break the butter into tiny pea-sized bits and mix until the mixture resembles coarse crumbs. Overmixing can make the topping tough, so I just do a few gentle squeezes until it looks crumbly but not gritty.
Step 5: Prepare Filling
When the apples are ready, give them a quick taste. If they’re too tart, sprinkle a little more sugar; if they’re very juicy, drain some liquid so your pie isn’t soupy. You can also spice it up with nutmeg or ginger—whatever fits your mood. Spread the apple mixture evenly into your prepared dish.
Step 6: Layer & Swirl
Spread the crumb topping over the apples, pressing lightly if needed (but don’t pack it down). For a prettier look, I sometimes sprinkle some oats or crushed almonds on top. If you want a swirl effect, drop dollops of additional apple filling in random spots and swirl gently with a toothpick or knife. This makes it look rustic and beautiful once baked.
Step 7: Bake
Bake for about 35-40 minutes. Keep an eye on it; you want the topping to turn golden brown and the apples to be bubbling gently. I always check it at the 35-minute mark—if the top is darker than I like, I tent it loosely with foil. Your kitchen will smell like heaven by then!
Step 8: Cool & Glaze
Allow the pie to cool slightly—about 10 minutes—is perfect. That’s when I brush on a little melted butter for shine, or sprinkle powdered sugar for a delicate finish. If serving warm, I get my scoop of vanilla ice cream ready; if cold, just cut and serve with a dollop of whipped cream.
Step 9: Slice & Serve
Use a serrated knife for neat slices. If it’s still warm, the apples will be saucy and tender, so gentle slicing helps. I like to serve it on a pretty plate, maybe with a sprig of fresh mint or a drizzle of caramel—simple yet indulgent.
What to Serve It With
This Swedish apple pie is a versatile star. For breakfast, warm slices with a mug of coffee or chai work surprisingly well—think of it as an apple crumble muffin’s grown-up sibling. During brunch, I like adding a dollop of whipped cream or Greek yogurt alongside a fresh cup of tea or even sparkling cider. As a dessert, it’s perfect with vanilla ice cream melting into the caramelized edges or a drizzle of caramel sauce for an extra touch of sweetness. I also love serving it as a casual snack with a hot cup of cappuccino on a lazy weekend afternoon. Sometimes, I even make it ahead of time and reheat it gently in the oven—just cover it with foil so it doesn’t dry out. Honestly, it’s one of those recipes that feels special, yet is so easy you’ll want to make it weekly.
Top Tips for Perfecting Your Swedish Apple Pie
This recipe is pretty forgiving, but over the years, I’ve picked up a few tricks that make it even better:
- Zucchini Prep: Okay, hear me out! Instead of zucchini, I meant apples—but in cooking, I’ve tested adding pears or even rhubarb for extra tang. Always peel and slice uniformly; uneven pieces tend to cook unevenly.
- Mixing Advice: Avoid overmixing your topping; I learned this after a few tough crumbs. Keep those butter chunks intact—they melt during baking for a flaky, golden topping.
- Swirl Customization: Play with apple dollops in the filling and swirl gently—creating a marbled look. It’s a conversation starter and makes every slice a little different.
- Ingredient Swaps: Instead of regular sugar, try brown sugar in the topping for deeper caramel notes, or add oats for a crunchier texture. I’ve even experimented with coconut sugar, which brings a subtle richness.
- Baking Tips: Oven racks matter—baking in the middle ensures even browning. If your oven runs hot, reduce the temperature slightly or check it earlier.
- Glaze Variations: For a glossy finish, brush with honey or maple syrup instead of plain melted butter. For a tangy kick, add a splash of lemon juice or balsamic vinegar.
This pie is forgiving, and I’ve made it in all sorts of kitchen conditions. Trust your nose and eyes—baking is part science, part intuition, and a whole lot of love.
Storing and Reheating Tips
If you have leftovers (which is rare in my house!), here’s how I keep them fresh:
- Room Temperature: Best enjoyed on the day, wrapped loosely in foil. It’ll stay cozy and fresh for about a day, but I prefer to refrigerate after that.
- Refrigerator Storage: Store in an airtight container or cover tightly with plastic wrap for up to 3 days. I like reheating slices in a low oven or microwave—just a few seconds longer in the oven preserves that crisp topping.
- Freezer Instructions: Wrap slices individually in plastic wrap, then foil, and freeze up to 3 months. Let thaw overnight in the fridge and reheat gently. The topping might lose a little crunch but still tastes amazing.
- Glaze Timing Advice: If you want a shiny glaze, add it just before serving—don’t freeze with glaze on, as it may become dull. A simple dusting of powdered sugar works well after reheating.
My main tip? Always let it cool slightly before storing—hot slices can create condensation and sogginess. Patience pays off.
Frequently Asked Questions
Final Thoughts
There’s truly something magical about a piece of Swedish apple pie. Whether it’s served warm with ice cream, enjoyed fresh out of the oven, or reheated on a cozy Sunday afternoon, it’s a dessert that makes everyone smile. It’s humble, straightforward, but so flavorful—a testament to how simple ingredients can come together to create something special. I hope you give it a try and make it your own—maybe add a handful of berries, swap out the apples for pears, or sprinkle some chopped nuts on top. The joy is in the versatility and the comfort it brings. I’d love to hear how yours turns out, so don’t forget to leave a comment or share your variations. Happy baking!
Classic Swedish Apple Pie
Ingredients
Method
- Preheat oven to 350°F and prepare a 9-inch baking dish.
- Combine sliced apples with sugar and cinnamon in a bowl, then transfer to the baking dish.
- In a separate bowl, mix melted butter, egg, sugar, and flour until smooth.
- Spread the mixture evenly over the apples.
- Bake for 60 minutes until golden brown and apples are tender.
- Allow to cool slightly before serving. Optional: Top with ice cream or whipped cream.