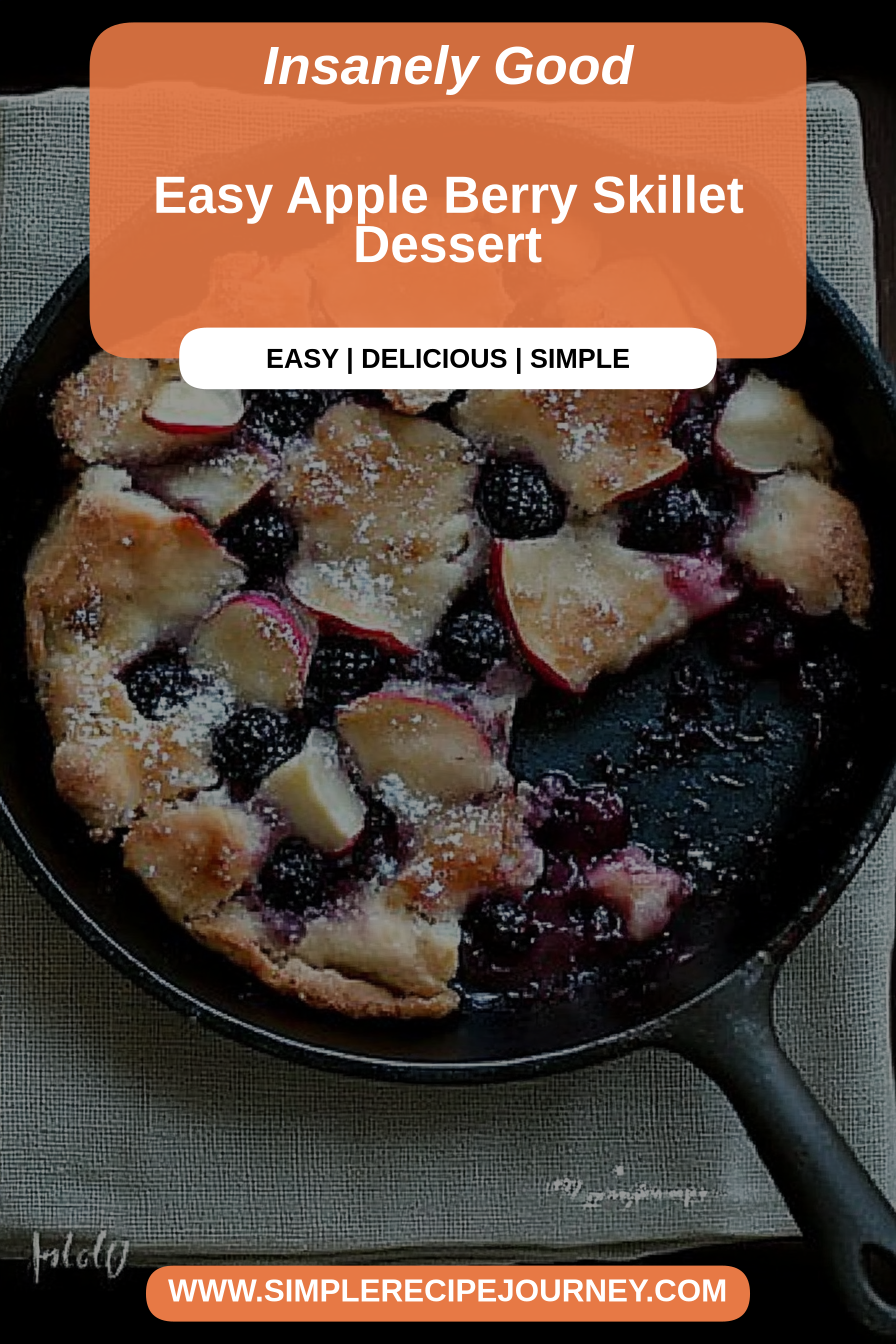
Easy Apple Berry Skillet Dessert
Oh, where do I even begin with this apple berry skillet dessert? It’s one of those recipes that feels like a warm hug on a plate. I remember the first time I made it; it was a crisp autumn evening, and I was trying to use up some extra apples from the farmer’s market and a forgotten pint of mixed berries from the freezer. Honestly, I wasn’t expecting much, but what came out of the oven completely blew me away. The smell alone – warm apples, sweet berries, a hint of cinnamon – filled the entire house and had my kids peeking into the kitchen asking “What’s that delicious smell?!” It’s got that comforting, homemade goodness that reminds me of my grandmother’s kitchen, but with a little something extra, a bright burst of berry flavor that makes it feel a bit more special. If you’re a fan of classic apple desserts but are looking for a twist that’s both incredibly easy and utterly delicious, this apple berry skillet dessert is your new best friend. It’s less fuss than a pie, more forgiving than a crumble, and frankly, it’s just plain delightful.
What is an Apple Berry Skillet Dessert?
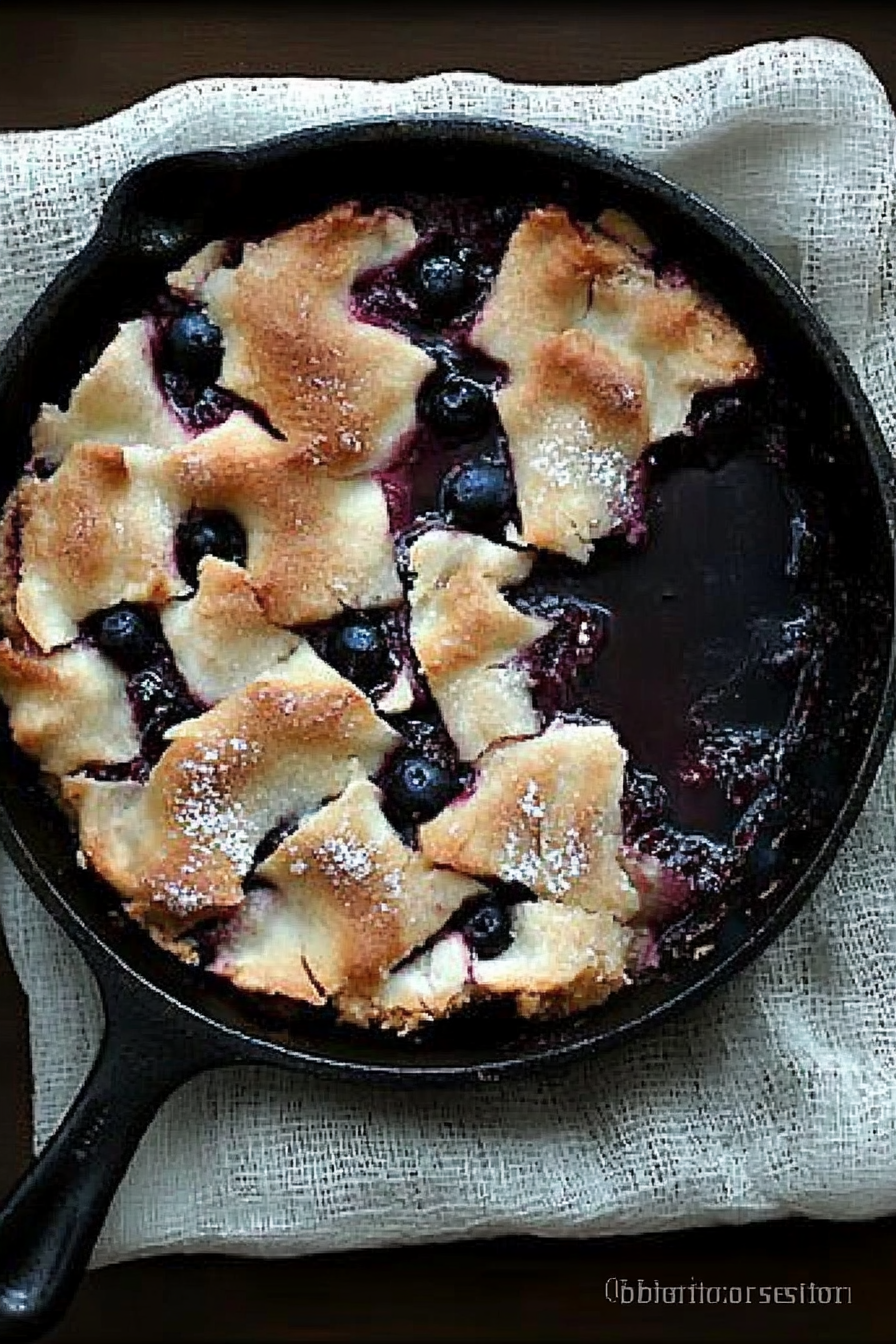
Think of this apple berry skillet dessert as a delightful marriage between a rustic apple crisp and a vibrant berry cobbler, all baked together in one glorious skillet. It’s essentially a tender, cake-like base studded with chunks of juicy apples and bursts of tart berries, all topped off with a light, streusel-like topping and a drizzle of sweet glaze. The “skillet” part is key here – baking it in a cast-iron skillet gives it this incredible crust and helps all those flavors meld together beautifully. It’s not overly complicated; it’s more of a comforting, homey bake that feels incredibly satisfying without requiring a ton of specialized skills. The name itself, apple berry skillet dessert, perfectly captures what it is: a warm, comforting dessert bursting with the best of both apple and berry worlds, made conveniently in a single skillet. It’s the kind of dessert that looks impressive enough for company but is so simple, you’ll want to make it on a Tuesday night just because.
Why you’ll love this recipe?
There are so many reasons why this apple berry skillet dessert has become a staple in my kitchen, and I just know you’re going to fall in love with it too. First and foremost, the flavor combination is just divine. You get the sweet, slightly tart apples that soften beautifully as they bake, perfectly complemented by the bright, juicy pop of mixed berries. It’s a symphony of sweet and tart, warm and fresh, all in one bite. Then there’s the simplicity factor, which is a huge win for me, especially on busy weeknights. You can literally whip up the batter and filling in about 15 minutes, pour it into the skillet, and let the oven do the rest. No fancy techniques, no multiple bowls, just straightforward goodness. And let’s talk about cost-efficiency! Apples are usually pretty budget-friendly, and I almost always have frozen berries on hand, making this a dessert that won’t break the bank. It’s also incredibly versatile. While I adore it baked in a skillet, I’ve also spooned the batter into ramekins for individual servings, and it’s just as delicious. You can play around with the types of apples and berries you use depending on what’s in season or what you have in your pantry. What I love most about this particular apple berry skillet dessert is that it hits that sweet spot between being a hearty, comforting bake and feeling a little bit elegant. It’s the perfect dessert when you’re craving something sweet and satisfying, but don’t want the fuss of a multi-step cake or pie. It’s truly a lifesaver, and honestly, my family devours it every single time.
How do I make an apple berry dessert?
Quick Overview
This apple berry skillet dessert is wonderfully straightforward. We’ll create a simple batter, mix in our apples and berries, top it with a quick crumb topping, and bake it all together in a skillet until golden and bubbly. The beauty lies in its minimal effort for maximum reward. You’re looking at about 15-20 minutes of prep time, followed by about 35-45 minutes of baking. It’s designed to be foolproof, so don’t worry if you’re new to baking – this recipe is incredibly forgiving and always turns out delicious.
Ingredients
For the Main Batter:
1 ½ cups all-purpose flour
1 cup granulated sugar
2 teaspoons baking powder
½ teaspoon ground cinnamon
¼ teaspoon salt
½ cup unsalted butter, melted and slightly cooled
1 large egg
½ cup milk (whole or 2% works best, but I’ve tested this with almond milk and it actually made it even creamier!)
1 teaspoon vanilla extract
For the Filling:
3 medium apples, peeled, cored, and chopped into ½-inch pieces (Honeycrisp, Fuji, or Gala are excellent choices!)
1 ½ cups mixed berries, fresh or frozen (a blend of blueberries, raspberries, and blackberries is fantastic)
For the Topping:
½ cup all-purpose flour
¼ cup packed light brown sugar
¼ teaspoon ground cinnamon
3 tablespoons cold unsalted butter, cut into small pieces
For the Glaze:
½ cup powdered sugar
1-2 tablespoons milk or lemon juice (start with 1 tbsp and add more for desired consistency)
Step-by-Step Instructions
Step 1: Preheat & Prep Pan
First things first, let’s get our oven preheated to 375°F (190°C). While the oven is heating up, grab your favorite 9 or 10-inch oven-safe skillet – cast iron is my absolute favorite for this because it distributes heat so evenly and gives the most gorgeous crust. Lightly grease the inside of your skillet with a little butter or cooking spray. This just ensures everything releases nicely once it’s baked.
Step 2: Mix Dry Ingredients
In a large mixing bowl, whisk together the 1 ½ cups of all-purpose flour, 1 cup of granulated sugar, 2 teaspoons of baking powder, ½ teaspoon of cinnamon, and ¼ teaspoon of salt. Give it a good whisk to make sure everything is evenly distributed. This ensures your cake base has a nice, consistent texture.
Step 3: Mix Wet Ingredients
In a separate, smaller bowl, whisk together the ½ cup of melted butter, 1 large egg, ½ cup of milk, and 1 teaspoon of vanilla extract until everything is well combined and smooth. I always make sure my melted butter isn’t piping hot, just warm enough to melt the butter, so it doesn’t scramble the egg.
Step 4: Combine
Now, pour the wet ingredients into the bowl with the dry ingredients. Using a spatula or a wooden spoon, gently mix until just combined. Be careful not to overmix! A few streaks of flour are perfectly fine. Overmixing can lead to a tougher texture, and we want this to be tender and light. It should be a thick batter, almost like pancake batter but a bit more substantial.
Step 5: Prepare Filling
In a medium bowl, toss your chopped apples and mixed berries with a tablespoon or two of the reserved batter. This helps coat the fruit and prevents it from sinking too much during baking. If you’re using frozen berries, give them a quick rinse and pat dry if they seem excessively wet, though sometimes the extra moisture is just fine and adds to the juiciness.
Step 6: Layer & Swirl
Spoon about two-thirds of the batter into your prepared skillet, spreading it out evenly. Don’t worry if it’s not perfectly smooth. Now, scatter the apple and berry mixture evenly over the batter. Dollop the remaining batter over the fruit. You don’t need to cover it completely; leaving some fruit peeking through is part of the charm. For the topping, in a small bowl, combine the ½ cup flour, ¼ cup brown sugar, and ¼ teaspoon cinnamon. Add the 3 tablespoons of cold butter and use your fingertips or a pastry blender to cut the butter into the flour mixture until it resembles coarse crumbs. Sprinkle this topping evenly over the batter and fruit.
Step 7: Bake
Place the skillet in your preheated oven and bake for 35-45 minutes, or until the topping is golden brown and a toothpick inserted into the center of the cake part (avoiding fruit) comes out clean. The edges should be bubbly, and the aroma will be absolutely heavenly. If the topping starts to brown too quickly, you can loosely tent the skillet with aluminum foil for the last 10-15 minutes of baking.
Step 8: Cool & Glaze
Once baked, carefully remove the skillet from the oven and let it cool on a wire rack for at least 15-20 minutes. This is crucial because it’s still quite hot and will continue to set as it cools. While it’s cooling, whisk together the ½ cup powdered sugar with 1 tablespoon of milk or lemon juice in a small bowl. Add more liquid, a teaspoon at a time, until you reach a drizzly consistency. Once the dessert has cooled slightly but is still warm, drizzle the glaze artfully over the top. The glaze will harden slightly as it cools further, adding a lovely sweet finish.
Step 9: Slice & Serve
Serve the apple berry skillet dessert warm, directly from the skillet. It’s absolutely divine on its own, but if you want to go all out, a scoop of vanilla bean ice cream or a dollop of whipped cream is pure bliss. I love using a sturdy spatula to cut generous wedges right out of the skillet. The combination of the tender cake, warm fruit, and crunchy topping is just irresistible.
What to Serve It With
This apple berry skillet dessert is so wonderfully versatile, it truly fits into any meal or occasion. For breakfast, imagine cutting into a warm slice with your morning coffee. It’s like a special treat to start the day, far more exciting than plain toast. I like to serve it with a sprinkle of extra cinnamon or a tiny dollop of Greek yogurt to balance the sweetness. At brunch, it’s a showstopper! I’ll serve it in pretty wedges on a nice platter, maybe with a side of fresh berries or a light scattering of powdered sugar. It pairs beautifully with mimosas or a fresh pot of tea. As a dessert, it’s simply perfection. Served warm with a generous scoop of vanilla ice cream, it’s utterly decadent. A drizzle of caramel sauce or a dollop of crème fraîche also works wonders. For cozy snacks, this is my go-to. When that 10 pm craving hits and I don’t want to go through a whole cake-baking process, this is my savior. I’ll just cut a small piece, warm it up for a few seconds in the microwave, and enjoy it with a cup of chamomile tea. My family also loves it with a glass of milk, especially the younger ones. It’s that kind of comforting, delicious treat that brings everyone together.
Top Tips for Perfecting Your Apple Berry Skillet Dessert
Over the years, I’ve learned a few tricks that take this apple berry skillet dessert from good to absolutely amazing. For the apples, I always opt for varieties that hold their shape well when baked, like Honeycrisp, Fuji, or Gala. Granny Smith can be a bit too tart unless you’re going for that extra zing. I also make sure to chop them into roughly uniform ½-inch pieces so they cook evenly. If you find your apples are releasing a lot of water, especially if they’re very ripe, you can gently squeeze out some of the excess moisture after chopping, though this isn’t always necessary. When it comes to mixing the batter, my biggest piece of advice is this: do NOT overmix. As soon as you no longer see big streaks of dry flour, stop mixing. A few little lumps are perfectly fine and will actually contribute to a more tender crumb. Overworking the gluten in the flour is the number one culprit for a tough texture. For the fruit, I often toss them with a tablespoon or two of the batter before adding them to the skillet. This coating helps the fruit distribute more evenly and prevents it from sinking to the bottom like little stones. It also ensures that every bite gets a good mix of cake and fruit. When it comes to the topping, the key to that perfect crumbly texture is using cold butter. Cut it into small cubes and rub it into the dry ingredients until you have pea-sized pieces. Don’t overwork it; we want those lovely little butter pockets that bake up golden and delicious. If you’re feeling adventurous with swirl customization, you can reserve a little bit of the batter and mix it with a tablespoon of cocoa powder or a few drops of food coloring for a marbled effect before you add the fruit. For ingredient swaps, if you don’t have milk, a plant-based milk like almond or oat milk works wonderfully. For the berries, if you only have one kind, that’s perfectly fine too! A bag of frozen mixed berries is usually the most cost-effective and convenient option for me, and they bake up beautifully. For baking, always use an oven thermometer if you have one, as oven temperatures can vary. Place the skillet in the center of the oven for the most even heat distribution. To check for doneness, a toothpick inserted into the cakey part should come out clean, and the edges should look set and slightly golden. The topping should be beautifully browned. If the topping gets too dark before the inside is cooked, a loose tent of aluminum foil is your best friend. Finally, for the glaze, the consistency is key. Start with the lesser amount of liquid and add more gradually until it’s thick enough to drizzle but thin enough to spread easily. You want it to be visible and sweet, but not so thin that it just soaks into the dessert.
Storing and Reheating Tips
This apple berry skillet dessert is honestly best served warm, but it stores and reheats surprisingly well, which is another reason I love it so much. If you happen to have any leftovers (which is rare in my house!), you can store them covered at room temperature for up to two days. Just make sure it’s completely cooled before covering. The topping might lose a bit of its crispness at room temperature, but it’s still delicious. For longer storage, I always opt for the refrigerator. Once cooled, cover the skillet tightly with plastic wrap or transfer the dessert to an airtight container. It will keep well in the fridge for up to 4-5 days. The flavors actually tend to meld together even more, which can be quite nice! If you plan on freezing portions, I recommend cutting individual slices and wrapping them tightly in plastic wrap, then placing them in a freezer-safe bag or container. It should stay good in the freezer for about 2-3 months. To reheat, my favorite method is to pop a slice (or the whole skillet if you’re lucky enough to have it!) back into a 350°F (175°C) oven for about 10-15 minutes, or until heated through and the topping is nice and warm. This will help revive some of that lovely crispness. If you’re in a hurry, you can also gently reheat a single slice in the microwave for 30-60 seconds, but be aware that the topping won’t be as crunchy. For the glaze, I actually find it’s best to add it *after* reheating if you’re storing it without glaze or if it’s been refrigerated for a while. You can always whip up a fresh small batch of glaze to drizzle over the warm dessert for that extra touch of sweetness. If you store it with the glaze already on, it might become a bit sticky or slightly dissolved during storage and reheating, but it’s still tasty!
Frequently Asked Questions
Final Thoughts
I truly hope you give this apple berry skillet dessert a try. It’s more than just a recipe to me; it’s a little bit of comfort, a burst of joy, and a whole lot of deliciousness all rolled into one. The way the apples soften and the berries burst, all held together by that tender cake and crunchy topping, it’s just magical. It’s the perfect end to a meal, a wonderful treat for a weekend brunch, or even a delightful breakfast if you’re feeling indulgent. Remember, the key is not to overthink it; baking should be fun! If you loved this, you might also enjoy my recipe for a Classic Apple Crumble or my Easy Mixed Berry Cobbler. They share that same homey, comforting vibe. Please, if you make this apple berry skillet dessert, I would absolutely love to hear about it! Leave a comment below and tell me how it turned out, or share your own favorite variations and tips. Happy baking, and enjoy every single bite!
Skillet Apple Berry Crumble
Ingredients
Method
- Preheat your oven to 400°F (200°C).
- In a large bowl, combine the sliced apples, mixed berries, granulated sugar, cornstarch, cinnamon, and nutmeg. Toss to coat evenly. Stir in the melted butter.4 medium apples
- Pour the fruit mixture into a 9 or 10-inch cast-iron skillet, spreading it evenly.
- In a separate medium bowl, whisk together the flour, rolled oats, brown sugar, and salt for the crumble topping.4 medium apples
- Add the cold butter cubes to the dry ingredients. Use a pastry blender, fork, or your fingertips to cut the butter into the mixture until it resembles coarse crumbs.4 medium apples
- Sprinkle the crumble topping evenly over the fruit mixture in the skillet.
- Place the skillet on a baking sheet (to catch any drips) and bake for 25-30 minutes, or until the topping is golden brown and the fruit is bubbly.
- Let the skillet cool for at least 10-15 minutes before serving. This allows the filling to thicken.