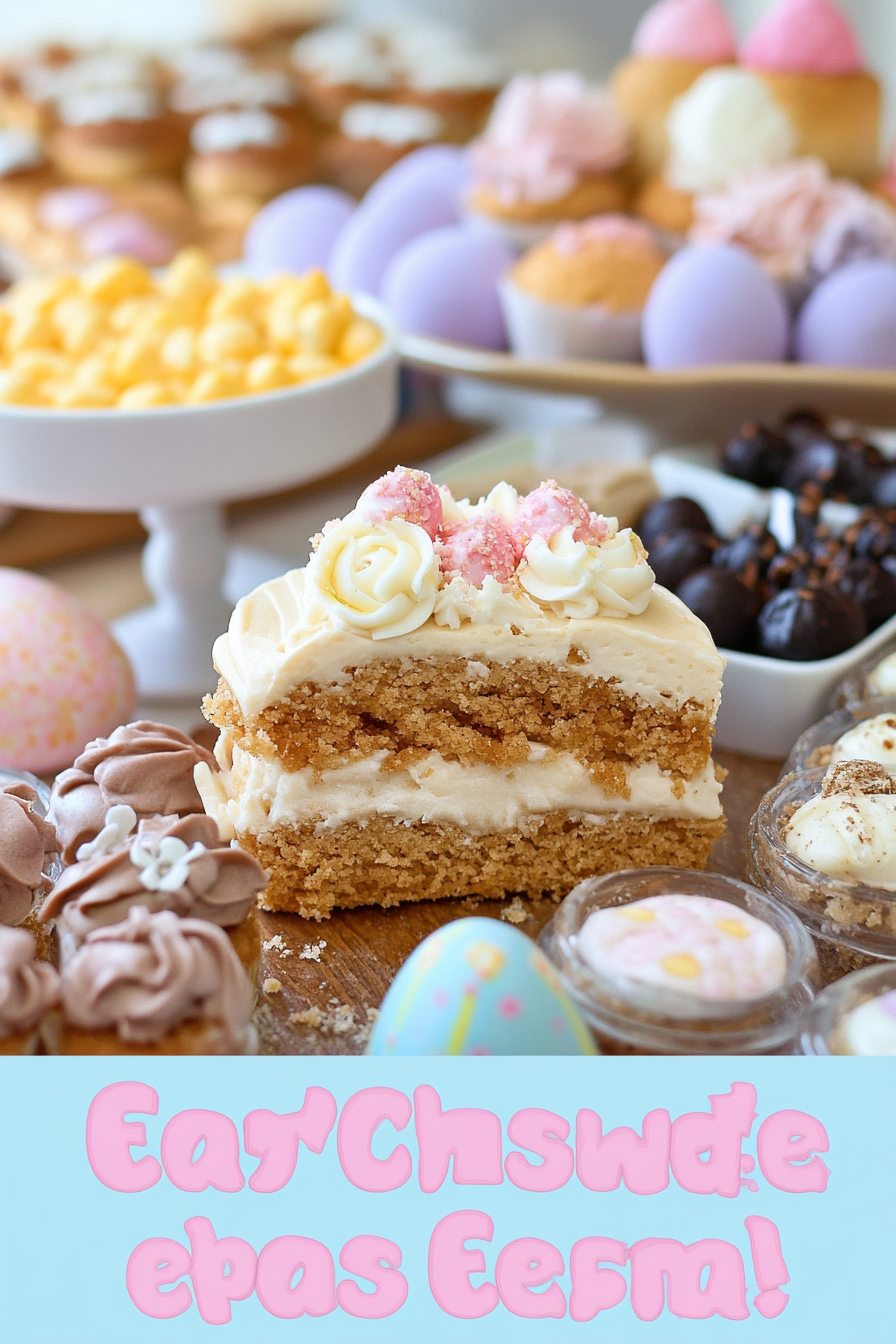
Easter Treats Our Family Loves
Oh my goodness, can you believe Easter is just around the corner? It always sneaks up on me, and every year, I scramble a little to figure out what delicious Easter treats to bring to the family gathering. For the longest time, it was always the same store-bought cookies or a last-minute dash for cupcakes. But then, I discovered this carrot cake, and honestly, it’s a game-changer. It’s not just any carrot cake; it’s got this incredible cream cheese swirl baked right in, making it ridiculously moist and just perfectly spiced. Think of it like a hug in cake form, but way more elegant than a hug! It’s got that comforting flavor profile many of us love in our Easter treats, but with an extra layer of deliciousness that sets it apart. It’s quickly become my absolute favorite for any spring celebration, especially Easter.
What is Carrot Cake with Cream Cheese Swirl?
So, what exactly is this magical creation? At its heart, it’s a classic carrot cake – you know, the kind that’s packed with grated carrots, warm spices like cinnamon and nutmeg, and often nuts and raisins (though I’ll share my stance on those later!). But the twist, the real star of the show, is the luscious cream cheese filling that’s swirled into the batter before it bakes. Imagine pockets of tangy, sweet cream cheese mingling with the moist, spiced cake. It’s essentially a two-in-one treat: a moist, flavorful cake with a decadent cheesecake-like ribbon running through it. It’s not overly complicated; it just takes a little extra love and a few extra steps to get that beautiful marbling effect. The name itself sounds fancy, doesn’t it? But trust me, it’s totally doable for any home baker, and it’s way more impressive than your average sheet cake.
Why you’ll love this recipe?
Where do I even begin with why this cake is so darn good? First off, the flavor is just out of this world. The carrots lend an amazing natural sweetness and moisture, and the blend of cinnamon, nutmeg, and a hint of ginger just screams cozy and celebratory. Then you get those delightful bursts of tangy cream cheese that cut through the sweetness perfectly. It’s a flavor combination that’s both comforting and sophisticated. And the texture! Oh, the texture is divine. It’s incredibly moist, almost fudgy in parts, thanks to the carrots and a secret ingredient I’ll share in a bit. It’s never dry, which is my biggest pet peeve with carrot cakes.
What I also adore about this recipe is its relative simplicity. While it has a few more steps than a basic cake, none of them are difficult. You mix a batter, you whip up a quick cream cheese filling, and then you swirl them together. It looks impressive, but it’s really just a fun process. Plus, it’s surprisingly cost-effective to make! Carrots are inexpensive, and the rest are pantry staples. It’s a lifesaver when you want to bring something homemade to an Easter potluck without breaking the bank. And it’s so versatile! Serve it as is, or with a dollop of whipped cream. It’s fantastic for breakfast, brunch, or as a show-stopping dessert.
Honestly, the main reason I keep coming back to this recipe is the reaction it gets. It always disappears in minutes at my house, and people rave about it. It feels special, but it’s made with ingredients you probably already have. It’s the perfect balance of familiar and exciting, which is exactly what I look for in my favorite Easter treats.
How do I make a Carrot Cake with Cream Cheese Swirl?
Quick Overview
This cake is all about layering flavors and textures. We’ll start by making a wonderfully spiced carrot cake batter, then whip up a quick and creamy cream cheese mixture. The magic happens when we swirl these two together before baking. The result is a moist, flavorful cake with beautiful ribbons of cream cheese running throughout. It’s straightforward, and the visual appeal is a huge bonus. You’ll be amazed at how easy it is to get that professional-looking swirl!
Ingredients
For the Main Batter:
- 3 cups all-purpose flour
- 2 teaspoons baking soda
- 1 teaspoon ground cinnamon
- 1/2 teaspoon ground nutmeg
- 1/4 teaspoon ground ginger
- 1/2 teaspoon salt
- 1.5 cups granulated sugar
- 1 cup vegetable oil (or other neutral oil like canola)
- 4 large eggs, at room temperature
- 1 teaspoon vanilla extract
- 3 cups grated carrots (about 3-4 medium carrots, packed)
- 1 cup crushed pineapple, drained well (this is my secret to extra moisture!)
- 1/2 cup chopped pecans or walnuts (optional, but highly recommended!)
For the Filling:
- 8 ounces cream cheese, softened
- 1/2 cup granulated sugar
- 1 large egg
- 1 teaspoon vanilla extract
For the Glaze:
- 1.5 cups powdered sugar
- 2-3 tablespoons milk or heavy cream
- 1/2 teaspoon vanilla extract
Step-by-Step Instructions
Step 1: Preheat & Prep Pan
First things first, let’s get our oven ready! Preheat it to 350°F (175°C). Now, grab a 9×13 inch baking pan. I like to grease it really well with butter or cooking spray, and then give it a light dusting of flour. This ensures no sticky situations, and your beautiful cake will slide right out. You can also line the bottom with parchment paper for extra insurance, which is a trick I learned after a few close calls!
Step 2: Mix Dry Ingredients
In a large bowl, whisk together the all-purpose flour, baking soda, cinnamon, nutmeg, ginger, and salt. Give it a good whisk to make sure everything is evenly distributed. This step is super important for ensuring your leavening agents and spices are well incorporated, preventing any pockets of baking soda or spice in your cake. You want that uniform flavor and rise!
Step 3: Mix Wet Ingredients
In a separate, large bowl, whisk together the granulated sugar and vegetable oil until well combined. Then, beat in the eggs one at a time, making sure each one is fully incorporated before adding the next. Stir in the vanilla extract. The mixture should look smooth and slightly thickened. This is the base for our super moist cake!
Step 4: Combine
Now, let’s bring it all together. Gradually add the dry ingredients to the wet ingredients, mixing on low speed or by hand just until *barely* combined. Seriously, don’t overmix! Overmixing can develop the gluten in the flour, leading to a tougher cake. Once most of the flour is incorporated, gently fold in the grated carrots, crushed pineapple (make sure it’s well-drained to avoid a soggy cake!), and chopped nuts if you’re using them. The batter will be thick and loaded with all those yummy mix-ins.
Step 5: Prepare Filling
While your batter is resting for a moment, let’s make the cream cheese swirl. In a medium bowl, beat the softened cream cheese and sugar until it’s smooth and creamy – no lumps allowed! Beat in the egg and vanilla extract until just combined. Again, don’t overmix here. This filling is going to give us those gorgeous creamy ribbons.
Step 6: Layer & Swirl
This is where the fun begins! Spoon about half of the carrot cake batter into your prepared pan, spreading it out evenly. Dollop spoonfuls of the cream cheese filling over the batter. Then, spoon the remaining carrot cake batter over the cream cheese. You don’t need to be perfectly precise here; we want some of the cream cheese to peek through. Now, grab a butter knife or a skewer and gently swirl the cream cheese mixture into the batter. Make figure-eights or random swirls – the more organic, the better! You want to create ribbons, not completely mix it in.
Step 7: Bake
Pop that beautiful pan into your preheated oven. Bake for 35-45 minutes, or until a wooden skewer or toothpick inserted into the center of the cake comes out clean, or with just a few moist crumbs attached. Keep an eye on it, as ovens can vary. If the top starts browning too quickly, you can loosely tent it with foil.
Step 8: Cool & Glaze
Once it’s done, carefully remove the cake from the oven and let it cool in the pan on a wire rack for at least 20-30 minutes. This is crucial for it to set up properly. While it’s cooling, whisk together the powdered sugar, milk (or cream), and vanilla extract in a small bowl until you have a smooth, pourable glaze. Once the cake has cooled a bit but is still warm, drizzle the glaze all over the top. The warmth of the cake will help it spread and set beautifully. If you prefer a thicker glaze, add more powdered sugar; for a thinner one, add a touch more liquid.
Step 9: Slice & Serve
Let the glaze set completely before slicing and serving. This usually takes another 30 minutes or so. Slice into squares and admire those gorgeous swirls! The best way to serve it is at room temperature, so you can really appreciate all the flavors and textures. If you’ve got any leftovers (which is rare in my house!), they are even better the next day.
What to Serve It With
This carrot cake is so versatile, it fits right into any meal or occasion. For a relaxed Easter morning, I love serving a slice with a hot cup of coffee. The rich, spiced cake with a bit of creamy glaze is just the perfect way to start the day. It’s a step up from a simple muffin or scone and feels wonderfully indulgent.
For a more formal Easter brunch spread, I like to cut it into slightly smaller squares and arrange them prettily on a cake stand. It looks so impressive next to deviled eggs and fresh fruit salad. A glass of sparkling cider or a mimosa would be a lovely pairing here. It adds a touch of elegance to the table without being fussy.
As a dessert, this cake truly shines. I sometimes serve it with a dollop of freshly whipped cream or even a small scoop of vanilla bean ice cream. The contrast of warm cake and cold ice cream is just heavenly. It’s also fantastic alongside a simple fruit salad – the sweetness of the cake complements the tartness of berries or citrus.
And for those cozy afternoon snacks when you just need a little something sweet? A slice of this cake is absolute perfection. It’s comforting and satisfying, and the cream cheese swirl makes it feel like a real treat. My kids often ask for this when they want something sweet after school, and I’m always happy to oblige because I know it’s made with wholesome ingredients and it’s so much better than anything store-bought.
One of my favorite family traditions is to have a slice after the Easter egg hunt. It’s the perfect sweet reward after all that running around! It always brings a smile to everyone’s face.
Top Tips for Perfecting Your Carrot Cake With Cream Cheese Swirl
I’ve made this cake more times than I can count, and through the years, I’ve picked up a few tricks that really make a difference. For instance, with the carrots, don’t just chop them! Grating them finely (I use the medium holes on my box grater) is key. It allows them to soften beautifully into the cake, distributing their moisture and sweetness evenly. You want them to be almost invisible, melting into the batter, not chunky. And be sure to pack them into your measuring cup; a loose pack won’t give you enough carrot power!
When it comes to mixing the batter, this is where most people go wrong. Remember what I said about not overmixing? It’s vital. Once the dry ingredients are added to the wet, mix only until the flour streaks disappear. Overworking the batter will give you a tough, dense cake. Gently folding in the carrots and pineapple at the end is the way to go. For the pineapple, I can’t stress enough to drain it *really* well. I usually give it a good squeeze through a fine-mesh sieve or even wrap it in a clean tea towel to get out as much juice as possible. Excess liquid can make the cake gummy.
The swirl is where you can really have fun! Don’t overthink it. The goal is just to marble the cream cheese filling into the cake batter. Start with larger dollops of the cream cheese filling on top of the cake batter, then use a knife or skewer to gently drag it through the batter. You can make figure-eights, loops, or just random strokes. Aim for some streaks of cream cheese throughout, but don’t try to completely mix it in, or you’ll lose the distinct swirl effect. And don’t worry if it’s not perfectly uniform; that’s part of its charm!
Ingredient swaps are my jam! If you’re not a fan of nuts, just omit them entirely. They are totally optional. If you want to add raisins, go for it, but maybe soak them in a little warm water or orange juice for 10 minutes first to plump them up and make them less chewy. For a dairy-free version, I’ve experimented with a neutral vegetable oil like sunflower oil, and it works beautifully. And if you don’t have crushed pineapple, you could try unsweetened applesauce, but the pineapple really adds something special with its subtle tang and tropical sweetness.
Baking tips: Always use the middle rack of your oven for even baking. If your oven tends to run hot, you might want to reduce the temperature by 25 degrees Fahrenheit. To check for doneness, insert a toothpick into the center – if it comes out clean or with a few moist crumbs attached, it’s ready. If it comes out with wet batter, give it a few more minutes. Avoid opening the oven door too early, as this can cause the cake to sink.
And finally, the glaze! It’s simple, but getting the consistency right is key. If it’s too thick, add milk or cream a teaspoon at a time until it reaches a nice pourable consistency. If it’s too thin, add a bit more powdered sugar. I like to drizzle it when the cake is still warm, as it helps it spread and set into a lovely, slightly crackled finish. But if you prefer a thicker, more solid glaze, let the cake cool completely before adding it.
Storing and Reheating Tips
This cake is surprisingly forgiving when it comes to storage. At room temperature, it will keep well for about 2-3 days. Make sure it’s covered tightly with plastic wrap or in an airtight container. This is perfect if you know it’s going to be gobbled up quickly after you bake it. The moisture from the carrots and pineapple helps keep it fresh for longer, but it’s always best to avoid extreme temperatures.
If you need to store it for longer, the refrigerator is your best bet. Wrap the cooled cake tightly in plastic wrap, then place it in an airtight container. It should stay fresh in the fridge for up to a week. I find the cream cheese swirl actually benefits from a day in the fridge; it firms up a bit and the flavors meld even more. When you want to serve it from the fridge, I highly recommend letting it sit at room temperature for about 30-60 minutes before slicing. This brings out the best texture and flavor; a cold cake can sometimes taste a bit dense and muted.
Can you freeze it? Absolutely! This cake freezes beautifully, which is a lifesaver for holidays. Once it’s completely cooled, I wrap it very well. First, I wrap it tightly in a layer of plastic wrap, then in a layer of aluminum foil, and finally, I place it in a freezer-safe bag or airtight container. It can be stored in the freezer for up to 2-3 months. To thaw, transfer the frozen cake to the refrigerator and let it thaw overnight. Then, bring it to room temperature as you would with fridge-stored cake. It will still be wonderfully moist and delicious!
A note on the glaze: If you plan to freeze the cake, I highly recommend glazing it *after* it has thawed. The glaze can sometimes become a bit sticky or crack more if frozen and thawed. So, freeze the un-glazed cake, thaw it in the fridge, and then make and apply a fresh glaze. Or, if you’re serving it straight from the fridge and didn’t freeze it, let it come to room temp before glazing. The key is always serving it at its optimal temperature for the best taste and texture!
Frequently Asked Questions
Final Thoughts
So there you have it – my absolute favorite carrot cake with that irresistible cream cheese swirl. It’s the kind of dessert that just makes people happy. It’s got all those wonderful, comforting flavors we associate with spring and Easter treats, but with that extra touch of decadence that makes it truly special. It’s proof that you don’t need to be a professional baker to create something amazing that will wow your friends and family.
I really hope you give this recipe a try for your next celebration, or even just for a weekend treat. I promise, the smell filling your kitchen as it bakes is worth it alone, and the taste? Well, that’s pure bliss. If you love this recipe and are looking for more delightful ways to celebrate the season, be sure to check out my other Easter-themed posts for more inspiration! I’m always sharing new discoveries and family favorites.
I can’t wait to hear how yours turns out! Please leave a comment below and let me know if you tried it, what your favorite part was, or if you made any fun twists. And if you share a picture on social media, tag me – I’d love to see your creations! Happy baking, everyone!

Easter Egg Nests
Ingredients
Method
- Line a baking sheet with parchment paper.
- In a microwave-safe bowl, combine the semi-sweet chocolate chips and peanut butter. Microwave in 30-second intervals, stirring after each, until smooth and melted.
- Gently fold the chow mein noodles and mini marshmallows into the melted chocolate mixture until evenly coated.
- Drop spoonfuls of the mixture onto the prepared baking sheet, forming nest shapes. You can use the back of a spoon to create a well in the center.
- Immediately place a few mini candy Easter eggs into the center of each nest before the mixture sets.
- Let the nests cool and set completely at room temperature, or in the refrigerator for faster setting.