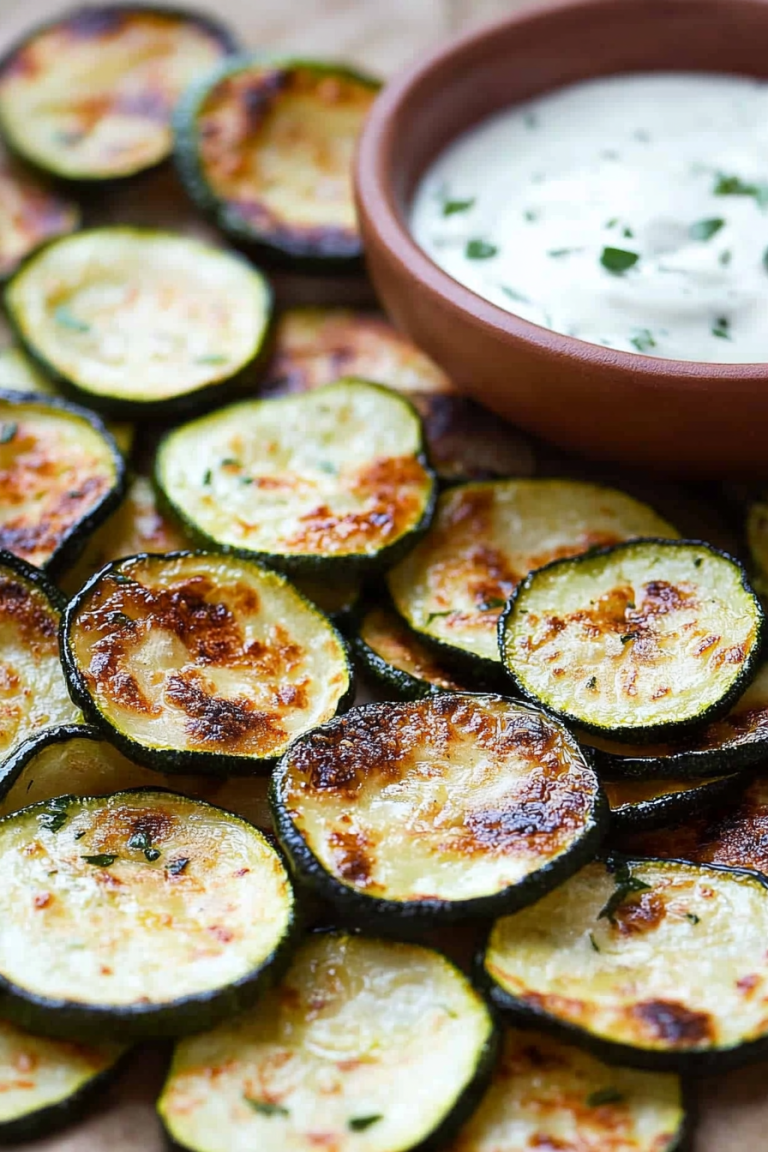
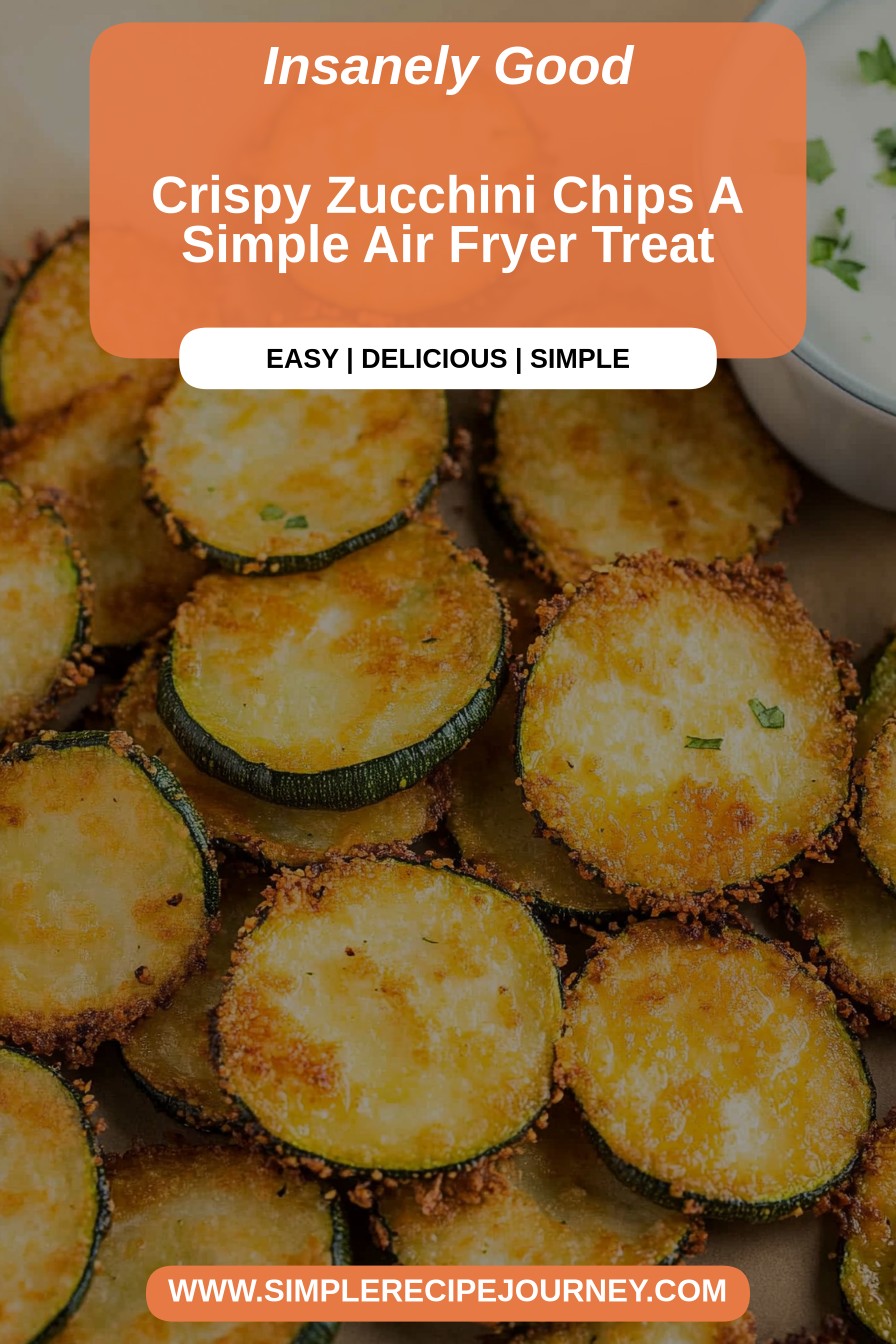
Crispy Zucchini Chips A Simple Air Fryer Treat
Oh, where do I even begin with these zucchini chips? They’re honestly one of those recipes that just makes my heart sing. I remember the first time I made them, it was during that crazy summer when our garden was absolutely overflowing with zucchini. I mean, mountains of it! I was starting to panic a little, wondering what on earth I was going to do with it all, and then it hit me – crispy, savory zucchini chips! It felt like a culinary revelation, a way to transform what felt like an overwhelming harvest into something utterly irresistible. They’re so much better than any store-bought chip, and the fact that they’re packed with veggies? Well, that’s just a bonus my kids happily overlook because they’re too busy devouring them! This recipe is my go-to when I want something a little bit crunchy and satisfying, but I don’t want to spend hours in the kitchen. They’re surprisingly simple, and honestly, they taste way fancier than they are. Think of them as a healthier, homemade cousin to potato chips, but with a unique, slightly earthy flavor that’s just divine.
What are Zucchini Chips?
So, what exactly are these magical little bites of goodness? At their heart, zucchini chips are simply thinly sliced zucchini that’s been seasoned and baked until wonderfully crisp. It’s not quite a “chip” in the potato chip sense, more like a delightful, baked vegetable crisp that has this incredible texture – a little bit tender on the inside, but with a satisfying crunch on the outside. They’re a fantastic way to use up an abundance of zucchini, especially during peak season. I like to think of them as nature’s way of saying, “Here’s a healthy snack that’s also incredibly delicious.” The name itself, “zucchini chips,” really captures the essence – they’re the chip-like experience, but starring the humble zucchini. It’s a simple concept, but when you get the technique just right, it’s pure magic. They’re the perfect solution for when you’re craving something to munch on, but you want to feel good about what you’re eating.
Why you’ll love this recipe?
Honestly, the list of reasons why I adore this zucchini chip recipe is pretty long, but let me try to narrow it down for you. First off, the flavor is just spectacular. You get that subtle, slightly sweet taste of zucchini, beautifully enhanced by the savory seasonings. It’s not overpowering, which is what I love. Then there’s the texture. When they come out of the oven, they’re perfectly crisp, almost delicate, but they have a satisfying chewiness too. It’s a flavor and texture combination that’s just addictive. And let’s talk about simplicity. I know sometimes recipes sound complicated, but this one is a lifesaver on busy weeknights. You can honestly whip up a batch in under 30 minutes, active time included. Plus, it’s incredibly budget-friendly! Zucchini is usually pretty affordable, and the other ingredients are pantry staples. What I love most, though, is their versatility. They’re fantastic on their own, but they’re also amazing crumbled over salads, served alongside dips, or even just as a little something extra on a charcuterie board. They’re a much healthier alternative to fried snacks, and they disappear in minutes at my house. Seriously, my kids ask for these constantly, which is a win-win in my book! They’re a testament to how delicious healthy eating can be.
How do you make Zucchini Chips?
Quick Overview
This recipe is all about simplicity and coaxing out the best texture from your zucchini. We’ll start by thinly slicing the zucchini, giving it a quick bath to remove excess moisture (this is KEY for crispiness!), then tossing it with a flavorful blend of spices before a short stint in the oven. The goal is to dehydrate them just enough to get that delightful crunch without turning them into dust. It’s a straightforward process that yields a surprisingly sophisticated snack. You’ll be amazed at how something so simple can be so utterly delicious!
Ingredients
For the Main Batter:
2 medium zucchini (about 1 pound total) – Look for firm, unblemished zucchini. I find the medium-sized ones work best because they have a good ratio of flesh to seeds.
2 tablespoons olive oil – Extra virgin is great here for flavor, but any good quality olive oil will do.
1 teaspoon garlic powder – Adds a nice savory punch.
1/2 teaspoon onion powder – For a little depth.
1/2 teaspoon smoked paprika – This is my secret weapon for flavor! It adds a lovely smoky, slightly sweet note.
1/4 teaspoon cayenne pepper (optional) – Just a tiny pinch if you like a little warmth.
Salt and freshly ground black pepper to taste – Don’t be shy with the salt; it really brings out the flavors!
For the Coating (Optional, but recommended!):
1/2 cup grated Parmesan cheese – Use freshly grated if you can; it melts so much better!
1/4 cup almond flour or finely ground breadcrumbs – This helps create an extra crispy coating. Almond flour is great for a slightly nuttier flavor and gluten-free option.
For Serving:
Your favorite dipping sauce (marinara, ranch, aoli) – Or enjoy them plain!
Step-by-Step Instructions
Step 1: Preheat & Prep Pan
First things first, let’s get our oven ready and prepare our baking sheets. Preheat your oven to a moderate 375°F (190°C). This temperature is key – hot enough to crisp them up, but not so hot that they burn before they have a chance to dry out. Line two large baking sheets with parchment paper. This is non-negotiable for me; it prevents sticking and makes cleanup a breeze. If you don’t have parchment, lightly grease the baking sheets, but parchment paper is truly your best friend here for even cooking and easy removal.
Step 2: Mix Dry Ingredients
In a medium bowl, whisk together your garlic powder, onion powder, smoked paprika, cayenne pepper (if using), salt, and black pepper. If you’re using the optional coating, I like to mix the Parmesan cheese and almond flour (or breadcrumbs) into this dry spice blend now. This ensures everything is evenly distributed, so you don’t get pockets of plain flour or overwhelming spice. Make sure it’s all nicely combined before we add the wet ingredients.
Step 3: Mix Wet Ingredients
Now, let’s prep the zucchini itself. Wash your zucchini thoroughly and then, using a mandoline slicer or a very sharp knife, slice them into thin rounds, about 1/16 to 1/8 inch thick. You want them thin enough to crisp up, but not so thin that they’ll shatter. Lay the slices out on paper towels and pat them dry with more paper towels. This step is crucial for getting them crispy! Seriously, don’t skip this moisture-removing step. Then, in a large bowl, toss the zucchini slices with the olive oil. Make sure each slice is lightly coated. We’re not drowning them in oil, just giving them a nice sheen so the spices and coating can adhere.
Step 4: Combine
Now for the magic part where everything comes together. Add the oiled zucchini slices to the bowl with your dry spice and coating mixture. Gently toss everything together with your hands or a spatula. You want to make sure each zucchini slice is evenly coated with the seasonings and the optional Parmesan-almond flour mix. Be gentle so you don’t break the delicate slices. If it seems a little dry, you can add another tiny drizzle of olive oil, but be sparing – too much oil can make them greasy rather than crispy.
Step 5: Prepare Filling
This step isn’t really about a “filling” in the traditional sense for zucchini chips, but rather ensuring your zucchini is properly prepped for baking. The key is making sure the slices are as dry as possible before coating them. I often lay them out on clean kitchen towels for about 10-15 minutes to let gravity do some of the work in drawing out excess moisture. Some people even salt them lightly and let them sit, then pat them dry again. The less water content, the crispier your chips will be. So, think of this “filling” preparation as moisture management!
Step 6: Layer & Swirl
Arrange the coated zucchini slices in a single layer on the prepared baking sheets. You don’t want them overlapping too much, or they’ll steam instead of crisp. If you have too many to fit on two sheets without crowding, it’s better to bake in batches. This ensures maximum surface area exposure to the heat, which is what leads to that beautiful crispiness. Take a moment to make sure they’re spread out nicely; it really makes a difference in the final texture.
Step 7: Bake
Pop those baking sheets into your preheated oven. Bake for 15-20 minutes. Now, here’s where you need to keep an eye on them. Ovens can vary, and zucchini slices can go from perfectly crisp to burnt in a matter of seconds! After about 10 minutes, carefully flip each slice over. This helps them crisp up evenly on both sides. Continue baking for another 5-10 minutes, or until they are golden brown and crisp around the edges. They’ll continue to crisp up as they cool, so don’t overbake them in the oven.
Step 8: Cool & Glaze
Once they’re golden and crisp, carefully remove the baking sheets from the oven. Transfer the zucchini chips to a wire rack to cool completely. This is another crucial step for achieving ultimate crispiness! As they cool, any remaining moisture will evaporate, leaving you with perfectly crunchy chips. I usually resist the urge to dip them right away, but if you’re serving them immediately and want a little extra something, you could drizzle a very light glaze over them once they’re out of the oven. For this recipe, a “glaze” isn’t really a traditional component, but you could certainly brush them with a little extra olive oil and sprinkle with fresh herbs like parsley or chives right after they come out of the oven for added flavor and visual appeal.
Step 9: Slice & Serve
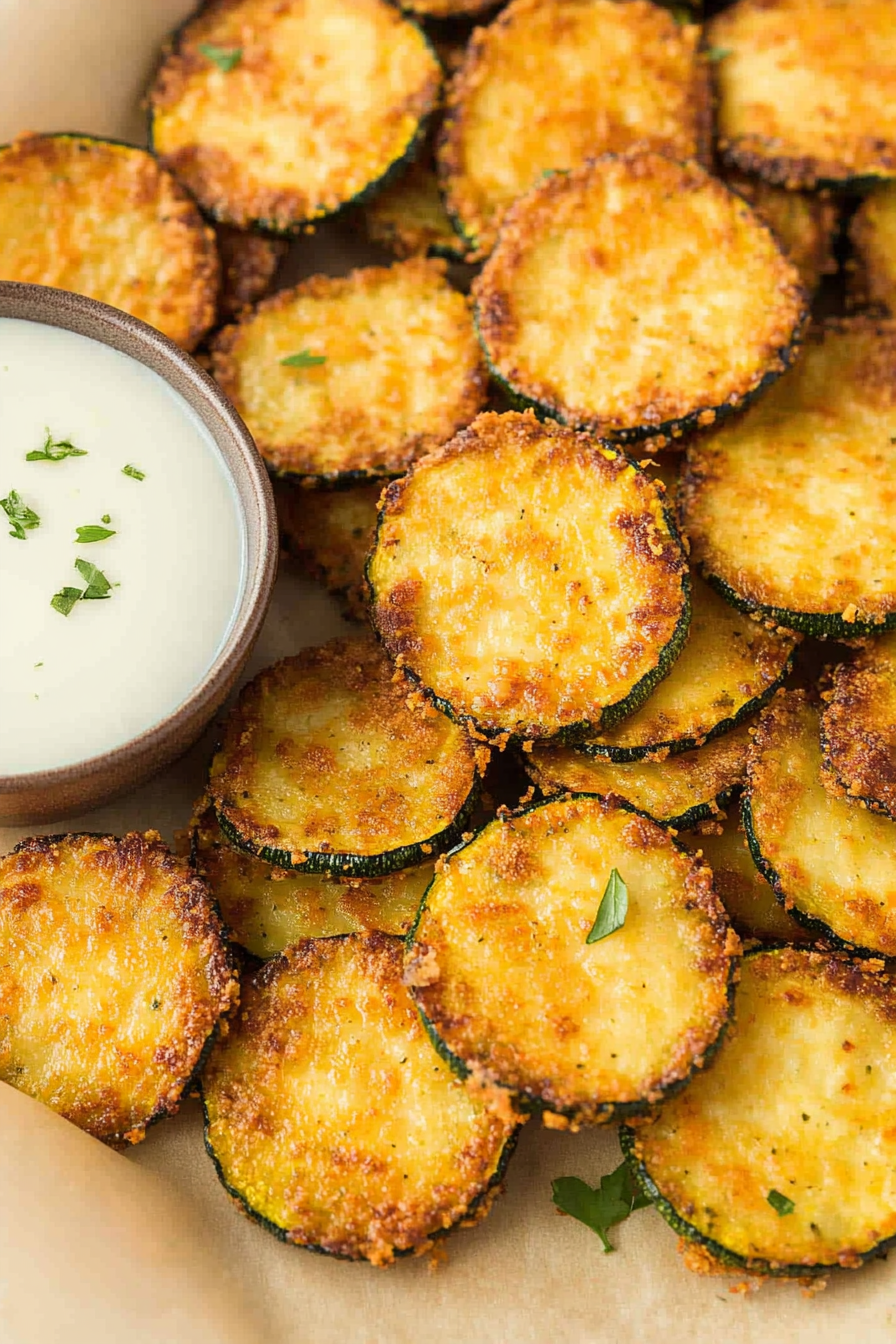
Once completely cooled and wonderfully crisp, your zucchini chips are ready to be enjoyed! I love serving them piled high in a bowl or arranged artfully on a platter. They are fantastic on their own, but they truly shine when paired with a delicious dip. My favorites include a tangy marinara sauce, a creamy ranch dressing, or a zesty garlic aioli. They’re also a wonderful addition to salads, offering a satisfying crunch that mimics croutons but with way more flavor. Just be warned: they’re so addictive, a batch rarely lasts long!
What to Serve It With
These zucchini chips are so versatile, you can enjoy them at any time of day! For breakfast, I love them alongside a simple poached egg or scrambled eggs. The savory crunch is such a nice contrast to the creamy eggs. They can even add a fun element to a weekend brunch spread, perhaps alongside some mini quiches or fresh fruit salad. I often crumble them over my avocado toast for an extra layer of texture and flavor. When serving them as a more formal appetizer or part of a light meal, they’re divine alongside grilled chicken or fish. They add a lovely lightness and crunch to the plate. As a dessert… well, they’re not exactly a sweet treat, but they can be a surprisingly satisfying savory component to a cheese board or a charcuterie platter, balancing out richer flavors. And for those cozy nights in, they’re simply perfect for snacking. I often serve them with a bowl of my homemade hummus or a spicy salsa. My kids also love them dipped in ketchup, which, admittedly, is a bit of a guilty pleasure for me too! They’re just that good.
Top Tips for Perfecting Your Zucchini Chips
Over the years, I’ve learned a few little tricks that really elevate these zucchini chips from good to absolutely spectacular. The absolute number one thing you need to master is moisture removal. I cannot stress this enough. Zucchini has a high water content, and if you don’t get enough of it out, you’ll end up with soggy chips, not crispy ones. So, after slicing, I lay them out on layers of paper towels and really press down. Sometimes, I even let them sit on a cooling rack with a paper towel underneath for about 15-20 minutes. It makes a world of difference. When it comes to mixing, be gentle! You don’t want to mash the zucchini slices. Just a light toss to ensure they’re evenly coated with the oil and seasonings. If you’re using the Parmesan and almond flour coating, make sure it adheres well. A light spray of cooking oil after coating can help the Parmesan stick better if needed. For baking, it’s all about even cooking. Make sure your slices are in a single layer on the baking sheet. Don’t overcrowd the pan! If you have a lot of zucchini, bake in batches. This ensures each chip gets direct heat and crisps up properly. Keep an eye on them in the last 5-10 minutes; they can go from perfectly golden to burnt in a blink. Flipping them halfway through is also a game-changer for achieving that even crispiness on both sides. If you’re feeling adventurous with flavor, don’t be afraid to experiment! I’ve tried adding a pinch of dried dill for a fresh, herby flavor, or a dash of chili powder for extra heat. You can also swap out the smoked paprika for regular paprika if you prefer. For the coating, I’ve found that freshly grated Parmesan cheese melts and crisps up so much better than pre-shredded. And if you’re going gluten-free, almond flour is fantastic, but finely ground gluten-free breadcrumbs also work beautifully. Finally, remember they continue to crisp as they cool. So, pull them out when they look golden and slightly firm, and they’ll be perfect by the time they reach room temperature.
Storing and Reheating Tips
Alright, let’s talk about what to do with any leftover zucchini chips, though let’s be honest, there are rarely any! If you find yourself with a few stragglers, storing them properly is key to maintaining their delightful crunch. For short-term storage, if they’re completely cooled, you can keep them at room temperature in an airtight container for up to 2-3 days. Make sure they’re fully cooled before sealing them up, otherwise, the residual heat can create condensation and make them soggy. I often line the container with a paper towel to absorb any stray moisture. If you need to store them for a bit longer, the refrigerator is your friend. In an airtight container in the fridge, they should stay reasonably crisp for up to 5 days. However, I’ve found that refrigeration can sometimes soften them slightly, so they might not be quite as snappy as when they’re fresh. For longer storage, freezing is a great option. Once they’re completely cooled, lay them in a single layer on a baking sheet and freeze until solid. Then, transfer them to a freezer-safe bag or container. They should last for about 2-3 months. When you’re ready to enjoy them from the freezer or fridge, the best way to reheat them and bring back that glorious crispiness is in a single layer on a baking sheet in a moderate oven, around 300-325°F (150-160°C), for about 5-10 minutes. This gently re-warms them and dries them out beautifully. Avoid the microwave at all costs – it will turn them into sad, chewy little discs. If you’re planning on freezing them, I’d recommend leaving them plain, without any glaze or extra wet toppings, as these can affect their texture upon thawing and reheating. It’s best to add any finishing touches after they’ve been crisped up again.
Frequently Asked Questions
Final Thoughts
So there you have it – my absolute favorite way to turn a mountain of zucchini into the most incredibly addictive, crispy chips! I really hope you give this recipe a try. It’s one of those simple pleasures that feels like a little bit of magic in the kitchen. It’s a fantastic way to sneak in some extra veggies for picky eaters, and honestly, they’re just so satisfying to snack on. The crunch, the savory flavor, the sheer ease of it all – it just makes me happy! If you love these, you might also enjoy my recipe for baked sweet potato fries for another healthy, crispy snack option, or perhaps my quick and easy veggie fritters for a different way to use up garden bounty. Give these zucchini chips a whirl, and I can’t wait to hear what you think! Let me know in the comments how yours turned out and if you discovered any amazing dipping sauce pairings. Happy baking, everyone!
Crispy Air Fryer Zucchini Chips
Ingredients
Method
- Preheat air fryer to 350°F. Whisk egg in a shallow bowl.
- In a separate shallow bowl, combine panko breadcrumbs, parmesan cheese, and salt.
- Coat zucchini slices in egg. Transfer to panko bowl and cover entire chip, pressing panko mixture into the chip on both sides using a fork.
- Spray air fryer basket with oil sprayer or brush with oil. Place zucchini chips in a single layer, leaving space in between. Spray or brush both sides with oil.
- Cook 5 to 6 minutes. Flip and cook another 5 minutes or until golden brown.
- While the batch is cooking, repeat step 3 to prepare the rest of the zucchini chips. Repeat step 4 and 5 with remaining zucchini.
- Serve with ranch dressing or your favorite dipping sauce.