Autumn Delight A Simple Pumpkin Lush
There’s just something magical about autumn’s cozy flavors, isn’t there? I remember snuggling up with a warm blanket, a mug of pumpkin-spiced coffee in hand, and my grandma’s legendary pumpkin dessert resting on the kitchen counter. That rich, creamy aroma… It’s almost like a hug in dessert form. Over the years, I’ve tweaked and perfected my own version of that nostalgic treat, and I can honestly say — this pumpkin lush is what I turn to when I want something that’s both indulgent and ridiculously easy. It’s one of those recipes my kids ask for all the time — they call it ‘pumpkin pie in a cup,’ which is pretty spot-on. Best of all? It’s no-bake, quick to assemble, and can be made in advance. Trust me, it’s a lifesaver on busy weeknights when you want something sweet but don’t want to turn on the oven. And forget the store-bought pies — once you try this, you’ll never go back!
What is pumpkin lush?
Think of it as a layered pumpkin dessert that feels a little like a cross between a creamy parfait and a no-bake pie. It’s essentially a sweet, velvety pumpkin pudding tucked between buttery graham cracker crust and topped with luscious whipped topping or cream cheese frosting. The name “pumpkin lush” perfectly captures the richness and comfort this dessert delivers. It’s like a little piece of fall heaven in a glass! The beauty of this recipe is that it’s incredibly versatile — you can serve it in individual jars or a big dish, and it’s endlessly customizable. Its roots come from classic layered desserts, but with a modern twist, making it a perfect treat whether you’re hosting family or just craving something cozy after a long day. It’s a crowd-pleaser, comfort food, and family favorite all rolled into one!
Why you’ll love this recipe?
What I love most about pumpkin lush is how simple it is to whip up but still feels fancy enough to impress. The flavor is just right — not too sweet, with that warm hit of pumpkin and spice that screams fall, but balanced enough to enjoy anytime. Plus, the texture is heavenly: smooth, creamy, with a crunchy graham cracker base that adds the perfect contrast. It’s a real timesaver, too — no baking necessary, so I can get it ready while juggling dinner and homework chaos. And budget-wise? The ingredients are staples I usually have in my pantry — canned pumpkin, graham crackers, whipped topping, and a few spices. I’ve experimented with different toppings and fillings, and honestly, it’s become one of my go-to desserts. Whether you want a quick dessert for a weeknight or a festive dish for holidays, this pumpkin lush truly checks all the boxes. And the fact that my kids ask for it all the time makes it extra special. It’s one of those recipes that feels like a warm hug and keeps everyone coming back for more.
How do I make pumpkin lush?
Quick Overview
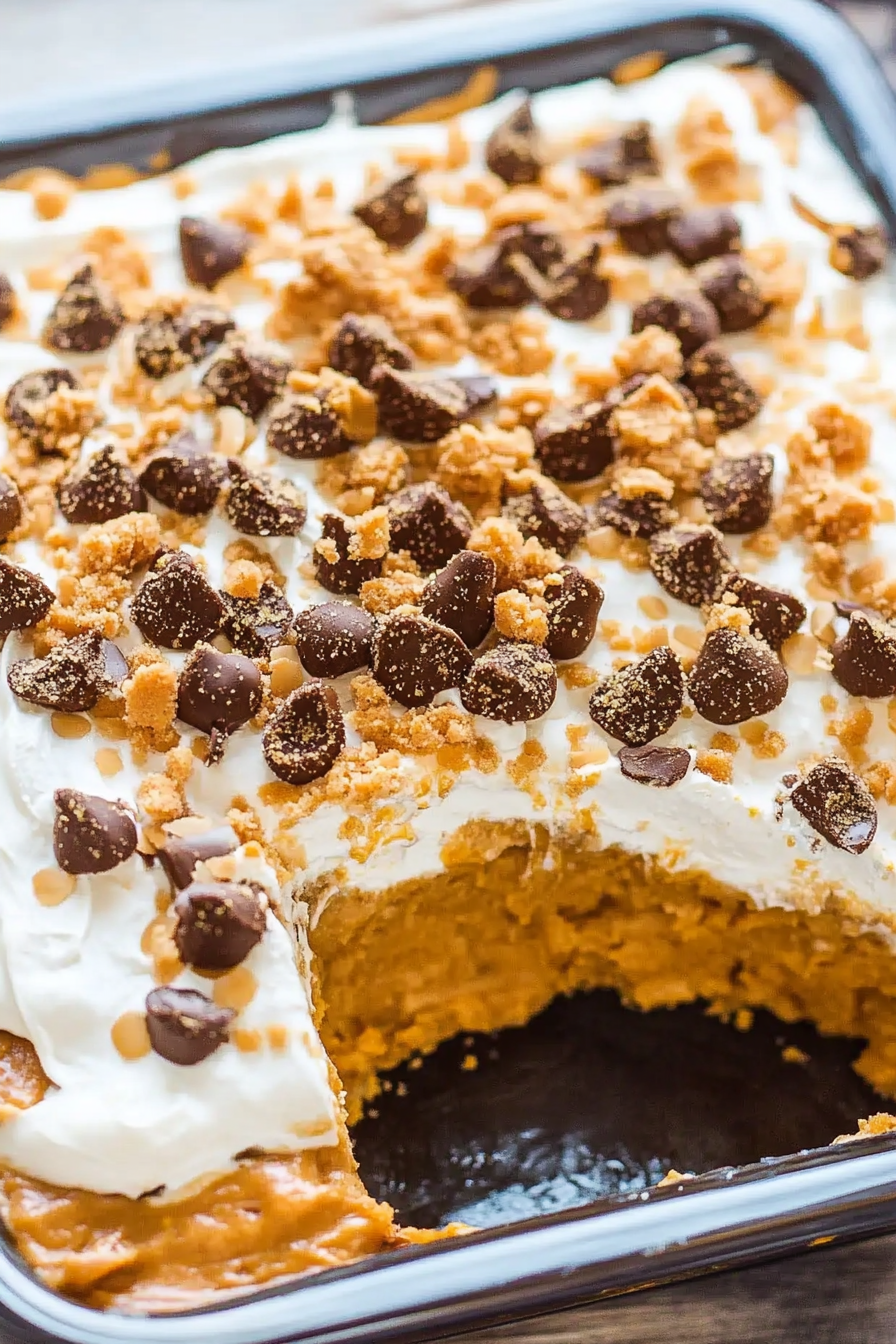
This pumpkin lush comes together like a charm — no oven needed! First, you prepare a simple graham cracker crust and press it into your dish. Then, you make a luscious pumpkin mixture by blending canned pumpkin, cream cheese, sweetener, and pumpkin pie spices. Layer that over the crust, top with whipped cream, and sprinkle a little cinnamon for that beautiful finishing touch. Chill it for at least a couple of hours, and you’re all set to enjoy a dessert that tastes as good as it looks. I love that you can prepare this a day ahead — it actually tastes better after sitting for a bit to let all those flavors meld. It’s quick, easy, and makes enough to satisfy a crowd or keep leftovers for days!
Ingredients
For the Main Batter:
- 1 can (15 oz) pumpkin puree — organic or the plain variety, no sugar added.
- 8 oz cream cheese, softened — trust me, softened makes it way easier to blend
- 1 cup powdered sugar or to taste — I like a little more for extra sweetness
- 1 teaspoon pumpkin pie spice — c’mon, it’s essential for that cozy flavor
- 1 teaspoon vanilla extract — adds depth and warmth
- 1/2 cup milk or almond milk — I tested with almond milk and it made it even creamier!
For the Filling:
- 1 cup whipped topping or homemade whipped cream — optional but highly recommended
- Graham crackers or digestive biscuits, crushed — about 2 cups
- Butter, melted — to bind the crust
- Extra cinnamon or nutmeg for sprinkling
For the Glaze:
- Additional whipped topping or cream cheese frosting — for topping if desired
- Cinnamon dust or a drizzle of caramel syrup — optional but adds a gorgeous touch
Step-by-Step Instructions
Step 1: Preheat & Prep Pan
No oven required here! Just grab a 9×13-inch dish or individual glasses if you’re feeling fancy. If you prefer a firmer crust, you can lightly butter the dish or line it with parchment paper. Set aside.
Step 2: Mix Dry Ingredients
Crush your graham crackers until fine — I do this in a zipper bag and roll over them with a rolling pin. Mix in the melted butter and a pinch of cinnamon until it resembles wet sand. Spread this evenly at the bottom of your dish and press down firmly — I use the back of a spoon to get it nice and flat. Chill while you prepare the filling.
Step 3: Mix Wet Ingredients
In a large bowl, beat the softened cream cheese until smooth. Add the powdered sugar, vanilla, pumpkin pie spice, and milk, then beat until silky and well combined. I always taste it here — just to make sure the sweetness is right. If you like it extra sweet, add a touch more sugar.
Step 4: Combine
Gently fold in the pumpkin puree until evenly mixed. Avoid overmixing to keep it light and airy. The mixture should be velvety and slightly thick but spreadable. If it feels too stiff, a splash more milk can help loosen it up.
Step 5: Prepare Filling
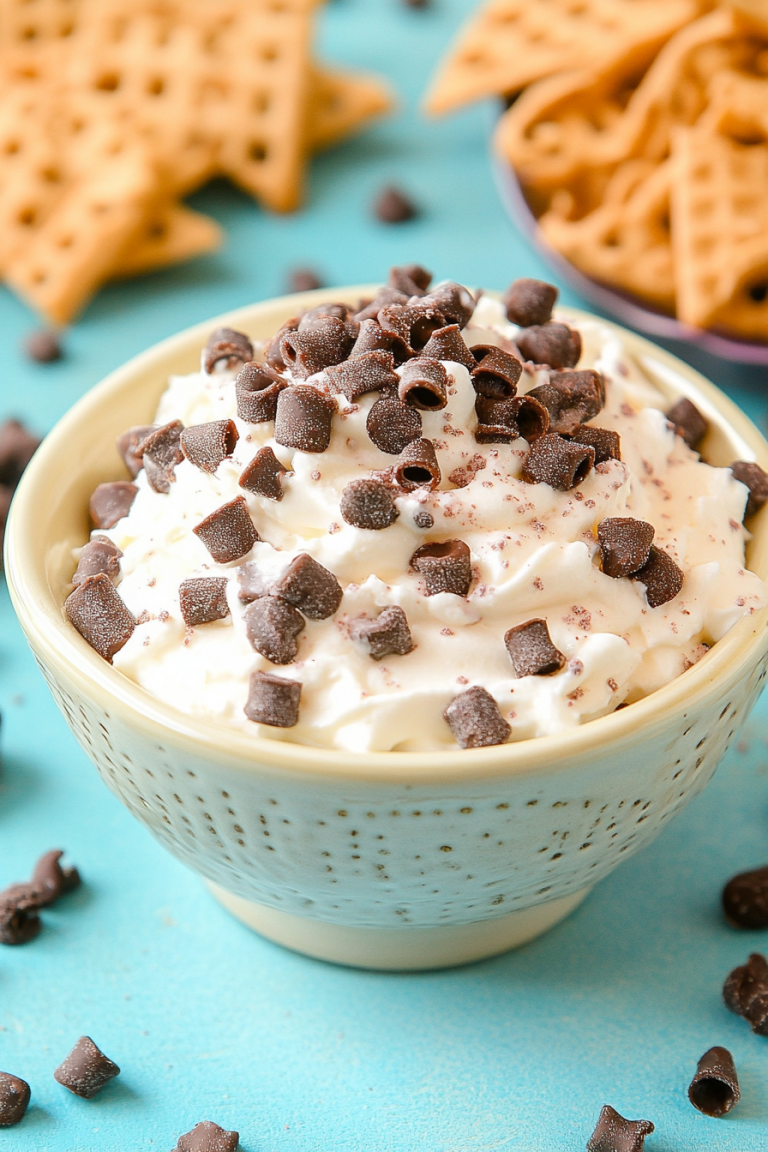
Fold in your whipped topping or whipped cream if you want an even lighter feel. This also adds lusciousness. Taste again — perfection is in the details! You can also add mini chocolate chips or chopped nuts here if you’re feeling it.
Step 6: Layer & Swirl
Spoon the pumpkin filling over the crust. If you want that beautiful swirl effect, add dollops of extra whipped topping or cream cheese frosting on top, then use a toothpick or skewer to swirl and create pretty patterns.
Step 7: Bake
Luckily, no baking! Just pop it in the fridge and let it chill for at least 2 hours, but overnight is best for maximum flavor melding. If you’re in a rush, even 1 hour can work, but patience is key for that perfect texture.
Step 8: Cool & Glaze
Before serving, I like to add an extra layer of whipped topping or a drizzle of caramel on top for that “wow” factor. Keep it chilled until ready to serve to keep everything firm and fresh.
Step 9: Slice & Serve
Use a sharp knife dipped in hot water for clean slices. Serve with a sprinkle of cinnamon or a dollop of whipped cream for presentation. This tastes even better after a few hours in the fridge, giving the flavors time to deepen.
What to Serve It With
This pumpkin lush is such a versatile treat! For breakfast, I serve it with a strong cup of coffee or a chai latte — it’s a perfect start to a crisp fall morning. During brunch, I love pairing it with crisp apple cider or a sparkling spiced water; it feels like a special indulgence without the fuss. As an afternoon snack, it’s just enough sweetness tucked in a cute jar or small bowl, and it’s fantastic with a warm cup of herbal tea. When dessert time rolls around, I often elevate it with a sprinkle of toasted pecans or caramel bits — it’s divine alongside a scoop of vanilla ice cream or a dollop of Greek yogurt. My kids adore this so much that it’s practically their daily treat during October and November. It’s also wonderful for bringing to potlucks or holiday gatherings because it’s impressive and simple. Honestly, once you have this in your recipe arsenal, you’ll find yourself making it repeatedly. It’s pure comfort food — no guilt, just pure, pumpkin-spiced happiness!
Top Tips for Perfecting Your Pumpkin Lush
After making this a dozen times, I’ve picked up a few tricks that help it turn out picture-perfect every single time. First, don’t skip softening the cream cheese. Cold or hard cream cheese will make the filling lumpy and less smooth. I’ve tested with both room temperature and slightly chilled — room temp beats cold hands down. When mixing, avoid overbeating — just enough to combine. Overmixing can make the filling a little airy and change the texture, so fold gently if you can. For the swirl effect, I recommend dolloping extra whipped topping randomly over the pumpkin layer and then swirling with a toothpick — it makes the dessert look professional! If you’re vegan or dairy-free, coconut whipped cream works beautifully, and for the crust, graham crackers made with gluten-free ingredients are a good substitute. On the baking front, if your fridge isn’t very cold, leave the dessert to chill a little longer — it helps it set up nicely. Want to customize the spice level? Add more cinnamon or a dash of ginger — I sometimes blend in a pinch of cloves for a more robust flavor. And if you prefer a firmer texture, let it chill overnight. The biggest lesson I learned is to give yourself plenty of time for chilling — it’s what makes this dessert glorious and sliceable.
Storing and Reheating Tips
This dessert holds up surprisingly well. Keep leftovers covered with plastic wrap or in an airtight container in the refrigerator for up to 3 days — if it lasts that long! The flavors deepen overnight, and it’s still just as luscious. If you want to make this ahead of time, I suggest assembling the layers and chilling — but add the whipped topping or glaze just before serving to keep it looking fresh. For longer storage, yes, you can freeze it, but be prepared for a slightly softer texture upon thawing. Wrap it tightly with plastic wrap, then foil, and it’ll last up to a month. To serve after freezing, thaw in the fridge overnight, then top with fresh whipped cream and garnish before slicing. When reheating is needed, it’s best to serve straight from the fridge — this dessert is meant to be eaten cold, and warming it up can make the filling runny. The glaze or whipped toppings may become a little less fluffy after storage, but trust me — it’s still delicious! Perfectly preserved, it tastes just like the first day — rich, creamy, and full of cozy fall flavors.
Frequently Asked Questions
Final Thoughts
If you’re on the lookout for a dessert that’s both luscious and effortless, pumpkin lush will become your new best friend. Its comforting pumpkin spice flavor, creamy texture, and no-bake ease make it a standout for fall gatherings, holiday dinners, or even a simple weeknight treat. I always keep a batch in the fridge — it’s a quick fix for when that sweet tooth kicks in, or when I need something cozy to warm up a chilly evening. Plus, it’s a great way to get some pumpkin into your diet without all the fuss of baking a pie from scratch. Once you try it, I bet you’ll be tweaking the recipe just like I did — adding bits of chocolate, swapping in dairy-free ingredients, or playing with toppings. Honestly, this recipe has earned a permanent spot in my recipe box, and I can’t wait for you to try it. Happy baking, and I’d love to hear how yours turns out—drop a comment or share your variations! Enjoy every spoonful of this sweet little slice of fall magic.
Sweet Potato Casserole
Ingredients
Method
- Preheat oven to 350°F. Peel and chop sweet potatoes, then boil until tender. Mash until smooth.
- In a large mixing bowl, combine mashed sweet potatoes, butter, brown sugar, milk, eggs, and vanilla. Mix until smooth.
- Spread the sweet potato mixture into a greased baking dish. Bake for 25 minutes.
- Sprinkle marshmallows and pecans evenly over the top. Return to oven and bake until marshmallows are golden, about 5 minutes.