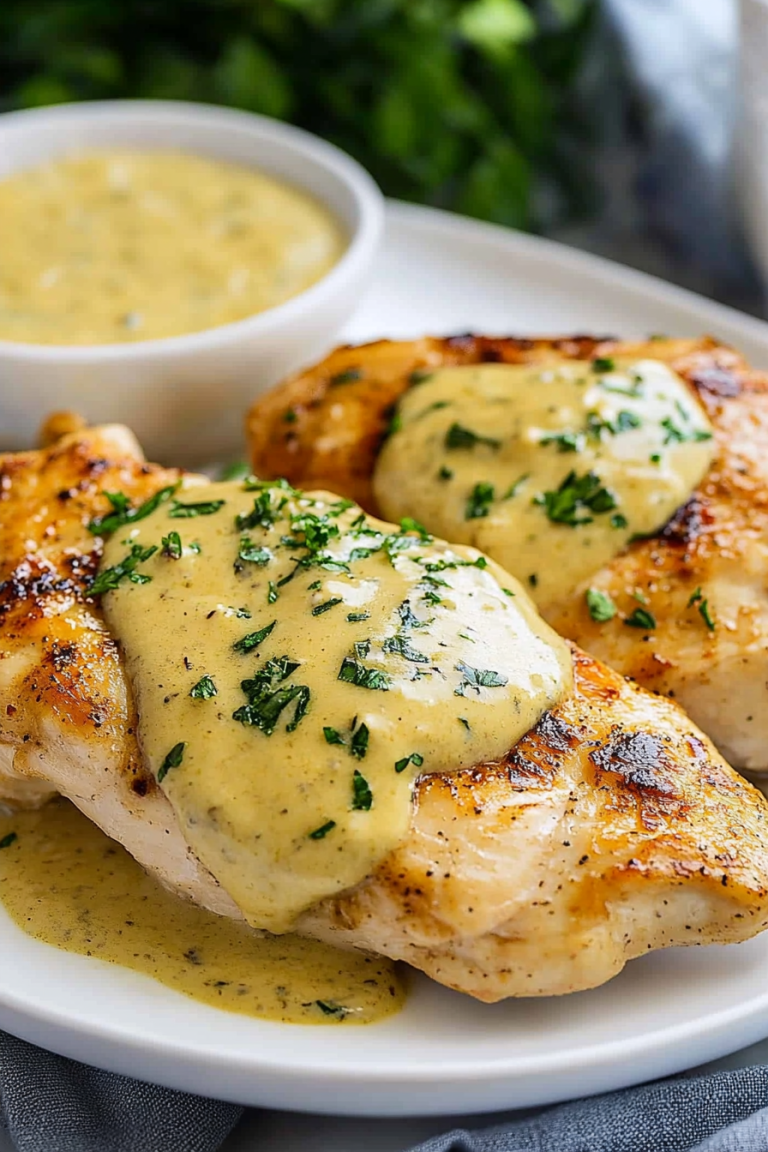
Crispy Air Fryer Parmesan Chicken Recipe
There’s nothing quite like the smell of perfectly crispy, flavorful chicken coming out of the air fryer. I remember the first time I made this—my kitchen was filled with that irresistible scent, and my family couldn’t stop raving about how tender and juicy the meat was, with a golden crust that was just right. Honestly, it’s become my go-to meal on busy weeknights because it’s fuss-free and tastes like you’ve been slaving away for hours. I mean, I love roasted chicken, but this — oh, this— is a game changer. No oil splatters, no long waits, just crispy goodness in less time than it takes to order takeout. Trust me, once you try this, you’ll ask yourself how you ever lived without your trusty air fryer. And the best part? It’s simple enough that even the most novice cook can nail it first try. Let’s dive into how I make my favorite air fryer chicken—so flavorful, so easy, and so delicious—ready for your next family dinner or quick lunch prep.
What is an air fry chicken?
Think of air fryer chicken as a healthier, fuss-free way to get that crispy, crave-worthy chicken skin without deep frying. The name’s pretty straightforward—it’s chicken cooked in an air fryer, which uses hot air swirling around the food to crisp and cook it evenly. It’s essentially a mini convection oven, but what makes it special is how quickly it can create that perfect crispy exterior while keeping the inside juicy and tender. You can make just about any cut—drumsticks, breasts, thighs, even tenders—so it’s super versatile. My favorite part? It’s almost foolproof, and once you get the hang of it, you’ll wonder how you ever cooked chicken any other way. Plus, you barely need any oil—a tablespoon here or there—and you’re good to go. Think of it as your secret weapon for weeknight dinners or weekend indulgence, all rolled into one simple, delicious package.
Why you’ll love this recipe?
What I love most about this air fryer chicken is how incredibly flavorful it turns out every single time. The crispy, golden crust combined with that juicy meat inside? It’s like biting into that perfect fried chicken, but way healthier and quicker. The magic is all in the air fryer’s genius—no oil splatters, no smelly greasy pots, just a straightforward method that’s almost impossible to mess up. Plus, it’s budget-friendly because all you really need is some chicken and basic pantry staples—olive oil, spices, maybe a pinch of garlic powder if I’m feeling fancy. This dish is so versatile—serve it with roasted veggies, over rice, in tacos, or even chopped up on a salad. My kids ask for this all the time; it’s become their favorite sneaky way to get some protein. And when I’m tired after a long day, I just pop the chicken in, set the timer, and in no time, dinner’s served. Trust me, there’s no better way to get crispy, flavorful chicken without heating up the whole kitchen or spending ages in the oven. Plus, once you master the technique, you’ll want to make it every week. It’s simple, satisfying, and totally addictive!
How do I make an air fryer chicken?
Quick Overview
This recipe walks you through seasoning your chicken to perfection, then popping it into the air fryer for a quick cook that yields crispy skin and tender meat. I like to marinate mine in a bit of olive oil, lemon, and spices beforehand—it’s like a flavor boost that’s totally worth the extra five minutes. When the chicken hits that hot air, it transforms into a crispy, golden masterpiece in about 20-25 minutes, depending on the cut. No fuss, no grease, just delicious, crunchy chicken that’s ready on the clock. The key is in the seasoning and the crisping technique—trust me, it’s as easy as a Sunday morning and just as satisfying.
Ingredients
For the Main Seasoning: For the Main Seasoning: For the Main Seasoning: For the Main Seasoning: For the Main Seasoning: For
– 4 boneless chicken breasts or thighs (choose fresh, good quality chicken—frozen works in a pinch but needs to be thawed thoroughly)
– 2 tablespoons olive oil (or avocado oil, if you prefer a milder flavor)
– 1 teaspoon garlic powder
– 1 teaspoon smoked paprika (for that nice smoky flavor)
– 1 teaspoon salt
– ½ teaspoon black pepper
– ½ teaspoon onion powder
– Optional: pinch of cayenne pepper for heat
For the Optional Marinade (if you want extra flavor):
– Juice of half a lemon
– 1 teaspoon honey or maple syrup (adds a subtle sweetness and helps with browning)
– 1 teaspoon dried herbs like thyme or oregano
For the Crispy Coating (if you want extra crunch):
– ½ cup panko breadcrumbs (for crunch without deep frying)
– 2 tablespoons grated Parmesan cheese (optional but adds savory richness)
Step-by-Step Instructions
Step 1: Preheat & Prep Pan
First, I turn on the air fryer to 400°F (200°C) and let it warm up while I prep the chicken. I always give the basket a quick spray of non-stick spray—just a light coating—so nothing sticks, but honestly, even that’s optional with parchment paper. While it warms, I pat the chicken dry with paper towels—moisture is the enemy when crispy is what you’re after. I also tend to trim off any excess fat or tendons for more even cooking. If I have a bit more time, I’ll let the chicken marinate in the lemon and herbs for about 15 minutes—it’s a small step that makes a big flavor difference.
Step 2: Mix Dry Ingredients
In a small bowl, I mix together garlic powder, smoked paprika, salt, pepper, and onion powder. This seasoning blend forms the flavor backbone. I find that doing it in a bowl makes it easy to coat the chicken evenly, and I usually toss in the Parmesan here if I’m using it. This step makes the chicken taste incredible without requiring a ton of ingredients.
Step 3: Mix Wet Ingredients
If I’m using the marinade, I whisk together olive oil, lemon juice, honey, and herbs. Otherwise, I just brush or dribble olive oil over the chicken. I like to massage everything in—think of it as giving the chicken a little spa treatment. This step helps the seasonings stick and creates that irresistible crispy crust.
Step 4: Combine
Next, I coat each piece of chicken in the seasoning mixture, making sure every side gets love. If you’re using breadcrumbs, I usually dredge the chicken here, pressing the panko onto the surface gently for maximum crunch. Remember not to overdo it—just an even coating is perfect. If you’re doing skin-on chicken, I prefer to loosen the skin slightly and push some seasoning underneath for extra flavor.
Step 5: Prepare Filling
If you want to stuff your chicken or add a filling (say, cheese or herbs), now’s the time. I like a simple cheese stuffing—mozzarella or cream cheese mixed with herbs—because it melts beautifully during cooking. Just slice the chicken carefully, stuff, and secure with toothpicks if needed. Keeping the filling manageable ensures everything cooks evenly without leaking out.
Step 6: Layer & Swirl
If you’re making a layered or marbled effect (say, with sauce or flavored oils), I recommend placing the chicken in the basket and swirling in your preferred sauce or herbs. But honestly, I mostly skip this step for simplicity—and it still turns out gorgeous. If you want a swirl of marinade or sauce, just spoon or drizzle it artfully on top before cooking.
Step 7: Bake
Place the chicken in the basket, making sure pieces aren’t overcrowded—giving each piece room to crisp. Cook at 400°F (200°C) for about 20-25 minutes, flipping halfway if your Air Fryer doesn’t have a rotation feature. I check for doneness by slicing into the thickest part—juices should run clear, and the meat should be firm but tender. If you prefer extra crispiness, give it a couple of more minutes, but keep an eye on it to prevent burning.
Step 8: Cool & Glaze
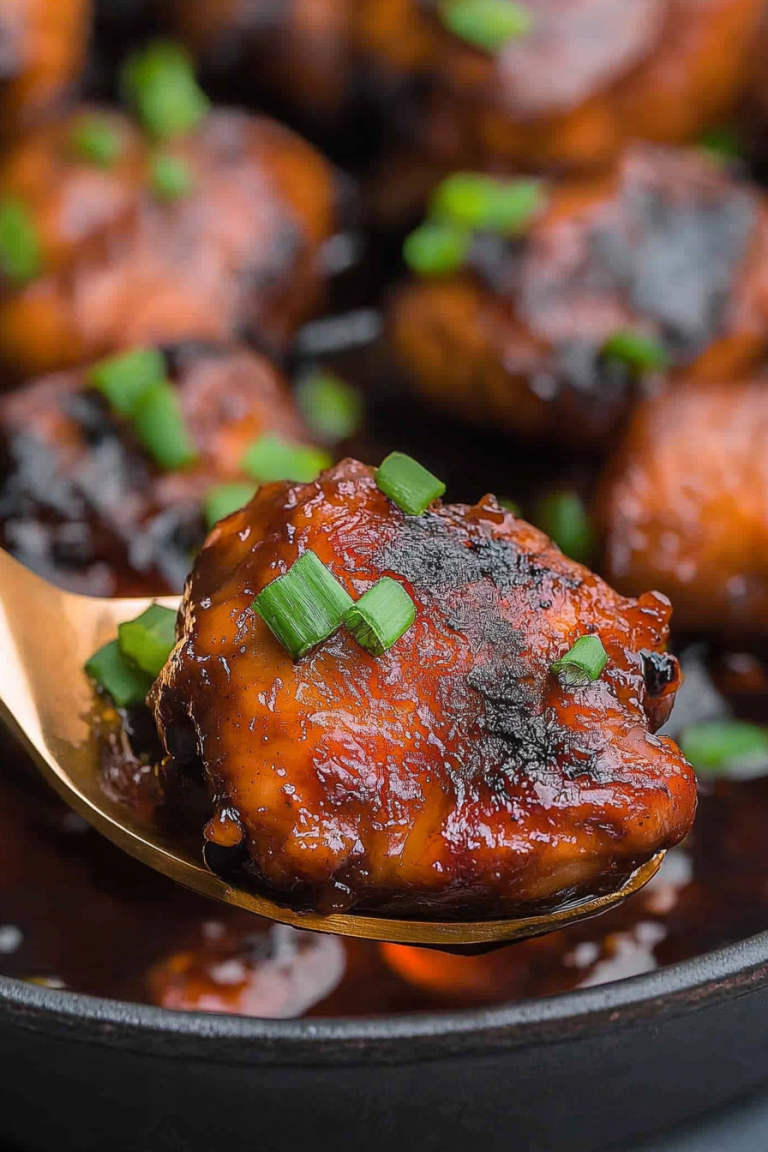
Once cooked, I transfer the chicken to a wire rack to cool just a minute or two—this keeps the crust crisp. If you like a glaze (honey mustard, BBQ, or a simple soy glaze), brush it on while the chicken’s still warm; the heat helps it set beautifully. I love a light drizzle of honey and a sprinkle of fresh herbs for a vibrant finish.
Step 9: Slice & Serve
Finally, I slice the chicken at a slight angle for presentation, serve it with a side of roasted veggies or a fresh salad, and dig in. For the best experience, I recommend letting it rest for 2 minutes after slicing—that way, the juices settle in, and your chicken stays moist. Honestly, there’s something so satisfying about biting into that crispy exterior and tender flesh—it’s almost like comfort food in a crispy shell.
What to Serve It With
This air fryer chicken pairs wonderfully with so many sides. For a quick breakfast, I love serving it with scrambled eggs and a slice of toasted sourdough—trust me, it’s a filling start to the day that’s not heavy like fried breakfast. On weekends or for brunch, I make a colorful salad with arugula, cherry tomatoes, and a simple vinaigrette—serving the chicken sliced over the greens with a squeeze of lemon makes it feel special. For dinner, I often serve it alongside roasted sweet potatoes and steamed green beans—simple, wholesome, and built-in leftovers for the next day. And if I’m feeling indulgent, I’ll make a batch of fluffy homemade biscuits or cornbread to soak up the juices. Oh, and my kids actually ask for seconds, which is saying a lot in our house! I’ve even shredded leftover chicken into tacos, topped with a sprinkle of cheese and a dollop of sour cream. The flavor is so adaptable, it’s hard to go wrong.
Top Tips for Perfecting Your Air Fryer Chicken
There are a few tricks I’ve picked up over the years that make this recipe even better. First, always pat the chicken dry—moisture is the enemy of crispness, so take that extra little step. I like to marinate mine for at least 15 minutes, but if you’re in a rush, just season generously—because salt and spice are what give it that incredible flavor. When coating with breadcrumbs or Parmesan, pressing gently helps it stick so it doesn’t fall off during cooking. A tip I learned the hard way: don’t overcrowd the basket. Air needs room to circulate, and that’s what makes the skin crispy. If you want extra golden color, gently spritz the chicken with cooking spray during the last few minutes of cooking. Adjust the cooking time based on the size of your chicken pieces—bigger cuts need a little longer.
Personally, I’ve experimented with different seasonings—curry powder, lemon zest, even a touch of cumin—and they all work beautifully. Just remember, a little goes a long way, and taste as you go. If you’re making it spicy, add the cayenne carefully—you can always add more, but you can’t take it out!
This recipe has become my secret (well, not so secret anymore) weapon for quick, satisfying dinners. I’ve had nights where I was skeptical—it just sounds too simple—but every time, I end up with a golden, crispy piece of chicken that’s guaranteed to bring a smile. So don’t be afraid to play around and make it your own. Remember, the most important thing is to enjoy the process—and trust me on this one: your taste buds will thank you.
Storing and Reheating Tips
If you happen to have leftovers (which is rare in my house, honestly), here’s how I store and reheat to keep that crispy magic alive.
For short-term, pop any leftover chicken in an airtight container and refrigerate for up to 3 days. To reheat, just toss it back in the air fryer at 350°F (175°C) for about 5-7 minutes—no sogginess, and it’ll regain much of its crisp exterior.
If you’re freezing, wrap each piece in plastic wrap or foil, then place in a freezer-safe container—this keeps it fresh for up to 3 months. To reheat from frozen, just give it a little extra time in the air fryer, maybe 8-10 minutes, and be sure to check that it’s heated all the way through.
A quick note about glaze or sauces: if you plan to add a glaze or sauce after reheating, do so while the chicken is warm—but avoid glazes with high moisture content if storing for longer—they can make the crust soggy. Just a light brush or drizzle is perfect when serving.
Frequently Asked Questions
Final Thoughts
If you haven’t yet jumped on the air fryer chicken bandwagon, I promise this is the dish to convert you. The crispy exterior, juicy interior, and the ease of preparation make it a household staple in my kitchen. I’ve made this countless times—each time, I find a new way to spice it up or serve it differently, and it never fails to impress. It’s a perfect example of how simple ingredients and a little know-how create magic. Whether you’re cooking for a busy weeknight, a casual weekend, or entertaining friends, this recipe shines. And honestly, I think once you make it, you’ll be hooked too—I’d love to hear about your favorite ways to customize it or what you pair it with. Happy baking (and eating), my friend!
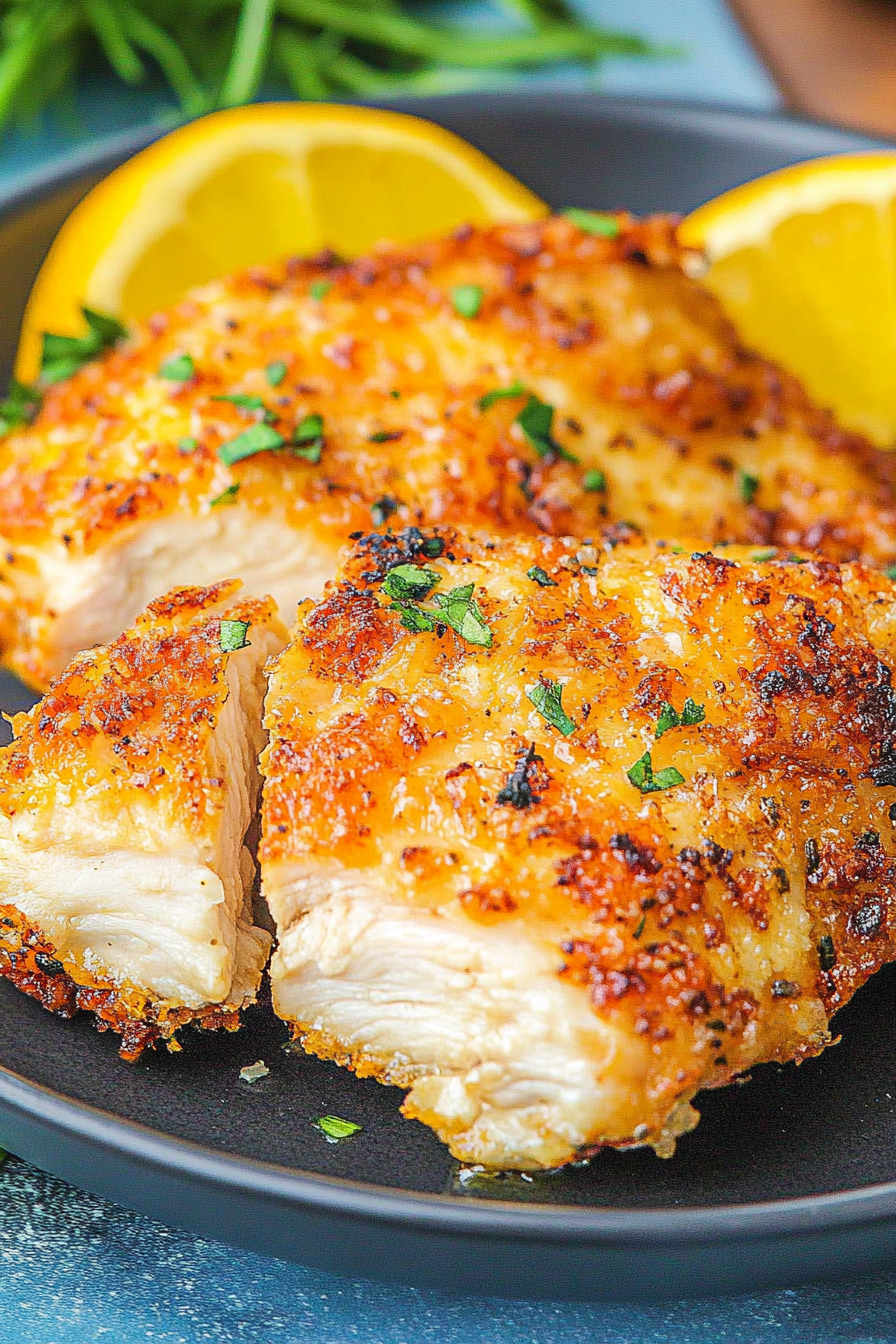
Crispy Air Fryer Chicken Breast
Ingredients
Method
- Preheat the air fryer to 400°F. In a shallow dish, combine flour, garlic powder, salt, and black pepper. In a separate bowl, whisk eggs. In another dish, mix Parmesan and Panko breadcrumbs.
- Dredge each chicken breast in the flour mixture, then dip into the beaten eggs, and coat with the Parmesan-Panko mixture, pressing to adhere.
- Lightly spray the air fryer basket with cooking spray. Place the coated chicken breasts in the basket and spray the tops with cooking spray.
- Air fry for 6 minutes, then flip the chicken. Spray with more cooking spray and cook for an additional 5 minutes or until internal temperature reaches 165°F and the coating is crispy.
- Remove from air fryer and let rest for 5 minutes. Garnish with extra Parmesan and lemon wedges if desired. Serve immediately.