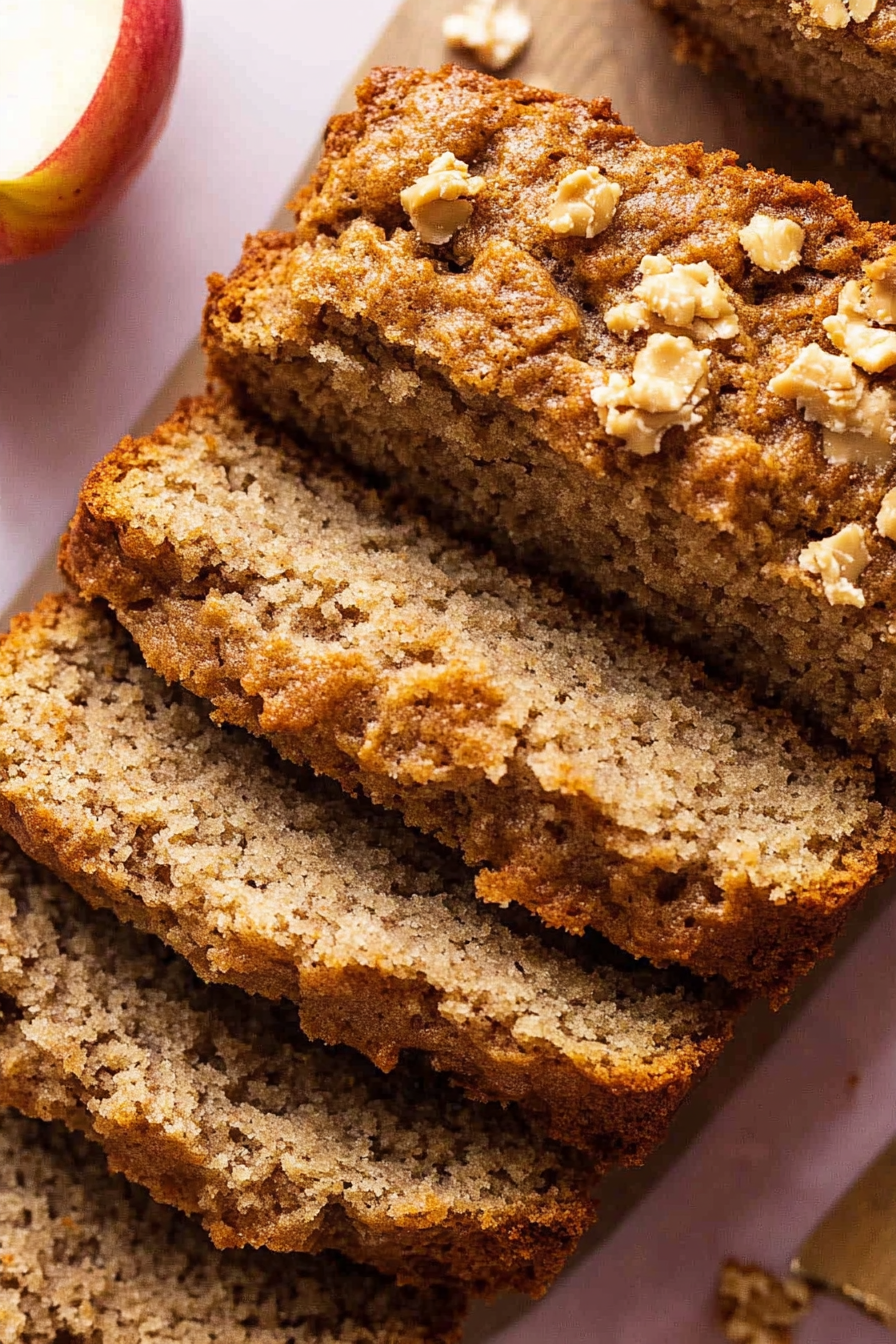
Easy Apple Peanut Butter Bread with Streusel
There’s something about the smell of fresh-baked bread that feels like a warm hug, right? I remember my grandma’s kitchen when she was baking cinnamon rolls or banana bread, and the moment that sweet, nutty aroma filled the air, everything else just faded away. Well, this apple peanut butter bread is kind of like that — cozy, inviting, and with just enough sweetness to make your kitchen smell like pure comfort. It’s honestly become a go-to for me on busy mornings and lazy Sunday brunches. Plus, my kids ask for it all the time, and I love that I can sneak in a little fruit and protein without any fuss. If you’re into that perfect combo of fruity, nutty, and chewy bread, trust me on this one — you’ll want to keep the recipe close by. And honestly, it’s so easy, you’ll wonder why you didn’t try it sooner!
What is Apple Peanut Butter Bread?
This apple peanut butter bread is essentially a moist, tender loaf that combines the sweet-tart punch of fresh apples with the rich creaminess of peanut butter. Think of it as a cross between a soft apple cake and a hearty nutty bread, but baked into a loaf that’s perfect for slicing and spreading with a little butter or jam. The idea started with those classic peanut butter and apple snacks I loved as a kid — you know, apple slices dipped in peanut butter? But I wanted to elevate that cozy combo into a bread that’s equally good for breakfast, snack, or even a light dessert. It’s a marriage of textures: the fruit pieces stay juicy and help keep the bread moist, while the peanut butter adds a nutty richness that makes each bite feel special. It’s simple, wholesome, and just a little bit indulgent.
Why you’ll love this recipe?
What I love most about this apple peanut butter bread is how versatile it is — it’s basically comfort food you can enjoy any time of day. The flavor combo is unlike any other, with that unmistakable warmth from the apples and the subtle saltiness of peanut butter perfectly balancing each slice. The smell alone will have everyone in the house wandering into the kitchen — I swear my kids always ask, “Is it finished yet?” even when it’s just halfway through baking.
It’s also super straightforward. I’ve tested this countless times, and I’ve learned that using ripe apples and natural peanut butter makes a big difference in flavor and moisture. Plus, you don’t need fancy ingredients — just pantry staples that you probably already have. And! You can customize it easily. Want to make it vegan? Swap in almond or sunflower seed butter. Craving a little extra crunch? Toss in some chopped pecans or walnuts. I’ve made this with just a drizzle of honey, with cinnamon swirled inside, or even topped with a light glaze that makes it feel like a fancy bakery treat. What I find most satisfying is how well it keeps — I love slicing it up on lazy mornings or slipping a piece in my lunchbox for an energizing snack. Honestly, this bread has become my little baking staple.
How do I make Apple Peanut Butter Bread?
Quick Overview
This bread comes together quickly, and you don’t need any fancy equipment — just a mixing bowl, a loaf pan, and a spoon or spatula. Basically, you mix wet ingredients, combine them with dry, fold in chopped apples and peanut butter, layer everything in your pan, and bake. I love that you get a luscious swirl of peanut butter through the middle, thanks to a simple layering technique. The aroma alone will make your kitchen smell like fall in the best way. It’s ideal for busy mornings because it actually comes together in about an hour and a half, including cooling time. And once baked, it’s a hit with everyone, even the pickiest eaters!
Ingredients
For the Main Batter:
– 2 cups all-purpose flour (I always opt for unbleached for better texture)
– 1 teaspoon baking powder
– ½ teaspoon baking soda
– ½ teaspoon salt
– 1 teaspoon cinnamon (because everything’s better with cinnamon)
– 1 cup granulated sugar (or a mix of honey and sugar for a natural touch)
– ½ cup vegetable oil or melted coconut oil
– 2 large eggs
– 1 teaspoon vanilla extract
– 1 cup grated fresh apple (about 1 large apple, peeled or unpeeled based on preference)
– ½ cup milk (dairy or plant-based, I tested almond milk to make it extra creamy)
For the Filling:
– ½ cup creamy peanut butter (natural if possible, so it’s less sweet and more flavorful)
– 2 tablespoons honey or maple syrup (optional for extra sweetness)
– A handful of chopped nuts (pecans, walnuts, or more apples for texture)
For the Glaze (optional):
– ½ cup powdered sugar
– 1-2 teaspoons milk or lemon juice
– A dash of vanilla or cinnamon (for extra flavor)
Step-by-Step Instructions
Step 1: Preheat & Prep Pan
Set your oven to 350°F (180°C) and lightly grease a standard loaf pan with butter or non-stick spray. Lining it with parchment paper is also a good idea — I find it helps with removing the bread perfectly without crumbling. Wait until your oven’s fully heated before tossing the batter in; that’s key for even baking.
Step 2: Mix Dry Ingredients
In a big bowl, whisk together the flour, baking powder, baking soda, salt, and cinnamon. I always do this first — it ensures everything’s evenly distributed and prevents clumping later on. The dry mixture should feel airy and slightly chunky from the cinnamon and baking soda.
Step 3: Mix Wet Ingredients
In another bowl, combine the sugar, eggs, vanilla, and oil. Whisk until smooth — I like to check that the mixture is a little fluffy and rich-looking. Then, stir in your grated apples and milk. The apples will release some juice, which makes the batter extra moist and flavorful. Trust me, using freshly grated apples makes a huge difference — it’s like little bursts of fruit in every bite.
Step 4: Combine
Add the wet ingredients to the dry, and gently fold everything together with a spatula or wooden spoon. It’s tempting to overmix at this point, but once everything is just combined, stop — that’s the secret to a tender loaf. If you see a few lumps, that’s totally fine!
Step 5: Prepare Filling
Mix the peanut butter with honey or maple syrup if you want it a little sweeter or thinner for easier spreading. Melt it slightly in the microwave for a few seconds if it’s stiff. This will help you swirl it effortlessly into the batter later.
Step 6: Layer & Swirl
Pour half of your batter into the prepared loaf pan. Dot with spoonfuls of your peanut butter mixture, then add the rest of the batter on top. Using a skewer or a butter knife, gently swirl through the layers — don’t overdo it, but aim for a marbled effect that lets the peanut butter peek through nicely.
Step 7: Bake
Pop the loaf in the oven and bake for about 50-60 minutes. Check the doneness with a toothpick inserted into the center; it should come out clean. Every oven varies, so start checking around the 50-minute mark. If the top browns too quickly, tent it loosely with foil to prevent burning.
Step 8: Cool & Glaze
Let the bread cool in the pan for about 10 minutes, then transfer it to a wire rack to cool completely. I know it’s tempting to slice it hot, but if you wait until it’s fully cooled, your slices will hold together beautifully. If you’re glazing, mix powdered sugar with a splash of milk and drizzle over the cooled bread for a sweet, pretty finish.
Step 9: Slice & Serve
Slice with a serrated bread knife to avoid squishing the moist crumb. Serve it warm or at room temperature, maybe topped with a pat of butter or a smear of jam. Every slice is like a little gift — perfect for breakfast, afternoon tea, or a late-night treat.
What to Serve It With
This apple peanut butter bread pairs beautifully with so many things, depending on the occasion. For breakfast, a hot cup of coffee or a dollop of Greek yogurt on the side makes it feel like a special start. During brunch, I love serving slices with fresh fruit and a drizzle of honey, maybe even a splash of warm maple syrup. It’s delightful with a cup of chai or spiced tea as well. At dinner parties or after a hearty meal, I’ll warm slices and serve with vanilla ice cream or mascarpone — it’s a cozy, homemade dessert that truly hits the spot.
On busy mornings, I’ll just slice and wrap a piece to grab on the go. And if you want to make it extra indulgent, add a sprinkle of mini chocolate chips before baking or top slices with toasted coconut after cool-down. This bread really is a canvas — I test new ideas all the time, and it never disappoints.
Top Tips for Perfecting Your Apple Peanut Butter Bread
Over the years, I’ve picked up a few tricks that help ensure this bread is always a hit. First, when grating apples, I like to use a box grater with large holes and then toss the grated apple in a paper towel to squeeze out excess moisture. That way, the bread stays moist and doesn’t get soggy.
Be gentle when folding the wet and dry ingredients — overmixing can lead to dense bread, which I’ve learned the hard way. Just a few gentle strokes until everything’s combined is perfect.
Swirling the peanut butter mixture is a fun step — I like to do it in a figure-eight pattern to get a nice marbled effect. Trust me, a pretty swirl makes all the difference when slicing later.
For ingredient swaps, I’ve tried almond butter, which adds a slightly nutty flavor, and honey instead of sugar, which makes it a little more delicate. Be mindful that changing sweeteners or flours can alter the texture, so start with small adjustments.
When baking, I always position my loaf in the center of the oven and rotate it halfway through. This helps it bake evenly and avoids hot spots that could burn the top.
And finally, don’t skip the cooling step! I’ve rushed slicing hot bread before, and it always ends with a crumbly mess. Cooling faithfully results in perfectly sliced, moist bites every time.
Storing and Reheating Tips
To keep your apple peanut butter bread fresh, store leftovers in an airtight container at room temperature for up to two days — if it’ll last that long! For longer storage, wrap it tightly in plastic wrap or foil and pop it in the fridge. It’ll stay good for about a week and still taste moist and flavorful. I like to slice it before refrigerating so I can grab a piece quickly — just toast or warm in the microwave for a few seconds if you prefer it warm.
If you want to freeze it, wrap slices individually with plastic wrap, then put them in a sturdy freezer bag. It’ll last up to three months. To reheat, just pop a slice in the microwave for 15-20 seconds or warm in a toaster oven. The flavors actually deepen overnight, so even next-day slices taste incredible.
When applying glaze later, I suggest doing it right before serving — if stored too long, the glaze can lose its shine and texture. Trust me, a fresh drizzle makes even store-bought bread feel gourmet!
Frequently Asked Questions
Final Thoughts
This apple peanut butter bread has truly become one of my favorite baked goods to keep in rotation. It’s a beautiful balance of wholesome and indulgent, so comforting yet so easy to whip up. I love how each slice is packed with fresh apple chunks and that swirl of peanut butter — it’s like a little treat that feels both satisfying and nourishing. Whether you’re making breakfast for your family, a quick snack, or a cozy dessert, this bread never fails to bring a smile. And the best part? It’s versatile enough to adapt to your taste — add nuts, switch up the sweetener, or even include a dash of cinnamon or nutmeg for extra warmth. I really hope you give this a try and enjoy it as much as my family and I do. Happy baking — can’t wait to hear how yours turns out!
Healthy Apple Peanut Butter Bread
Ingredients
Method
- Preheat oven to 350ºF and line a standard loaf pan with parchment paper.
- Prepare the streusel topping by mixing all ingredients into a small bowl until a crumble forms. Set aside.
- Combine all of the dry ingredients in a medium-sized bowl. Set aside.
- In a large bowl, cream together brown sugar, oil, and vanilla. Add peanut butter, grated apples, and banana. Mix until combined. Add eggs and mix well. Stir in almond milk.
- Gradually add dry ingredients to wet mixture, mixing until smooth.
- Transfer batter to loaf pan and top with streusel mixture.
- Bake for 50-60 minutes until a toothpick inserted in the center comes out clean. Cool for 15-20 minutes before removing from pan.