Easy Baked Bean Casserole Recipe
I still remember the first time I whipped up this bean casserole. It was late fall, the house was warm, and I’d just come back from the farmers market with a bag full of fresh beans and veggies. Honestly, I was craving something hearty but simple—something that could warm my soul without taking hours to make. I threw together a few cans of beans, some cheese, spices, and a splash of creativity — and the smell alone brought everyone to the kitchen. My kids ask for this all the time, and truth be told, I’d happily eat it every week if I could. It’s one of those recipes that feels like a hug in a dish—touches of nostalgia, oozing comfort, and a flavor that just *clicks.* Whether it’s a busy weeknight or a weekend gathering, this bean casserole is a lifesaver on busy nights. And the best part? It’s ridiculously easy, so you can focus on good company instead of stressing over complicated recipes. Trust me, once you try it, it’ll be a staple in your house too.
What is a bean casserole?
Think of bean casserole as the kind of comfort food that’s simple, filling, and impossibly delicious. It’s essentially a baked dish made with beans, layered or mixed with vegetables, cheese, and sometimes a touch of meat or herbs for extra flavor. The name “casserole” comes from the dish being baked in a single ovenproof dish—easy clean-up and a warm, golden top. This dish has roots in home cooking traditions all over, from hearty American comfort foods to hearty Latin-inspired meals. The concept is pretty much a celebration of beans—those tiny powerhouses packed with protein and fiber—turned into something satisfying enough to serve as a main course. Think of it as a cousin to the classic baked ziti or shepherd’s pie, but with a cozy, plant-based twist. It’s versatility at its best: you can swap ingredients based on what’s in your pantry, add a swirl of hot sauce, or sprinkle extra cheese just before baking for that melted goodness everyone loves.
Why you’ll love this recipe?
What I love most about this bean casserole is how incredibly forgiving it is. No fancy equipment, no hard-to-find ingredients—just good, honest flavor in every bite. The taste? It’s a gentle, savory richness from the simmered beans and melted cheese, balanced by the freshness of herbs and the slight sweetness of caramelized veggies if you add them in. It’s what I call “everyday luxury,” perfect for taking the edge off a busy Tuesday or impressing friends at a low-key dinner. Plus, it’s budget-friendly—cans of beans and a few pantry staples go a long way, so your wallet doesn’t suffer. I’ve tested this with different beans, like black beans, pinto, or kidney, and honestly, they all turn out fantastic—each adding its own personality. This dish is also super versatile—you can serve it with rice, over greens, or even with a side of warm crusty bread. I sometimes mix it up by adding a sprinkle of crushed tortilla chips on top for crunch or a dash of hot sauce for kick. What I love most is how it just *feels* like a hug, especially on those cold days—warming, hearty, and satisfying in every way. And because it’s so easy, I’ve made it on nights when I just didn’t want to fuss but still wanted something delicious and wholesome. If you’re into family-friendly comfort food, this is definitely a keeper. Trust me on this—once you make it, it’ll disappear in minutes, I promise.
How do I make a bean casserole?
Quick Overview
This recipe is as straightforward as it gets, but don’t let that fool you—every layer packs flavor. You basically simmer beans with some spices, prep a cheesy topping, and layer everything in a baking dish. The magic happens when it bakes—turning everything into a melty, golden, slightly crispy top with a soft, flavorful interior. The best part? You can prep this ahead, pop it in the oven, and relax while it does its thing. It’s perfect for busy weeknights or a cozy weekend dinner with minimal fuss but maximum comfort. Honestly, once you have your ingredients ready, the whole process from start to finish takes less than an hour, and most of that is bake time. Plus, I’ll share some tips to make it even more personalized—adding extra veggies, swapping cheeses, or making it spicy. It’s a relaxed method that rewards you with a dish everyone will ask for again and again.
Ingredients
For the Main Batter:
- 2 cans (15 oz each) of beans—pinto, black, or kidney, drained and rinsed
- 1 cup cooked rice or quinoa (for added heft and texture)
- 1 small onion, finely chopped
- 2 cloves garlic, minced
- 1 teaspoon smoked paprika
- 1 teaspoon cumin
- 1/2 teaspoon chili powder (optional for heat)
- Salt and pepper to taste
- 2 tablespoons olive oil or butter
For the Filling:
- 1 cup chopped bell peppers or tomatoes (or a mix)
- 1/2 cup chopped fresh cilantro or parsley
- Juice of half a lime (or lemon)
- Optional: chopped cooked sausage or shredded chicken for a non-vegetarian version
For the Glaze / Topping:
- 1 cup shredded cheese—cheddar, Monterey Jack, or Mexican blend
- 1/2 cup crushed tortilla chips or crackers (for crunch)
- Fresh herbs or chopped green onions for garnish
Step-by-Step Instructions
Step 1: Preheat & Prep Pan
First things first, set your oven to 375°F (190°C). Lightly grease a baking dish—like 8×8 or similar—with butter or non-stick spray. This keeps things from sticking and makes cleanup easier. I always do this early so I don’t forget, especially when I get excited about layering everything!
Step 2: Mix Dry Ingredients
In a large bowl, combine your drained beans, rice or quinoa, spices, and a pinch of salt and pepper. Give it a good stir—think of this as building the flavor foundation. I like to mash some beans slightly with a fork or a potato masher—this helps everything stick together better, making sure the casserole isn’t too dry or crumbly.
Step 3: Mix Wet Ingredients
In a small bowl, whisk together the olive oil, lime juice, and a little water if needed. Pour this mixture over the beans and rice combo, and stir until everything’s nicely coated. You want it moist but not soupy—just enough to hold everything together without sinking into a puddle.
Step 4: Combine
Now, fold in the chopped peppers or tomatoes, and fresh herbs. Taste the mixture and add more salt or spices if needed—this is your flavor control station! The smell should be bright and savory, making your kitchen smell like comfort in progress.
Step 5: Prepare Filling
In a small bowl, mix the chopped veggies with a squeeze of lime and a handful of herbs. This will add a fresh pop later in the casserole. Feel free to experiment—sometimes I add a dash of hot sauce here for extra zing or throw in some sautéed mushrooms for earthiness.
Step 6: Layer & Swirl
Spread half of your bean mixture in the baking dish. Dollop the filling over it, then top with the remaining bean mixture. Using the back of a spoon or a knife, gently swirl the top layers to create a marbled effect. Not only does this look beautiful, but it also ensures every slice has a mix of flavors and textures—trust me, it’s worth the tiny effort!
Step 7: Bake
Sprinkle the shredded cheese evenly on top, then add the crushed tortilla chips or crackers for that irresistible crunch. Bake in your preheated oven for about 25-30 minutes, or until bubbling and golden brown on top. Keep an eye toward the end—nothing beats a cheese that’s melty and slightly crisp around the edges.
Step 8: Cool & Glaze
Once out of the oven, let it cool for about 5 minutes. This helps everything set and prevents hot cheese burns! If you’re feeling fancy, drizzle a little extra olive oil or hot sauce just before serving. I sometimes add a sprinkle of fresh herbs then, for vibrant color and freshness.
Step 9: Slice & Serve
Use a sharp knife to cut into squares or triangles—whatever your family prefers. Serve it hot, maybe with a side salad or some crusty bread. This casserole is *so* good on its own, but a dollop of sour cream or a squeeze of lime can really brighten the flavors. And trust me, leftovers are just as tasty the next day—reheat it gently in the microwave or oven, covered with foil for even warming.
What to Serve It With
This bean casserole is pretty flexible, so it plays nicely with all kinds of dishes. For breakfast, serve it alongside fresh scrambled eggs and a hot cup of coffee—who says comfort food can’t start your day? On a lazy weekend, it’s perfect with a side of guacamole and tortilla chips for a casual, delicious brunch. And if you’re craving something sweet, you can even sprinkle a little cinnamon sugar on top before baking for a dessert twist—imagine a sweet, cheesy, bean-filled pie! For cozy snack nights, I love just slicing a piece and serving it with a dollop of sour cream or hot sauce. It’s satisfying, filling, and the kind of dish that makes everyone feel at home. I’ve even brought it to potlucks and had friends ask for the recipe on the spot. Honestly, it’s become my family’s go-to comfort dish.
Top Tips for Perfecting Your Bean Casserole
Over the years, I’ve learned a few tricks that make this dish even better. First, always drain and rinse your beans well—otherwise, they can be too mushy or create excess liquid, which can make the casserole watery. I like to mash a handful of beans when mixing—it helps everything stay together and gives a nice creamy texture. When swirling the layers, don’t rush—try to distribute the filling equally and create a marbled look, which not only looks pretty but ensures each bite is bursting with flavor. For cheese, I recommend using a good melting variety like Monterey Jack or cheddar—trust me, a cheesy top really elevates the experience. If you want it spicier, tossing in chopped jalapeños or a dash of cayenne can add some heat. For healthier tweaks, try swapping out the rice for additional veggies or using low-fat cheese. I’ve also experimented with almond milk instead of regular milk, and surprisingly, it made it even creamier! The baking time is flexible—if your casserole is bubbling but not quite golden, give it a few extra minutes. Keep an eye on the edges so it doesn’t burn. And for toppings, a quick sprinkle of chopped green onions at the last minute brings freshness and color. Once you’ve made this a couple of times, you’ll start customizing it naturally—adding your own personal touches that make it uniquely yours. It’s forgiving, adaptable, and always delicious.
Storing and Reheating Tips
This casserole keeps beautifully in the fridge for up to 3 days. Just cover it tightly with foil or transfer it to an airtight container—no sogginess, I promise. To reheat, sprinkle a little water or broth over slices before microwaving; this helps keep it moist. For best results, reheat at medium power in short bursts, checking frequently so it doesn’t dry out. If you want to freeze it, wrap it tightly with plastic wrap and then foil, or store in a freezer-safe container for up to 2 months. To reheat from frozen, thaw it overnight in the fridge, then warm in the oven at about 350°F covered with foil—this keeps it from drying out. I usually add fresh cheese or herbs after reheating if I want that freshly baked feeling. Timing is everything—avoid overcooking so the cheese stays gooey and the beans don’t turn into mash. For best flavor, add fresh toppings or a squeeze of lime after reheating. This dish is resilient and still tastes great reheated—perfect for making ahead on lazy weekends!
Frequently Asked Questions
Final Thoughts
If you’re looking for a cozy, satisfying dish that comes together quickly and keeps everyone coming back for more, this bean casserole is your new best friend. It’s a perfect blend of hearty beans, melting cheese, and fresh flavors, all baked into a golden, bubbling masterpiece. I love how forgiving it is—changing up ingredients, adding a spicy kick, or tweaking the cheese can make it your own. Plus, it’s a great way to turn pantry staples into a show-stopping meal. I’ve made this countless times, and honestly, it never fails—every bite feels like a warm hug. Whether you’re feeding a hungry family or just craving something wholesome, I encourage you to give this a try. And don’t forget to share your own twists! I’d love to hear how yours turns out. Happy baking, and may your kitchen always be filled with good smells and even better memories!
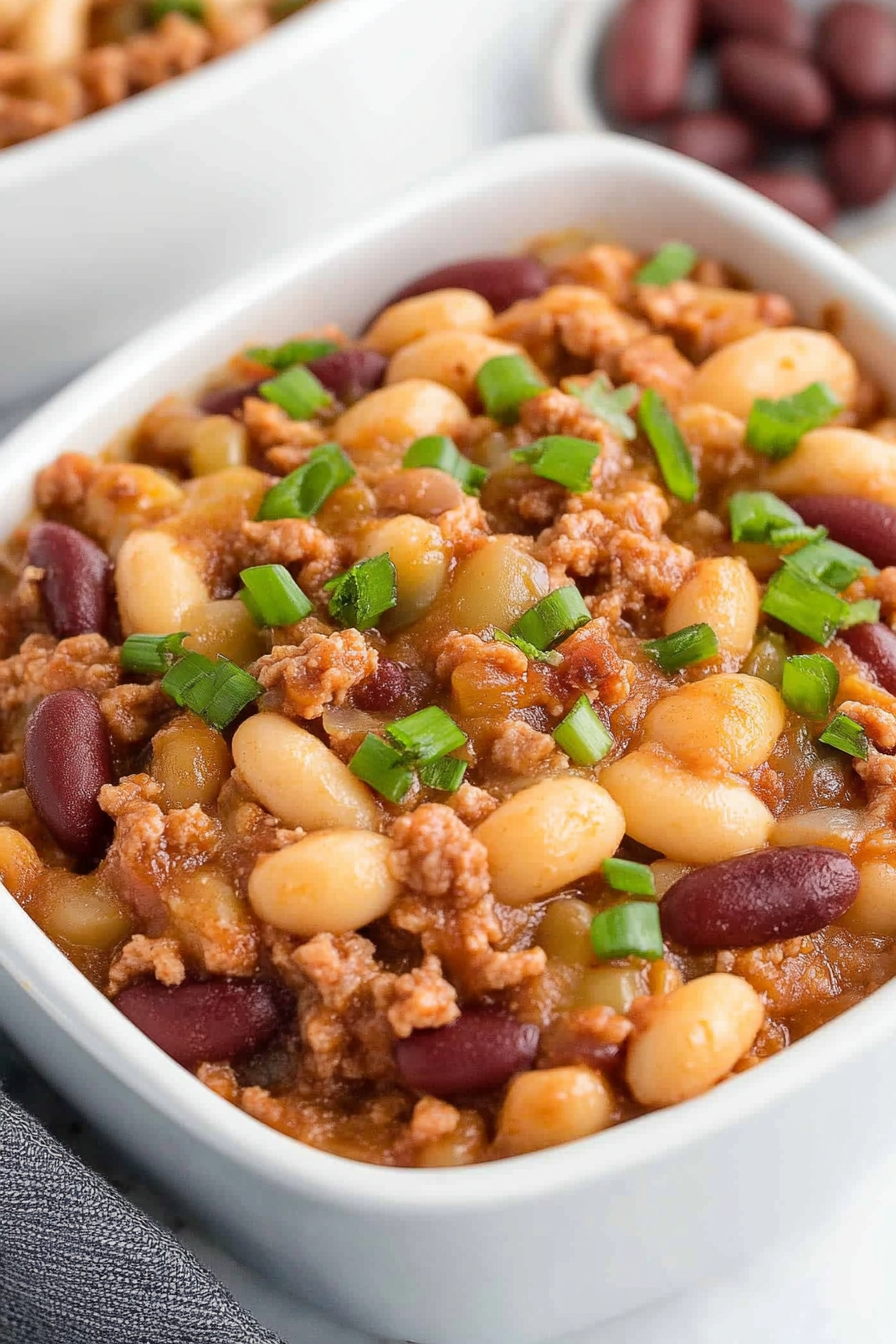
Classic Bean Casserole
Ingredients
Method
- Preheat oven to 350°F.
- In a large pot over medium high heat, cook bacon, ground beef, onions, and ketchup until meat is cooked and onions are softened.
- Stir in brown sugar, mustard, vinegar, pork and beans, red kidney beans, white kidney beans, salt, and pepper to taste.
- Put mixture into a 9×13 inch casserole dish and bake for 30 minutes. Serve hot. Sprinkle on green onions if desired.