Easy Berry Shortcake Trifle Delight
Oh, strawberry shortcake. Just saying the words makes me feel like I’m back in Grandma’s kitchen, the air thick with the sweet scent of macerating berries and buttery biscuits. This isn’t just any dessert for me; it’s a memory, a feeling, a little slice of pure joy. You know how sometimes you just crave something that tastes exactly like a perfect summer day? This strawberry shortcake is that. It’s so much more than just berries and cream; it’s a symphony of textures and flavors that just sing together. Forget those dry, crumbly versions you might have tried elsewhere. This one? This one is special. It’s the kind of dessert that makes people close their eyes with the first bite and utter a little happy sigh. Honestly, it’s my go-to when I want to impress without breaking a sweat, and it’s a guaranteed crowd-pleaser, every single time. It’s like the grand finale of the berry season, all wrapped up in one glorious dish.
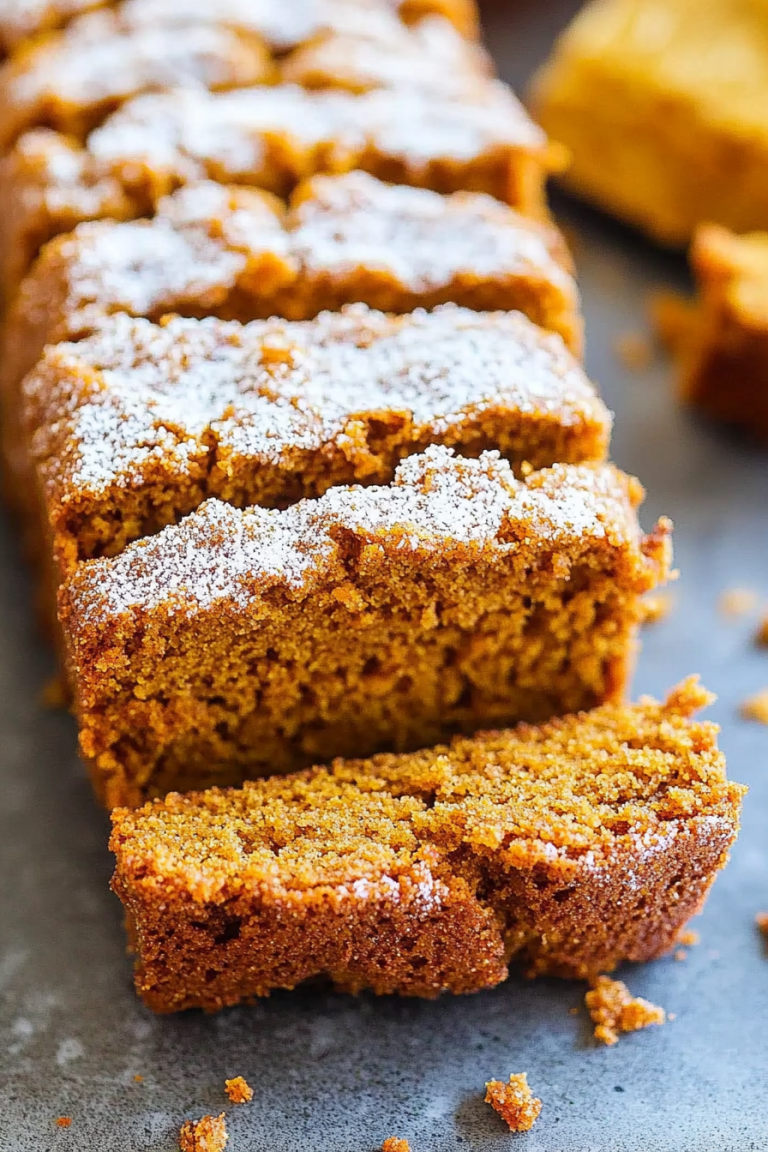
What is a strawberry shortcake?
So, what exactly *is* strawberry shortcake? At its heart, it’s a classic American dessert that celebrates the vibrant sweetness of fresh strawberries. The “shortcake” part traditionally refers to a type of biscuit or scone, something that’s made with a higher proportion of fat (like butter or shortening) compared to regular cake, giving it a crumbly, “short” texture. It’s not meant to be light and airy like a sponge cake, but rather tender and slightly dense, with a lovely, rich flavor. We layer this beautiful, slightly sweet biscuit with mounds of juicy, macerated strawberries (that just means we let them sit with a bit of sugar, coaxing out all their delicious juices) and a generous dollop of freshly whipped cream. Think of it as the most delightful, summery pedestal for those perfect, sun-ripened strawberries. It’s simple, it’s elegant, and it’s utterly delicious.
Why you’ll love this recipe?
What are some of the reasons why this particular strawberry shortcake recipe has become my absolute favorite, and I just know you’re going to feel the sameflavor is just out of this world. The biscuits are perfectly tender, not too sweet, with a hint of vanilla that complements the strawberries beautifully. And those strawberries? When they sit with a little sugar, they release this incredible, syrupy juice that is pure liquid summer. Then there’s the simplicity. Seriously, you don’t need to be a pastry chef to nail this. The biscuit dough comes together in minutes, and the rest is just assembly. It’s the kind of recipe that feels incredibly rewarding for the amount of effort you put in. Plus, it’s surprisingly cost-efficientWhat are some good pantry staples for a strawberry lover?versatility! While it’s incredible on its own, you can totally jazz it up. I’ve added a splash of Grand Marnier to the strawberries, or a tiny bit of lemon zest to the biscuits, and it takes it to a whole new level. What I love most about this recipe, though, is that it feels so comforting and familiar, yet it always feels a little bit special, too. It’s like a hug in dessert form. It’s definitely a step up from a basic cake, offering a more delightful texture and a more intense berry flavor.
How to Make Strawberry Shortcake
Quick Overview
This strawberry shortcake is all about fresh, bright flavors and delightful textures. We’ll be making a tender, slightly sweet biscuit that’s perfect for soaking up all those juicy strawberry juices, and then topping it all off with fluffy whipped cream. It’s a straightforward process: mix up the dough, bake the biscuits until golden, macerate your strawberries, whip some cream, and then assemble. It’s surprisingly quick, making it a lifesaver when you need a showstopper dessert without a ton of fuss. The key is really letting those strawberries macerate to get the most flavor out of them.
Ingredients
For the Main Batter:
You’ll need 2 cups of all-purpose flour, which forms the base of our tender biscuits. Make sure it’s not self-rising; we want to control the leavening. Then, about 1/4 cup of granulated sugar for a hint of sweetness. Don’t skip the baking powder – 2 teaspoons of it are crucial for that lovely lift and tender crumb. A good pinch of salt, about 1/2 teaspoon, just to balance everything out. And the star of the show for richness and texture: 6 tablespoons of cold, unsalted butter, cut into small cubes. Cold butter is key to those flaky layers! And finally, about 3/4 cup of milk or buttermilk. Buttermilk really adds a little extra tang and tenderness, if you have it. I sometimes use whole milk, and it works beautifully too. A teaspoon of vanilla extract in the dough adds a wonderful warmth.
For the Filling:
This is where the magic happens! You’ll need about 2 pounds of fresh strawberries. Make sure they’re ripe and sweet – that’s the most important thing! Hull them (remove the green tops) and then slice them or quarter them, depending on your preference. I like a mix of slices and quarters. Then, about 1/4 cup of granulated sugar. You might need a little more or less depending on how sweet your strawberries are. Let them sit for at least 30 minutes, or even an hour, to really draw out those juices. This is what makes the filling so luscious!
For the Glaze:
Just 1 cup of heavy whipping cream, very cold. Make sure it’s cold; that’s essential for whipping properly. 2 tablespoons of powdered sugar (also known as confectioners’ sugar) for sweetness without grittiness. And another 1/2 teaspoon of vanilla extract for that classic flavor. Sometimes, if I’m feeling fancy, I’ll add a tiny pinch of cream of tartar to help stabilize the whipped cream, but it’s not strictly necessary if you’re careful.
Step-by-Step Instructions
Step 1: Preheat & Prep Pan
First things first, preheat your oven to a nice, hot 400°F (200°C). You want it good and ready to bake those biscuits to perfection. While the oven heats up, grab a baking sheet and line it with parchment paper. This is a lifesaver for easy cleanup, trust me! If you don’t have parchment, you can lightly grease the baking sheet, but parchment paper is my preferred method for non-stick success.
Step 2: Mix Dry Ingredients
In a large bowl, whisk together the 2 cups of all-purpose flour, 1/4 cup granulated sugar, 2 teaspoons of baking powder, and 1/2 teaspoon of salt. Give it a really good whisk to make sure everything is evenly distributed. You want to make sure that baking powder is mixed in well so all your biscuits rise evenly.
Step 3: Mix Wet Ingredients
Now, cut in the cold butter. You can use a pastry blender, two forks, or your fingertips. Work quickly so the butter stays cold. You want the mixture to resemble coarse crumbs with some pea-sized pieces of butter still visible. Those little bits of butter will create steam in the oven, making your biscuits wonderfully flaky. Then, in a separate small bowl or liquid measuring cup, whisk together the 3/4 cup milk (or buttermilk) and 1 teaspoon vanilla extract.
Step 4: Combine
Pour the wet ingredients into the dry ingredients. Stir with a fork or spatula *just* until the dough comes together. Don’t overmix! Overmixing develops the gluten too much, which will result in tough biscuits. It’s okay if there are a few dry spots; we’ll take care of that when we turn it out.
Step 5: Prepare Filling
While the dough is resting for a moment, let’s get those strawberries ready. Hull and slice or quarter your 2 pounds of fresh strawberries. Place them in a medium bowl and sprinkle with 1/4 cup of granulated sugar. Gently toss to combine. Let them sit at room temperature for at least 30 minutes, or even up to an hour. This process, called macerating, draws out their natural juices and sweetens them beautifully, creating a luscious syrup. Stir them occasionally.
Step 6: Layer & Swirl
Turn the biscuit dough out onto a lightly floured surface. Gently pat or roll it out to about 3/4-inch thickness. Don’t overwork it. Use a biscuit cutter (or a glass rim) to cut out rounds. Gather the scraps, gently pat them together, and cut out more rounds until you’ve used most of the dough. Arrange the biscuit rounds on your prepared baking sheet, leaving a little space between them. For an extra touch, you can brush the tops lightly with a little extra milk or cream and sprinkle with a touch more sugar.
Step 7: Bake
Bake for 15-18 minutes, or until the biscuits are golden brown on top and cooked through. You can test for doneness by inserting a toothpick into the center – it should come out clean. The smell in your kitchen at this point will be absolutely divine!
Step 8: Cool & Glaze
Let the biscuits cool on the baking sheet for a few minutes, then transfer them to a wire rack to cool slightly. While they’re cooling, whip your cream. In a chilled bowl, combine the cold heavy whipping cream, 2 tablespoons powdered sugar, and 1/2 teaspoon vanilla extract. Beat with an electric mixer until soft peaks form. Be careful not to overbeat, or you’ll end up with butter! Once the biscuits are just warm or at room temperature, we’re ready to assemble.
Step 9: Slice & Serve
To serve, gently split each biscuit in half horizontally using a fork or a knife. Spoon a generous amount of the macerated strawberries (with all their juice!) over the bottom half of each biscuit. Top with a dollop of whipped cream, then place the top half of the biscuit on top. Add a few more strawberries and a final swirl of cream. Serve immediately for the best experience. This is when the magic really happens!
What to Serve It With
This strawberry shortcake is practically a meal in itself, but it also pairs wonderfully with a few things, depending on the occasion. For a simple, delightful breakfast, I love serving it alongside a perfectly brewed cup of coffee or a refreshing glass of iced tea. The slightly sweet biscuit and berries are a lovely start to the day, especially on a weekend morning when you have time to linger. For a more elegant brunch spread, I’ll often serve individual shortcakes with a few fresh mint leaves as a garnish. A mimosa or a light sparkling rosé is the perfect beverage pairing to make it feel extra special. When serving it as a dessert, it’s the star, of course. A light, fruity dessert wine can be lovely, or simply serve it with a stronger coffee. For those moments when you just need a sweet treat, a cozy snack, it’s perfect on its own, maybe with a glass of cold milk. My family tradition is to have it after a Sunday roast, but honestly, it’s good anytime you need a little sunshine in your life. It’s also fantastic with a scoop of vanilla bean ice cream on the side if you’re feeling particularly decadent!
Top Tips for Perfecting Your Strawberry Shortcake
I’ve made this strawberry shortcake more times than I can count, and over the years, I’ve picked up a few tricks that really elevate it. For the strawberries, the most important thing is using the ripest, sweetest berries you can find. If your berries aren’t super flavorful, don’t be afraid to add an extra tablespoon of sugar. Gently macerating them for at least 30 minutes is key; it’s what creates that amazing, syrupy sauce that’s so crucial. For the biscuits, cold ingredients are your best friend. Make sure your butter is really cold and cut into small pieces. Don’t overwork the dough when you mix it; a few streaks of flour are okay. Overmixing leads to tough biscuits, and we want them tender! When you’re patting out the dough, handle it as little as possible. For the swirl on top, I usually just gently swirl the strawberries and their juice over the biscuit and cream, but if you want to get fancy, you can reserve some of the beautiful strawberry syrup and drizzle it artfully. For ingredient swaps, if you can’t find buttermilk, regular whole milk works fine, but adding a teaspoon of lemon juice or vinegar to it and letting it sit for a few minutes will mimic the tang. If you’re making this ahead, I highly recommend keeping the components separate and assembling right before serving. The biscuits are best fresh, and the cream won’t deflate as quickly. If you absolutely must bake the biscuits ahead, store them in an airtight container at room temperature. I’ve tried making these with almond milk, and while it works, it does make the biscuits a tad less tender than with dairy milk, so I stick to dairy if I can. Remember, the goal is a tender, slightly crumbly biscuit that cradles the sweet berries and creamy topping – it’s all about balance!
Storing and Reheating Tips
Storing this beautiful strawberry shortcake is all about keeping the components happy. The best way to keep everything tasting fresh is to store the biscuits, macerated strawberries, and whipped cream separately. The biscuits, if you have any leftovers (which is rare in my house!), are best stored at room temperature in an airtight container for up to two days. They might lose a little crispness but will still be delicious. If you need to store them for longer, you can put them in the refrigerator, but they can become a bit dry, so I usually avoid this unless it’s very warm. For the macerated strawberries, store them in an airtight container in the refrigerator for up to 3-4 days. Their flavor actually deepens over time, which is lovely! The whipped cream is best made just before serving, but if you need to store it, keep it in an airtight container in the refrigerator and it should be good for about a day, though it might lose some of its volume. If you’re planning to freeze any components, I’d only recommend freezing the plain baked biscuits. Wrap them tightly in plastic wrap, then in foil, and they’ll keep for about 1-2 months. Thaw them overnight at room temperature and gently rewarm them in a low oven (around 250°F/120°C) for a few minutes to crisp them up. I wouldn’t freeze the strawberries or whipped cream as their texture suffers too much. When it comes to the glaze, it’s always best to add it right before serving, as the juices from the strawberries can make the biscuits soggy if they sit too long.
Frequently Asked Questions
Final Thoughts
There you have it – my absolute favorite strawberry shortcake recipe! It’s more than just a dessert; it’s a little piece of sunshine, a taste of pure, unadulterated joy. The tender biscuits, the juicy, sweet strawberries, and the fluffy cream all come together in such a perfect harmony. It’s incredibly satisfying to make something so delicious from scratch, and the smiles it brings to people’s faces make all the effort completely worth it. If you love this recipe, you might also enjoy my recipe for Raspberry Lemon Scones or my Classic Vanilla Bean Ice Cream. They’re all about celebrating fresh, seasonal flavors! I truly hope you give this strawberry shortcake a try. I can’t wait to hear what you think and how it turns out for you and your loved ones. Please leave a comment below and let me know your thoughts, or share any fun variations you come up with. Happy baking!
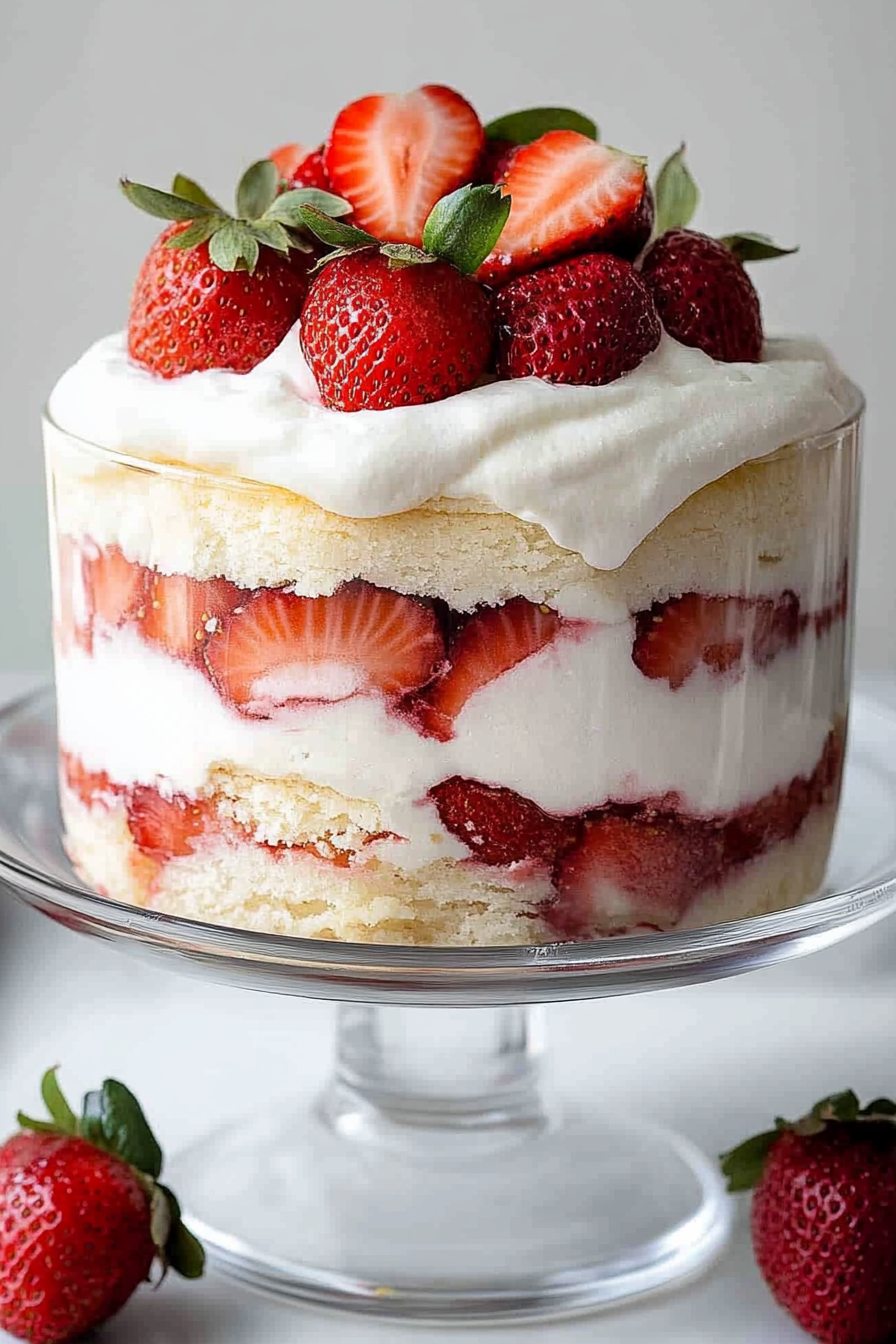
Strawberry Shortcake Delight
Ingredients
Method
- In a medium bowl, mix together the strawberries, sugar, and preserves. Chill while preparing other ingredients.
- In another bowl, beat the softened cream cheese with the sweetened condensed milk until smooth. Fold in the whipped cream gently.
- Layer in a large trifle dish: one-third of the cake cubes, followed by a layer of strawberry mixture, then a layer of cream cheese mixture. Repeat until all ingredients are used.
- Refrigerate for at least 2 hours before serving.