Easy Candy Bar Cake Recipe
If you’ve ever wanted a dessert that hits all the right sweet spots—rich, fudgy, nutty, and just a little bit gooey—then trust me, the Snickers Poke Cake is your new best friend. I made this for the first time at a family get-together years ago, and it disappeared in minutes. My kids ask for this all the time, especially on those busy weeknights when I need something quick but really crave that indulgent, caramel-y punch. Honestly, it’s one of those recipes you keep in your back pocket—because it’s simple enough to throw together, yet impressive enough to make you feel like a baking wizard. The beautiful marbled top, the layers of caramel flavor, and that crunchy Snickers surprise inside? Total crowd-pleaser. And the best part? You can totally customize it—more nuts, extra caramel drizzle—you name it. If you’re a chocoholic or a Snickers lover, this one’s a lifesaver on busy nights or even those lazy weekends when you just want to treat yourself. So, grab that bag of Snickers, and let’s get baking!
What is a Snickers Poke Cake?
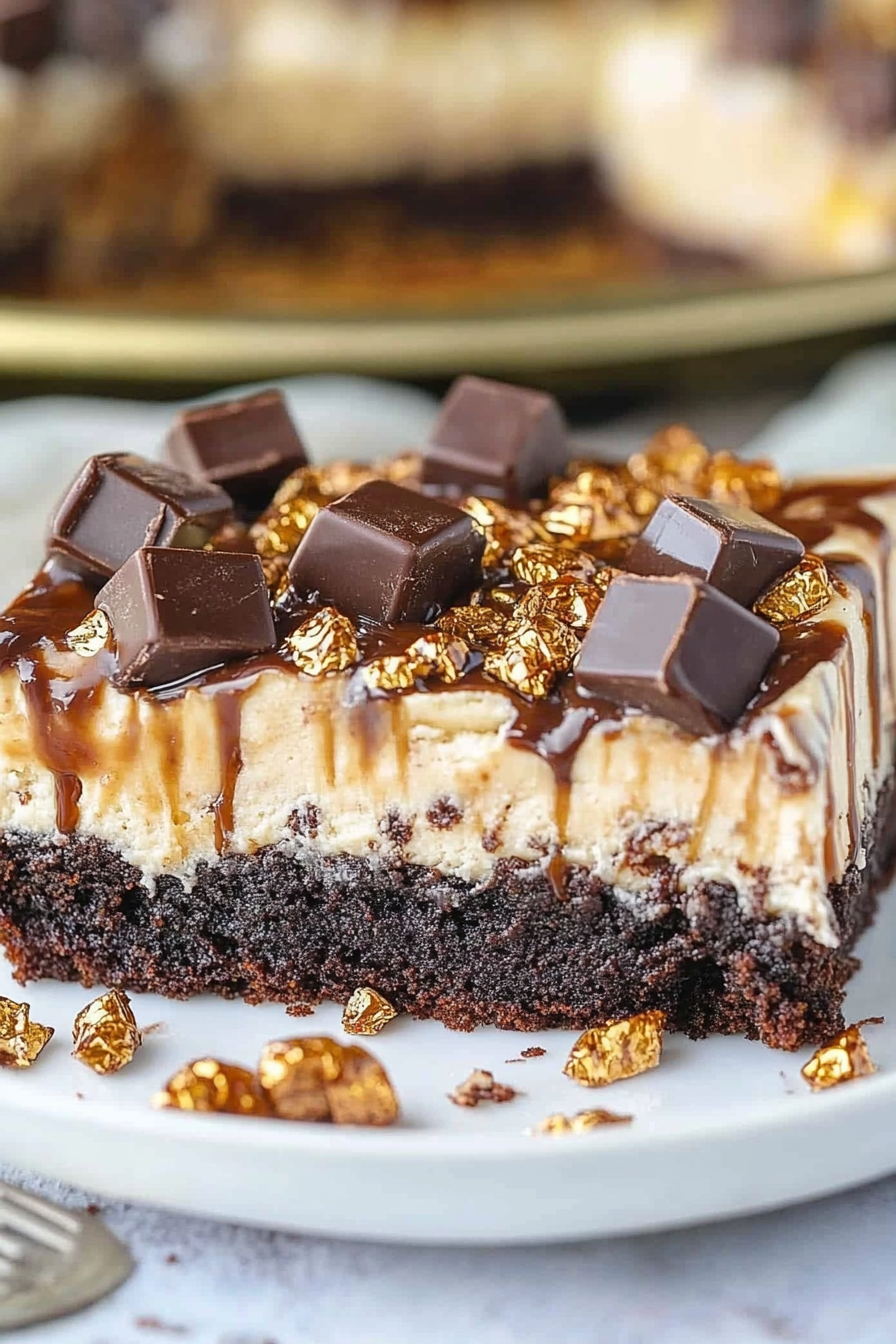
The Snickers Poke Cake is essentially a rich, moist chocolate cake infused with gooey caramel and topped with chopped Snickers bars. Think of it as a giant, decadent dessert that combines all the best parts of your favorite candy bar. The “poke” part refers to how, after baking, you poke holes all over the cake and then pour warm caramel or fudge over it, letting the sweet, sticky goodness seep deep into every bite. It’s a fun twist on traditional layer cakes—no frosting fuss, just a magic syrup that makes each slice irresistibly moist and flavorful. The name is pretty literal, but it’s also almost tongue-in-cheek because it’s so decadent yet surprisingly easy to make. It’s perfect when you’re craving something chocolatey and caramel-y but don’t want to fuss with layers or complicated decorating. Think of it as a no-fail crowd favorite, especially if you love the combo of chocolate and caramel with a bit of crunch—like biting into a Snickers bar, but in cake form!
Why you’ll love this recipe?
What I love most about this Snickers Poke Cake is how insanely delicious it is, but without all the hassle. It’s basically foolproof—perfect for beginner bakers or anyone who’s short on time but still wants to bring something wow-worthy to the table. The flavor? Oh my goodness, it’s like a giant Snickers bar in cake form. The chocolatey base is perfectly soft and tender, while the caramel gives it that sticky, sweet undertone that keeps you coming back for more. Plus, the chopped Snickers on top add a bit of crunch and nutty flavor that have everyone asking, “Is this real?” The beauty of this cake is also in its versatility. I’ve tested it with different chocolates, sometimes using peanut butter cups instead of Snickers—trust me on this one, they’re just as good. What makes it stand out compared to your typical chocolate cake? The addition of caramel and bits of candy inside. It’s like a candy store exploded into a cake—so fun and satisfying! And let’s be honest, it’s a showstopper: beautiful enough to serve at dessert tables, but simple enough that I always do this when I need a quick treat for friends or a family gathering. Don’t be surprised if it becomes your go-to dessert, too.
How do I make a Snickers Poke Cake?
Quick Overview
This cake is almost too easy to call a recipe. You start with a simple chocolate cake batter, bake it until moist and tender, then use the handle of a wooden spoon to poke holes all over. While it cools slightly, you pour warm caramel sauce over the top—this is what truly makes the cake unforgettable. Once cooled completely, you sprinkle chopped Snickers bars over the top, then finish with a luscious drizzle of chocolate glaze. It’s a one-pan wonder that looks like you fussed forever but really only takes minutes of hands-on time. Trust me, once you get the hang of poking and pouring, you’ll want to make this all the time. The best part? It’s a no-fuss, no-mess dessert that feeds a crowd and makes everyone feel special.
Ingredients
For the Main Batter:
- 1 box chocolate cake mix (your favorite brand; I love a super moist one)
- Ingredients called for on the box (usually eggs, oil, water)
- Optional: a splash of coffee or espresso powder to enhance chocolate flavor
For the Filling:
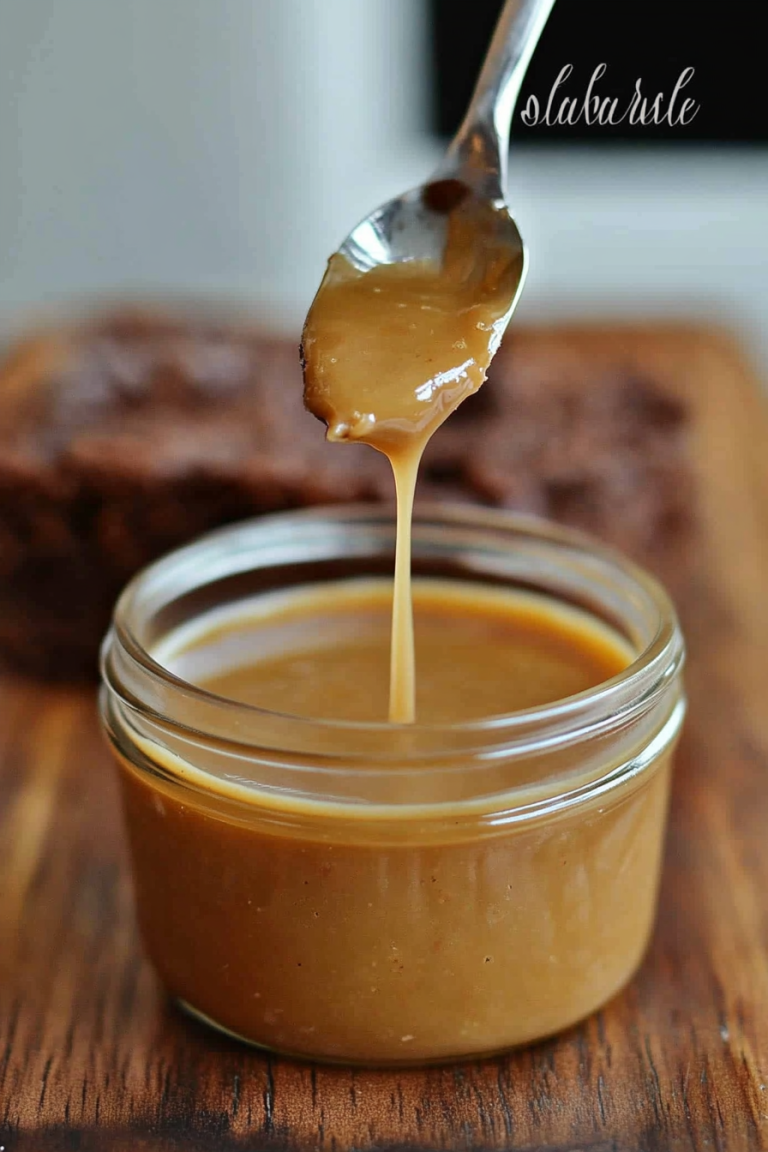
- 1 cup caramel sauce (store-bought or homemade—easy peasy!)
- About 4-6 Snickers bars, chopped into small pieces
For the Glaze:
- 1/2 cup heavy cream or milk
- 1 cup semi-sweet chocolate chips
- 1 tablespoon butter (optional, for shine)
- Extra chopped Snickers or nuts for topping
Step-by-Step Instructions
Step 1: Preheat & Prep Pan
Set your oven to 350°F (175°C) and grease a 9×13-inch baking dish. You can line it with parchment paper for easier cleanup if you like. I always do this—makes the cake come out perfectly without sticking.
Step 2: Mix Dry Ingredients
In a large mixing bowl, whisk together your cake mix and any dry ingredients listed on the box. If you want an extra chocolate boost, stir in a teaspoon of espresso powder. It’s a game-changer for that deep, rich flavor.
Step 3: Mix Wet Ingredients
In a separate bowl, combine eggs, oil, and water. I like to use room temperature ingredients—they blend better and make the cake extra tender. Whisk until smooth.
Step 4: Combine
Pour the wet mixture into the dry and gently fold until just combined. Don’t overmix—this keeps your cake light and fluffy. It’ll be thick but pourable.
Step 5: Prepare Filling
While batter is resting, chop your Snickers into small chunks. This piece is fun because the caramel, nuts, and chocolate bits inside really pop in each bite. Set aside a handful for sprinkling on top later.
Step 6: Layer & Swirl
Pour half of the batter into your prepared pan, then evenly sprinkle half of the chopped Snickers over the batter. Pour remaining batter over, then use a toothpick or knife to swirl the Snickers into the batter—creating a marbled effect. This isn’t crucial, but it looks super pretty!
Step 7: Bake
Pop it into the oven and bake for 35-40 minutes, or until a toothpick inserted in the center comes out with just a few moist crumbs. The smell alone will make your house smell like a candy shop.
Step 8: Cool & Glaze
Let the cake cool in the pan for about 20 minutes, then poke holes all over it with the handle of a wooden spoon. While it’s still warm, pour your caramel sauce evenly over the top—this seeps right into the holes for maximum gooey goodness. Finish cooling completely before drizzling your chocolate glaze. I like to do a quick glaze by heating cream and pouring it over chocolate chips, then stirring until smooth. You can add a pinch of sea salt or vanilla for extra flavor.
Step 9: Slice & Serve
Once totally cool and glazed, sprinkle the remaining chopped Snickers over the top for an extra crunch. Slice with a sharp knife—clean cuts, no squishing—and serve at room temperature. Trust me, this cake slices beautifully when it’s fully cooled, and it’s just as delicious the next day (if it lasts that long!).
What to Serve It With
This cake is pretty much a star on its own, but if you want to elevate the experience, pair it with a cold glass of milk, a cup of coffee, or even a scoop of vanilla ice cream for contrast. During brunch, I’ve served slices with whipped cream and fresh berries—everyone loves that sweet, crunchy combo. It’s also perfect for a casual dessert after dinner. I’ve seen folks pair it with a drizzle of extra caramel or a dusting of powdered sugar for presentation. Honestly, I like to keep it simple because the cake itself is so rich and flavorful. For a fun family tradition, I sometimes cut into it while watching a movie—kids love it at movie night because it’s like a big, chocolatey treat that they can eat with their hands. It’s such a crowd-pleaser and a real comfort food—think of it as a homemade candy bar you get to enjoy with family or friends.
Top Tips for Perfecting Your Snickers Poke Cake
Over the years, I’ve learned a few tricks that make this cake even better. First, when chopping Snickers, I refrigerate them first—it makes slicing through the caramel and nuts a lot easier and cleaner. Trust me, warm candy bars get sticky and messy. Second, don’t skip the poking step; it’s what gives the cake that luscious, moist texture because the caramel really sinks in. When pouring the caramel, try to do it slowly and evenly—rushing can cause uneven soaking. Regarding the glaze, I’ve tried making it with different chocolates—white, milk, dark—and honestly, semi-sweet hits the sweet spot without overpowering the caramel. If you want a richer finish, add a tablespoon of butter to your glaze. Want a nutty crunch? Toss some chopped peanuts or almonds into the glaze for extra texture. Oh, and if you’re looking to make it a little lighter, substitute applesauce for oil in the batter—works surprisingly well. Just be careful not to overbake; you want that moist, fudgy center. I also tested this with gluten-free flour, and it’s surprisingly close to the original—just swap out with a good gluten-free blend and add an extra splash of water if needed. The key is in the balance—bite into it, and you’ll see why I love this recipe so much.
Storing and Reheating Tips
This cake is best enjoyed within 2-3 days for maximum freshness, but I’ve stored it successfully for up to a week in the fridge. Cover it tightly with plastic wrap or store in an airtight container to keep the moisture locked in. If it’s been a couple of days, you can reheat individual slices in the microwave for about 15-20 seconds—they’ll become melty and cozy again. Just make sure to cover them with a paper towel to avoid splatters. For longer storage, wrap individual slices or the whole cake with plastic wrap and freeze for up to a month. When ready to eat, let it thaw in the fridge overnight or bring slices to room temperature for that fresh-from-the-oven feeling. Just a quick note: I usually add the remaining chopped Snickers or drizzle the glaze on after reheating, so the topping stays fresh and crunchy. If you’ve got leftover glaze, reheat it gently over low heat—stirring constantly—until smooth and pourable. This cake only gets better with a little time in the fridge—it allows the flavors to meld together beautifully.
Frequently Asked Questions
Final Thoughts
This Snickers Poke Cake has become a staple in my dessert lineup because it’s honestly a fail-proof way to satisfy that chocolate and caramel craving. Every time I make it, I get the same reaction—eyes wide, fork in hand—and the words, “You didn’t say this was homemade, I thought it was from a bakery!” It’s so satisfying to see your family and friends dig in and enjoy a treat that looks fancy but is actually *so* easy. I love how adaptable it is—adding extra nuts, swapping caramel flavors, even switching the chocolate topping. It’s one of those recipes you can make on a whim, and it never disappoints. I really hope you give it a try—trust me, once you taste that first slice, you’ll make it again and again. And hey, I’d love to hear how yours turns out, so drop a comment or share your variations. Happy baking—and enjoy every gooey, chocolatey, caramel-filled bite!
No-Bake Chocolate Peanut Butter Bars
Ingredients
Method
- Line a 9x13 inch baking dish with parchment paper. In a mixing bowl, combine graham cracker crumbs, peanut butter, and honey until well mixed. Press the mixture evenly into the prepared dish.
- Melt chocolate chips in a microwave-safe bowl, stirring every 30 seconds until smooth. Pour the melted chocolate over the peanut butter layer and spread evenly.
- Refrigerate for at least 2 hours or until set. Cut into squares and serve.