Easy Christmas Cookies from Cake Mix
Every holiday season, there’s a special magic in the air that somehow makes everything taste a little sweeter—literally. I remember childhood mornings waking up to the aroma of freshly baked cookies filling the whole house, the kind that made me feel cozy even if it was snowing outside. Over the years, I’ve tried countless recipes, but there’s one that always brings back those nostalgic feelings and has become a family favorite—my homemade Christmas cookies. They’re simple enough for a busy weeknight but special enough to serve during the holidays with a cup of steaming cocoa or a glass of milk. Honestly, I think these cookies have the power to turn any ordinary day into a festive celebration. And believe me, you don’t need a baking degree to make them—you just need a little love, some good ingredients, and maybe a few extra sprinkles! Trust me on this one, once you try these, they’ll be your go-to Christmas tradition too.
What are Christmas cookies?
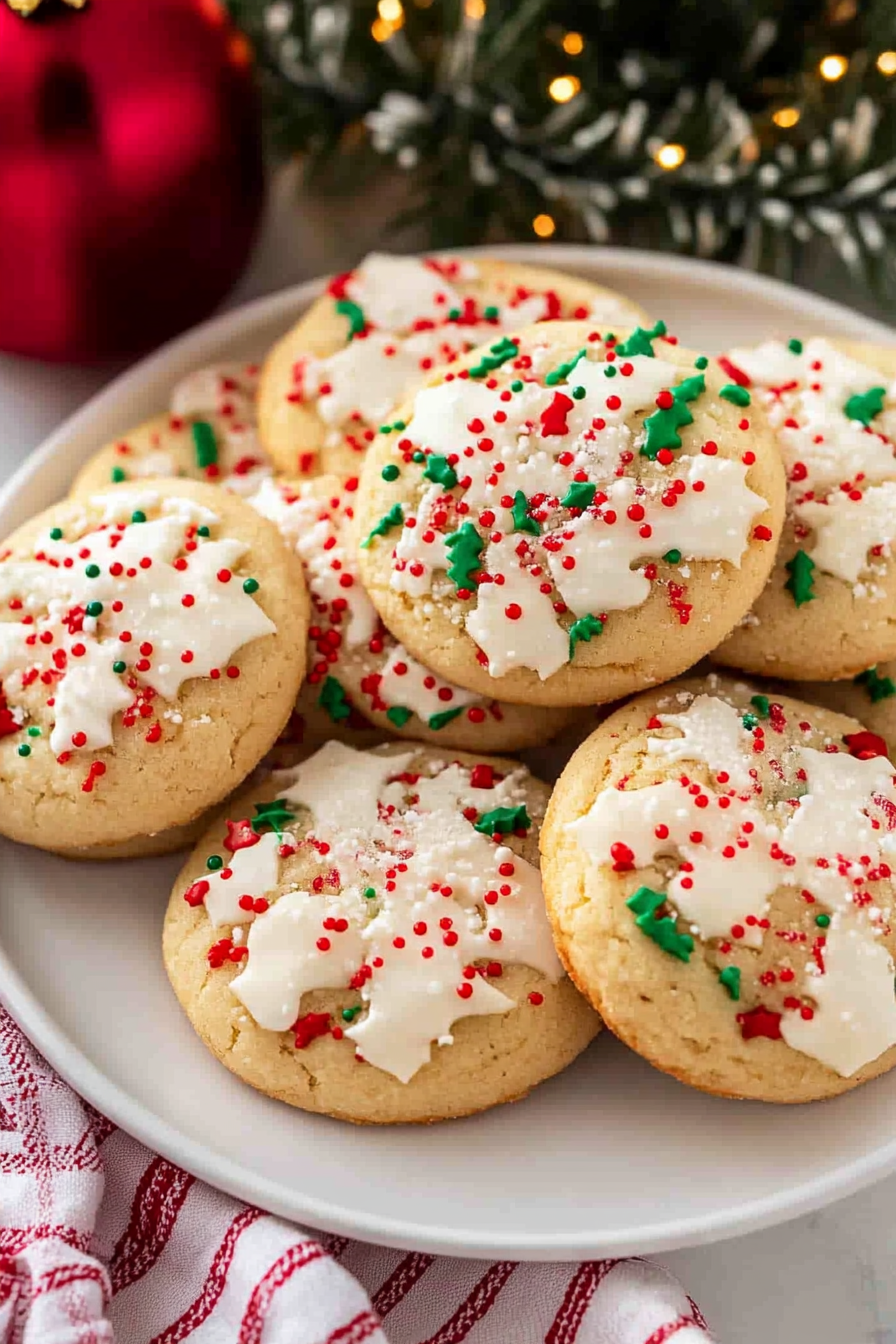
Think of Christmas cookies as the edible embodiment of holiday cheer—a little sweet gift that everyone in the family can enjoy. They’re essentially soft, buttery cookies infused with warm spices and decorated with colorful icing or sprinkles. The beauty of these cookies is how versatile they are; you can make them classic, gingery, with a hint of cinnamon, or even add chocolate chips for an extra treat. The name “Christmas cookies” isn’t just because they’re a holiday staple but also because they’re often shaped like stars, Christmas trees, or snowflakes—think of them as edible ornaments. This recipe is all about the cozy, festive feeling—perfect for baking with kids, sharing with friends, or just indulging in after a long day. I love how they turn out soft and chewy on the inside with just the right touch of crunch on the edges, and the smell alone is enough to bring everyone rushing into the kitchen.
Why you’ll love this recipe?
What I love most about these Christmas cookies is their simplicity—they come together with minimal fuss but make a huge impact. They’re a true crowd-pleaser, whether for your holiday cookie swap or a last-minute gift box. The flavor? Oh, it’s warm and comforting—the perfect blend of butter, sugar, and a sprinkle of festive spices like cinnamon, nutmeg, and a whisper of vanilla. The best part? You don’t need fancy ingredients or a fancy kitchen. Just basic pantry staples that you probably already have: flour, butter, sugar, eggs, and a touch of holiday magic. Plus, these cookies are endlessly versatile—you can cut them into shapes, pipe icing on top, or even customize the filling and flavorings to suit your mood. What really makes this recipe stand out is how adaptable it is; I’ve made a batch that turned out a little spicier, others that I decorated with colored royal icing, and still others that disappeared in minutes at my house because everyone just couldn’t resist.
How do I make Christmas cookies?
Quick Overview
This recipe is honestly a lifesaver on busy nights or when you’re just craving something sweet and nostalgic. The process starts with whisking together the butter, sugar, and vanilla until creamy, then slowly adding eggs and dry ingredients. Once the dough is smooth and pliable, you roll it out, cut into holiday shapes, and bake until golden. The whole thing takes about 30 minutes from start to finish, making it perfect for last-minute baking days or a family movie night. The magic really happens when you get to decorate—whether with icing, sprinkles, or just a dusting of powdered sugar—it’s the kind of project everyone can get involved in. And trust me, your house will smell like Christmas should—warm, sweet, and just a little spicy. Once cooled, these cookies are perfect for stacking in tins or layering on a festive platter. Simple, delightful, and so worth the effort.
Ingredients
For the Main Batter:
– 2 1/2 cups all-purpose flour (I always use unbleached for a richer flavor)
– 1 teaspoon baking powder
– 1/2 teaspoon salt
– 1 teaspoon ground cinnamon (because cinnamon makes everything feel Christmas-y)
– 1/2 teaspoon nutmeg (for that warm holiday aroma)
– 1 cup unsalted butter, softened (trust me, softened butter makes this a breeze)
– 1 cup granulated sugar
– 1 large egg
– 1 teaspoon pure vanilla extract
For the Filling:
– Optional: Christmas-colored sprinkles or jam for a jam-filled version
– A pinch of extra cinnamon or ginger for a little extra spice variation
For the Glaze:
– 1 cup powdered sugar
– 1-2 tablespoons milk or cream
– Food coloring or extracts (like peppermint or lemon) to customize flavor and look
– Sprinkles or edible glitter for extra sparkle
Step-by-Step Instructions
Step 1: Preheat & Prep Pan
Set your oven to 350°F (175°C) and line baking sheets with parchment paper. This keeps the cookies from sticking and makes cleanup a lot easier. I always do this first—nothing worse than getting to the best part and realizing I forgot!
Step 2: Mix Dry Ingredients
In a medium bowl, whisk together the flour, baking powder, salt, cinnamon, and nutmeg. This ensures all those cozy spices are evenly distributed. Trust me, overmixing can make your cookies tough, so I like to keep this step gentle and just combine everything well.
Step 3: Mix Wet Ingredients
In a large bowl, beat the softened butter and sugar with a hand or stand mixer until light and fluffy—about 2-3 minutes. Add the egg and vanilla, mixing until smooth. The smell of vanilla and butter together? Pure holiday comfort.
Step 4: Combine
Gradually add the dry ingredients into the wet mixture, mixing on low speed just until everything’s combined. Don’t overmix here—stirring by hand is fine too. Your dough should come together in a shaggy ball, ready to be rolled out.
Step 5: Prepare Filling
If you’re making jam-filled cookies, spoon a small amount of your favorite jam in the center of cut-out shapes. Or sprinkle with extra cinnamon or ginger if you want more spice in each bite.
Step 6: Layer & Swirl
Roll the dough out onto a lightly floured surface to about 1/4-inch thickness. Cut into shapes with cookie cutters—stars, trees, snowflakes, whatever makes you smile. For a marbled effect, you can layer different colored dough and swirl lightly before cutting.
Step 7: Bake
Place the cut cookies on your prepared baking sheet, leaving a little space between each. Bake for 8-10 minutes, or until the edges are just starting to turn a light golden. The smell alone will make your house feel like a winter wonderland.
Step 8: Cool & Glaze
Let the cookies cool on a wire rack for about five minutes—they’ll be fragile straight out of the oven. Then, stir together powdered sugar and milk for your glaze, adding food coloring if you like. Drizzle or dip your cookies, scatter sprinkles, and let dry completely before stacking or serving.
Step 9: Slice & Serve
If you’ve cut your cookies into shapes, you can gently lift them with a spatula for a polished look. Serve them slightly warm or at room temperature. Honestly, they taste just as good a day later—if they last that long! Decorate inspired by your favorite holiday themes or keep it simple with a dusting of powdered sugar.
What to Serve It With
These cookies are incredibly versatile—they shine in so many ways. For breakfast, serve a few alongside your morning coffee with a dash of whipped cream or cinnamon. My kids actually ask for these as their weekend treat with hot cocoa in the afternoon—they call it their “festive snack.” During brunches, I like decorating the table with a variety of shapes and colors, pairing them with spiced apple cider or mulled wine. And for dessert, layered on a festive platter with cookies, candies, and nuts, these are always the first to disappear. Sometimes, I add a little lemon zest to the glaze for a fresh twist, or swap sprinkles for edible glitter to make them extra special for a holiday party. Honestly, I love how they turn simple ingredients into something so magical and heartwarming. It’s the kind of treat that makes baking feel like a holiday tradition—cozy, cheerful, and full of love.
Top Tips for Perfecting Your Christmas Cookies
Over the years, I’ve picked up a few tricks to make these cookies turn out picture-perfect every time. First, always measure your flour accurately—spoon it into your measuring cup and level it off; packed or heaping flour can make cookies dense and tough. I’ve learned that chilled dough is easier to handle, especially if it’s sticky—just wrap it tightly and refrigerate for 30 minutes. When rolling out, a dusting of flour prevents sticking, but don’t use too much or your cookies might dry out a little. I also experimented with different spices—adding a pinch of cardamom or cloves can totally change the flavor profile. For swirling colors and flavors, I like layering different doughs and using a toothpick or skewer to create marbling—so fun! Trust me, don’t overbake; pull them out when they’re just barely golden on the edges. This keeps them moist inside. For the glaze, start with less milk—you can always add more to reach the perfect drizzle consistency. A little practice makes perfect, but honestly, I’ve made mistakes along the way—like overmixing or forgetting to flour the surface—and each one taught me new ways to be a better baker. To finish, I keep some extra sprinkles and edible glitter nearby for that extra holiday sparkle. Remember, it’s all about having fun and adding your personal touch!
Storing and Reheating Tips
Once these Christmas cookies cool down, storing them properly is key to keeping that fresh, chewy texture. If you’re planning to eat them within a day or two, just keep them in an airtight container at room temperature—preferably layered with parchment paper to prevent sticking. They stay soft and fresh for about three days this way. If you want to extend their life, pop them in the fridge in a sealed container for up to a week, but be aware that they might become a little crisper—perfect for dunking in tea or coffee. For longer storage, freeze them—wrap each cookie individually in plastic wrap, then place them in a freezer-safe bag or container. They’ll last up to three months that way. When you’re ready to enjoy, let them thaw at room temperature for about 15 minutes or warm in a low oven for a few minutes if you love that freshly baked feel again. If they’re glazed or decorated, wait to add the icing until after they’ve thawed to keep the shine and detail crisp. Reheating is optional—you really can enjoy them straight from the freezer or fridge!
Frequently Asked Questions
Final Thoughts
This recipe for Christmas cookies has become a cornerstone of my holiday traditions. It’s the kind of baking that fills your home with warmth and makes everyone smile—plus, it’s a fantastic way to create memories and enjoy the small joys of the season. The best part? Almost everything is customizable—whether you add a dash of peppermint extract, sprinkle with holiday-colored sugars, or even incorporate some chopped nuts or dried fruits. I’ve made countless batches, and each time, there’s a little tweak or personal touch that makes them unique. And honestly, there’s something about baking these cookies that turns a day into a celebration, even on the busiest of times. So grab your rolling pin and your favorite cutters—these cookies are waiting to bring a little extra joy to your holiday season. I’d love to hear how yours turn out, so don’t forget to leave a comment or share your festive variations. Happy baking, and may your season be filled with warmth, love, and lots of cookies!
Festive Sugar Cookies
Ingredients
Method
- In a large bowl, beat together the softened butter and sugar until creamy.
- Add the egg and vanilla extract, and mix until well combined.
- Gradually add the flour and salt, mixing until dough forms.
- Divide the dough into two discs, wrap in plastic wrap, and chill for 30 minutes.
- Preheat oven to 350°F. Roll out dough on a floured surface to ¼ inch thickness.
- Cut out cookies with your favorite shapes and place on a baking sheet lined with parchment paper.
- Bake for 10 minutes or until the edges are lightly golden. Let cool before decorating.