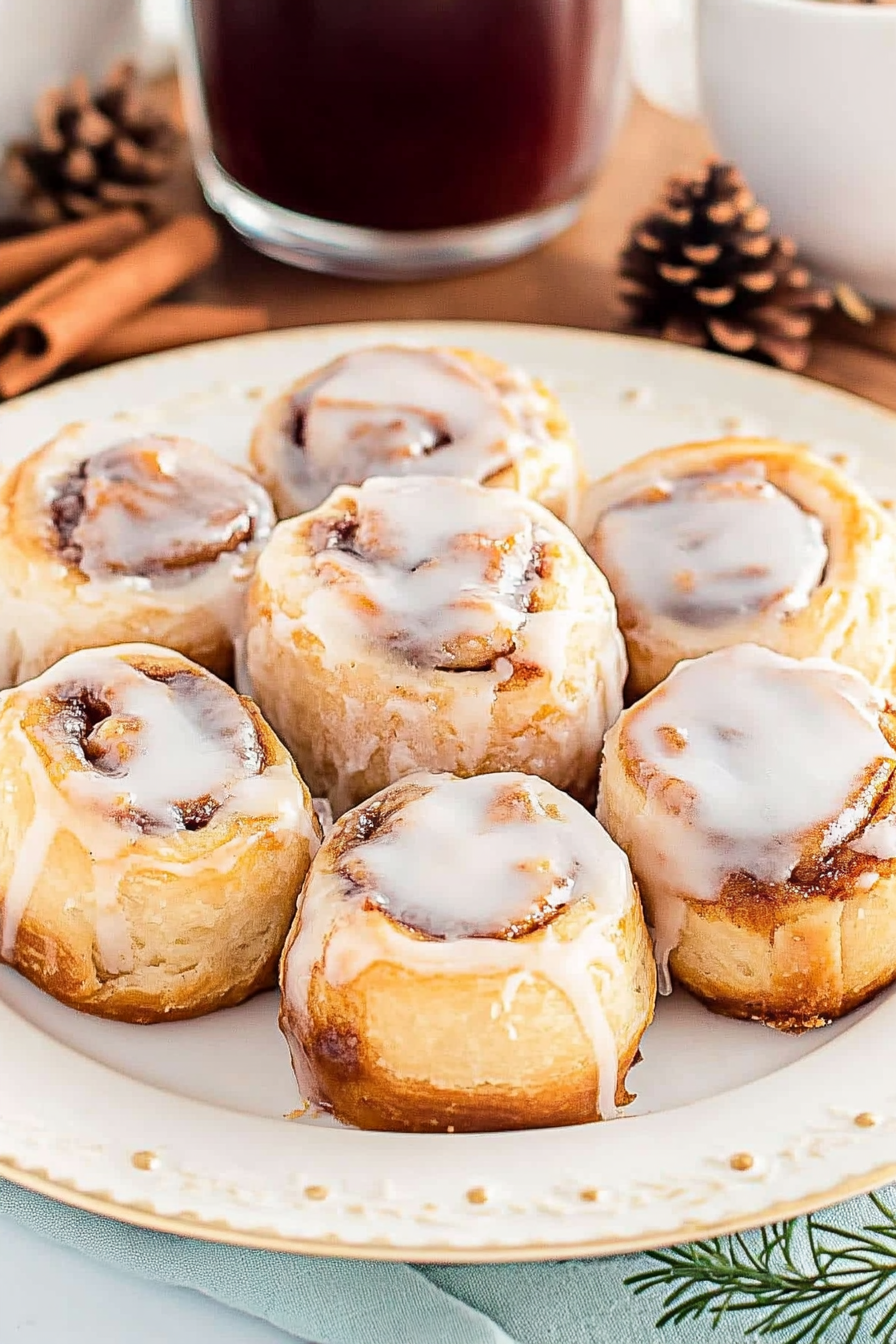
Easy Cinnamon Roll Pie Crust Delight
Honestly, there’s something about the smell of fresh cinnamon rolls wafting through the house that instantly takes me back to lazy Sunday mornings at my grandma’s place. The way the warm, spiced aroma fills every corner, mingling with a hint of buttery sweetness — it’s pure magic. I always do this when I want to treat myself or surprise my family with something special: whip up a batch of these cinnamon rolls. Trust me, they’re not just pretty to look at; they’re unbelievably soft, gooey, and perfectly balanced between sweet and spicy. And the best part? This recipe’s surprisingly straightforward — no complicated techniques or hard-to-find ingredients. My kids ask for these all the time, and I’ve yet to meet anyone who can resist a warm, freshly baked cinnamon roll. Plus, a drizzle of icing on top, and you’ve got a breakfast or snack that feels almost luxurious, but is really just simple love baked into dough. Ready to make some memories and fill your home with that heavenly scent? Let’s go!
What is cinnamon roll?
Cinnamon rolls are basically fluffy, sweet bread swirls packed with a cinnamon-sugar filling. Think of it as the ultimate soft, pillowy pastry that’s rolled out, spread with a cinnamon-spiced filling, then rolled up and sliced before baking. The name “cinnamon rolls” hints at exactly what you get: a roll of dough with cinnamon tucked inside, baked to golden perfection. Originating from European sweet bread recipes, these rolls became a comfort staple in many American kitchens — especially for weekend brunches or a cozy breakfast treat. It’s essentially a labor of love: a little bit of mixing, a bit of patience while rising, and then that satisfying swirl of filling and dough before they go into the oven. The finish is gooey, aromatic, and bursting with that classic cinnamon flavor. In our house, they’re more than just breakfast — they’re a way to slow down and savor special moments, especially when topped with a creamy glaze or icing.
Why you’ll love this recipe?
What I love most about this cinnamon rolls recipe is how straightforward it is — I’ve made it countless times, and it never fails to turn out dreamy. The aroma alone gets everyone’s attention, and the soft, springy texture is seriously addictive. Plus, you don’t need fancy ingredients or any complicated techniques; just basic pantry staples. They’re budget-friendly, too, which makes them perfect for weekend baking projects or spontaneous sweet cravings. And versatility? Oh, definitely! You can customize the filling with nuts, raisins, or even a dash of cocoa powder if you’re feeling adventurous. My favorite part? The glaze — a simple icing that ties everything together and makes each bite irresistibly sweet and sticky. This recipe is also forgiving for beginners; I’ve tested it with different flours, adjusting the rising times, and each time, it’s come out beautifully. Honestly, what I love most — aside from how cozy and nostalgic they taste — is how these cinnamon rolls turn an ordinary morning into a celebration. No matter how many I bake, they always disappear in minutes at my house!
How do you make cinnamon rolls?
Quick Overview
In essence, making these cinnamon rolls is a warm-up, a little patience, and a lot of love. You’ll start by preparing a soft, slightly sweet dough — a simple yeasted bread that’s kneaded until smooth. While it’s rising, you make a cinnamon-sugar filling with a touch of butter and spices. Once your dough has doubled in size, you roll it out, spread on the filling, then roll up and cut into slices. Each piece gets nestled into a baking dish, left to rise again for about 30 minutes, and then baked until golden brown. Finish with a quick glaze or icing, and you’re all set. The best part? This process is almost meditative, and the scent that fills your kitchen will have everyone asking, “When are these ready?” It’s a cozy, rewarding experience — and that warm, sweet payoff is worth every minute.
Ingredients
For the Main Batter:
– 2 ¼ teaspoons active dry yeast (or one packet)
– ¾ cup warm milk (about 110°F, or just warm to the touch)
– ¼ cup granulated sugar
– 4 tablespoons unsalted butter, melted
– 1 large egg
– 3 cups all-purpose flour
– ½ teaspoon salt
For the Filling:
– ½ cup packed brown sugar
– 2 tablespoons ground cinnamon
– ¼ cup softened unsalted butter
– Optional: chopped nuts, raisins, or chocolate chips for extra flair
For the Glaze:
– 1 cup powdered sugar
– 2-3 tablespoons milk or heavy cream
– ½ teaspoon vanilla extract
– A pinch of salt (if using salted butter)
Step-by-Step Instructions
Step 1: Preheat & Prep Pan
Set your oven to 375°F (190°C). Lightly grease a 9×13-inch baking dish or line it with parchment paper. Having everything ready makes the process so much smoother — trust me, I always do this first so I’m not scrambling last minute!
Step 2: Mix Dry Ingredients
In a big mixing bowl, whisk together the flour and salt. This step creates a uniform base for the dough, ensuring everything rises evenly. I like to do this first to keep things organized.
Step 3: Mix Wet Ingredients
Warm your milk and stir in the yeast and a teaspoon of sugar. Let it sit for about 5 minutes until it gets frothy — that’s how you know the yeast’s alive. Then, add the melted butter, egg, and the remaining sugar. Whisk until smooth. This mixture should be warm, but not hot — if it’s too hot, it’ll kill the yeast, and your dough won’t rise properly.
Step 4: Combine
Pour the wet ingredients into the dry and stir until just combined. Then, knead gently on a floured surface for about 5 minutes until it’s soft, elastic, and smooth. It might be a little sticky — that’s okay! Just sprinkle a tiny bit more flour if needed. Don’t overmix, or your rolls might turn out dense.
Step 5: Prepare Filling
Mix together the brown sugar and cinnamon in a small bowl. Soften your butter so it’s spreadable. If you’re adding nuts or raisins, prep those now. The filling should be spreadable but not runny, so adjust with a little more sugar or butter if needed.
Step 6: Layer & Swirl
Roll out your dough on a floured surface to about 12×16 inches. Spread the softened butter all over, then sprinkle the cinnamon-sugar mixture evenly. Starting from a long edge, carefully roll the dough up tightly into a log. Slice into approximately 12 even pieces. Arrange the slices in your prepared pan, cut side up. You can fit them snugly; they’ll puff up as they bake.
Step 7: Bake
Cover the pan loosely with a clean kitchen towel or plastic wrap and let the rolls rise in a warm place for 30-45 minutes, until they’ve doubled in size and look puffy. Bake for about 20-25 minutes, or until they’re golden around the edges. Keep an eye on them — every oven varies a bit!
Step 8: Cool & Glaze
While the rolls are baking, mix your glaze ingredients. It should be thick but pourable. When the cinnamon rolls come out of the oven, let them cool for about 10 minutes — that keeps the gooey insides from sliding out when you cut. Then, drizzle on your glaze while they’re still warm for that glossy, sticky finish.
Step 9: Slice & Serve
Use a sharp serrated knife to cut the rolls, wiping it clean between cuts for neat slices. Serve warm, maybe with a little extra glaze or a cup of coffee. I love serving these with fresh fruit or a dollop of whipped cream on the side. Nothing fancy, just comfort on a plate.
What to Serve It With
These cinnamon rolls are a showstopper on their own, but if you want to elevate the experience, here are some ideas:
- For Breakfast: Pair with a strong, dark coffee or a mug of hot chai. Serve alongside sliced bananas or berries for a fruitier touch.
- For Brunch: Make it a spread with scrambled eggs, crisp bacon, and fresh orange juice. The sweet rolls balance beautifully with savory dishes.
- As Dessert: Serve a cinnamon roll a la mode — with a scoop of vanilla ice cream melting over the warm pastry. Or drape with extra caramel sauce for an indulgent twist.
- For Cozy Snacks: Just plain and simple with a cup of tea or hot cocoa. It’s the perfect late-afternoon pick-me-up.
Personally, I love making these for Sunday brunch or even as a sweet gift. I’ve passed the recipe along to friends, who’ve told me their kids ask for seconds (and thirds!). I think once you master the basic technique, you’ll want to experiment—add a cream cheese frosting next time or swap out cinnamon for cardamom. Anyway, I hope these become a new favorite in your house too!
Top Tips for Perfecting Your Cinnamon Rolls
Over the years, I’ve picked up a few tricks to make these even better. Here’s what I’ve learned:
- Yeast Activation: Make sure your milk isn’t too hot or too cold — just warm enough to froth the yeast. If it doesn’t get bubbly, the dough might not rise properly.
- Gentle Kneading: Resist the urge to over-knead. A soft, slightly sticky dough works best. Overworking it can lead to dense rolls.
- Filling Variations: If you’re feeling fancy, sprinkle chopped pecans or even a little orange zest into the cinnamon sugar. It adds depth and surprise.
- Rising Tips: The key to fluffy rolls is patience. Let them double in size in a warm, draft-free spot — I often turn my oven on briefly to warm up then turn it off before rising.
- Glaze Glove: To get a smooth glaze, sift your powdered sugar first and add the milk gradually. If it’s too runny, add a bit more sugar; too thick, a splash more milk.
- Experimenting with Flours: Whole wheat or bread flour can add a heartier touch, but I’ve tested this with all-purpose flour, and it’s perfect every time.
Oh, and don’t forget — sometimes mistakes happen! Like that one time I rolled the dough too thin, and the filling spilled out — lesson learned: thicker dough is better for rolling. Or when I hurried and skipped a rise, resulting in denser rolls. These little slip-ups only make you better. I promise, once you get the hang of it, they’re almost impossible to mess up—and totally worth the extra effort!
Storing and Reheating Tips
Leftovers? No problem. These cinnamon rolls taste just as good the next day — if you store them right. Keep them in an airtight container at room temperature for up to 24 hours. After that, pop them in the fridge to keep them fresh for up to 3 days. To reheat, microwave for about 15-20 seconds or warm them in a 300°F oven wrapped in foil for 10 minutes. If you prefer them extra gooey, add a splash of milk or a fresh drizzle of glaze when reheating. For longer storage, wrap them tightly in plastic wrap and freeze. Thaw at room temperature or microwave briefly to warm up. Just keep in mind, the glaze or icing is best added fresh — so wait until they’re warm to drizzle again for that perfect shine and flavor. This way, your cinnamon rolls stay soft and delicious, even days later.
Frequently Asked Questions
Final Thoughts
These cinnamon rolls have become a staple at my house — they’re comfort food in its purest form, warm from the oven, fragrant and sticky, with that perfect cinnamon-spiced bite. I love how forgiving and adaptable the recipe is; you can make it ahead, customize the fillings, or skip the glaze if you’re feeling minimalist. One thing’s for sure: once you bake these once, you’ll find yourself making them over and over again. They’re my go-to for special mornings or when I need a pick-me-up after a long day. Honestly, sharing these with friends and family feels like giving a hug in pastry form. So, grab your ingredients, put on some cozy music, and enjoy the baking process. I can’t wait to hear how yours turn out! Don’t forget to leave a comment below, share your variations, or just tell me how much everyone loved them — happy baking!

Cinnamon Rolls with Pie Crust
Ingredients
Method
- Preheat oven to 350°F.
- Line a baking sheet with parchment paper.
- On a lightly floured surface, roll out the pie crust into a rectangle. Spread softened butter evenly over the surface.
- Combine brown sugar and cinnamon. Sprinkle the mixture evenly over the buttered crust.
- Carefully roll the dough into a log shape. Slice into 8 equal pieces.
- Place the rolls on the prepared baking sheet. Bake for 20 minutes until golden.
- Mix powdered sugar with cream and vanilla to make the glaze. Drizzle over warm rolls before serving.