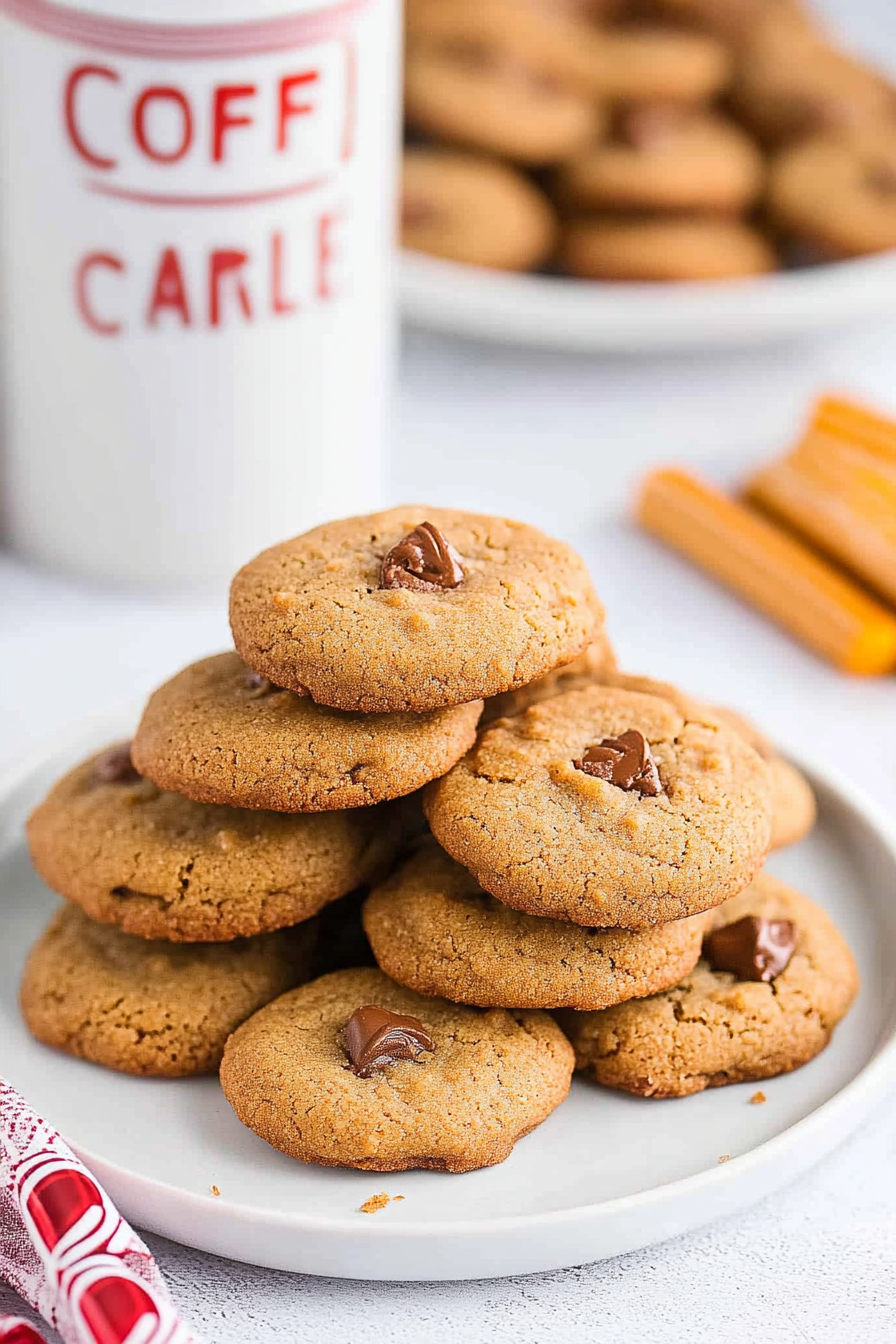
Easy Coffee Cookie Bites Delight
There’s something so nostalgic about biting into a cookie that instantly transports you back to childhood afternoons and lazy weekend afternoons with a glass of cold milk. But let me tell you, these Coffee Crisp Cookies? They might just become your new favorite treat — I promise, they’re dangerously good. I remember the first time I tried to recreate that iconic chocolate bar in cookie form; I was skeptical at first, but once I cracked the perfect blend of cocoa, coffee, and a hint of crunch, I knew I had something special. They’re sweet, with just a punch of coffee flavor, and that satisfying crispy crunch from bits of that classic Coffee Crisp bar I grew up loving. Seriously, these cookies are a little piece of heaven. I always do this when I need a quick pick-me-up or a sweet gift for friends; it’s my secret weapon for happy moments. And honestly? They disappear fast at my house — my kids ask for these all the time. Once you make them, I bet they’ll become your go-to, too.
What is coffee crisp cookies?
Think of Coffee Crisp Cookies as a loving homage to Canada’s beloved Coffee Crisp chocolate bar, but in cookie form. It’s essentially a crispy, chocolatey treat with a hint of coffee that packs a punch — think of it as a cross between a bar cookie and a crunchy biscuit. The idea is to infuse that iconic Coffee Crisp flavor into a tender yet crispy cookie base, then add a gooey or crunchy filling that mimics the original’s delightful layers. The name itself nods to that crisp, crackly texture and the bold coffee flavor that makes Coffee Crisp bars so addictive. It’s a flavor combination that’s familiar but elevated — perfect with your morning coffee or as a sweet snack to close out the evening. I love that it’s super approachable to make at home, and it’s a fun little project that always impresses friends and family alike.
Why you’ll love this recipe?
Honestly, what’s not to love about these Coffee Crisp Cookies? First, the flavor profile is simply addictive — the rich chocolate and coffee combo hits all the right notes. My favorite part? The texture. These cookies are a perfect play of crunch and chew, thanks to tiny bits of crumbled Coffee Crisp bars tucked inside, giving that signature crackle with every bite. What I love most about this recipe is how simple it is to throw together — I’ve made these countless times, and they never fail to turn out amazing. Plus, they’re budget-friendly, using ingredients I usually keep on hand: butter, sugar, cocoa powder, and those little Coffee Crisp bars I always buy on sale (or stock up during Canadian snack runs!). You can enjoy these in so many ways, whether you want a quick snack, a lunchbox treat, or even a sweet finish to a big family dinner. They’re also incredibly versatile—try adding a sprinkle of sea salt on top for that sweet-salty magic or swapping out the cocoa for a bit of espresso powder to deepen the coffee flavor. Trust me, once you make these, they’ll be your new go-to whenever you need a little cozy boost or a little something special for friends.
How do you make coffee crisp cookies?
Quick Overview
This recipe is a total lifesaver on busy nights — it’s simple, quick, and needs only a few ingredients. You start with a basic cookie dough that’s rich, cocoa-y, and just a little chewy. Then, you fold in tiny pieces of Coffee Crisp bars for that unmistakable crunch and flavor. After shaping your cookies and swirling in the filling, they bake up with a beautiful crackly top, filled with gooey, crispy goodness. The best part? They’re only about 20 minutes from start to finish. Once cooled, a quick drizzle of chocolate glaze takes them to the next level, but honestly, they’re fantastic on their own, too. I love how forgiving this recipe is — no fancy equipment needed, just your hands and a baking sheet, and you’re golden. Whether you’re an experienced baker or a total novice, I promise these cookies are foolproof and utterly addicting.
Ingredients
For the Main Batter:
– 1 cup (226g) unsalted butter, softened — I always use room temp, so it mixes easily.
– 1 cup (200g) granulated sugar — adjust if you like them sweeter.
– 1/2 cup (45g) unsweetened cocoa powder — good quality, so they’re rich.
– 2 large eggs — for binding and moisture.
– 2 teaspoons vanilla extract — a must for deep flavor.
– 2 1/2 cups (310g) all-purpose flour — I prefer unbleached for a richer taste.
– 1 teaspoon baking powder
– 1/2 teaspoon salt
For the Filling:
– 4 Coffee Crisp bars, chopped into tiny pieces — avoid biting into a whole bar, keep it small!
– 2 tablespoons unsalted butter, melted — to mix with the bars for that gooey center.
For the Glaze:
– 1/2 cup (80g) semi-sweet chocolate chips
– 1 tablespoon butter or coconut oil — melts the chocolate smoothly and gives a nice shine.
Step-by-Step Instructions
Step 1: Preheat & Prep Pan
Preheat your oven to 350°F (175°C). Line a baking sheet with parchment paper — I always do this to prevent sticking and for easy cleanup. Really, don’t skip this step, or you’ll be scraping burnt cookies off your pan, trust me. If you’re making chunkier cookies, a silicone baking mat also works beautifully.
Step 2: Mix Dry Ingredients
In a small bowl, whisk together the flour, baking powder, and salt. Set aside. This step ensures your leavening is evenly distributed, helping your cookies rise just right and stay tender but crisp.
Step 3: Mix Wet Ingredients
In a large bowl, cream together the softened butter and sugar until light and fluffy — about 2-3 minutes with a hand mixer or vigorous whisking if you’re doing this by hand. Add the eggs one at a time, mixing well after each, then stir in vanilla. Your mixture should look smooth and shiny, almost like frosting.
Step 4: Combine
Gradually add your dry ingredients to the wet, mixing on low speed or folding gently with a spatula. Just mix enough until everything’s combined — overmixing can make cookies tough. You’ll see the dough come together, thick and glossy, with a chocolatey scent that’s almost impossible to resist.
Step 5: Prepare Filling
In a small bowl, toss the chopped Coffee Crisp bars with melted butter until well coated. This makes sure the chunks are gooey and easy to distribute inside your cookies. If you want a more intense coffee punch, you can also sprinkle a little instant coffee powder into the filling.
Step 6: Layer & Swirl
Take about a tablespoon of dough, roll it into a ball, then flatten slightly on your baking sheet. Make a little indentation, and drop a teaspoon of the Coffee Crisp filling inside. Cover with another small spoonful of dough, sealing the filling inside. For a pretty swirl, you can gently drag a butter knife through the top to create a marbled effect, but I like them rustic and imperfect — it’s more charming that way.
Step 7: Bake
Bake for 12-15 minutes, just until the edges are set and slightly crackly. They might look a little soft in the center — that’s okay, they’ll firm up as they cool. For extra crunch, let them cool on the baking sheet for 5 minutes before transferring to a wire rack.
Step 8: Cool & Glaze
Once they’re completely cooled (this is important to avoid melting your glaze), melt the chocolate chips and butter together in a microwave in 20-second bursts, stirring in between. Drizzle the glaze generously over the cooled cookies — this step is optional but makes them look ultra-professional and enhances the flavor.
Step 9: Slice & Serve
Honestly, these are best enjoyed slightly warm or at room temperature. I like to serve them on a pretty plate with a cup of coffee or tea. They also look lovely on a cookie platter, and trust me — they won’t last long. My friends always ask for seconds, so I usually double the recipe!
What to Serve It With
If you’re wondering how to make the most of these Coffee Crisp Cookies, I’ve got plenty of ideas! For breakfast, crumble one over Greek yogurt with a drizzle of honey — it’s like a chocolatey coffee granola. My family loves them as an afternoon treat with a steaming mug of coffee or hot cocoa; the bitter-sweetness balances perfectly. For brunch, try serving them alongside flaky croissants and fresh berries — they add a rich, crunchy contrast. I’ve also made a cookie and coffee milkshake with blended pieces of these cookies, and that’s absolute heaven on a hot day. And if you’re looking for something cozy, they’re perfect served with a scoop of vanilla ice cream or a drizzle of caramel. Honestly, these cookies are so versatile; I find new ways to enjoy them every week.
Top Tips for Perfecting Your Coffee Crisp Cookies
To take your cookies from good to incredible, I’ve learned a few tips along the way. First, handle the dough gently — overmixing it tends to make cookies tough, especially with cocoa. Keep the dough chilled if it feels too soft for easier handling, but I find that these cookies bake up nicely even at room temperature. When adding the Coffee Crisp chunks, make sure they’re cut small enough so they distribute evenly and don’t burn in the oven. This is one of those recipes where visual cues matter: the crackly top is your signal that they’re done. If you want a gooey center, take them out a minute or two early; for crunchier cookies, let them go a little longer. Regarding ingredient swaps, I tested making these with dark chocolate instead of semi-sweet, and it was a hit — richer and more luxurious. You can even try adding a shot of espresso powder to intensify the coffee flavor, especially if you like a deeper, more mature taste. When it comes to glazing, I prefer a thinner drizzle so it’s just a shiny accent — but a thicker coating makes it look ultra decadent. Trust your instincts, have fun with the process, and don’t be afraid to experiment. The best cookies are born out of a little trial and error, after all.
Storing and Reheating Tips
This is one of those recipes that stays fresh for days, but here’s my secret: store them in an airtight container at room temperature for up to 3 days. Keep the cookies separated with parchment paper to prevent sticking, and they’ll stay soft on the inside and crispy on the outside. If you want to keep them longer, pop them into a Ziploc or airtight container and refrigerate for up to a week — just warm them slightly in the microwave before serving to bring back that fresh-baked feel. For longer storage, these cookies freeze beautifully. Wrap them tightly in plastic wrap and then foil, or stash in a freezer bag for up to 3 months. When ready to enjoy, let them thaw at room temperature for about 15-20 minutes, then drizzle with glaze if desired. If you frozen them with the glaze already on, just pop them in a low-temperature oven (around 250°F) for a few minutes to soften and warm them up. They’re just as good the next day, I swear!
Frequently Asked Questions
Final Thoughts
If you’re a fan of those classic Coffee Crisp bars, trust me — these cookies are a little slice of that magic you’ve been craving. The combination of crispy crunch, rich chocolate, and the subtle coffee kick is irresistible. Once you’ve tried making these, I think you’ll be surprised how simple and satisfying they are. They also make a lovely gift for friends — just package them in a cellophane bag with a cute ribbon, and you’ve got a charming, homemade treat that beats store-bought any day. I’ve tested this recipe over and over, tweaking a little here and there because honestly, I can’t get enough of them. The smell alone during baking is enough to make everyone in the house come running. So, gather your ingredients, set your timer, and get ready to indulge — this is one of those recipes you’ll want to keep in your back pocket for whenever you’re craving something sweet and satisfying. Happy baking, and I can’t wait to hear how yours turns out!

Delicious Mocha Cookies
Ingredients
Method
- Preheat oven to 350°F. In a large bowl, beat together the softened butter, brown sugar, and granulated sugar until light and fluffy.
- Add the light corn syrup, egg, and vanilla extract to the mixture and beat until well combined.
- In a separate bowl, combine the flour, baking soda, and salt. Gradually add to the wet mixture and beat until fully blended.
- Stir in the chopped Coffee Crisp chocolate bars.
- Drop rounded tablespoons of dough onto a greased baking sheet. Bake for 15 minutes or until golden brown.
- Allow cookies to cool on the baking sheet for a few minutes, then transfer to a wire rack to cool completely.