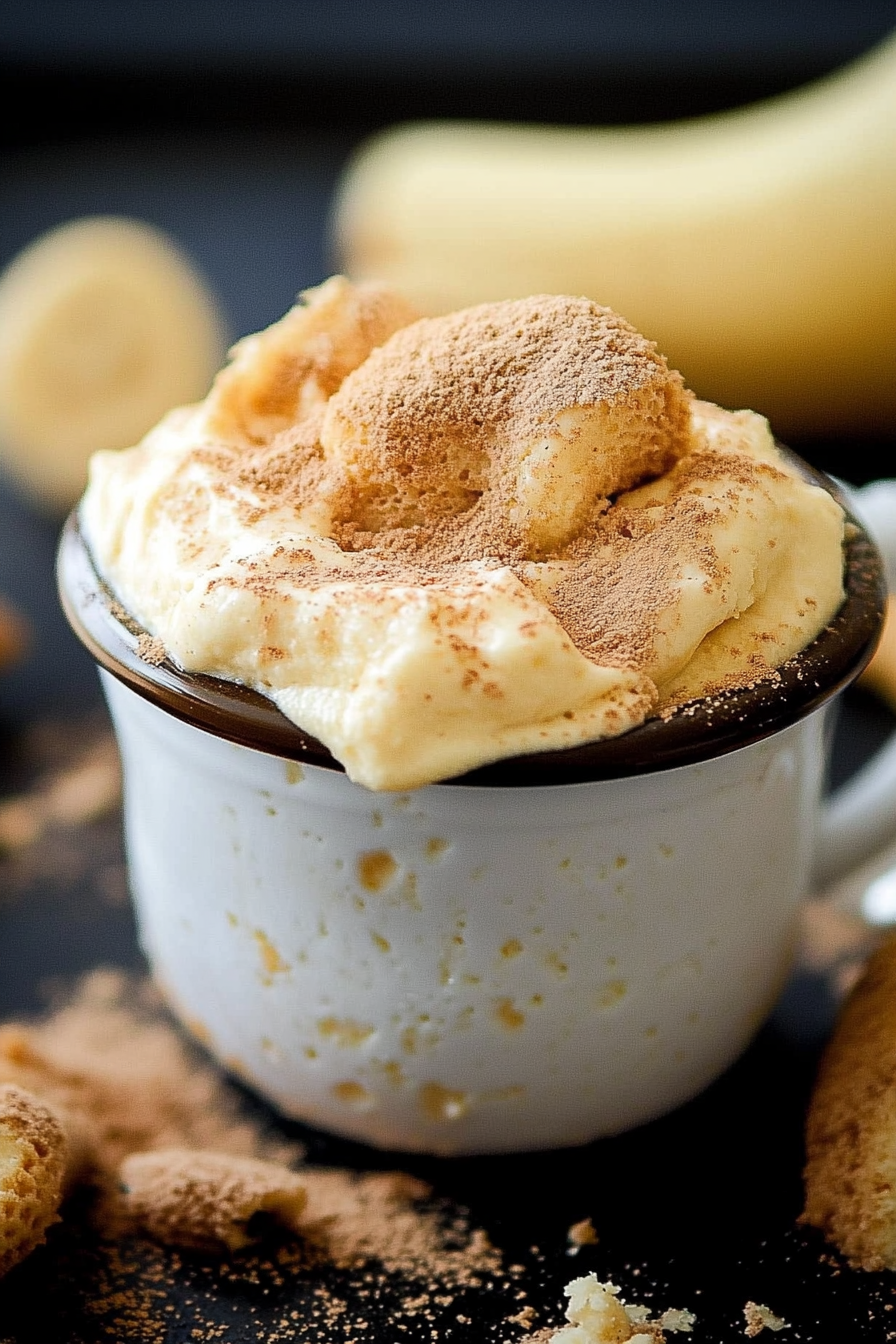
Easy Creamy Banana Pudding Delight
There are some foods that just wrap you up like a warm hug, aren’t there? For me, that’s banana pudding. Not just any banana pudding, mind you, but *my* banana pudding. It takes me straight back to Grandma’s kitchen, the air thick with the sweet, comforting scent of ripe bananas and vanilla. Whenever I smell it now, I swear I can almost hear her humming. It’s the kind of dessert that’s both simple and utterly sublime, a classic for a reason. I know, I know, everyone has their favorite banana pudding recipe, some swear by the no-bake version with instant pudding, and others go for a fancy baked custard. But this one? This is the one that’s been passed down, tweaked a little over the years by yours truly, and it’s become my go-to for literally any occasion. It’s a lifesaver when company’s coming unexpectedly, a perfect finale for a Sunday dinner, and honestly, sometimes it’s just what I need on a Tuesday night when the craving hits and I don’t want to turn on the oven for hours.
What is banana pudding?
So, what exactly *is* this magical concoction we call banana pudding? At its heart, it’s layers of creamy vanilla custard, tender vanilla wafers, and sweet, ripe banana slices, all baked together until it’s this glorious, golden-topped masterpiece. Think of it as the ultimate elevated banana cream pie meets a comforting bread pudding, but with those iconic vanilla wafers soaking up all that deliciousness. It’s not a quick, no-bake affair; this one involves a little bit of stovetop magic and a gentle bake in the oven, which really deepens the flavors and creates that incredible texture. The name itself just evokes comfort, doesn’t it? It’s the essence of sweet, simple indulgence, and this recipe captures that perfectly. It’s the kind of dessert that feels both rustic and elegant, all at the same time.
Why you’ll love this recipe?
Honestly, there are so many reasons why this banana pudding recipe holds such a special place in my heart, and I know you’re going to feel the same way. First and foremost, the flavor! It’s just… divine. The custard is rich and silky smooth, infused with real vanilla, and it perfectly complements the sweetness of the bananas. When it bakes, the wafers become soft and custardy, almost like a tender cake, and the top gets this beautiful, slightly caramelized crust. It’s pure comfort food. Then there’s the simplicity. Don’t let the “baked” part scare you! Once you get the hang of it, it’s incredibly straightforward. Most of the ingredients are pantry staples, which is always a win in my book. I can whip this up without a special trip to the grocery store most of the time. Plus, it’s surprisingly budget-friendly! You don’t need fancy ingredients to make something truly spectacular. And versatility? Oh yes! While it’s perfect on its own, I’ll get into how you can dress it up or down later, but the core recipe is just so adaptable. What I love most about this is that it feels like a labor of love, but it’s so achievable for any home cook. It’s got that homemade charm that you just can’t get from a store-bought dessert.
How do I make banana pudding?
Quick Overview
Making this banana pudding is all about building layers of flavor and texture. We’ll start by creating a luscious, homemade vanilla custard on the stovetop, then it’s just a matter of layering everything in a baking dish – crispy vanilla wafers, sweet banana slices, and that glorious custard. A gentle bake in the oven transforms it into a warm, comforting, and utterly irresistible dessert. The key is to take your time with the custard to get it perfectly smooth, and then let it all meld together in the oven. It’s a process that’s so rewarding, and the result is truly spectacular, far beyond anything you’d get from a box mix.
Ingredients
For the Custard:
We’re talking real ingredients here, folks! You’ll need 6 large egg yolks – these are crucial for that rich, velvety texture. Don’t skimp on the quality of your eggs; fresh ones make a difference! For sweetness, about 3/4 cup of granulated sugar, but I sometimes nudge it to a full cup if my bananas are a little less ripe or if I’m feeling a bit extra sweet. You can play with that based on your preference. Then, 1/3 cup of all-purpose flour acts as our thickener. Make sure it’s fully whisked in to avoid lumps – I’ll share my trick for that. For the liquid, we need 3 cups of whole milk. You *can* use 2%, but whole milk gives the best creaminess, trust me on this one. And the star flavor: 2 teaspoons of pure vanilla extract. Please, please, *please* use pure vanilla extract. It makes a world of difference compared to imitation. I also love to add a pinch of salt, which really balances out the sweetness and enhances all the other flavors.
For the Layers:
This is where the magic really happens. You’ll need about 18-20 ripe, but still firm, medium bananas. Overripe bananas can turn mushy, so look for ones that are nicely speckled but not completely brown. You’ll want about 2-3 sleeves of crisp vanilla wafers – they’re the foundation of our pudding! Don’t use the wafer cookies; it has to be vanilla wafers for that classic taste and texture. I always buy an extra box because I can’t resist sneaking a few while I’m assembling!
For the Meringue Topping (Optional, but Highly Recommended!):
If you’re feeling fancy or just love that classic meringue topping, you’ll need 3 large egg whites (save those yolks for the custard!), a pinch of cream of tartar to help stabilize them, and about 1/4 cup of granulated sugar. That’s it! It adds such a beautiful visual appeal and a lovely sweet contrast.
Step-by-Step Instructions
Step 1: Preheat & Prep Pan
First things first, let’s get our oven preheated to 350 degrees Fahrenheit (175 degrees Celsius). Now, grab a pretty 2-quart baking dish. It can be ceramic, glass, or even a cast-iron skillet if you have one that’s oven-safe. You don’t need to grease it; the custard is rich enough that it won’t stick, and the wafers help absorb any moisture.
Step 2: Mix Dry Ingredients
In a large, heavy-bottomed saucepan (this is important for even heating!), whisk together the granulated sugar, all-purpose flour, and that pinch of salt. Make sure they’re really well combined. This step is crucial to prevent lumps later on. I like to whisk until the flour is completely incorporated and there are no streaks of white. It looks like a pale sandy mixture.
Step 3: Mix Wet Ingredients
In a separate medium bowl, whisk together your 6 egg yolks. Just give them a good whisk until they’re bright yellow and slightly frothy. Now, slowly, and I mean *slowly*, start tempering the egg yolks. This is the key to not scrambling them! While continuously whisking the yolks, gradually ladle in about 1 cup of the whole milk. You’re essentially warming them up gently. Keep whisking until it’s all incorporated, then you can pour this mixture back into the saucepan with the dry ingredients. Once that’s done, stir in the remaining 2 cups of milk and the pure vanilla extract.
Step 4: Combine
Now, place the saucepan over medium heat. This is where the magic starts to thicken. You need to stir *constantly*. Seriously, don’t walk away! Use a whisk or a heatproof spatula, making sure to scrape the bottom and sides of the pan. You’re looking for the custard to thicken to the point where it coats the back of a spoon. This usually takes about 8-10 minutes. You’ll see it start to get thicker and a little bit glossy. Once it’s reached that coating consistency, remove it from the heat immediately. If you overcook it, it can curdle, and nobody wants that!
Step 5: Prepare Filling
While the custard is still warm, slice your ripe bananas. You want them about 1/4-inch thick. Don’t slice them too thin, or they’ll disappear, and definitely not too thick, or they’ll be overwhelming. The goal is to have a lovely banana flavor in every bite. If you’re going to add the meringue topping, this is also a good time to start whipping your egg whites. In a clean, dry bowl, beat the egg whites with a pinch of cream of tartar until soft peaks form. Gradually add the 1/4 cup of sugar, beating until stiff, glossy peaks form. This should be done just before you assemble, so it’s fresh.
Step 6: Layer & Swirl
Now for the fun part! Start by laying a single layer of vanilla wafers on the bottom of your prepared baking dish. Break them up a bit if you need to fill any gaps. Then, arrange a layer of your banana slices over the wafers. Spoon about half of the warm custard over the bananas and wafers. Repeat with another layer of wafers, another layer of banana slices, and then the remaining custard. You want to make sure everything is well-covered. If you’re adding meringue, gently spoon it over the top, making sure to spread it all the way to the edges of the dish to create a seal. You can make pretty swirls with the back of a spoon or a spatula.
Step 7: Bake
Place your baking dish on a baking sheet (just in case of any bubble-overs). Bake in your preheated oven for about 30-40 minutes, or until the custard is set and the meringue is golden brown. If you didn’t add meringue, you’re looking for the custard to be firm and just slightly jiggly in the center. The edges should be set. Keep an eye on it; ovens can vary!
Step 8: Cool & Glaze
This is perhaps the hardest step: waiting! Once it’s out of the oven, let the banana pudding cool completely on a wire rack for at least 2-3 hours. This is crucial for the flavors to meld and for the pudding to set properly. If you try to cut into it too soon, it’ll be a runny mess. If you’ve made a meringue, the cooling process is when it sets. If you’re not using meringue, you can make a simple glaze of powdered sugar mixed with a little milk and vanilla and drizzle it over the top once it’s cooled, but honestly, it’s incredible on its own.
Step 9: Slice & Serve
Once it’s fully cooled and set, it’s time to serve! Use a sharp knife to cut it into generous portions. The wafers should be soft and creamy, the bananas tender, and the custard rich and smooth. Serve it at room temperature or slightly chilled. It’s truly heavenly.
What to Serve It With
This banana pudding is a star all on its own, but it plays wonderfully with other dishes and beverages, depending on the occasion. For a truly comforting breakfast, imagine a slice of this warm pudding alongside a steaming mug of strong, black coffee. It’s like a decadent start to your day that feels incredibly earned. For a more elegant brunch spread, consider serving smaller portions alongside fresh fruit salad, maybe some crispy bacon or a light quiche. A sparkling mimosa or a refreshing glass of iced tea would be perfect pairings here. As a dessert, it’s a dream after a hearty meal. Think roast chicken, grilled steak, or even a rich pasta dish. It’s the perfect sweet, creamy counterpoint. I love to serve it with a dollop of whipped cream or a scoop of vanilla bean ice cream if I’m feeling particularly indulgent! And for those cozy, quiet evenings when you just need a little something sweet, a bowl of this banana pudding with a glass of cold milk is pure bliss. It’s the ultimate comfort food pairing.
Top Tips for Perfecting Your Banana Pudding
Over the years, I’ve learned a few tricks that take this banana pudding from good to absolutely unforgettable. For the bananas, I always stress using ripe but still firm ones. If they’re too soft, they can get mushy and make the pudding watery. I’ve found that slicing them yourself right before layering is best, rather than prepping them too far in advance. When it comes to mixing the custard, the tempering of the egg yolks is non-negotiable. Remember to whisk constantly over medium heat – that steady stirring is key to achieving that silky smooth texture and preventing any lumps or scrambling. If you *do* end up with a few tiny lumps, don’t panic! You can often strain the custard through a fine-mesh sieve before layering. For the wafer layers, I like to use just enough to cover the bottom and then another layer on top of the bananas before the custard. This creates that perfect balance of creamy custard and soft, cake-like wafers. Don’t overcrowd them, or they’ll get too soggy. If you’re making the meringue topping, ensure your bowl and whisk are spotlessly clean and dry; any trace of fat will prevent the egg whites from whipping properly. For ingredient swaps, I’ve experimented with dairy-free milk alternatives, and while they work, whole milk truly provides the best richness and mouthfeel. You *could* try a plant-based milk like full-fat coconut milk, but the flavor will change. I’ve also tried a gluten-free flour blend for thickening, and it works reasonably well, though the texture might be slightly different. Baking is always an adventure, so my best advice is to know your oven. If it tends to run hot, reduce the temperature slightly or check for doneness a few minutes early. A jiggly center is a good indicator that it’s still cooking, but it will set up as it cools. Lastly, the cooling time is paramount! Patience is a virtue here, my friends. Allowing it to cool completely ensures that perfect sliceable texture and allows all those wonderful flavors to meld together beautifully. Trust me, the wait is always worth it!
Storing and Reheating Tips
This banana pudding is fantastic because it holds up really well, but there are a few ways to ensure you get the best results for storage and reheating. If you’ve got leftovers (which is rare in my house, but it happens!), let the pudding cool completely at room temperature first. Once it’s cooled, you can cover it tightly with plastic wrap or transfer it to an airtight container. Stored at room temperature, it’s best enjoyed within a day, as the bananas can start to brown and soften too much beyond that. For longer storage, the refrigerator is your best friend. In an airtight container in the fridge, it will keep well for about 2-3 days. The texture of the wafers will continue to soften, becoming even more pudding-like, which many people actually prefer! If you’re planning to freeze it, I’d recommend doing so *before* adding the bananas and wafers, or if you really want to freeze the whole thing, be prepared for a slightly softer texture upon thawing. If freezing the assembled pudding, wrap it very, very well in a couple of layers of plastic wrap and then a layer of aluminum foil. It can stay frozen for up to a month. To thaw, transfer it to the refrigerator overnight. Reheating is simple: you can gently warm individual slices in the microwave for about 30-60 seconds, or until warmed through. Be careful not to overheat, or the custard can become rubbery. If you’ve made a meringue topping, reheating is best done in a low oven (around 250°F or 120°C) for about 10-15 minutes, uncovered, to help crisp it up again. If you’re not serving immediately after baking, I always recommend waiting until it’s fully cooled before covering and refrigerating. Adding the glaze right before serving is usually best if you want it to stay nice and shiny. Enjoy your delicious leftovers!
Frequently Asked Questions
Final Thoughts
So there you have it, my absolute favorite banana pudding recipe! It’s more than just a dessert; it’s a bowl full of nostalgia and pure comfort. I truly believe that this recipe captures the essence of what homemade baking should be – delicious, a little bit magical, and always made with love. It’s perfect for those moments when you want to impress without the stress, or simply treat yourself to something truly special. If you love this recipe, you might also enjoy my classic apple pie or my fudgy brownies – they’re all part of my repertoire of comfort classics! I can’t wait for you to try this banana pudding and experience that warm, cozy feeling it brings. Let me know in the comments how yours turns out, and if you discover any amazing variations or tips of your own. Happy baking, everyone!

Easy Banana Pudding
Ingredients
Method
- In a large mixing bowl, whisk together the instant pudding mix and milk until smooth and beginning to thicken. Set aside.
- In a separate large bowl, beat the softened cream cheese and sweetened condensed milk together until well combined and smooth.
- Add the pudding mixture to the cream cheese mixture and beat until fully incorporated.
- Gently fold in the thawed whipped topping until just combined, being careful not to overmix.
- Line the bottom of a 9x13 inch baking dish with a layer of vanilla wafers.
- Arrange a layer of sliced bananas over the vanilla wafers.
- Pour the pudding mixture evenly over the bananas and spread to cover.
- Top with another layer of vanilla wafers. You can crush some of them for a different texture if desired.
- Cover the dish tightly with plastic wrap and refrigerate for at least 4-6 hours, or preferably overnight, to allow the flavors to meld and the pudding to set.