Easy Glazed Chicken Recipe
If there’s one dish that’s secretly the star at my dinner table, it’s definitely my homemade teriyaki chicken. I remember the first time I tried making it myself—smelling that sweet, savory glaze bubbling on the stovetop, I felt like I had just uncovered a secret family recipe. It’s incredibly simple, yet the flavor punches way above its weight. Honestly, I’d compare it to takeout—only better because I know exactly what’s going into it, and I get to customize it just how we like. Plus, it’s one of those recipes that make your house smell like a cozy Asian restaurant, even when you’re just cooking for two or a crowd. It’s so versatile, too—you can serve it over rice, noodles, or even toss it in a salad. Trust me, once you master this, it becomes your go-to for busy weeknights or last-minute dinner guests. And the best part? My kids ask for this all the time—sometimes, I think I make it more than any other dish because it’s just that good! So, let’s dive into all the tips, tricks, and secrets to making perfect, addictive teriyaki chicken right in your own kitchen.
What is Teriyaki chicken?
Think of teriyaki chicken as the delicious lovechild of sweet, salty, and umami flavors—wrapped up in crispy, tender chicken. The term “teriyaki” actually comes from the Japanese words “teri” meaning glaze or shine, and “yaki” meaning grilled or broiled. In essence, it’s a cooking style where meat is glazed with a savory-sweet soy-based sauce as it cooks, creating that irresistible glossy coating. The dish is incredibly popular worldwide because it’s both satisfying and straightforward to make at home. It’s essentially like a sauce-and-glaze combo that turns ordinary chicken into something extraordinary—and trust me, once you get the hang of it, you’ll see how easy it is to whip up whenever cravings hit. My version is all about balancing the flavors so that its sweet, tangy, and salty notes sing harmoniously, with just a hint of caramelized goodness. It’s comfort food with a classy twist, perfect for weeknights or weekend dinners.
Why you’ll love this recipe?
What I love most about this teriyaki chicken is how it hits all the right notes—rich, sweet, umami, and a little smoky from the sear. The aroma alone will draw everyone to the kitchen! It’s honestly a lifesaver on busy nights because you can prep everything in under 30 minutes and still pull off a restaurant-quality meal. Plus, the ingredients are super budget-friendly—soy sauce, honey, garlic, and ginger are pantry staples that you probably already have. One of my favorite parts is the versatility. Serve it over fluffy jasmine rice, sautéed veggies, or even as a filling for lettuce wraps. It’s also a big hit with my family because it’s both kid-friendly and fancy enough to impress anyone. And if you’re into experimenting, you can easily swap in different proteins—shrimp, tofu, or even pork—making this a real kitchen MVP. The flavor complexity keeps everyone asking for seconds, and I love that it’s so forgiving—once you master the basics, you can add your own twist with chili flakes or sesame seeds. Honestly, it’s become our go-to for cozy, no-fuss dinners.
How do I make Teriyaki Chicken?
Quick Overview
This recipe is all about quick, confident steps to tender, flavorful chicken with that perfect sticky glaze. You start by marinating or seasoning your chicken briefly, then searing it until golden. Meanwhile, the magic happens in the sauce—made with soy, honey, garlic, and ginger—that simmers until slightly thickened. You’ll then toss the chicken back into the sauce, letting it soak up all that glossy goodness. The entire process takes about 30 minutes, and the result is juicy pieces coated in a shiny, caramelized glaze. Honestly, no complicated techniques, just a little patience to let the sauce thicken and cling beautifully. It’s a foolproof, crowd-pleasing method that you can tweak based on your taste or what you have in the fridge. Trust me on this one—it’s so good you’ll want to make it weekly.
Ingredients
For the Sauce:
– 1/2 cup soy sauce (preferably low-sodium for better control)
– 1/4 cup honey or brown sugar (maple syrup works, too!)
– 2 cloves garlic, minced
– 1 teaspoon fresh ginger, grated
– 2 tablespoons rice vinegar (or apple cider vinegar)
– 1 tablespoon cornstarch mixed with 2 tablespoons water (to thicken)
– Optional: sesame oil, for extra flavor
For the Chicken:
– 4 boneless chicken thighs or breasts, sliced into strips or bite-sized pieces
– Salt and pepper, for seasoning
– 1 tablespoon vegetable oil or sesame oil for searing
Step-by-Step Instructions
Step 1: Preheat & Prep Pan
Start by heating your skillet over medium-high heat. I like to use a non-stick or cast-iron pan because it gets nice and hot—perfect for a caramelized exterior. While it’s warming up, season your chicken with a little salt and pepper. Make sure to pat the chicken dry—this helps it sear properly and crisps up nicely. Once the pan’s hot, add a tablespoon of oil and swirl it around. You’ll want the pan to be hot enough that the chicken sizzles when it hits the surface, but not so hot that it burns.
Step 2: Mix Dry Ingredients
In a small bowl, combine soy sauce, honey, rice vinegar, garlic, and ginger. Whisk everything together—this is your flavor base. Trust me, the smell of garlic and ginger simmering in that sweet soy base is what makes this dish smell like pure comfort. If you’re feeling adventurous, add a splash of sesame oil or chili flakes for a little heat.
Step 3: Mix Wet Ingredients
In a separate small bowl, blend the cornstarch with water. This slurry will help thicken your sauce beautifully. Keep it handy because you’ll add it near the end to give that shiny, sticky consistency we all love.
Step 4: Combine
In the hot pan, sear the chicken pieces until they’re golden on all sides—about 5-7 minutes. Don’t crowd the pan; cook in batches if needed. Once the chicken is just cooked through, pour in your sauce mixture. It will start bubbling—this is when the magic happens! Let it simmer for 3-4 minutes, stirring frequently. When the sauce thickens enough to coat the back of a spoon, you’re ready for the next step.
Step 5: Prepare Filling
While I like to keep the chicken simple, you can add sliced green onions or sprinkle sesame seeds on top for extra flavor and crunch. A squeeze of lime at the end adds a fresh zing if you’re feeling bright.
Step 6: Layer & Swirl
Return the chicken to the pan, turning to coat each piece with that luscious glaze. For a pretty presentation, you can swirl the sauce around in the pan, creating a marbled effect. This step makes the dish look as good as it tastes!
Step 7: Bake
Actually, this isn’t baking—it’s stovetop simmering. But if you want an extra crispy finish, you can toss the cooked chicken in a hot oven for five minutes. It’s not necessary, but it adds a nice texture—trust me on this! Otherwise, serve immediately.
Step 8: Cool & Glaze
If you want the sauce extra thick and sticky, let it cool for a few minutes so it can set beautifully. When ready, drizzle a little extra honey or sprinkle a few sesame seeds before serving for that perfect glossy finish.
Step 9: Slice & Serve
Slice the chicken if you used larger pieces, or serve straight from the pan—either way, little mopping of rice or crusty bread is encouraged. Seriously, I can’t resist spooning all that extra sauce over my rice—so good! And the aroma? It’ll have everyone in the house asking when dinner’s ready.
What to Serve It With
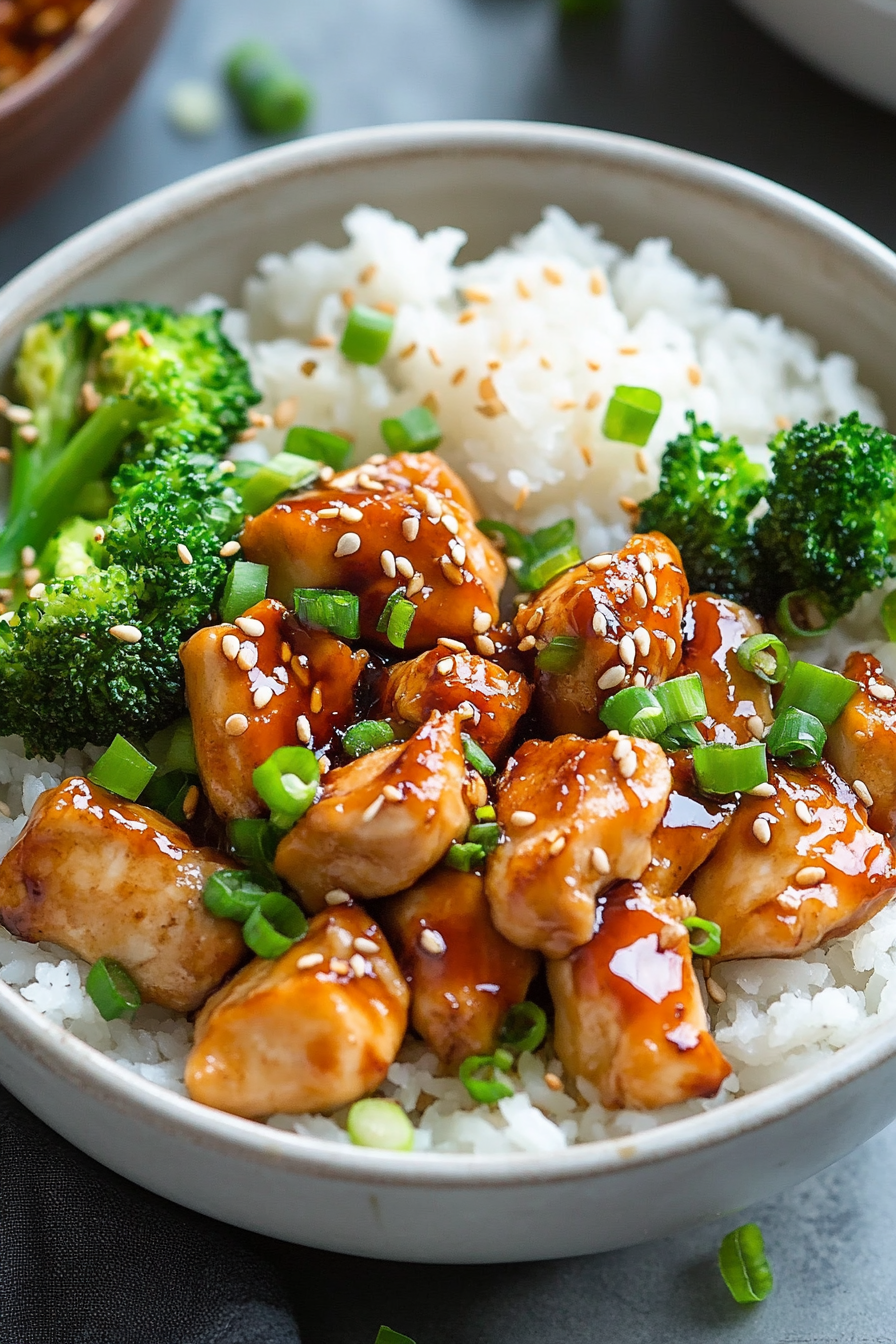
This teriyaki chicken is so flexible, I often serve it over fluffy jasmine rice or cauliflower rice on busy weeknights. A quick stir-fry of broccoli, snap peas, or bell peppers makes a colorful, delicious complement. And if you’re feeling fancy, serve it alongside miso soup or a simple Asian slaw. It’s a hit at our family dinners, and I’ve even packed leftovers into wraps—my kids ask for this as their lunch the next day. My parents love it with roasted broccoli and a dash of Sriracha on the side for an extra kick. Honestly, this is one of those recipes that feels like a hug on a plate, filling and satisfying without hours of effort. The sweet glaze pairs beautifully with roasted or steamed veggies, and it’s equally delicious cold or hot. Sometimes I even take a shortcut and toss cooked chicken in the sauce for an impromptu salad. Once you’ve made this, you’ll find yourself dreaming up all sorts of variations and pairings—trust me, the sky’s the limit!
Top Tips for Perfecting Your Teriyaki Chicken
After countless batches, I’ve picked up a few tricks to make this even better each time. First, when preparing the chicken, avoid overcrowding the pan—it causes steaming rather than searing. If your chicken sticks or doesn’t brown, make sure your pan is hot enough before adding it. I learned this the hard way — patience pays off! When making the sauce, I like to taste and adjust the sweetness or saltiness as I go. If you prefer it less sweet, cut back on honey; for more punch, add a splash of rice wine or a teaspoon of miso. The thickness of the sauce is just right when it’s glossy and coats everything evenly—if it’s too runny, just simmer it a little longer or add a bit more cornstarch slurry. For variations, I’ve tested maple syrup and coconut aminos with great results—different flavors, same fantastic glaze. My biggest tip? Always let the sauce simmer till it’s thick enough to cling to the chicken without being gloopy. The caramelized bits that develop are pure magic—don’t rush the process. Also, experimenting with sesame seeds, chopped green onions, or a sprinkle of chili flakes can totally transform the flavor profile. Trust me, making this recipe your own keeps it fun and exciting—every batch gets better with a little tweak or personal touch.
Storing and Reheating Tips
This dish is actually just as good the next day—if anything, the flavors deepen overnight! Keep any leftovers in an airtight container in the fridge, and it should stay fresh for up to 3 days. When reheating, I recommend reheating in a skillet over low heat so the sauce can warm gently and stay sticky—microwaving can sometimes make the sauce messier. If it’s a bit too thick, just add a splash of water or broth to loosen it up. For freezing, I like to store portions in freezer-safe bags or containers — it can last up to 2 months. Thaw overnight in the fridge and reheat as above. Just a quick note: if you’re planning to glaze or add extra honey afterward, do so after reheating, because cold sauce won’t stick quite as well. When storing, avoid soaking the chicken in sauce—separate or drain excess to prevent sogginess. And a little tip: If you want the perfect glossy look after reheating, toss the chicken in a quick warm glaze right before serving. This dish reheats beautifully and tastes like it just came off the stove—making it perfect for meal prep or busy weekdays.
Frequently Asked Questions
Final Thoughts
This homemade teriyaki chicken has become a staple in my kitchen for good reason. It’s flavorful, quick, and endlessly customizable—plus, it always gets rave reviews around my dinner table. From the first bite, you’ll understand why I keep returning to this recipe—there’s something so comforting about that sweet, savory glaze coating tender chicken. If you’ve never tried making it yourself, I promise it’s easier than ordering takeout—and so much more satisfying. The best part? Once you get comfortable with the basics, you can tweak it to your heart’s desire—adding pineapple for a tropical twist, using different proteins, or experimenting with spicy sriracha if you like heat. I love seeing how everyone makes it their own. Don’t forget to leave a comment or share your twist—I’d love to hear how yours turns out! Happy cooking, friends. This one’s a keeper, I promise you’ll fall in love with it—just like I did all those years ago.

Teriyaki Chicken
Ingredients
Method
- Heat olive oil in a skillet over medium-high heat.
- Add chicken and cook until browned on all sides, about 4 minutes. Continue to cook until internal temperature reaches 160°F, about 3 minutes more.
- While chicken cooks, whisk together soy sauce, water, honey, brown sugar, rice vinegar, sesame oil, ginger, garlic, and cornstarch in a small bowl.
- Pour the sauce into the skillet with chicken and cook until thickened, about 1 minute.
- Serve warm with sprinkled green onions and sesame seeds if desired.