Easy Mango Banana Marshmallow Delight
Okay, so you know how sometimes you just crave something that screams “comfort” but also feels like a little ray of sunshine? That’s exactly what these Mango Banana Marshmallow Crumble Bars are for me. They’re not just a dessert; they’re a whole mood. My mom used to make a simple banana bread that was legendary, and my absolute favorite fruit is mango – I’d eat it straight from the peel if I could! So, I started thinking, what if I could combine that nostalgic banana goodness with the tropical sweetness of mango, all topped with this delightful, slightly chewy marshmallow layer? It sounds a bit out there, I know, but trust me, the first time I pulled these out of the oven, the aroma alone was enough to make my neighbors peek out their windows. They’re kind of like a sophisticated, fruit-forward cousin to a classic crumble, but with that playful, unexpected marshmallow twist that just makes you smile. If you love a good banana bread or a fruit crumble, you’re going to be obsessed with this mango banana marshmallow magic. It’s become my go-to for potlucks, lazy weekend mornings, and honestly, even when I just need a little pick-me-up after a long day.
What is Mango Banana Crumble Bars?
So, what exactly are these magical little bars? Think of them as a delicious, layered treat that brings together the best of a few worlds. At its heart, it’s a soft, moist cake-like base infused with the comforting flavor of ripe bananas. Layered on top of that is a vibrant, sweet-tart mango filling – it’s like a burst of tropical sunshine. And then, the pièce de résistance: a crown of melted marshmallows that gets just a touch golden and slightly gooey in the oven, creating this incredible, chewy topping. It’s not a traditional cake, and it’s not quite a pie, but it’s definitely in that sweet spot of baked goodness that’s both familiar and exciting. The name itself, mango banana marshmallow, just rolls off the tongue, doesn’t it? It hints at the delightful fruity sweetness from the mango and banana, followed by that surprise, comforting chew from the marshmallows. It’s essentially a baked hug in bar form, perfect for anyone who enjoys a delightful combination of textures and tastes.
Why you’ll love this recipe?
I love mango banana marshmallow crumble bars. I know you will too!flavor. Oh my goodness, the flavor! You get the comforting, familiar sweetness of banana, which is then brightened and elevated by the juicy, tangy burst of ripe mango. It’s a tropical vacation for your taste buds! And the marshmallow topping? It adds this wonderfully soft, slightly sweet chewiness that perfectly complements the fruit and the base. It’s just… dreamy. Then there’s the simplicity. I know it sounds like it might be complicated with three distinct layers, but honestly, it’s surprisingly straightforward. The base comes together in one bowl, the mango filling is super quick, and melting the marshmallows is a breeze. I’ve whipped these up on busy weeknights when I needed a dessert that wouldn’t take all evening, and they always come out beautifully. They’re also incredibly cost-effective. Bananas are usually pretty budget-friendly, especially when they’re ripe and ready to go. Mangoes can be a bit pricier depending on the season, but you can often find them on sale, and a little goes a long way. Plus, you probably already have marshmallows in your pantry! What really sets these apart, though, is their versatility. They are fantastic on their own, but they’re also brilliant for so many different occasions. Think of them as a more exciting alternative to your standard banana bread or a simple fruit crumble. I’ve brought these to barbecues, bake sales, and even just served them with a cup of tea on a rainy afternoon. They’re a guaranteed crowd-pleaser, and everyone always asks for the recipe. For me, personally, this recipe hits that perfect balance of being both comforting and a little bit special. It reminds me of childhood treats but with an elevated, tropical twist that feels sophisticated enough for guests but is still easy enough for a casual treat.
How do you make Mango Banana Crumble Bars?
Quick Overview
Making these delightful bars is a three-part symphony, but don’t let that intimidate you! First, we’ll whip up a simple, moist banana-based batter that forms the delicious foundation. Then, we’ll prepare a vibrant, sweet mango filling. Finally, we’ll top it all off with a layer of fluffy marshmallows that bake to a beautiful golden-brown, creating that irresistible chewy topping. It’s a straightforward process that results in a truly stunning dessert. You’ll mix, spread, top, and bake – that’s pretty much it! The key is using ripe fruit and not overmixing the batter, which keeps everything tender and delicious. It’s a recipe that’s forgiving and incredibly rewarding.
Ingredients
For the Main Batter:
2 cups all-purpose flour (I sometimes use a mix of all-purpose and whole wheat for a nuttier flavor, about 1.5 cups AP and 0.5 cup whole wheat)
1 teaspoon baking soda
1/2 teaspoon salt
1 teaspoon ground cinnamon
1/4 teaspoon ground nutmeg (optional, but it adds a lovely warmth)
1 cup (2 sticks) unsalted butter, softened (make sure it’s truly softened, not melted!)
1 cup granulated sugar
2 large eggs
1 teaspoon vanilla extract
3 ripe bananas, mashed well (about 1.5 cups mashed banana – the riper, the better for sweetness and flavor!)
For the Filling:
2 cups diced ripe mango (fresh or frozen and thawed works great; I aim for about 2-3 medium mangoes)
1/4 cup granulated sugar (adjust based on mango sweetness)
2 tablespoons cornstarch
1 tablespoon fresh lemon juice (this brightens the mango flavor and helps it set)
For the Glaze/Topping:
1.5 cups mini marshmallows (or about 15-20 large marshmallows, cut into pieces)
Step-by-Step Instructions
Step 1: Preheat & Prep Pan
First things first, let’s get our oven ready! Preheat it to 350°F (175°C). You’ll need a 9×13 inch baking pan. I always like to grease it well with butter or baking spray and then line it with parchment paper, leaving an overhang on the sides. This makes lifting the bars out so much easier later on – trust me, it’s a lifesaver when it comes time to slice and serve! Make sure the parchment goes all the way up the sides so the marshmallows don’t stick to the metal.
Step 2: Mix Dry Ingredients
In a medium bowl, whisk together the flour, baking soda, salt, cinnamon, and nutmeg (if you’re using it). Giving these a good whisk ensures that all the leavening agents and spices are evenly distributed, so you don’t get any surprise salty or bready bits in your final bar. It also helps to aerate the flour a bit, which contributes to a lighter texture. Just a quick whisk until everything is well combined is all you need here.
Step 3: Mix Wet Ingredients
In a large bowl, cream together the softened butter and granulated sugar until light and fluffy. This is where you really want to get some air into the batter, so use an electric mixer if you have one, or a whisk and some elbow grease. Beat in the eggs one at a time, making sure each is fully incorporated before adding the next. Then, stir in the vanilla extract and the mashed ripe bananas. Make sure those bananas are really mashed – you want them smooth and creamy for the best flavor and texture in the base.
Step 4: Combine
Now, gradually add the dry ingredients to the wet ingredients, mixing on low speed or by hand until just combined. Be careful not to overmix here! Overmixing can develop the gluten in the flour, leading to tough bars. Stop mixing as soon as you don’t see any streaks of dry flour. The batter will be thick, and that’s exactly what you want. It should look soft and have a lovely banana aroma already.
Step 5: Prepare Filling
While the oven is preheating, or just before you assemble, let’s get our mango filling ready. In a medium bowl, combine the diced mango, granulated sugar, cornstarch, and lemon juice. Stir everything together gently. The cornstarch is key here; it will help thicken the mango juices as it bakes, creating a lovely, jammy layer. The lemon juice adds a lovely brightness that cuts through the sweetness. If you’re using frozen mango, make sure it’s thawed and drained a bit so you don’t have excess liquid.
Step 6: Layer & Swirl
Spread about two-thirds of the banana batter evenly into your prepared baking pan. You might need to use a spatula or the back of a spoon to get it flat, as it’s a thick batter. Then, spoon the mango filling evenly over the batter. You can gently swirl it in a little with a knife or toothpick if you like, but I usually just spread it as evenly as possible. Finally, dollop or spread the remaining one-third of the banana batter over the mango layer. Again, try to cover as much of the mango as you can to create a nice top layer before the marshmallows go on. This helps keep everything contained.
Step 7: Bake
Now for the magic part! Place the pan in the preheated oven and bake for about 30-40 minutes, or until the banana batter is set and a toothpick inserted into the batter (avoiding the mango layer) comes out clean. The edges should be starting to turn golden brown. Keep an eye on it, as oven temperatures can vary. You want that lovely banana base to be cooked through before we add the final topping.
Step 8: Cool & Glaze
Once the bars have baked and the toothpick comes out clean, carefully remove the pan from the oven. Now, quickly and evenly scatter the mini marshmallows (or marshmallow pieces) all over the top of the hot bars. The residual heat will start to melt them beautifully. Pop the pan back into the oven for another 3-5 minutes, just until the marshmallows are puffed up and lightly golden. You want them melty and a little toasty, but not burned! Keep a close eye on them, as marshmallows can go from perfect to burnt in a flash. Let the bars cool in the pan on a wire rack for at least 20-30 minutes. This is crucial for them to set properly, especially with that gooey marshmallow topping. If you try to cut them too hot, they’ll just fall apart!
Step 9: Slice & Serve
Once they’ve cooled sufficiently and the marshmallow topping has settled a bit, use the parchment paper overhang to lift the entire slab out of the pan. Transfer it to a cutting board. Now, for the best part: slicing! Use a sharp knife to cut them into squares or bars. I find wiping the knife clean between cuts helps get nice, clean slices, especially with the gooey marshmallow. Serve them at room temperature or slightly warm. They are absolutely divine on their own, but I’ll sometimes add a dollop of whipped cream or a drizzle of extra mango puree if I’m feeling fancy.
What to Serve It With
These Mango Banana Marshmallow Crumble Bars are wonderfully versatile, fitting into almost any meal or snack occasion. For breakfast, they’re a step up from plain toast! Imagine slicing one in half and toasting it lightly – the warm banana and melted marshmallow is pure bliss. I love pairing them with a strong cup of coffee to cut through the sweetness, or a fresh glass of orange juice. For a more impressive brunch spread, cut them into smaller, elegant squares. They look beautiful nestled amongst fruit salads or yogurt parfaits. A glass of chilled prosecco or a mimosa makes for a lovely accompaniment. As a delightful dessert, they are perfect after a hearty meal. I often serve them with a scoop of vanilla bean ice cream or a dollop of coconut whipped cream for an extra tropical touch. A dusting of powdered sugar can also make them look extra special on a dessert plate. And for those cozy snacks moments, when you just need something comforting and delicious? These are your answer. I love having one with a cup of herbal tea while curled up with a good book. They’re also fantastic for sharing with friends during a casual get-together. My kids always ask for these when they have friends over; they’re a guaranteed hit that feels special without being fussy. Honestly, they’re so good, you don’t really need anything else!
Top Tips for Perfecting Your Mango Banana Marshmallow Crumble Bars
Over the years, I’ve made these bars more times than I can count, and I’ve picked up a few tricks that I think make all the difference. Let’s dive into some of my best advice! For the Zucchini Prep (wait, I meant banana prep! See? I’m human!), the key is using really ripe bananas. The ones with lots of brown spots are your best friends here. They’re sweeter and mash up much easier, giving you that lovely, moist texture and rich banana flavor without needing a ton of added sugar. Make sure they’re mashed really well, almost like a puree, to avoid any large lumps in your base.
When it comes to Mixing Advice, remember what I said about not overmixing the batter. This is probably the most crucial tip for a tender bar. Mix just until the dry ingredients are incorporated into the wet. You want to see a few small lumps; that’s perfectly fine and actually preferable to overmixing. A thick, slightly lumpy batter is what you’re aiming for. This ensures the bars are soft and cakey, not tough and dense.
For Swirl Customization, while I usually just spread the mango filling, you *can* get creative! If you want a more marbled effect, dollop spoonfuls of the mango filling over the base batter and then dollop the remaining batter on top. Then, use a skewer or a thin knife to gently swirl the layers together. Don’t over-swirl, though, or you’ll lose the distinct layers. Aim for elegant ribbons of fruit peeking through the banana base. It’s mostly for visual appeal, but it does make them look extra special!
When it comes to Ingredient Swaps, I’ve experimented a bit. If you’re not a fan of the lemon juice in the mango filling, a touch of lime juice works beautifully too, adding a slightly different citrusy note. For the butter in the base, I have tried using a dairy-free butter substitute, and it works well, though the flavor is slightly different. I haven’t personally tried oil, but I imagine it would work too, though the texture might be a bit more dense. As for the marshmallows, if you’re feeling adventurous, you could try making your own marshmallow topping, but the mini ones are just so convenient and give that perfect texture!
For Baking Tips, always remember that ovens vary. The baking time I give is a guideline. Keep an eye on your bars, especially towards the end of the first baking stage. You’re looking for the edges to be golden and a toothpick inserted into the batter part to come out clean. For the final marshmallow stage, watch them like a hawk! They can go from perfectly golden to burnt very quickly. If your oven tends to brown the tops too fast, you can loosely tent the pan with foil for the last few minutes of baking.
Regarding Glaze Variations, while the melted marshmallow topping is my absolute favorite, I know some people might want alternatives. If you’re not a marshmallow fan, you could try a simple cream cheese frosting spread over the cooled bars, or even a drizzle of melted white chocolate. A simple powdered sugar glaze made with powdered sugar and a splash of milk or lemon juice also works. Or, just dust the cooled bars with powdered sugar for a more classic look. But honestly, that gooey marshmallow is what makes these so unique!
Storing and Reheating Tips
Proper storage is key to keeping these Mango Banana Marshmallow Crumble Bars tasting amazing, especially with that delicate marshmallow topping. At Room Temperature, I’ve found they stay fresh for about 2 days, provided your kitchen isn’t too warm and humid. It’s best to keep them covered loosely with plastic wrap or foil, or in an airtight container. This helps prevent them from drying out, but also allows a little air to circulate so the marshmallows don’t get *too* sticky. Make sure they’ve cooled completely before covering them tightly!
For Refrigerator Storage, these bars can last for up to 4-5 days. I usually place them in an airtight container, and I sometimes put a piece of parchment paper between layers if I’m stacking them. The refrigerator will firm up the marshmallow topping a bit, which can make them easier to slice cleanly. When you’re ready to eat them from the fridge, I highly recommend letting them sit at room temperature for about 15-20 minutes to soften up slightly and regain some of that delicious chewiness. They’re still good cold, but they’re just heavenly at room temperature or slightly warmed.
If you want to make a big batch and freeze some for later, Freezer Instructions are your friend. I typically cut the bars into individual portions *before* freezing. Wrap each bar tightly in plastic wrap, then place them in a freezer-safe bag or container. They can last for up to 2-3 months in the freezer. To thaw, simply remove the bars from the freezer and let them come to room temperature for a few hours. The marshmallow might lose a tiny bit of its pristine fluffiness after freezing, but they’ll still be wonderfully delicious and full of flavor. You can gently warm them in a low oven (around 250°F or 120°C) for a few minutes after thawing to bring back some of that fresh-baked texture.
When it comes to Glaze Timing Advice, it’s best to add the marshmallows just before the end of the second bake. If you plan to store them for a day or two at room temperature or in the fridge, adding them then is perfect. If you’re freezing them immediately after baking, I actually recommend adding the marshmallows *after* thawing and before serving, or just a quick 5 minutes under the broiler or in a hot oven to re-melt them, as they can sometimes get a bit hard and less chewy after freezing and thawing.
Frequently Asked Questions
Final Thoughts
So there you have it – my beloved Mango Banana Marshmallow Crumble Bars! I truly hope you give these a try. They’re more than just a recipe; they’re a little slice of happiness, a perfect blend of comforting familiarity and tropical delight. I think what I love most is how versatile they are, and how they always seem to bring a smile to people’s faces. Whether you’re looking for a breakfast treat that feels a bit indulgent, a showstopper dessert for a gathering, or just a sweet something to brighten your day, these bars are up to the task. If you enjoy fruity bakes with a delightful texture contrast, you might also want to explore my [link to another recipe, e.g., “Key Lime Pie Bars”] or my [link to another recipe, e.g., “Coconut Mango Sticky Rice”]. They share that same spirit of tropical flavors and comforting sweetness. I can’t wait to hear how your Mango Banana Marshmallow Crumble Bars turn out! Please share your thoughts, any variations you tried, or how they were received in the comments below. Happy baking, and enjoy every single bite!
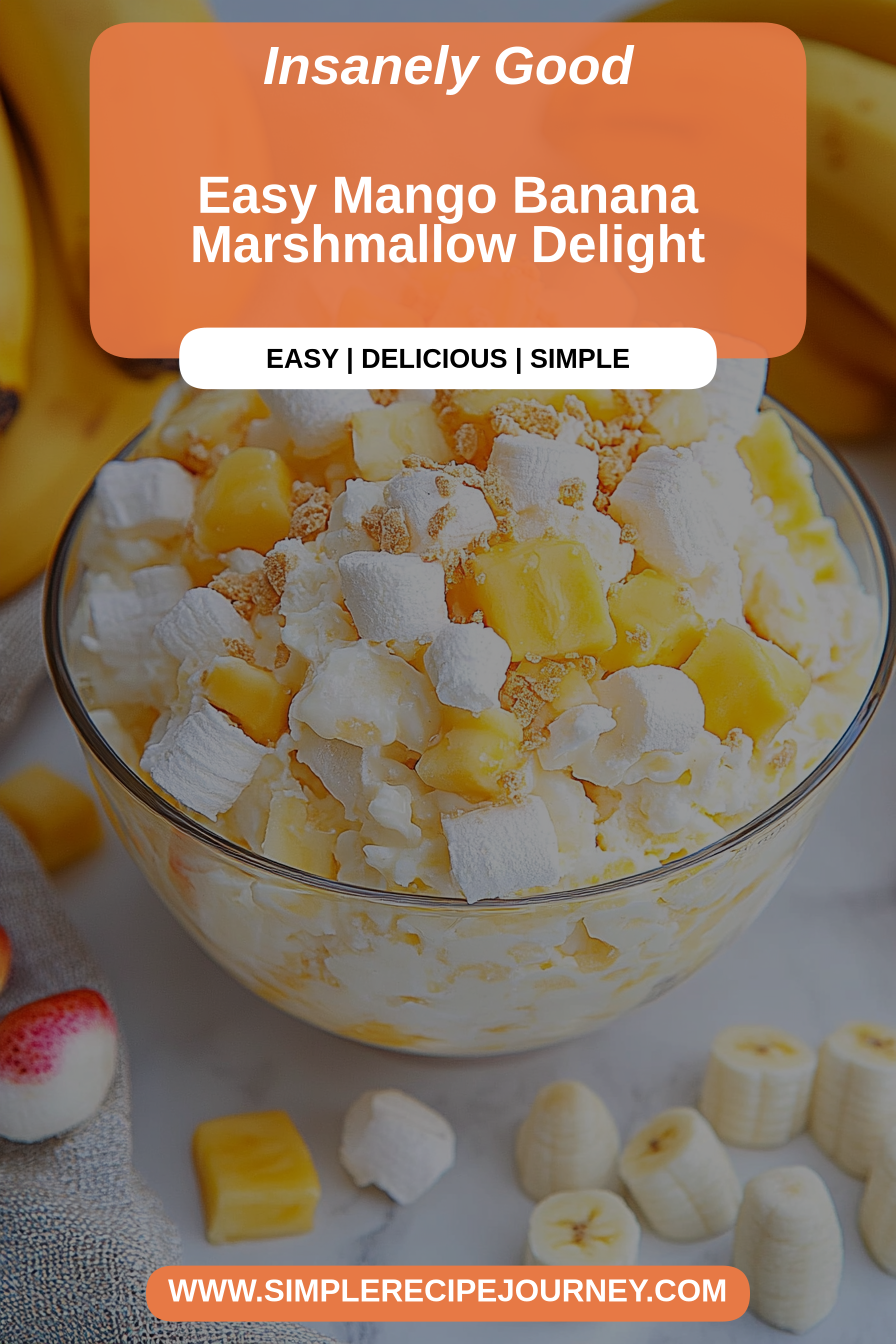
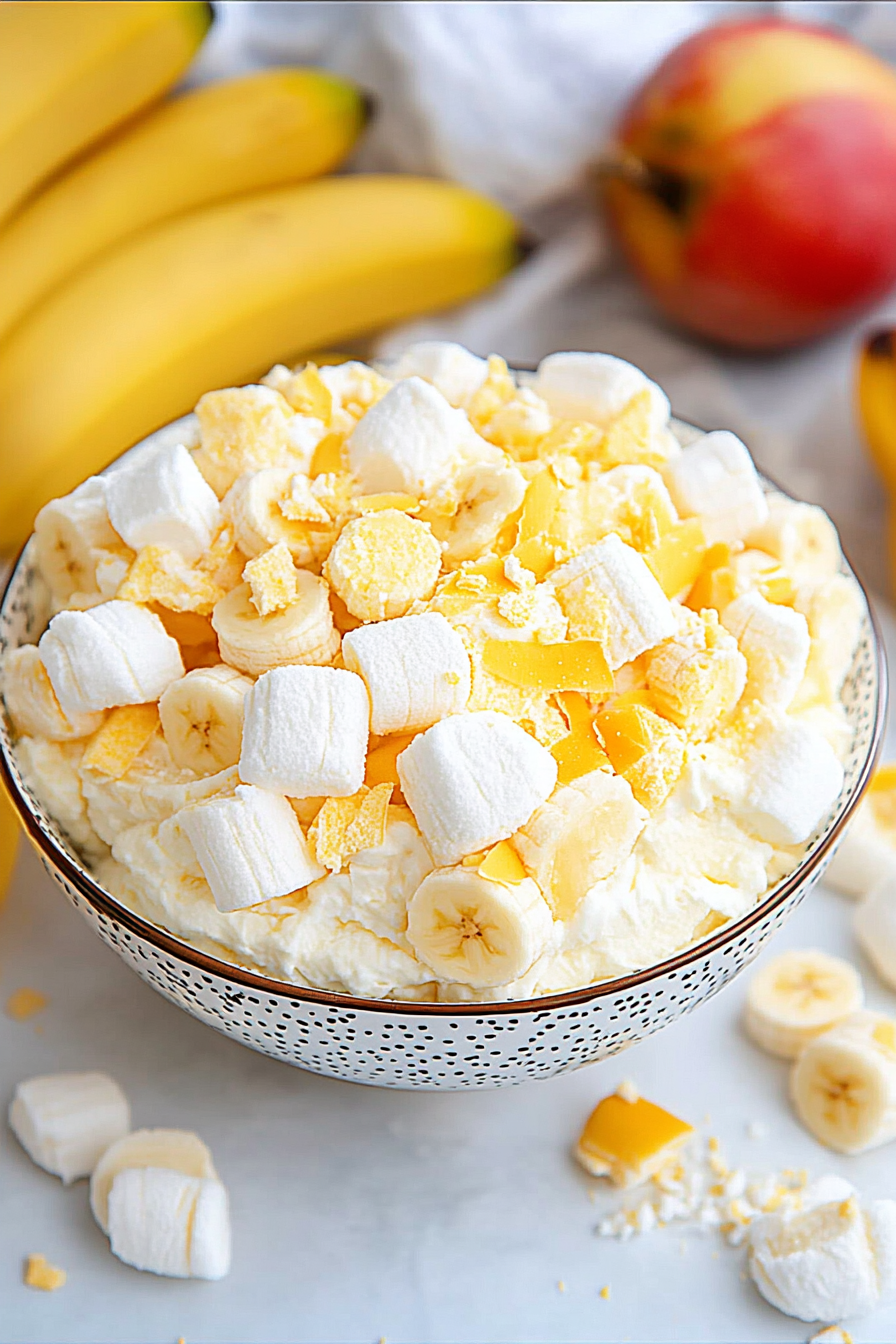
Mango Banana Marshmallow Salad
Ingredients
Method
- Whisk together the vanilla pudding mix and cold milk until smooth and no lumps remain.
- Fold in the Cool Whip until incorporated.
- Add half of the diced mango to a food processor or blender and puree until smooth.
- Mix the mango puree into the pudding mixture.
- Stir in the remaining diced mangoes, sliced bananas, marshmallows, and coconut until combined.
- Cover and chill in the refrigerator for at least 30 minutes before serving.