Easy No-Bake Chocolate Snowballs Recipe
There’s something magical about biting into a crisp, buttery, melt-in-your-mouth snowball. I remember the first time I tasted one—my grandma’s kitchen, the smell of toasted coconut and warm butter filling the air, and that perfect, sweet coating that makes your fingers a little sticky but your heart so full. Honestly, these snowballs are a childhood favorite of mine, and even now, whenever I make them, they whisk me right back to those warm, cozy afternoons. They’re incredibly simple to whip up—one of those recipes that feels like a warm hug. Plus, they’re a hit with kids and grown-ups alike. This isn’t just a cookie; it’s a moment of nostalgia wrapped in coconut and sugar. Whether you’re feeling a sweet tooth craving or just want a quick homemade gift, trust me, these snowballs will disappear from your plate faster than you can say “delicious.” I always do this when I want something sweet but don’t want to fuss over complicated baking. Ready to get cozy in the kitchen? Let’s make some snowballs!
What is snowball?
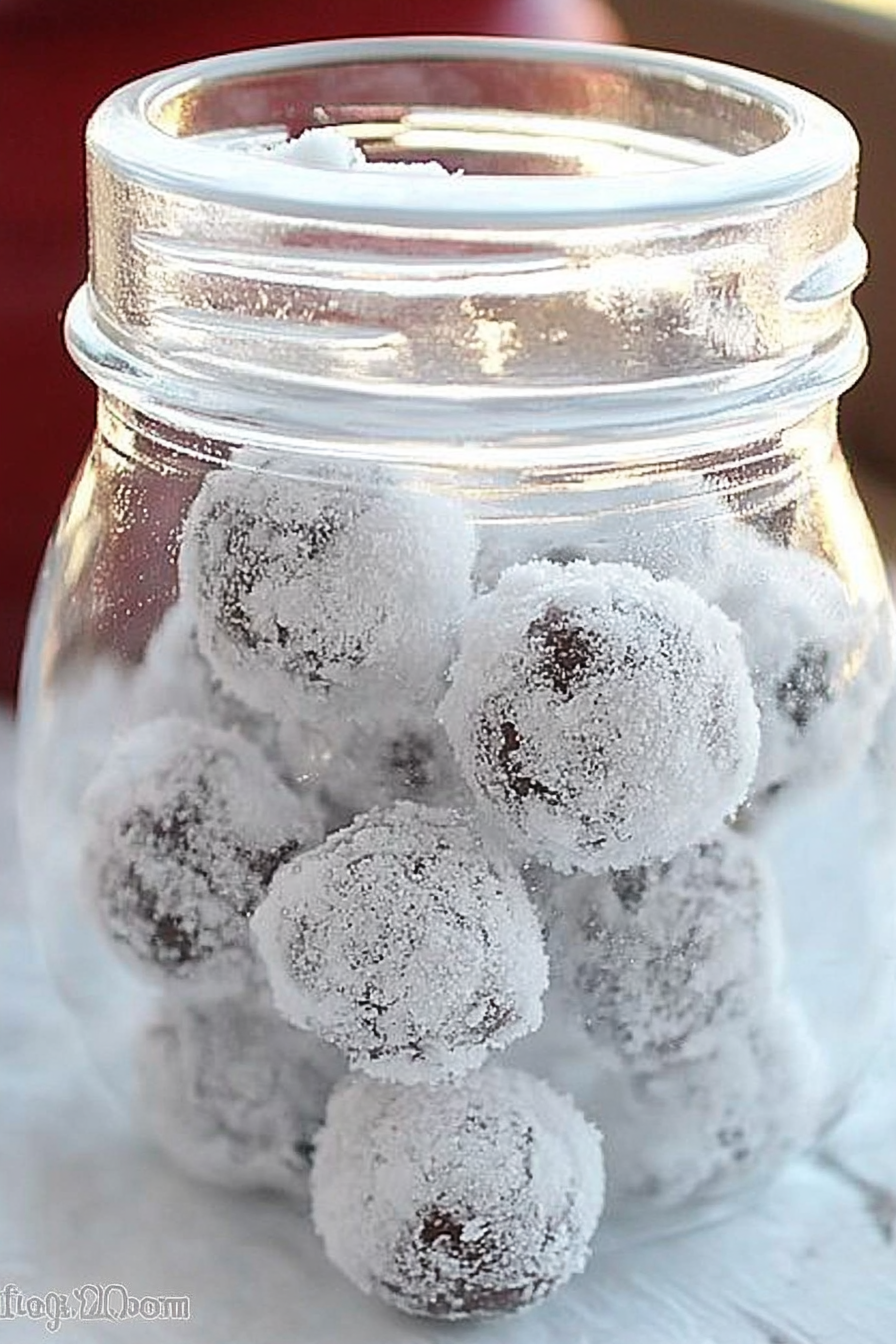
Think of snowballs as little bites of Heaven—crisp on the outside, soft and chewy inside, rolled in a snowy coating of powdered sugar and shredded coconut. The name “snowballs” perfectly captures that snowy, snowy appearance, but it also hints at how irresistibly tender and sweet they are. Essentially, these treats are no-bake (or very minimal baking) cookies made from a simple mixture of sweetened condensed milk, butter, vanilla, and a handful of finely chopped nuts or cookie crumbs, all coated generously in coconut and powdered sugar. They’re kind of like a cross between a cookie and a candy—no fuss, just melt-in-your-mouth goodness. I love that they don’t require any fancy equipment or ingredients—just trusty basic pantry staples, and you’re set for a batch of these festive little bites. And the best part? They get better with time, so a day or two after making them, the flavors truly meld into something magical.
Why you’ll love this recipe?
One of the first things that drew me to making snowballs is how incredibly easy and forgiving they are. I mean, if you’ve ever baked cookies with multiple steps, this is almost the opposite—minimal hassle, maximum yum. What I love most about this recipe is how flexible it is. Want to add a splash of almond extract instead of vanilla? Go for it. Feel like tossing in some chopped dried cranberries or chocolate chips? Absolutely! They’re perfect for little hands to roll too, which makes them a fun family activity. The flavor? Oh, it’s divine—the buttery sweetness mixed with the toasted coconut and that whisper of vanilla. Plus, they cost almost nothing to make, especially compared to fancy store-bought goodies. And if you’re hosting a holiday gathering, these little gems always steal the show because, honestly, who doesn’t love a sweet, snowy-looking treat? This one’s a lifesaver on busy nights, and honestly, it’s how I always sneak a homemade dessert onto the table without breaking a sweat. Plus, I guarantee you’ll get compliments from everyone—’What are these magical bites?’ I’ve even tested this dairy-free with coconut condensed milk, and let me tell you, it made these even creamier. Wait till you try that version!
How do you make snowballs?
Quick Overview
This recipe is about mixing a few pantry staples into a dough, shaping it into little balls, and then rolling them in coconut and powdered sugar. The best part? No baking required—just chill and set. The process is straightforward, which is why I keep it handy for quick gatherings or when you’re craving something sweet with minimal effort. I always get the texture right by chilling the dough before rolling—trust me, it makes all the difference. When they’re finished, they look like tiny snow-covered treats, perfect for popping into your mouth (and everyone else’s). The decorating step is optional, but honestly, a generous coating in coconut and powdered sugar makes them feel extra festive!
Ingredients
For the Main Batter:
– 1 cup (2 sticks) unsalted butter, softened — I always use real butter for that rich flavor
– 1 can (14 oz) sweetened condensed milk — sweet but not overpowering
– 1 teaspoon vanilla extract — or almond for a different twist
– 2 cups finely crushed vanilla or butter cookies — or shortbread crumbs if you prefer
– 1 cup finely chopped nuts (optional) — walnuts or pecans work beautifully
For the Filling (Optional):
– A handful of mini chocolate chips or dried cranberries for a flavor punch inside
For the Glaze:
– 1 cup shredded coconut — toasted lightly if you like a nuttier flavor
– 1 cup powdered sugar — sifted for smoothness
– A splash of milk or cream if you want to make a drizzly glaze (but I prefer just coating and rolling)
Step-by-Step Instructions
Step 1: Preheat & Prep Pan
No oven needed here, but I do like to prepare a baking sheet lined with parchment or wax paper so I can set the finished snowballs aside easily. It’s best to keep the workspace cool, especially if your kitchen is warm, so the dough stays firm when rolling. If your butter is super soft, pop the mixture in the fridge for about 10 minutes before shaping—trust me, it makes life easier.
Step 2: Mix Dry Ingredients
In a large bowl, I whisk together the crushed cookies and chopped nuts, making sure they’re evenly combined. That way, every snowball gets a bit of crunch and flavor. It’s kind of satisfying to see the crumbs help everything come together—almost like making a no-bake crust for a pie.
Step 3: Mix Wet Ingredients
In a separate bowl, cream the softened butter with the condensed milk and vanilla until smooth. It’s like mixing silky caramel—trust me, it should look glossy and inviting. If it feels too thin, just pop it in the fridge for a few minutes. I’ve tested this with almond milk too, and it actually made the mixture even creamier—so feel free to experiment!
Step 4: Combine
Pour the wet mixture into the dry ingredients and fold gently. Try not to overmix—just stir until it’s evenly combined. The dough should be soft but firm enough to roll into balls. If it’s too sticky, a quick sprinkle of extra cookie crumbs or a brief chill in the fridge will do wonders.
Step 5: Prepare Filling
If you want to add surprises inside, now’s the time—mini chocolate chips, dried cranberries, or even a tiny piece of caramel. Roll the filling into small balls and set aside.
Step 6: Layer & Swirl
Take small spoonfuls of dough and flatten slightly in your palms, then wrap a filling inside and roll into a smooth ball. For that classic snowball look, I like to dust my hands lightly with powdered sugar before shaping—that way the dough doesn’t stick too much. You can also layer some of the filling directly into the dough before rolling, creating a marbled effect if you swirl gently.
Step 7: Bake
This step is brief—actually, I don’t bake these at all! They chill in the fridge for at least 30 minutes to firm up, but some folks prefer to refrigerate overnight. The cold helps them hold their shape and develop that fudgy, melt-in-your-mouth texture. If you do bake, a gentle 350°F oven for about 10 minutes can help, but really, chilling is my go-to move here.
Step 8: Cool & Glaze
Once chilled or set, roll your snowballs in shredded coconut coated lightly in powdered sugar. For added holiday flair, I toast my coconut lightly first—it makes everything smell incredible. If you prefer a more rustic look, just sprinkle powdered sugar on top. Sometimes I drizzle a tiny bit of melted chocolate over the coconut coating for extra decadence.
Step 9: Slice & Serve
They’re best served slightly chilled or at room temperature. If you want a more refined presentation, I use a gentle sawing motion with a sharp knife for slicing—perfect for individual servings. Stick a pretty paper cupcake liner underneath, and they’re ready to wow guests or just enjoy with a cup of coffee.
What to Serve It With
I honestly love to serve snowballs with a steaming cup of coffee or tea—there’s something about the warm beverage and cool treat combo that’s just perfect. For brunch, a platter of these paired with fresh fruit makes a charming addition—think strawberries or orange slices to cut through all that sweetness. They’re also fantastic as a quick after-dinner bite—really, the kind of dessert that makes everyone smile. When my kids ask for snacks, I tell them these are “special cookies,” and they’re always thrilled. Sometimes, I even crush a few on top of ice cream for a quick sundae. The best part? You can customize them endlessly—swap out the coconut for crushed nuts, sprinkle some cocoa powder, or add a splash of rum extract for an adult twist. These snowballs aren’t just treats—they’re a canvas for your creativity.
Top Tips for Perfecting Your Snowballs
Over the years, I’ve picked up a few tricks that make these snowballs turn out perfectly every time. First, always use softened butter—if it’s too hard, the mixture won’t blend smoothly, and if it’s too melted, it gets sticky. I learned this the hard way after trying to rush things and ending up with a gooey mess. Second, don’t skip the chilling step—I promise, it’s worth it. Chilling the dough makes shaping easier and helps them hold their shape during any brief “baking” or setting. When it comes to rolling in coconut, I like to toast the coconut lightly beforehand—it adds a warm, nutty aroma that makes them even more irresistible. For variations, I’ve tried swapping out half the shredded coconut for mini chocolate chips—trust me, they look adorable and taste divine. A tip for a more elegant look: once coated, I gently press the snowballs into extra coconut or powdered sugar, then refrigerate again. This layering ensures every bite is packed with sweetness and crunch.
My biggest lesson? Don’t overmix the dough—keep it a bit crumbly to retain that melt-in-your-mouth texture. Also, taste the mixture before forming—sometimes, I find I want a tad more vanilla or a pinch of salt to balance sweetness. If you want a more decadent flavor, a splash of coconut or almond extract can transform the flavor profile in delightful ways. Lastly, don’t forget to label your homemade snowballs if you’re gifting—they taste even better the next day once flavors mingle!
Storing and Reheating Tips
These snowballs keep beautifully—no matter how you store them, actually. I usually keep mine in an airtight container at room temperature if I plan to serve them within a day or two. Just make sure they’re in a cool, dry spot and not in direct sunlight, which can cause the coating to become sticky. For longer storage, I pop them in the fridge—keeps them fresh and firm for up to a week. To prevent them from getting soggy, I recommend layering them with parchment paper or placing them in a sealed plastic container. If you want to freeze a batch (which is a lifesaver for holiday prep), wrap each snowball individually in plastic wrap, then pop them into a large freezer bag. They’ll last up to three months. When you’re ready to enjoy, just thaw in the fridge or leave out at room temperature for about 30 minutes. The flavor and texture are just as delightful after freezing, especially if you add a fresh sprinkle of coconut or powdered sugar before serving.
As for the glaze, if you’ve coated them in coconut and powdered sugar, I recommend adding a fresh dusting right before serving—this keeps that snowy, festive look. Trust me, storing the glazed version involves a bit more care; I usually store the coated snowballs in a single layer to avoid smudging or sticking, and add the glaze or decoration just before serving for that fresh appearance. They really do taste best when slightly chilled or at room temperature, so plan accordingly!
Frequently Asked Questions
Final Thoughts
Sharing these snowballs with my family always feels like passing down a little piece of my childhood. The mix of buttery richness, toasted coconut, and that snowy coating is irresistibly comforting. Every time I make a batch, I’m reminded of lazy afternoons in the kitchen, laughter echoing around, and the simple pleasure of a homemade treat. These snowballs are more than just cookies—they’re a way to slow down, share love, and indulge without guilt. I’ve tested countless variations, and honestly, nothing beats the classic version—the one I grew up loving. So, I encourage you to try this out, tweak it to suit your taste, and take a moment to enjoy the process. And hey, if you end up adding a splash of rum or tossing in some dried fruit, I’d love to hear about it! Happy baking, and I can’t wait to see how your snowballs turn out. Don’t forget to share your photos or leave a comment below—your feedback keeps the magic alive!
Snowballs
Ingredients
Method
- In a microwave-safe bowl, melt the butter and chocolate chips in 30-second intervals, stirring after each until smooth.
- In a large bowl, combine the shredded coconut, cocoa powder, and sweetened condensed milk. Mix well until all ingredients are evenly distributed.
- Pour the melted chocolate mixture into the coconut mixture and stir until fully combined.
- Using a tablespoon, scoop out the mixture and roll into 1-inch balls. Place on a parchment-lined baking sheet.
- Refrigerate the snowballs for at least 30 minutes before serving.