Easy Nutty Cookies Recipe
You know those days? The ones where a craving hits you like a freight train, and nothing short of something warm, gooey, and utterly comforting will do? For me, those days are practically synonymous with these peanut butter cookies. They’re not just cookies; they’re a hug in edible form. My mom used to make these for me after school, and the scent of them baking still transports me straight back to her sun-drenched kitchen. They’re so much simpler and infinitely more satisfying than any fancy dessert I could dream up. If you’ve ever found yourself staring longingly at a bakery window, wondering how they get those cookies *just right*, this is your answer. These are the peanut butter cookies that will make you forget all the others.
What is peanut butter cookie?
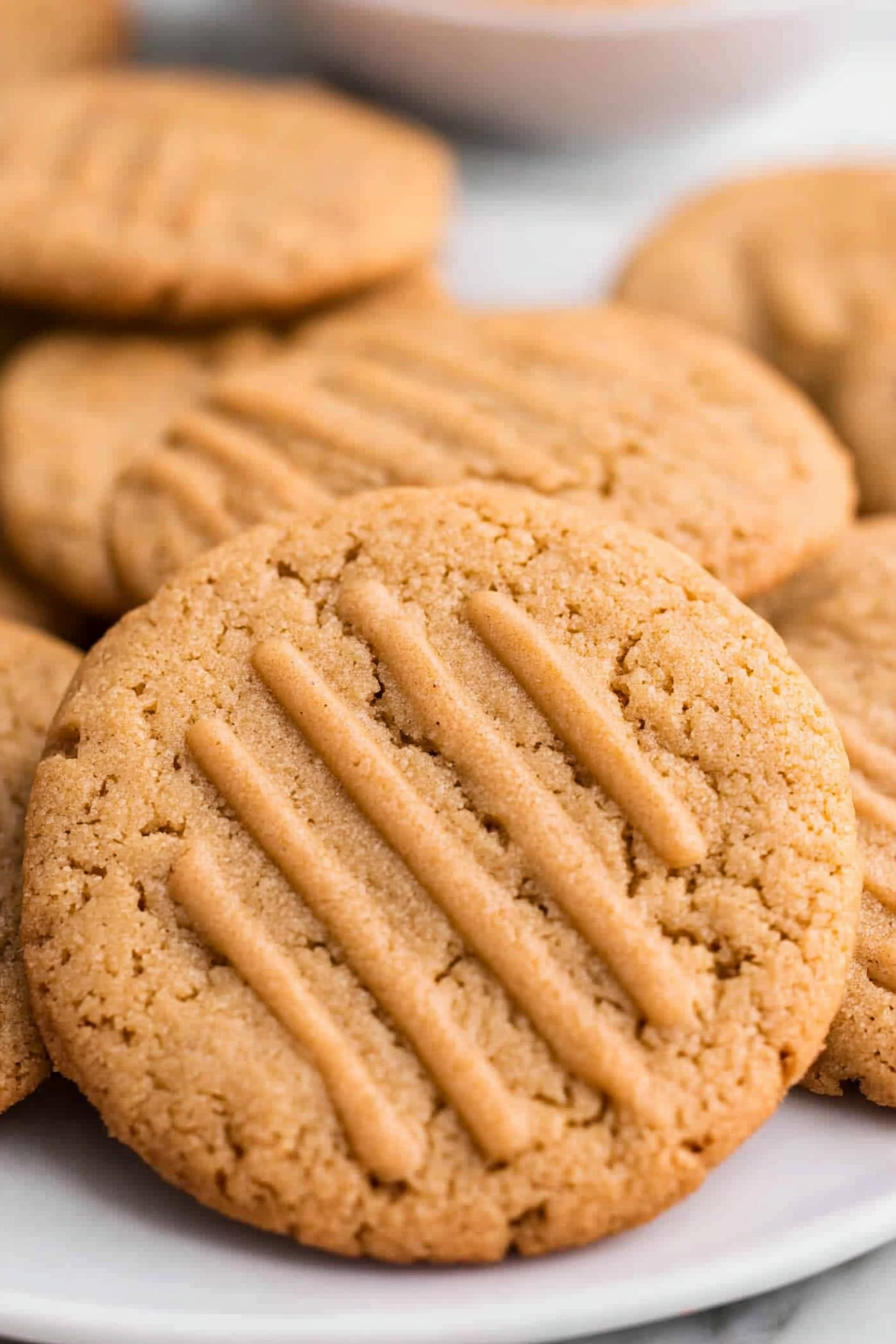
At its heart, a peanut butter cookie is all about that nutty, creamy, slightly sweet goodness that only peanut butter can deliver. Think of it as the ultimate expression of comfort food, baked into a delightful little disc. It’s a classic for a reason! Unlike a chocolate chip cookie, which relies on the distinct bursts of chocolate, the peanut butter cookie’s flavor is woven throughout every single bite. It’s a more subtle, yet deeply satisfying, kind of delicious. The texture can vary, of course – some are soft and chewy, others have a delightful crispness around the edges – but the soul of the peanut butter cookie remains the same: pure, unadulterated peanut butter bliss. This recipe, though, aims for that perfect balance – tender in the middle with just the slightest chew, and a flavor so rich you’ll be tempted to eat the dough straight from the bowl (don’t worry, I won’t tell!).
Why you’ll love this recipe?
Honestly, where do I even begin? First off, the flavor is just out of this world. It’s that deep, roasted peanut butter taste that hits all the right notes – not too sweet, not too salty, just… perfect. I’ve tried a lot of peanut butter cookie recipes over the years, and this one consistently delivers the most intensely satisfying peanut butter punch. And the texture! Oh, the texture is what truly sets it apart. They’re wonderfully tender and chewy on the inside, with those gorgeous crinkly tops that promise pure delight. They bake up beautifully, with slightly crisp edges that give way to a soft, melt-in-your-mouth center. Plus, it’s ridiculously easy to make. You don’t need any fancy equipment, just a couple of bowls and a whisk. I’ve made these on the busiest weeknights when I’ve needed a quick sweet fix, and they always come out like a dream. They’re also incredibly budget-friendly. Peanut butter, flour, sugar, butter – these are staples most of us already have in our pantry, making it an affordable indulgence. And the smell? As soon as they start baking, my whole house fills with that irresistible aroma, bringing my family running to the kitchen. It’s a recipe that truly brings people together.
How do I make peanut butter cookies?
Quick Overview
This is your gateway to cookie perfection! We’ll start by creaming together our butter and sugars until light and fluffy, then incorporate eggs and that all-important peanut butter. The dry ingredients are mixed separately and then gently folded in to create a tender dough. A quick chill helps the cookies hold their shape, and then it’s just a matter of rolling them into balls, pressing with a fork for that classic look, and baking until golden. The whole process is surprisingly fast, and the results are so rewarding. It’s truly the simplest way to achieve incredible peanut butter cookie flavor and texture.
Ingredients
For the Main Batter:
1 cup (2 sticks) unsalted butter, softened (I always use good quality butter; it makes a difference!)
1 cup granulated sugar
1 cup packed light brown sugar (this is key for that chewiness!)
2 large eggs (room temperature is best for emulsifying)
1 cup creamy peanut butter (use your favorite! I love Jif or Skippy for classic flavor)
1 teaspoon vanilla extract
2 ½ cups all-purpose flour (sifted, if you like it super light)
1 teaspoon baking soda
½ teaspoon salt
For the Chocolate Drizzle (Optional, but highly recommended!):
½ cup semi-sweet chocolate chips
1 tablespoon vegetable oil or coconut oil (helps with smoothness)
Step-by-Step Instructions
Step 1: Preheat & Prep Pan
First things first, get your oven preheated to 375 degrees Fahrenheit (190 degrees Celsius). I like to line my baking sheets with parchment paper. It makes cleanup a breeze and ensures the cookies don’t stick. If you don’t have parchment, a lightly greased baking sheet works too, but I find parchment is a lifesaver.
Step 2: Mix Dry Ingredients
In a medium bowl, whisk together the flour, baking soda, and salt. Give it a good whisk to make sure everything is evenly distributed. This ensures that your baking soda and salt are spread throughout the dough, which helps the cookies rise evenly and prevents any salty pockets. Set this aside for now.
Step 3: Mix Wet Ingredients
In a large bowl, cream together the softened butter, granulated sugar, and light brown sugar. Beat this with an electric mixer (or by hand if you’re feeling energetic!) until it’s light and fluffy. This usually takes about 2-3 minutes. This step is crucial for creating a tender cookie! Then, beat in the eggs one at a time, followed by the vanilla extract and the peanut butter. Mix until everything is just combined and looks wonderfully creamy. It should smell amazing already!
Step 4: Combine
Now, gradually add the dry ingredients to the wet ingredients. Mix on low speed, or stir by hand, until everything is *just* combined. Be careful not to overmix here! Overmixing can develop the gluten too much, leading to tough cookies. You want to stop as soon as you no longer see streaks of flour. It’s okay if it’s a little lumpy; that’s perfect.
Step 5: Prepare Filling
This recipe doesn’t have a separate filling in the traditional sense, but the peanut butter is the star! I do like to give the dough a little chill. Cover the bowl with plastic wrap and pop it in the refrigerator for at least 30 minutes. This makes the dough easier to handle and helps prevent the cookies from spreading too much as they bake. For the optional chocolate drizzle, once the cookies are baked and cooled, you’ll melt the chocolate chips with the oil until smooth.
Step 6: Layer & Swirl
No layering or swirling needed for these beauties! We’re going for classic. Take the chilled dough and roll it into balls, about 1.5 inches in diameter. Place them about 2 inches apart on your prepared baking sheets. Now for the fun part – grab a fork and gently press down on the top of each cookie, creating that iconic criss-cross pattern. This not only looks pretty but also helps them bake evenly.
Step 7: Bake
Bake for 9-12 minutes, or until the edges are lightly golden brown and the centers still look a little soft. They will continue to cook a bit on the hot baking sheet after you take them out. I usually check them around the 9-minute mark because I prefer my peanut butter cookies on the chewier side. If you like them crispier, bake them a minute or two longer.
Step 8: Cool & Glaze
Let the cookies cool on the baking sheets for about 5 minutes before carefully transferring them to a wire rack to cool completely. This is when they firm up. If you’re doing the optional chocolate drizzle, melt your chocolate chips and oil together in a microwave-safe bowl (heating in 30-second intervals, stirring in between) or over a double boiler. Once melted and smooth, drizzle it over the cooled cookies using a spoon or a piping bag. Let the chocolate set before serving.
Step 9: Slice & Serve
Once they’re fully cooled (or the chocolate has set), these peanut butter cookies are ready to be devoured! They’re best enjoyed at room temperature. You can stack them, arrange them on a platter, or just grab one (or three!) directly from the cooling rack. They are perfect for sharing… or not!
What to Serve It With
These peanut butter cookies are incredibly versatile, fitting into any occasion with ease! For a cozy breakfast or a quick morning pick-me-up, they’re fantastic with a steaming mug of black coffee or a glass of cold milk. The slight saltiness in the cookie really complements the rich coffee. If you’re planning a brunch, these cookies are a delightful addition to a sweet spread. They pair wonderfully with fruit salad or even alongside a slice of a more elaborate cake. For dessert, they’re a classic. I love serving them with a scoop of vanilla bean ice cream for an irresistible peanut butter ice cream sandwich. They also make a lovely ending to a hearty meal, especially when paired with a dessert wine or a rich hot chocolate. And for those oh-so-frequent “I need something sweet right now” moments (you know the ones!), they are simply perfect on their own. My kids absolutely love them after school with a glass of chocolate milk – it’s a tradition at this point. Honestly, they’re so good, they don’t really *need* anything else, but pairing them can elevate the experience even further.
Top Tips for Perfecting Your Peanut Butter Cookies
Over the years, I’ve picked up a few tricks that really make these peanut butter cookies sing. First, **the peanut butter is key**. While any creamy peanut butter will work, using one that’s just peanut butter and salt (avoiding added sugars or oils if possible) tends to give the most authentic, rich peanut butter flavor. Natural peanut butters can sometimes make the dough a bit oily, so if you go that route, you might want to drain off any excess oil. When you’re mixing the wet and dry ingredients, **don’t overmix**. This is probably the most common mistake people make. Overmixing develops the gluten in the flour, which can lead to tough, dry cookies. Mix until the flour just disappears – a few streaks are okay. For the iconic fork marks, **don’t press too hard**. You just want to create that signature pattern and slightly flatten the cookies; pressing too deep can make them spread too much. If your dough feels too soft to handle, **don’t skip the chilling step**. A 30-minute chill in the fridge makes a world of difference. It firms up the butter, preventing excessive spreading and making the dough much easier to scoop and roll. If you’re using a stand mixer, **make sure your butter is softened, not melted**. Softened butter creams better with sugar, creating air pockets that lead to lighter, more tender cookies. For variations, I’ve experimented with adding a pinch of cinnamon to the dry ingredients, which adds a lovely warmth. You can also swap out some of the granulated sugar for a bit of almond flour to add a different nutty dimension. And if you don’t have brown sugar, you can make your own by mixing molasses into granulated sugar, though the texture might be slightly different. The biggest lesson I learned was about **doneness**. Pulling them out when they *look* slightly underbaked is the secret to that perfect chewy center. They continue to bake on the hot pan, so aim for that “just set” look!
Storing and Reheating Tips
These peanut butter cookies are pretty robust, which is one of the things I love about them. For **room temperature storage**, I usually keep them in an airtight container or a cookie tin. They’ll stay deliciously fresh for about 3-4 days. If you stack them, placing parchment paper between layers can prevent them from sticking together, especially if it’s warm out. For **refrigerator storage**, which I usually only do if it’s extremely hot and humid, they can last a bit longer, maybe up to a week. Just make sure they are in a well-sealed container. When you take them out of the fridge, let them come to room temperature for about 15-20 minutes for the best texture. Now, for **freezer instructions**, these cookies freeze beautifully, either baked or as dough balls! For baked cookies, wrap them tightly in plastic wrap, then place them in a freezer-safe bag or container. They’ll keep for up to 2-3 months. To thaw, simply leave them at room temperature. If you want to freeze the dough balls before baking, place them on a baking sheet until frozen solid, then transfer them to a freezer bag. You can then bake them directly from frozen, though they might need an extra minute or two in the oven. Regarding the **glaze**, if you’re planning to store them unfrozen for more than a day or two, I’d recommend drizzling the chocolate *after* they’ve cooled and just before serving. The chocolate can get a bit soft or even bloom in certain temperatures, so it’s best added closer to consumption for optimal appearance.
Frequently Asked Questions
Final Thoughts
So there you have it – my go-to, tried-and-true peanut butter cookies. I truly believe these are the best because they strike that perfect balance of rich, nutty flavor, wonderfully chewy texture, and that comforting, home-baked goodness we all crave. They’re incredibly forgiving, simple to whip up, and guaranteed to bring smiles all around. They’re the cookies I make when I need a little bit of joy, or when I want to share a piece of my childhood with loved ones. If you’re a fan of peanut butter, or just a lover of all things deliciously baked, I really hope you’ll give these a try. I can’t wait to hear how yours turn out! Feel free to leave a comment below with your own tips or variations, and don’t forget to share your baking triumphs!
Peanut Butter Cookies
Ingredients
Method
- Preheat oven to 350°F. Grease a cookie sheet and set aside.
- In a large bowl, cream together butter, brown sugar and sugar on low speed until combined. Add egg and vanilla and beat on low until combined. Stir in peanut butter.
- Add salt and baking soda to the bowl. Gradually stir in the flour. Stir until flour is fully incorporated in the mixture.
- Roll dough into small balls and place on cookie sheet. Press the balls flat with a floured fork.
- Bake for 10 to 12 minutes until golden. Let cool on a cooling rack.