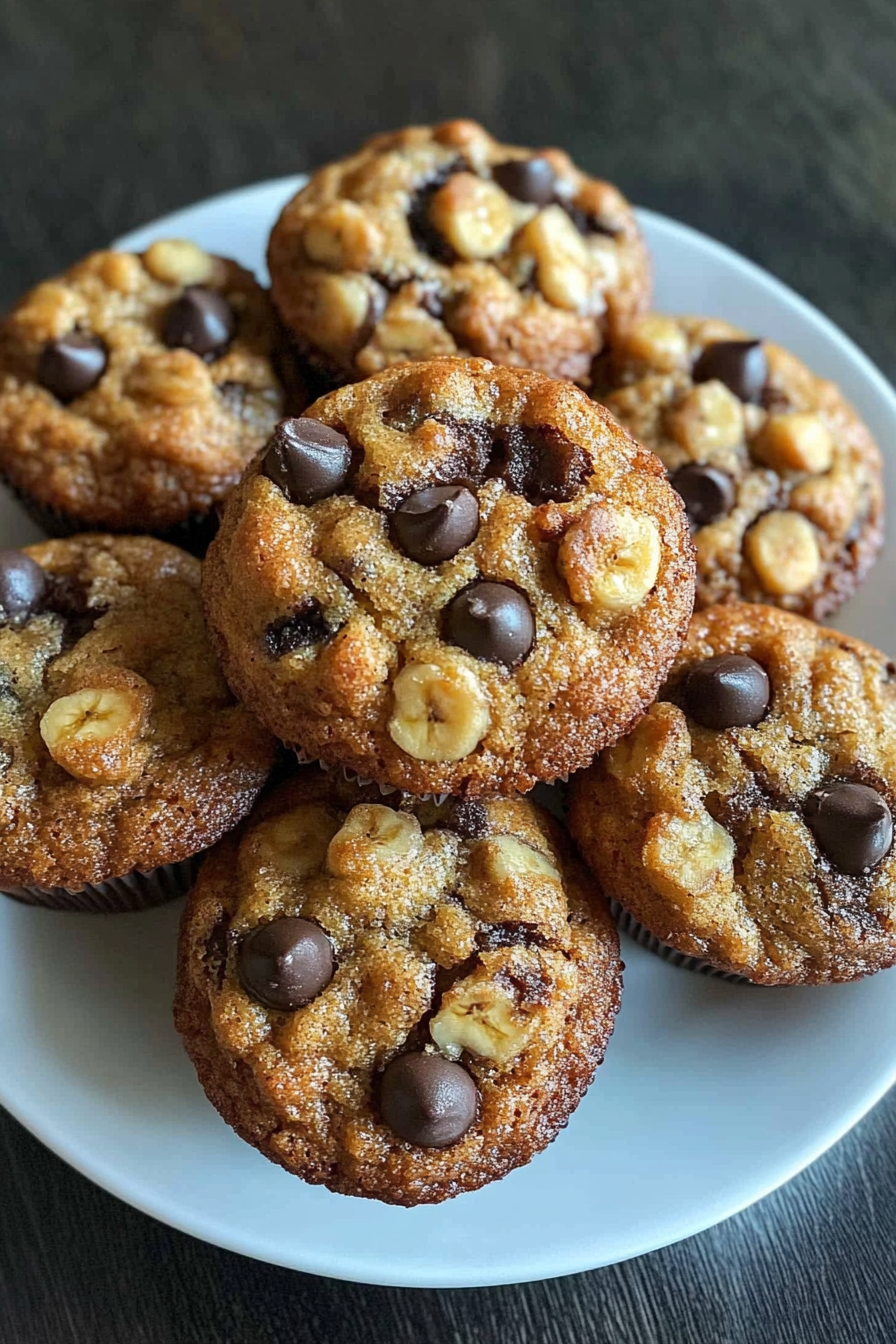
Easy Peanut Butter Banana Muffins Delight
There’s just something about the smell of freshly baked muffins that instantly transports me back to lazy Sunday mornings at my grandma’s house. The air filled with warmth, a hint of cinnamon, and that cozy sweetness of ripe bananas mingling with rich peanut butter—pure comfort in every bite. I always do this when I need a quick pick-me-up or a little treat that feels indulgent but is actually pretty good for you. These peanut butter banana muffins? They’ve become a staple at my house. My kids ask for this all the time, and honestly, I don’t mind whipping them up on busy mornings when I’m running around but still want something satisfying. They’re incredibly easy to make, require pantry staples, and the flavor—oh, the flavor—is just next-level. If you love banana bread but crave a little nuttiness and a fluffy muffin texture, trust me on this one, these will be your new go-to. Plus, the kiddos love helping layer the filling—it’s made me realize how fun baking can be for the whole family.
What is peanut butter banana muffin?
Think of peanut butter banana muffins as a cozy mash-up of your favorite classic comfort foods—banana bread meets a peanut butter sandwich in muffin form. It’s essentially a moist, tender muffin that’s packed with bananas’ natural sweetness, balanced perfectly by the creamy, nutty richness of peanut butter. The name says it all: they’re muffins made with bananas and peanut butter, but what makes them special is how foolproof they are. I like to think of them as the breakfast or snack version of that beloved PB&J, but much more grown-up and better for sneaking in some fruit. It’s a recipe I’ve tweaked over the years to be both kid-friendly and a little fancy enough to bring to brunch or a bake sale. There’s an inherent nostalgic charm to them, but they also somehow feel like a cozy hug in each bite. And let’s be honest—who doesn’t love that peanut butter-banana combo?
Why you’ll love this recipe?
What I love most about these peanut butter banana muffins is how adaptable and forgiving they are. They’re the kind of baked good that feels like a warm hug—moist, fluffy, and totally satisfying. The flavor is just irresistible: sweet bananas, creamy peanut butter, and a hint of vanilla with a sprinkle of chocolate chips if you’re feeling indulgent. They smell incredible as they bake, filling your whole kitchen with that familiar nutty aroma that makes everyone come running. Plus, they’re super simple to whip up—no fancy equipment or hard-to-find ingredients needed. Cost-wise, they’re budget-friendly because most of us have these basics sitting in the pantry: bananas, peanut butter, flour, and eggs. And they’re incredibly versatile—you can add blueberries, swap in almond butter, or even make them vegan with some adjustments! My kids ask for seconds every single time, and I love how they make our mornings just a little brighter.
How do I make peanut butter banana muffins?
Quick Overview
This recipe comes together in just a few steps: mash your bananas, mix up the wet ingredients, combine with dry, and layer in your filling before baking. What’s special about this method is how the peanut butter gets swirled into the batter—creating beautiful marbled muffins that are as pretty as they are tasty. The trick is not overmixing, so each muffin stays nice and fluffy. These muffins bake in about 20-25 minutes, filling your kitchen with that irresistible smell that makes everyone come running. And trust me, once you try these, they might just become your new weekend ritual or anytime snack—you’ll find yourself making double batches without even realizing it!
Ingredients
For the Main Batter:
– 3 ripe bananas (the overripe ones with brown spots are perfect for extra sweetness and flavor).
– 1/2 cup creamy peanut butter (natural is best, but any smooth variety works).
– 1/2 cup granulated sugar (or honey/maple syrup for a natural sweetener).
– 2 large eggs (fresh eggs make a difference in moisture).
– 1 teaspoon vanilla extract (for flavor depth).
– 1 1/2 cups all-purpose flour (self-rising or plain with a teaspoon of baking powder).
– 1 teaspoon baking soda (for a nice rise).
– 1/4 teaspoon salt (to balance all that sweetness).
For the Filling:
– 1/4 cup peanut butter (to swirl in for that gooey effect).
– Optional: a handful of chocolate chips or chopped nuts for added texture.
For the Glaze:
– 1/4 cup powdered sugar mixed with a teaspoon of milk or lemon juice (just enough to drizzle).
– Or, simply dust with extra cocoa powder or cinnamon for a different twist.
Step-by-Step Instructions
Step 1: Preheat & Prep Pan
Set your oven to 350°F (175°C). Line a muffin tin with paper liners or grease it well with butter or non-stick spray. This really helps with easy removal—trust me, nothing worse than sticky muffins!
Step 2: Mix Dry Ingredients
In a bowl, whisk together the flour, baking soda, and salt. Doing this first ensures even distribution of the leavening agents and prevents clumping, which can mess with your muffin texture.
Step 3: Mix Wet Ingredients
In another larger bowl, mash the bananas until smooth—some lumps are okay if you like a little texture. Add the peanut butter, sugar, eggs, and vanilla. Whisk everything until nice and combined. This is the moment your kitchen starts to smell amazing!
Step 4: Combine
Pour the dry ingredients into the wet, and gently fold until just combined—be careful not to overmix, or you’ll end up with dense muffins. Lumps are fine; overworking the batter makes them tough.
Step 5: Prepare Filling
In a small bowl, soften the extra peanut butter. If you want to get fancy, mix in some chocolate chips or chopped nuts for bursts of flavor and texture.
Step 6: Layer & Swirl
Drop a spoonful of batter into each muffin cup. Add a small dollop of peanut butter filling on top, then cover with more batter. Use a toothpick or skewer to gently swirl the peanut butter into the batter—just a few zigzags to create pretty marbled effects. Trust me, that swirl makes them look polished and irresistible!
Step 7: Bake
Bake for 20-25 minutes, or until a toothpick inserted in the center comes out clean. Magic happens around the 22-minute mark—be sure not to overbake or they’ll dry out. Let them rest in the pan for 5 minutes before transferring to a wire rack.
Step 8: Cool & Glaze
Once cooled a bit (at least 10 minutes to avoid melting the glaze), drizzle with the powdered sugar glaze or dust with cocoa powder. If you prefer a more rustic look, just sprinkle a tiny bit of sea salt—that’s my guilty pleasure with these!
Step 9: Slice & Serve
Slice open the muffins for a peek at that beautiful swirl—it’s almost too pretty to eat! Serve warm with a glass of milk or a cup of coffee, and watch how quickly they disappear.
What to Serve It With
These muffins are super versatile. For breakfast, I love serving them with a dollop of Greek yogurt and fresh berries—they add a tartness that balances the sweet. If you’re doing brunch, a platter of sliced fruit and a pot of hot coffee or tea makes everything feel fancy. They’re also perfect for kids’ lunchboxes—just pop in a small container, and they’re good to go. As a dessert, I sometimes warm them up and serve with a scoop of vanilla ice cream or a drizzle of honey. For cozy afternoons, a handful of chopped nuts or a smear of additional peanut butter on the side makes them even more satisfying. Trust me, they’ve become a family favorite, and I love how they turn simple ingredients into something special every time.
Top Tips for Perfecting Your Peanut Butter Banana Muffins
Over the years, I’ve learned a few tricks to make these muffins truly unbeatable. First, always use overripe bananas—they’re sweeter, softer, and mash up so much easier. If your bananas aren’t quite ripe enough, just pop them in a paper bag for a day or two—they’ll turn beautifully black and perfect for baking. About the peanut butter—use a natural, creamy variety because it blends smoothly and adds richness. If you prefer a nutty crunch, throw in some chopped nuts into the batter—but be gentle so they don’t sink to the bottom. When mixing the batter, combine just until you see no streaks of flour; overmixing makes them dense and tough, and nobody wants that. For the swirl, I’ve experimented with different spooning techniques—layering in alternating spoons creates a gorgeous marbled effect, but a quick swirl with a toothpick is faster and just as lovely. And finally, keep an eye on your muffins after 20 minutes—baking times can vary depending on your oven. To test doneness, insert a toothpick—they’re done when it comes out clean or with just a few moist crumbs.
Maybe my biggest tip? Don’t skip the cooling stage. Muffins are still baking a little in their hot centers, so waiting 10 minutes helps keep their shape when you slice into them. Once cooled completely, adding the glaze or dusting with cocoa powder gives that finished touch. Trust me, these muffins taste even better the next day, stored in an airtight container. Just reheat slightly in the microwave for a warm, gooey treat!
Storing and Reheating Tips
If you have leftovers—good luck—they store surprisingly well. Keep them in an airtight container at room temperature for up to two days; they stay moist and fresh, especially if covered tightly. For longer storage, pop them into the fridge—just tightly seal them in a container or zip-top bag. They’ll last up to a week, though I recommend bringing them to room temp or giving them a quick microwave zap before serving for that freshly baked feel. Want to stash a batch for later? Wrap each muffin individually and freeze for up to three months. To reheat, just microwave for 20-30 seconds, or until warm. If you’ve added glaze, wait until they’re fully reheated before drizzling again—otherwise, it can melt and slide off.
For the best presentation, I like to add an extra sprinkle of sea salt or chocolate chips on top after reheating—they add that little something extra. Honestly, proper storage is key to keeping these muffins tasting fresh and delicious, whether you’re eating them fresh from the oven or enjoying them days later.
Frequently Asked Questions
Final Thoughts
These peanut butter banana muffins are hands down one of my favorite quick treats—perfect for breakfast, snacks, or even a sweet ending to the day. They’re a testament to how simple ingredients, when combined thoughtfully, can create something truly delightful. I love how they bring a little bit of warmth and nostalgia, and honestly, I can’t keep them in the house for long—these disappear in minutes at my place! Whether you’re a seasoned baker or just starting out, trust me, these muffins are forgiving, fuss-free, and utterly delicious. Play around with the mix-ins, tweak the sweetness, and enjoy the process. Most importantly, don’t forget to share them with someone you love—baking is so much more fun when you do it together. Happy baking, friends! I can’t wait to hear how yours turn out. Drop a comment below or share your favorite twists—I love hearing your stories and innovations.
Peanut Butter Banana Muffins
Ingredients
Method
- Preheat your oven to 325°F. Spray a muffin tin or line with muffin liners.
- In a large bowl, mash the bananas. Add peanut butter, honey, egg, vanilla, cinnamon, baking soda, and salt. Mix until well combined.
- Fold in the almond flour and chocolate chips.
- Divide the batter evenly among the muffin cups, filling each about 3/4 full. Top with additional chocolate chips if desired.
- Bake for 20-22 minutes or until a toothpick inserted in the center comes out clean.
- Allow muffins to cool in the pan for 10 minutes, then transfer to a wire rack to cool completely.