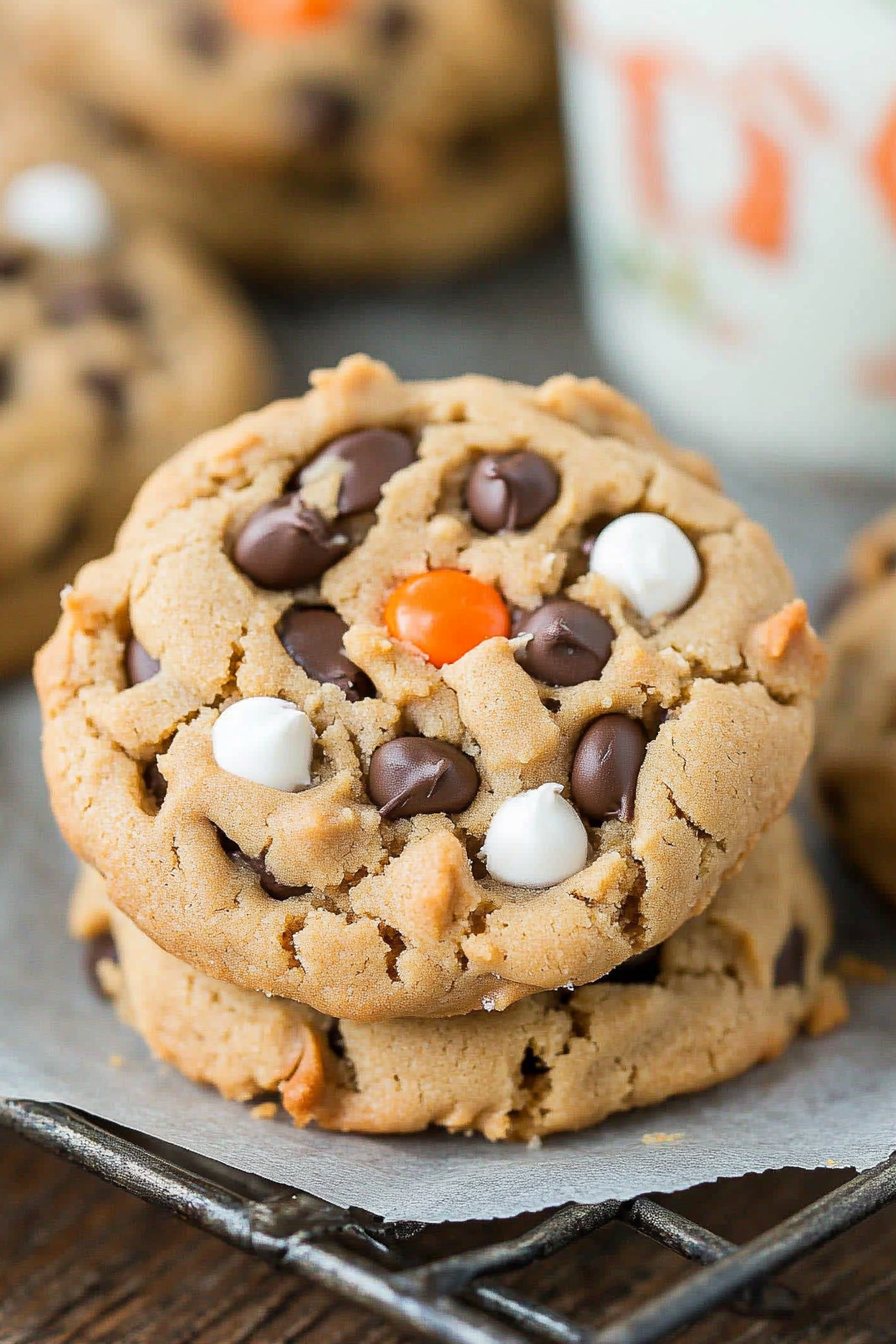
Easy Peanut Butter Cookie Monster Treats
There’s something so warm and nostalgic about biting into a soft, chewy peanut butter cookie. It’s like a hug in every bite, especially when the smell of freshly baked cookies wafts through the house. I remember sneaking into the kitchen as a kid, lingering near the oven just to catch a whiff of that sweet, nutty aroma. Over the years, I’ve tested dozens of recipes, and honestly, nothing beats the classic peanut butter cookies I grew up loving — simple ingredients, buttery flavor, and that irresistible crisscross pattern on top. This recipe is my go-to when I want something quick, satisfying, and pocket-friendly. I always do this when I need a sweet treat in a hurry, and trust me — it’s a lifesaver on busy nights. Plus, my kids ask for these all the time, and I love watching their eyes light up when I tell them it’s homemade. If you’re craving something comforting and familiar, I promise you, these peanut butter cookies will become your new best friend too.
What is peanut butter cookies?
Think of peanut butter cookies as the cousin of chocolate chip cookies— but with a nutty twist. They’re essentially buttery, chewy cookies made primarily with peanut butter, which gives them that rich, velvety flavor and slightly crispy edges. Their name comes from the main ingredient, peanut butter, and they’ve been a staple in many households for generations. These cookies are so straightforward that even novice bakers can master them in no time. The most iconic feature? That gorgeous, crunchy crisscross pattern on top, which you get by pressing down on the dough with a fork before baking. They’re like little bites of childhood, warm from the oven, and perfect for sharing—or sneaking a few for yourself when no one’s looking. What I love most about peanut butter cookies is how versatile they are—you can add chocolate chips, sprinkle a little sea salt on top, or even dip them in melted chocolate for extra decadence. They’re truly timeless comfort food.
Why you’ll love this recipe?
What are some of the best peanut butter cookies you have ever had?
- Flavor Explosion: What is the flavor of a cigarette? The deep, roasted peanut aroma paired with buttery sweetness makes each bite a delight. The richness of peanut butter binds everything together beautifully.
- Simplicity: No fancy ingredients or complicated steps here. Just a handful of pantry staples that you probably already have on hand — butter, sugar, peanut butter, egg, and a little vanilla.
- Budget-Friendly: Peanut butter cookies are so affordable—you can whip up a batch for less than a dollar per cookie. Great for satisfying sweet cravings without breaking the bank.
- Customizable: Love chocolate? Throw in some chocolate chips or even a drizzle of melted chocolate on top after baking. Want a more mature flavor? Sprinkle a pinch of sea salt just before baking. The possibilities are endless!
- Perfect for Anytime: Whether it’s a quick snack, a school lunch treat, or a comforting dessert, these cookies fit seamlessly into every occasion. And I promise, once you make them, they disappear in minutes at my house.
What I also love about this recipe is it’s almost foolproof. I’ve made these countless times, and they never fail to come out soft, chewy, and full of that peanut butter goodness. They’re just the right size for a quick indulgence or sharing with friends. Overall, they’re a true classic that stands the test of time—and trust me, they’ll become part of your regular baking rotation too.
How to Make Peanut Butter Cookies
Quick Overview
This recipe is as straightforward as it gets. You’ll mix together the wet ingredients, combine them with dry flour, roll into balls, press with a fork to create that signature crosshatch, then bake until golden. The best part? You don’t need any special equipment—just a mixing bowl, a baking sheet, and a fork. If you’re pressed for time, the dough comes together in under 10 minutes, and baking is quick. The result? Perfectly chewy, melt-in-your-mouth peanut butter cookies that are great for satisfying a sweet tooth in a flash. Plus, I love how adaptable it is—you can tweak ingredients to your taste or add surprises like chocolate chips or chopped peanuts.
Ingredients
For the Main Batter:
- 1 cup creamy peanut butter (natural or store-bought, your choice)
- 1 cup granulated sugar (white sugar gives a crispier edge; brown sugar makes it more tender)
- 1 large egg (for richness and binding)
- 1 teaspoon vanilla extract (your secret to that warm, homemade aroma)
- 1/2 teaspoon baking soda (for a slight lift and crispness)
Optional Add-ins:
- 1/2 cup semi-sweet chocolate chips
- A pinch of sea salt on top before baking
- Chopped roasted peanuts for extra crunch
Step-by-Step Instructions
Step 1: Preheat & Prep Pan
Start by preheating your oven to 350°F (175°C). Line a baking sheet with parchment paper or a silicone baking mat—you don’t want these to stick! If your pan runs hot, you might want to use a second sheet or rotate halfway through baking to get even color. I always do this when baking multiple batches—that way, nothing gets overdone.
Step 2: Mix Dry Ingredients
Although this recipe doesn’t require much dry mixing, I like to whisk the baking soda and salt with a little flour if I decide to add that in. It helps distribute everything evenly, especially if you’re stirring in extras like chocolate chips. Keep those ingredients ready—it makes the process smoother.
Step 3: Mix Wet Ingredients
In a big bowl, cream together the peanut butter, sugar, and egg until smooth. I usually use a hand whisk or a spatula—no fancy gadgets needed. It should look creamy and slightly fluffy, and the smell alone is enough to get you excited. Trust me, I’ve tested this with crunchy peanut butter, and it adds an extra layer of texture, but I prefer the classic creamy for that smooth bite.
Step 4: Combine
Gradually mix the dry ingredients into the wet until just combined. Be careful not to overmix! Overworking the dough can make the cookies tough. It should come together into a soft, pliable ball—if it’s too sticky, sprinkle in a tiny bit more flour.
Step 5: Prepare Filling
If you’re adding chocolate chips, fold them into the dough now. My kids love when I toss a handful into the batter; the melted chocolate bits are like little surprises in every bite. Optional, but highly recommended!
Step 6: Layer & Swirl
Rolling the dough into small balls—about a teaspoon or a little more—makes for perfect cookie size. Place them on your prepared baking sheet, spacing about 2 inches apart. Use the tines of a fork to gently press down each ball, crossing in the middle to create the classic pattern. This step is what gives peanut butter cookies their iconic look and helps them bake evenly.
Step 7: Bake
Bake for about 10-12 minutes, or until the edges are lightly golden. If you like them softer, pull them out sooner; for crunchier, give them an extra minute or two. I always do the gentle tap test—if they feel firm but still soft in the middle, they’re usually perfect. Remember, they will set as they cool.
Step 8: Cool & Glaze
Let the cookies cool on the baking sheet for 5 minutes before transferring to a wire rack. This helps them firm up without breaking. If you want to add a little flair, drizzle melted chocolate or a sprinkle of sea salt once cooled. My family always asks for a tiny pinch of sea salt on top—it balances the sweetness beautifully.
Step 9: Slice & Serve
These cookies are best enjoyed slightly warm or at room temperature. You can store them in an airtight container for up to a week—if they last that long! For an extra special touch, serve with a glass of cold milk or a cup of coffee. Honestly, I think they taste best when you share them with someone you love. My kids ask for seconds every single time.
What to Serve It With
Besides the obvious glass of milk, these peanut butter cookies go with just about everything. For breakfast, I love pairing one with a cup of rich coffee or a dollop of yogurt and fresh fruit. They also make a charming addition to brunch—stacked on a pretty plate with some sliced strawberries or a drizzle of honey. When it’s time for dessert, serve them with a scoop of vanilla ice cream, or dip half in melted chocolate for a decadent treat. On lazy afternoons, they’re perfect with a hot cup of tea and a cozy blanket. And my favorite—sharing a plate of these cookies during movie night, with everyone reaching in for seconds. Trust me; they’re just the right balance of sweet and nutty, and I guarantee they’ll bring a smile to everyone’s face.
Top Tips for Perfecting Your Peanut Butter Cookies
From years of baking these little delights, I’ve picked up some pro tips to make sure yours turn out just right:
- Zucchini Prep: I often add a tablespoon of grated zucchini for moisture — you’ll never taste it, but it makes the cookies even more tender. Just squeeze out excess moisture before mixing.
- Mixing Advice: Don’t overmix once you add the flour. Overmixing toughens the cookies. Mix until just combined and you’re good.
- Swirl Customization: Want fancy patterns? Use different shapes like mini rolls or flatten with a fork diagonally for a different look. You can even do a crisscross pattern with a fork dipped in cocoa powder for a moody twist.
- Ingredient Swaps: Almond or cashew butter work well if you’re allergic to peanuts. Just note they might change the flavor slightly. Use coconut sugar for a lower glycemic option—results will be slightly softer.
- Baking Tips: For extra crisp cookies, bake a minute longer or increase your oven temperature slightly. Keep an eye on the first batch to find your perfect timing.
- Glaze Variations: Instead of chocolate, you can dust the cooled cookies with powdered sugar or sprinkle with chopped nuts for a different texture.
Over the years, I’ve tried all sorts of tweaks—trust me, a little experimentation pays off. But honestly, the classic version remains my favorite. The key is gentle handling and patience—these cookies are worth every minute.
Storing and Reheating Tips
To keep your peanut butter cookies fresh and delicious:
- Room Temperature: Store in an airtight container for up to 5 days. Keep them covered to prevent them from drying out. They’re just as good on day 3 as they are fresh from the oven.
- Refrigerator Storage: If you’re making a big batch, pop them in an airtight container and refrigerate for up to a week. They might lose a little chewiness but will still taste fantastic. Warm them slightly in the microwave before serving for that freshly baked feel.
- Freezer Instructions: Wrap cookies tightly in plastic wrap, then store in a freezer bag for up to 3 months. To thaw, leave at room temperature or warm for a few seconds in the microwave. The texture stays pretty close to fresh, and it’s perfect for last-minute cravings.
- Glaze Timing: Add any toppings or drizzles after caramelization or cooling to prevent smudging. If you’re freezing the cookies with glaze, wait to apply the glaze until they’re fully thawed to keep the topping looking fresh.
This method keeps your cookies tasting just amazing, whether you’re enjoying them days later or pulling them out of the freezer for a spontaneous treat.
Frequently Asked Questions
Final Thoughts
If you’re searching for a cookie that hits all the right notes—rich peanut flavor, chewy moistness, and just the right amount of sweetness—this recipe is it. Over the years, I’ve baked these for school parties, cozy afternoons, and last-minute gatherings, and each time they’re met with happy smiles. The best part? They’re so easy, you’ll find yourself reaching for the ingredients without thinking twice. Once you get the hang of it, I bet you’ll start experimenting with add-ins and toppings—you see, these cookies are almost begging for a little creativity. So, gather your ingredients, turn on some good music, and enjoy the process. I promise, the smell alone will make everyone coming to the kitchen. Happy baking! And I’d love to hear how yours turn out—drop a comment, share your own twists, or just tell me about that first perfect batch. Nothing beats the joy of homemade cookies made with love.
Peanut Butter Cookies with Chocolate Chips
Ingredients
Method
- Preheat oven to 350°F. Line baking sheets with parchment paper.
- Cream together butter, peanut butter, and brown sugar until smooth. Mix in vanilla, egg, and milk. Add pudding mix and baking soda, mix well. Gradually add flour, then fold in chocolate chips and sprinkles.
- Scoop 2-tablespoon dough balls onto prepared baking sheets. Flatten slightly and, if desired, top with extra chocolate chips or sprinkles.
- Bake for 8-10 minutes until edges are lightly golden. While warm, press candy eyes on top if using. Let cool on wire racks before storing.