Easy Peanut Butter Fudge Recipe
There’s something about peanut butter fudge that’s like a warm hug from a childhood friend. I remember sitting at the kitchen table as a kid, watching my mom whip up batches of this creamy, melt-in-your-mouth treat. It’s one of those recipes that’s incredibly simple but secretly makes your taste buds do a little happy dance every time. Honestly, I’ve made this so many times I could do it with my eyes closed — and trust me, it’s always a hit. The smell alone, when that fudge starts setting, feels like baking heaven. Plus, it’s a lifesaver on busy nights when you’re craving something sweet but don’t want to turn on the oven or fuss with complicated desserts. This peanut butter fudge disappears in minutes at my house, and my kids ask for it all the time. I promise, once you try it, it’ll become a staple in your kitchen, too. If you love rich, nutty, chocolatey goodness, you’re in the right place. Ready to get your hands sticky and hearts happy? Let’s dive in!
What is peanut butter fudge?
Think of peanut butter fudge as a luscious, dense candy that combines the creamy richness of peanut butter with the sweet, velvety texture of fudge. It’s essentially a no-bake, melt-in-your-mouth treat that’s perfect for anytime you want something indulgent but fuss-free. The “fudge” part comes from a simple combination of sugar, butter, and sometimes chocolate, heated until silky smooth, then poured into a pan to set. The peanut butter is the star here, giving each bite a warm, nutty flavor that’s both comforting and addictive. The name might make you think of childhood snack bars, but this version is a little more grown-up — with a depth of flavor and a buttery finish that keeps you reaching for just one more piece. Whether you call it a candy, a treat, or just a really good excuse to indulge, peanut butter fudge is a timeless classic that always hits the spot.
Why you’ll love this recipe?
First off, your taste buds are going to thank you. The flavor combination of sweet, salty, and nutty is just pure perfection — it’s like a peanut butter cup’s grown-up, sophisticated sibling. The texture? Oh, it’s so smooth and fudgy you’ll wanna cut yourself a little slice and savor every bite. What I love most about this is how ridiculously easy it is to make — no fancy equipment, no lengthy baking times, just a few pantry staples and some melting magic. Plus, it’s super budget-friendly. You probably already have everything you need in your kitchen — sugar, butter, peanut butter, chocolate chips, maybe a splash of vanilla. And the best part? It’s totally versatile. You can add a sprinkle of sea salt for that perfect sweet-savory contrast, swirl in some caramel or chocolate, or even throw in crushed pretzels for a little crunch. I’ve tested this with dark, milk, and even natural peanut butter (trust me, natural works great!) and it keeps thing interesting. Honestly, I make this when I need a quick pick-me-up or a sweet thank-you gift — it’s pretty much the ultimate anytime treat. The smell alone, warming as it melts, will have everyone in your house heading straight to the kitchen. Trust me on this one. Once you taste how velvety and rich it is, you’ll wonder why you haven’t been making peanut butter fudge forever.
How do you make peanut butter fudge?
Quick Overview
This peanut butter fudge comes together faster than you can say “sweet tooth.” Basically, you melt butter and sugar together, stir in peanut butter and chocolate, then pour everything into a lined pan to set. The magic happens when you swirl in some extra peanut butter or chocolate for that marbled look and rich flavor. Once it’s cooled and firm, you cut it into squares and enjoy. No baking required! I love that you can customize this with different nuts, flavors, or toppings to match your mood or occasion. It’s a simple, satisfying recipe that’s perfect for busy days, holidays, or just whenever you need a little sweet escape.
Ingredients
For the Main Batter:
- 1 cup (2 sticks) unsalted butter, plus a little extra for greasing
- 2 cups granulated sugar
- 1 cup whole milk or cream (trust me, I tested it with almond milk and it’s just as creamy!)
- 1 teaspoon vanilla extract
For the Filling:
- 1 cup creamy peanut butter (chunky works too if you like a bit of texture)
For the Glaze:
- ½ cup semi-sweet chocolate chips (or your favorite dark chocolate)
- Optional: a pinch of sea salt or crushed peanuts for topping
Step-by-Step Instructions
Step 1: Preheat & Prep Pan
Start by lining a square baking pan (8×8 or 9×9) with parchment paper or foil. Lightly grease if needed to prevent sticking. This makes cleanup a breeze and helps you lift the fudge out neatly once set. Preheat your kitchen to get ready for melting magic!
Step 2: Mix Dry Ingredients
Not much here — just keep your ingredients organized. The key is having everything close by so you can work quickly once you start melting butter. No dry mixing needed for this part, but I do like to measure everything first to keep things smooth.
Step 3: Mix Wet Ingredients
In a medium saucepan, melt the butter over low heat. Once melted, stir in the sugar, milk, and vanilla. Keep stirring until everything is smooth and the mixture is just starting to boil — this helps build the rich fudge base. Trust me, patience here pays off!
Step 4: Combine
Reduce heat to low and add in your peanut butter and chocolate chips. Stir constantly until everything is perfectly smooth and glossy. It should look like a luscious chocolate-peanut butter sauce — silky and inviting. If it gets thick or starts to seize, just lower the heat a bit or add a splash more milk.
Step 5: Prepare Filling
Here’s where you get to customize! Warm the peanut butter slightly so it’s easy to swirl. If you want, melt a few chocolate chips for marbling or keep it plain. You can also add chopped nuts or a dash of cinnamon if you’re feeling adventurous.
Step 6: Layer & Swirl
Pour most of the fudge mixture into your prepared pan. Dollop the warm peanut butter on top in spoonfuls, then use a toothpick or skewer to swirl it gently through the fudge — creating beautiful marbled patterns. I love doing this because it looks fancy but is so easy.
Step 7: Bake
No oven needed! Just let the fudge cool at room temperature for about 2 hours or until firm. If you’re in a hurry, pop it in the fridge for 30-45 minutes. Just watch that it doesn’t get too hard before you cut — no one wants crumbled pieces!
Step 8: Cool & Glaze
Once set, melt your chocolate chips gently in the microwave or over a double boiler. Spread or dribble over the top for a shiny finish. Sprinkle with a tiny pinch of sea salt or chopped nuts if you like that sweet-salty combo. Allow it to cool fully so the glaze hardens before slicing.
Step 9: Slice & Serve
Lift the fudge out of the pan using the edges of your parchment. Use a sharp knife to cut into even squares. Remember to wipe the knife between cuts for clean edges. Serve with a glass of cold milk or a hot cup of coffee — honestly, nothing beats that combo. Store leftovers in an airtight container for up to a week — if they last that long!
What to Serve It With
Oh, the endless possibilities! For breakfast, break off a piece to pair with your morning coffee — I swear, it’s like a little slice of heaven. For brunch, serve alongside fresh fruit and a drizzle of honey. As a dessert, it’s perfect after dinner — just add a scoop of vanilla ice cream on the side for an indulgent twist. And for something cozy, pack a few squares into a small box for a sweet homemade gift — trust me, these disappear faster than you can say “delicious!” My family loves to crumble a bit of this fudge over ice cream sundaes or stack it into layered parfaits. It’s also fantastic crumbled over oatmeal or stirred into a mug of hot cocoa. Basically, this peanut butter fudge is my secret weapon for satisfying cravings — rich, satisfying, and totally addictive.
Top Tips for Perfecting Your Peanut Butter Fudge
Alright, I’ve learned a lot over the years making this fudge, so here are some insider tips:
Zucchini Prep: If you want to get a little sneaky with veggies, finely grate zucchini, squeeze out excess moisture with a paper towel, and fold it into your fudge mixture before pouring. It adds moisture without changing flavor — but I only do this if I want extra hidden nutrients!
Mixing Advice: Resist the temptation to overmix once you add the peanut butter and chocolate chips. Gentle stirring is key to keeping that smooth, fudgy texture. Overmixing can make the fudge grainy.
Swirl Customization: To get those beautiful marbled effects, dollop your peanut butter and run a skewer or knife through in swirling motion. For a cleaner look, work slowly and with confidence. Want more color? Mix in a few drops of food coloring into your peanut butter before swirling.
Ingredient Swaps: Out of chocolate chips? Try cocoa powder mixed into a little melted butter and sugar for a chocolate twist. Prefer almond or cashew butter? Go ahead! It’ll change the flavor but still turn out amazing. Just keep the ratio roughly the same.
Baking Tips: Even though there’s no actual baking, keep the fudge in a cool, dry place during setting. Too warm and it won’t set properly. If you’re in a humid climate, sticking it in the fridge speeds things up and keeps it firm.
Glaze Variations: For a different look, dust with powdered sugar after the chocolate glaze has cooled. Or press chopped nuts into the top while the glaze is still wet for a crunchy finish. Play around with flavor infusions — a splash of espresso or coconut extract makes a lovely addition.
One thing I’ve learned after endless test runs: patience is key. Let it set fully before slicing, and your pieces will come out neat and beautiful. Also, don’t be afraid to improvise — sometimes, I throw in a handful of crushed pretzels or mini marshmallows for extra fun. Trust your taste buds and embrace imperfections — that’s part of the magic.
Storing and Reheating Tips
This fudge keeps well, but a few tips make it even better:
Room Temperature: Store in an airtight container for up to 3 days. Keep out of direct sunlight, or it might get sticky or melt in summer heat.
Refrigerator: Wrap tightly in plastic wrap or store in an airtight container for up to 2 weeks. It firms up nicely and stays fresh. Just take it out a few minutes before serving so it softens a bit for that perfect melt-in-your-mouth feel.
Freezer: For longer storage, wrap tightly in plastic and foil, then freeze for up to 3 months. Let it thaw in the fridge or at room temp before slicing. It’s a great stash to keep on hand for unexpected guests or last-minute cravings.
Glaze Timing: If you’re adding extra glaze or toppings, do so after the fudge has fully cooled and set. It makes cleanup easier and keeps everything looking neat. For best results, reheat your melted chocolate slightly if it thickens — a quick 10-second zap in the microwave usually does the trick.
Frequently Asked Questions
Final Thoughts
This peanut butter fudge is one of those recipes I’d call a forever favorite. It’s incredibly forgiving, endlessly customizable, and so satisfying to make — not to mention a total crowd-pleaser. Every time I make it, I remember those lazy afternoons in my childhood kitchen, the smell of melting butter, and the anticipation of that first sweet bite. It’s funny how food has a way of bringing back those memories and creating new ones, isn’t it? If you try this, I’d love to hear how it turned out — did you swirl it more? Add some chopped pretzels? Make it into little gift boxes for friends? Whatever you do, I hope it brings a little joy to your day. Happy baking, friends! And don’t be shy — share your own variations or photos in the comments. I can’t wait to see what you create!
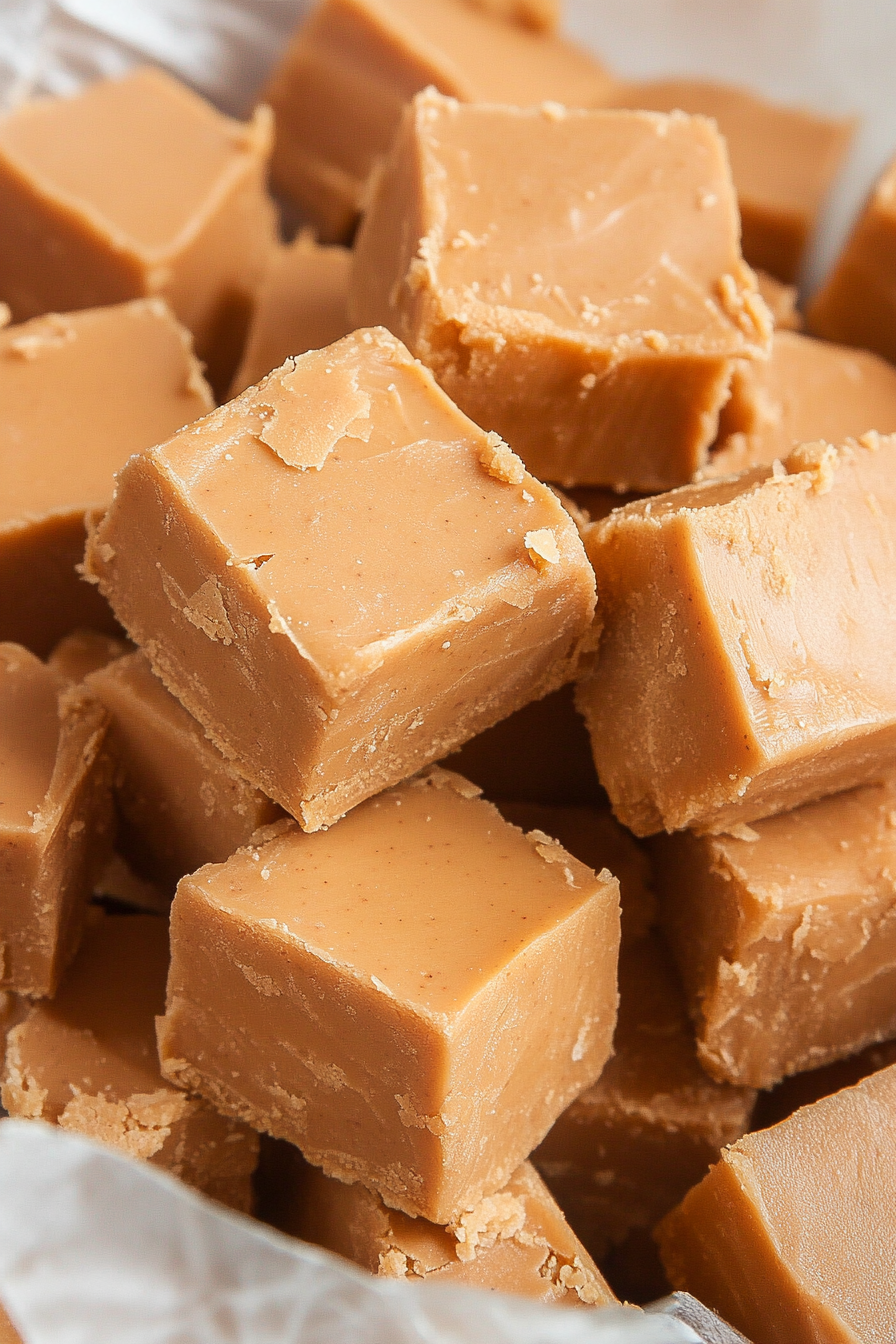
Creamy Peanut Butter Fudge
Ingredients
Method
- Combine the peanut butter, butter, and vanilla in a microwave-safe bowl. Microwave for 90 seconds, then stir until smooth and creamy. Gradually add powdered sugar, stirring thoroughly after each addition.
- Grease an 8x8 inch pan or line with parchment paper. Transfer the mixture into the pan and press evenly. Refrigerate for at least 4 hours before cutting into squares.