Easy Sweet Potato Crust Pizza Recipe
There’s just something about the smell of roasted sweet potatoes that instantly takes me back to cozy weekend mornings in my grandma’s kitchen. I remember sneaking bites of her sweet potato casserole, eyes wide with excitement, because who knew something so simple could taste so indulgent? Fast forward a few years, and I discovered that sweet potatoes aren’t just for sides — they make the most incredible base for a pizza that’s both comforting and a little unexpected. I always do this when I want a meal that feels like a warm hug but still keeps things fresh and exciting. Trust me, this sweet potato pizza is a total game-changer — it’s kind of like a healthier flatbread, packed with flavor, that disappears in minutes at my house. Whether you’re a vegetarian looking for something hearty or just craving a different take on pizza, this recipe hits all the right notes. Once you try it, you’ll be hooked — it’s honestly become a weekend staple for us, and my kids ask for it all the time. Ready to get into that warm, sweet, cheesy goodness?
What is sweet potato pizza?
Think of sweet potato pizza as a fun, creative way to use those lovely, vibrant tubers in a totally new dish. It’s essentially a pizza that uses mashed or processed sweet potatoes as the base instead of traditional dough. The idea started as a way to sneak more veggies into dinner but ended up becoming a thing of its own — a slightly sweet, savory crust that’s both gluten-free and completely customizable. The name “sweet potato pizza” might sound fancy, but it’s really just a delicious fusion of comfort food and wholesome ingredients. My version is a little more on the rustic side — think of it as a cross between a crispy flatbread and a thick, hearty toast. Plus, it’s a canvas for all kinds of toppings — from gooey cheese and herbs to roasted veggies and even bacon or plant-based proteins. It’s perfect for when you want something warm, satisfying, and a little different from your usual pizza night routine.
Why you’ll love this recipe?
Where do I even start? The flavor on this sweet potato pizza is like a warm hug — slightly sweet, with a hint of earthiness from the potatoes, complemented by savory toppings and melty cheese. It’s honestly a flavor combo I can’t get enough of, especially when I want something cozy but still a little nutritious. What I love most about this is how simple it is to make — no tricky kneading or pizza dough rolling needed. Just roast, mash, and spread! Plus, it’s budget-friendly. Sweet potatoes are super affordable, and you probably already have most of the toppings in your fridge. Another thing? It’s so versatile. Love spicy? Toss in some jalapeños or hot sauce. Want to go vegan? Use dairy-free cheese and skip the meat. It’s a blank canvas that’s easy to adapt, and that’s what makes it so appealing for busy weeknights or relaxed weekends. Honestly, I’ve made this more times than I can count, and it never fails to impress. My kids ask for seconds every time — I think it’s become one of our favorites because it’s just so satisfying, even without all the traditional pizza fuss.
How do you make a sweet potato pizza?
Quick Overview
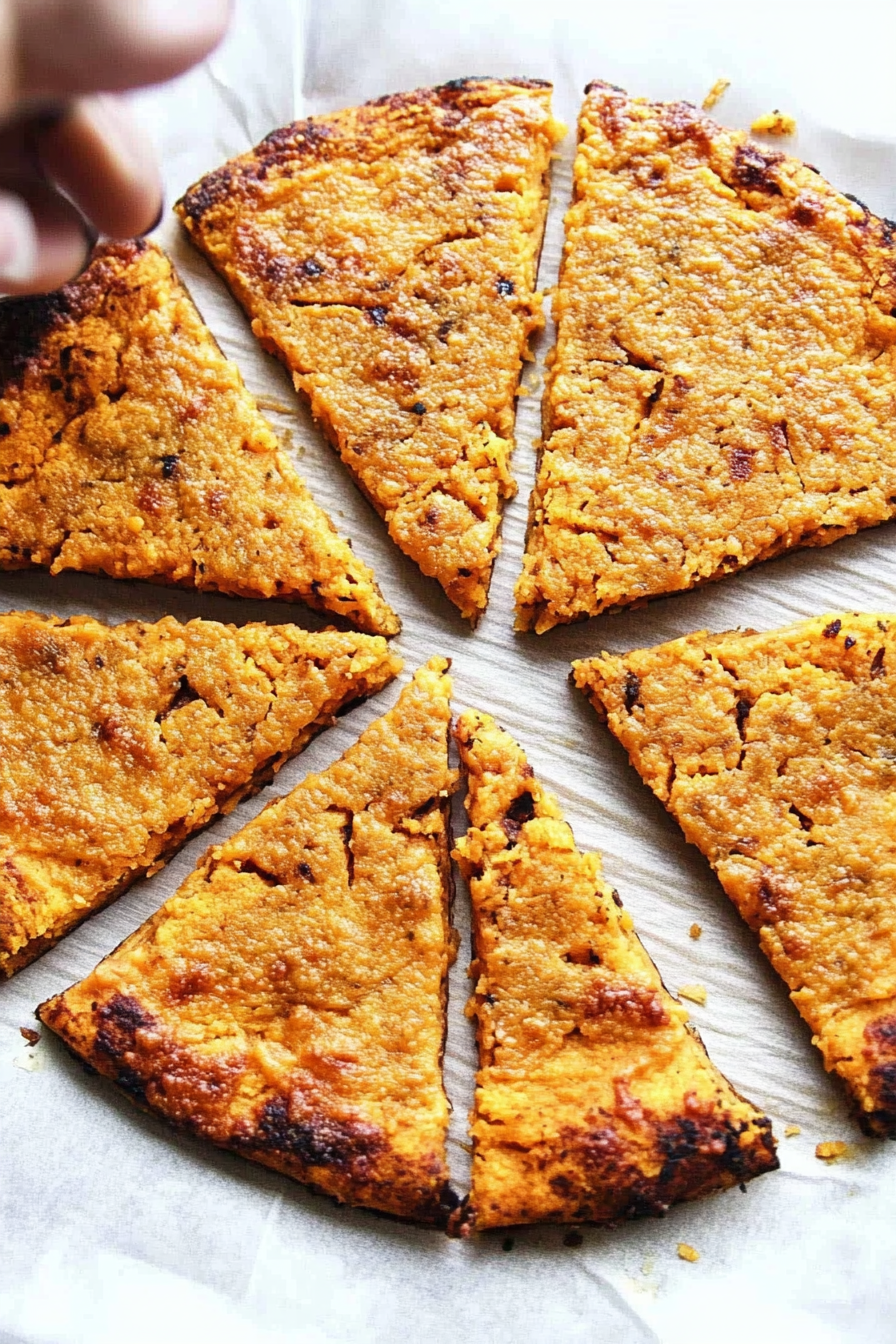
This sweet potato pizza comes together faster than ordering takeout. You start by roasting or boiling sweet potatoes until tender, then mash them into a smooth, slightly sticky dough-like mixture. Spread this onto a baking sheet or skillet, forming a thick crust. Pop it into a hot oven, and while it’s baking, prep your toppings — cheese, herbs, veggies, whatever you like. After the base firm enough to handle, layer your toppings, give it a sprinkle of cheese, and bake until bubbly. The whole process is straightforward, and because there’s no traditional dough involved, it’s perfect for when you’re craving something warm, flavorful, and just a little different. Plus, it’s really forgiving — once you get the hang of it, you’ll be customizing your own signature sweet potato pizza in no time.
Ingredients
For the Main Batter:
- 2 large sweet potatoes (about 1 to 1.5 pounds), roasted or boiled until very soft
- 1 large egg (or flax egg for vegan version)
- 1/4 cup shredded cheese (optional, for binding and flavor)
- Salt and pepper to taste
- 1/2 teaspoon garlic powder (or your favorite seasoning)
For the Filling:
- 1 cup shredded mozzarella or vegan cheese blend
- 1/2 cup cherry tomatoes, halved
- Fresh basil or arugula for topping
- Crumbled feta or vegan cheese, optional
- Cooked bacon bits or roasted chickpeas, optional for added crunch
For the Glaze:
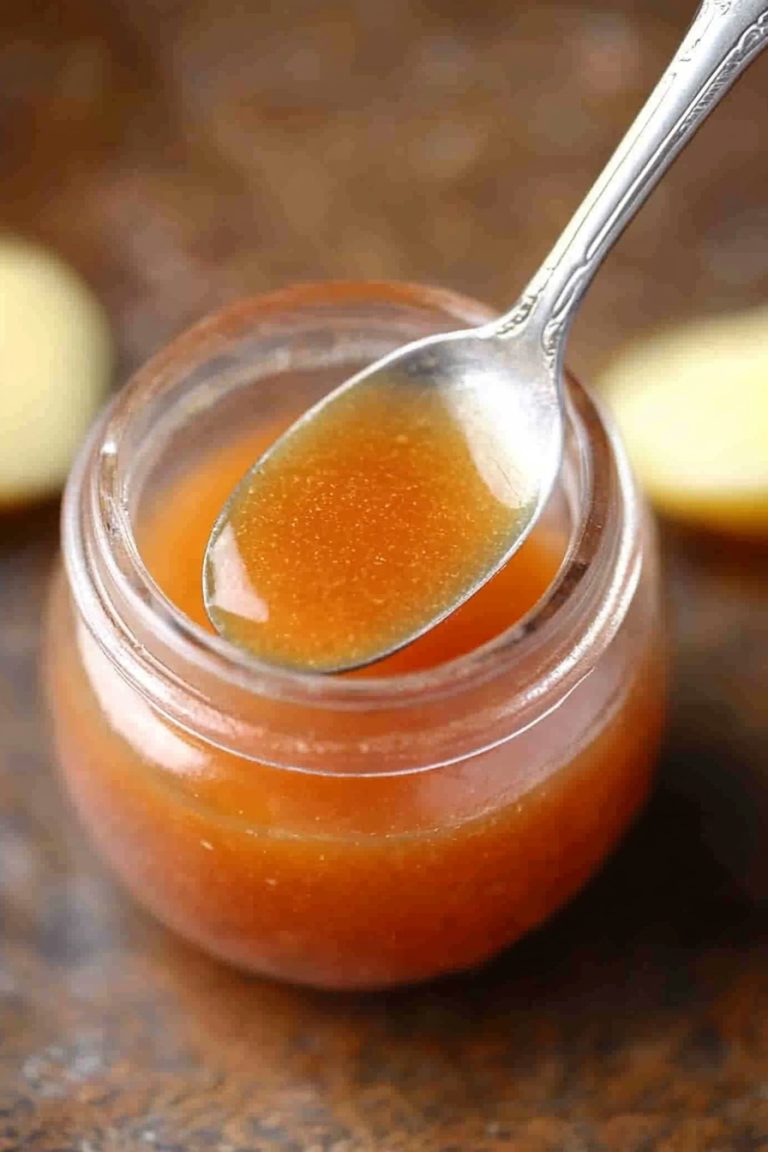
- Honey or maple syrup (just a light drizzle, optional)
- Olive oil for brushing (to help crisp the crust)
Step-by-Step Instructions
Step 1: Preheat & Prep Pan
Set your oven to 400°F (200°C). Line a baking sheet with parchment paper or lightly grease it. If you’re using a skillet, just give it a quick spray with cooking spray. Roasting sweet potatoes? Wrap them in foil and pop them in the oven for about 45 minutes until super soft, or boil them cut into chunks for about 15-20 minutes. Once cooked, let them cool just enough to handle.
Step 2: Mix Dry Ingredients
In a bowl, combine your seasonings — salt, pepper, garlic powder — and cheese if using. This helps evenly distribute those flavors into your base.
Step 3: Mix Wet Ingredients
Peel the sweet potatoes if you haven’t already. Mash them well with a fork or potato masher until smooth. If they’re still too sticky, sometimes a quick stir with your whisk or a splash of milk (dairy or plant-based) helps loosen things up. Mix in the egg, and cheese, and taste for seasoning.
Step 4: Combine
Add the dry ingredients into your mashed sweet potatoes and fold until everything is just combined. The mixture should be thick but spreadable. If it feels too loose, sprinkle in a little more cheese or a pinch of flour — it’s all about that doughy consistency that holds together on the baking sheet.
Step 5: Prepare Filling
While your base chills for a few minutes, grate your cheese and prep your toppings. Cherry tomatoes, herbs, cooked meats or plant-based proteins — whatever makes your dream pizza. I love adding fresh basil after baking for that perfect aromatic punch.
Step 6: Layer & Swirl
Spread your sweet potato mixture onto the baking sheet, forming a thick round or rectangle, about 1/2 inch thick. You want it to be even, but don’t worry if it’s rustic-looking — that’s part of the charm! Now, add your toppings — sprinkle cheese, arrange tomatoes, herbs, or whatever else you love. For a pretty marbled effect, sprinkle some cheese down in streaks and swirl gently with a toothpick or fork.
Step 7: Bake
Pop it into the oven and bake for about 20-25 minutes, or until the edges are golden and crispy. Keep an eye on it after 15 minutes — every oven is different. If you want a crunchier crust, broil it for the last 2-3 minutes, but watch closely so it doesn’t burn.
Step 8: Cool & Glaze
Let the pizza cool for about 5 minutes so it firms up a bit. If you’re using a glaze or drizzle, brush it on now — honey or olive oil for a glossy finish and extra flavor. It’s like the finishing touch that makes everything shine.
Step 9: Slice & Serve
Slice with a sharp knife and serve warm. I love garnishing with fresh herbs or even a squeeze of lemon for a little brightness. It’s best fresh but reheats beautifully — just pop slices in the oven or microwave as needed. Bonus points for serving with a crisp green salad or a chilled glass of white wine.
What to Serve It With
This sweet potato pizza is so flexible, you can serve it pretty much anytime. For breakfast, pair it with a strong cup of coffee and maybe some scrambled eggs — it’s like a veggie-infused brunch! During brunch, I love slicing it into wedges and serving with mimosas or fresh fruit. It’s equally fantastic as a snack or casual appetizer, especially when topped with a handful of microgreens or drizzled with balsamic glaze. As a dinner? Definitely serve it alongside a hearty salad or roasted vegetables. My family loves it with a side of roasted broccoli or a simple arugula salad with lemon vinaigrette. I’ve even taken leftovers to friends’ potlucks — it’s one of those dishes everyone seems to enjoy, especially because of that perfect balance of sweet and savory. My kids think it’s a treat, and honestly, I feel good about serving them something nourishing but still totally indulgent. It’s a win all around.
Top Tips for Perfecting Your Sweet Potato Pizza
Over the years, I’ve learned a few tricks to make this the most delicious version every time. First, when roasting sweet potatoes, don’t skip piercing the skin and poking holes — it releases steam and prevents explosions in the oven! I tested this recipe with both plain sweet potatoes and sweet baby Yukon Golds — both work well, but the darker orange spuds give a richer flavor. When mashing, try to get the smoothest consistency possible because lumps can make spreading tricky. I always do this trick after years of frustration: add just a little bit of grated cheese into your base — it helps with binding and adds flavor. Oh, and about toppings — I like to keep it simple, but don’t be afraid to experiment. I once added roasted red peppers and thyme, and wow — total game-changer. For a crispier crust, bake on the middle rack and avoid overcrowding your oven. Also, don’t skip the cooling step after baking; it helps set the shape and makes slicing easier. If you want to make it ahead, fully bake and cool, then reheat in the oven to keep that crispy edge. A light drizzle of honey or balsamic reduction right before serving takes it from good to fabulous. And a little tip — trust me, once it’s baked, adding fresh herbs on top makes it pop with freshness.
Storing and Reheating Tips
This really depends on how soon you want to enjoy leftovers. If you’re having it the same day, I recommend letting it cool completely and then covering it loosely with foil or plastic wrap. It stays fresh for about 1-2 days in the fridge. Just pop individual slices in the microwave for about 30 seconds or reheat in the oven at 350°F (175°C) for around 10 minutes until crispy again. Freezing works too — tightly wrap slices or portions wrapped in foil, then store for up to 3 months. To reheat from frozen, bake at 375°F (190°C) for about 15-20 minutes, or until bubbling and heated through. I wouldn’t recommend freezing before baking, as the texture can get a little soft, but I’ve done it successfully after baking. For best results, add your glaze or fresh herbs after reheating, not before, to keep everything looking fresh and vibrant. Trust me, this can be a lifesaver on busy nights or when you want to enjoy the same warm comfort days later.
Frequently Asked Questions
Final Thoughts
Honestly, I can’t rave enough about sweet potato pizza. It’s one of those recipes that makes you feel like a genius in the kitchen, even when you’re just winging it. The blend of sweetness and savory toppings is so satisfying, and because the crust is made from wholesome sweet potatoes, it feels like a treat you can actually feel good about. I’ve made this for friends during casual dinners, and every single time, people are surprised at how flavorful and comforting it is — it’s like a secret that everyone loves discovering. Plus, it’s a fantastic way to use up leftover sweet potatoes or roasted veggies. If you’re craving comfort food that’s bold, fresh, and easy, give this sweet potato pizza a shot. I promise, once you taste it, you’ll be hooked— and I’d love to hear your variations! Happy baking, and don’t forget to share your photos or tips in the comments. Can’t wait to see how yours turns out!
Sweet Potato Pizza
Ingredients
Method
- Preheat oven to 400 degrees. Pulse the sweet potato and oats through the food processor until very fine. Add the egg, garlic powder, and salt; pulse again to mix. The mixture should resemble a loose dough or thick batter.
- Transfer to a parchment-lined baking sheet or round pizza pan. Press into crusts and shape with your hands – you can make two smaller crusts or one larger crust. Crusts should be about 1/4 to 1/2 inch thick.
- Bake for 25-30 minutes, until the top is dry to the touch. Remove from oven, let cool, and invert back onto the pan with the dry side facing down. Peel the parchment very gently off the top layer and brush with olive oil. Bake for another 5-10 minutes to get a crispy top.
- Top with your favorite pizza toppings and return to the oven to melt cheese. Serve hot.