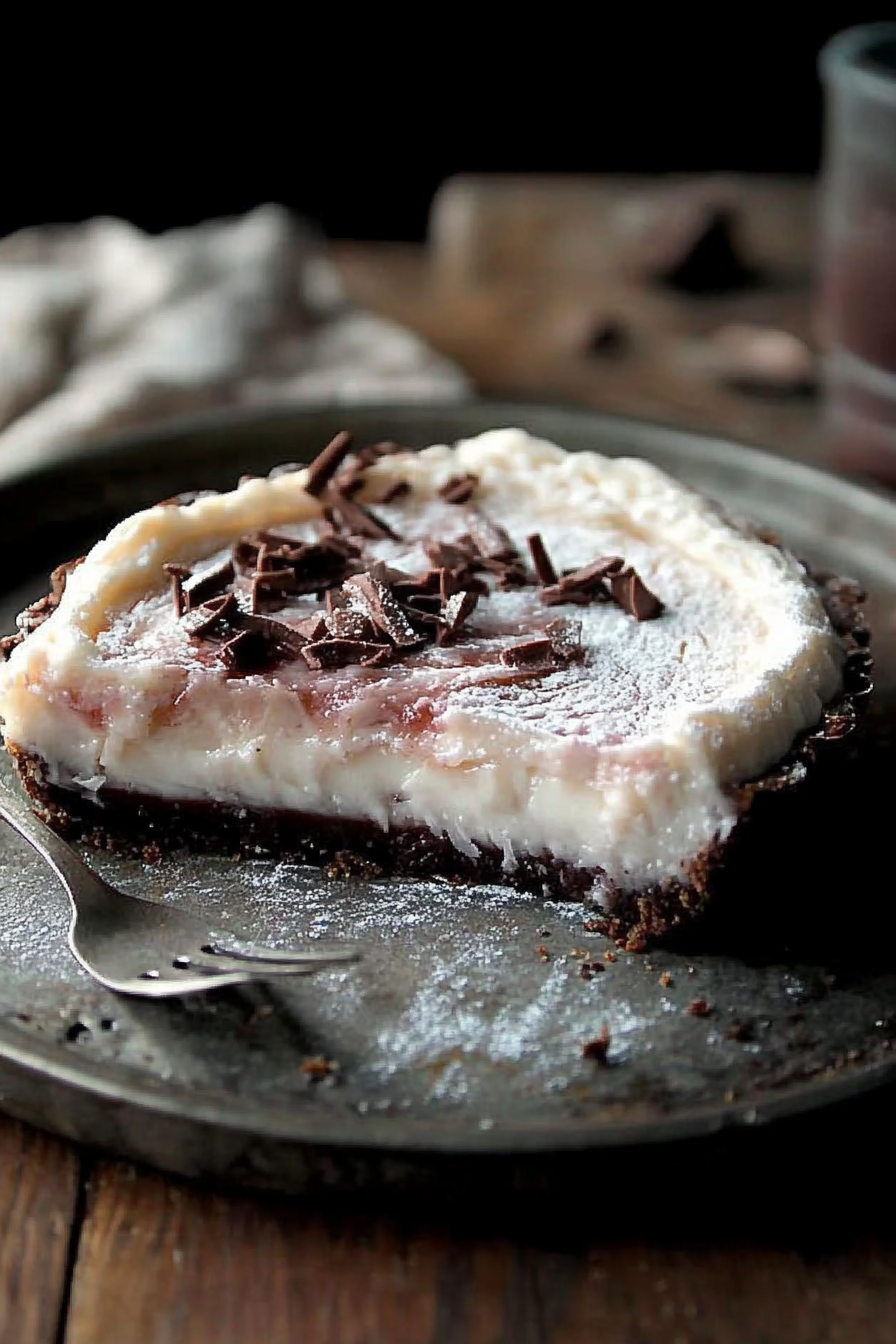
Silky French Tart How to Make It Easy
There’s just something about a French tart that feels fancy but is so unexpectedly simple to make at home. I remember the first time I tasted a perfectly baked French tart at a tiny boulangerie in Paris — the buttery crust, the silky filling, and that delicate glaze that made it shimmer under the morning sun. It’s one of those desserts that instantly transports me back to slow mornings sipping coffee in a sun-drenched Parisian café. I always do this when I want to impress friends or just indulge myself, and honestly, it’s one of my go-to recipes when I need a sweet dose of elegance without hours of baking. Trust me, once you get the hang of it, it’s a real showstopper that disappears in minutes at my house. And the best part? You can customize the filling and toppings to suit any mood or occasion, making it a truly versatile favorite.
What is French Tart?
A French tart is essentially a classic pastry dish with a crisp, flaky crust and a smooth, often rich filling. Think of it as the French version of a pie but a bit more refined — usually smaller, prettier, and with just the right balance of crunchy crust and luscious topping. The name “tart” actually comes from the French word “tarte,” which means “pie,” but here, it’s more about that delicate, elegant presentation. The base is typically made with a tender pastry dough called pâte sablée or pâte brisée, which is buttery and crumbly but holds up beautifully when filled. The fillings can vary from fruit compotes and custards to creamy cheesecakes or even savory ingredients. But what makes a French tart truly special is how it balances flavors and textures — a crisp crust that gives way to a creamy, sometimes tangy filling, topped with glazes, fruit slices, or nuts for that perfect finishing touch. It’s essentially a little piece of artistry you can enjoy with your afternoon tea or after dinner.
Why you’ll love this recipe?
What I love most about this French tart is how it combines elegance with simplicity — perfect for both a quick treat and a show-stopping dessert. The smell alone when you’re baking it is enough to draw everyone into the kitchen, a warm buttery aroma with hints of sugar and vanilla that just makes your home feel cozy. The crust is what I consider my secret weapon: flaky, tender, and just sweet enough to complement whatever filling you choose. Speaking of fillings, I’ve tested this with everything from a classic lemon curd to a jammy raspberry compote, and each turn out irresistibly good. Plus, it’s budget-friendly since it relies on pantry staples like butter, flour, eggs, and sugar, and you can even prepare the crust ahead of time. What’s even better? You can customize it endlessly — add fresh berries for summer, caramelized apples for fall, or a dusting of powdered sugar for a quick, elegant finish. If you love desserts that look as good as they taste, this French tart is a real winner. It’s a perfect balance of buttery, crunchy crust and luscious filling, and it’s so forgiving — I’ve made it on busy weeknights and still gotten rave reviews. My kids ask for this all the time, and I swear, it’s a recipe I could make in my sleep now. It’s really become a family favorite, and I hope you’ll enjoy it just as much!
How do I make French Tart?
Quick Overview
Making a French tart might sound fancy, but once you get the hang of the crust, it’s a breeze. The trick is to keep the dough cold and handle it as little as possible so it stays flaky. Start with a buttery pastry — you can make it by hand or in a food processor — then press it into your tart pan and prebake just enough to set. While that’s baking, whip up your filling — whether it’s a smooth lemon curd or a luscious custard — and pour it into the crust once it’s cooled slightly. Bake again until the filling is just set, then let it cool completely before glazing or decorating. The whole process takes about 1.5 hours, but most of that is waiting time, and you’ll be rewarded with a gorgeous, delicious French tart that’s actually easier than it looks.
Ingredients
For the main battery (crust):
– 1 1/4 cups (150g) all-purpose flour — I always opt for unbleached for a richer flavor
– 1/2 cup (115g) unsalted butter, cold and cubed — quality butter makes all the difference
– 1/4 cup (50g) granulated sugar — don’t skip this, it adds just enough sweetness
– 1 large egg — room temperature is best
– A pinch of salt — to balance the richness
For the Filling:
– 1 cup (240ml) lemon juice and zest, if making lemon tart (trust me, fresh lemon makes all the difference)
– 1/2 cup (100g) sugar
– 3 large eggs
– 1/2 cup (120ml) heavy cream or a splash of almond milk for a lighter touch
– 2 tablespoons all-purpose flour or cornstarch (optional, for thicker custard)
– Vanilla extract or other flavorings, if desired
For the Glaze:
– Apricot jam heated and strained, or a simple dusting of powdered sugar
– A splash of water or lemon juice to thin the glaze if needed
Step-by-Step Instructions
Step 1: Preheat & Prep Pan
Set your oven to 375°F (190°C). Lightly butter or spray your tart pan and set aside. I love using a removable bottom tart pan for easy slicing, but a regular one works just as well. If you have time, chilling the pan for 10 minutes helps the crust bake more evenly and stay crisp. Also, don’t forget to line the bottom with parchment for easy removal.
Step 2: Mix Dry Ingredients
In a mixing bowl or food processor, combine the flour, sugar, and salt. Pulse a few times if using a machine. This ensures even distribution of the ingredients and gives your crust that crumbly texture. It’s easy to overmix at this stage, so be gentle. You want the mixture to resemble coarse crumbs before adding the butter.
Step 3: Mix Wet Ingredients
In a small bowl, whisk together the egg and vanilla. Keep everything at room temp for a smooth mix. The cold butter will help create that tender, flaky crust—so don’t worry if your kitchen is warm. If using a food processor, add the cold butter and pulse until the mixture looks like coarse crumbs. If doing by hand, quickly rub the butter into the flour with your fingertips until it resembles breadcrumbs.
Step 4: Combine
Add the egg mixture to the dry ingredients and gently mix until just combined. It may look crumbly, but if you press it together with your hands, it should hold. Don’t overwork the dough — overmixing toughens the crust. Form it into a disk, wrap in plastic, and chill for at least 30 minutes.
Step 5: Prepare Filling
If making a lemon tart, mix your lemon juice, zest, sugar, eggs, and cream in a bowl. Whisk until smooth, then stir in the flour slowly if you want a thicker filling — I prefer mine silky, so I skip the flour sometimes. For other flavors, get creative — berries, chocolate, nut spreads, you name it!
Step 6: Layer & Swirl
Once the crust is chilled, roll it out gently on a floured surface to about 1/8 inch thick. Fit the dough into your pan, trimming excess, then poke a few holes with a fork to prevent bubbling. Pour in your prepared filling; if you’re layering with fruit or toppings, add them now. For that marbled effect, I love dolloping spoonfuls of jam or fruit compote and swirling with a toothpick.
Step 7: Bake
Bake at 375°F for about 25-30 minutes, until the filling is just set and the crust is golden. Keep an eye on it — if the edges brown too quickly, tent with foil. The filling should jiggle just slightly in the center when you shake the pan. Cool on a wire rack for at least 30 minutes before glazing.
Step 8: Cool & Glaze
Once cooled, warm your jam or glaze, strain to remove any solids, and brush the top for a beautiful shine. I love doing this when the tart is just at room temperature for that restaurant-perfect gloss. Alternatively, dust with powdered sugar for a simpler finish. The aroma of that sweet, shiny topping will make everyone anticipate their first bite!
Step 9: Slice & Serve
Use a sharp knife to cut through the tart with a gentle sawing motion — patience is key to keeping those beautiful layers intact. Serve it slightly chilled or at room temp. Pair it with a dollop of whipped cream or a small scoop of vanilla ice cream if you’re feeling indulgent. Presentation-wise, a sprinkle of fresh berries or mint leaves adds a pop of color and freshness.
What to Serve It With
This French tart is truly versatile. In the mornings, it’s delightful with a strong black coffee or a frothy latte — the zing of lemon or fruit balances that bitter bite perfectly. On weekends or special brunches, serve slices with a side of fresh fruit and a glass of chilled Prosecco or sparkling wine. When I’m craving sinfully sweet dessert, I go all out with whipped cream and a drizzle of chocolate sauce. My family loves it after dinner, especially when I top their slices with a tiny spoonful of berry compote or caramelized nuts — that crunch adds a playful texture. And honestly, it’s so good that sometimes, I’ll just nibble on a piece with my afternoon tea in sweatpants. It’s comfort food with a chic twist, and every time I make it, I feel like I’m channeling a little Parisian café right in my own kitchen.
Top Tips for Perfecting Your French Tart
Having made this a dozen times, I’ve learned a few tricks to ensure it always turns out just right. First, keep your butter cold — I even pop my butter in the freezer for a few minutes before mixing. It makes a huge difference in how flaky the crust gets. When mixing the dough, handle it as little as possible; overworking can toughen the crust, and nobody wants a chewy tart base. Trust me on this: if the dough cracks when you roll it out, just press it into the pan gently and patch it up with scraps. For the fillings, use fresh lemons or berries whenever you can; frozen works in a pinch, but fresh gives that bright, vibrant flavor. Swirling jam or fruit into the filling before baking creates beautiful marbled effects, but don’t overdo it — the layers should be distinct, not a muddled mess. Baking each tart on the middle rack ensures even heat; if your oven runs hot, tent the edges to prevent over-browning. One thing I’ve tested — adding a small amount of almond flour to the crust gives it a nuttier flavor without sacrificing texture. If you want to make this gluten-free, swap the all-purpose flour for a blend of almond and rice flour, but be aware the texture will change slightly. As for glazing, a quick brush with warmed jam gives a shiny, professional look, but you can also skip it for a more rustic vibe. My biggest lesson? Let the tart cool completely before slicing. Warm slices tend to fall apart, and honestly, the flavors settle better once it’s rested.
Storing and Reheating Tips
This tart is definitely best enjoyed fresh, but leftovers can be stored easily. If you’re not planning to eat it all at once, wrap it tightly in plastic wrap or store it in an airtight container. At room temperature, it’ll stay good for about a day or two — but I find it’s best to cover loosely to keep the crust crisp. If you want to keep it longer, pop it into the fridge, and it should be good for up to 3 days. Just keep in mind, refrigeration can make the crust a little softer, so if you want crispy edges the next day, pop slices in a hot oven or toaster oven for a few minutes before serving. For freezing, wrap the whole tart tightly with plastic wrap, then foil — it can last up to a month. To reheat, let it thaw overnight in the fridge, then warm gently in a low oven. If you’ve added a glaze or fruit topping, consider waiting to brush or add those until just before serving if you’re storing for longer. And remember: the flavor is always best when served at room temperature or slightly chilled, so patience pays off with this one.
Frequently Asked Questions
Final Thoughts
This French tart has become one of those recipes I turn to whenever I want a little slice of Paris in my own kitchen. Its perfect balance of buttery, flaky crust and sweet, vibrant filling makes it a true comfort — yet it also feels quite refined, even when whipped up in a hurry. Over the years, I’ve played with different fillings, toppings, and crust tweaks, and I can honestly say this recipe is a foundational masterpiece that never fails. The smell alone when it’s baking invites everyone to the kitchen, and I’ve learned that patience—letting it cool completely before slicing—is what makes it look as pretty as it tastes. If you love baking, experimenting, and sharing a piece of happiness with loved ones, I highly recommend giving this a try. Once you master it, I promise it’ll become a staple in your baking repertoire. Happy baking! And I can’t wait to hear how yours turns out — comment below with your favorite filling or any tweaks you try. Enjoy every buttery bite!
French Fruit Tart
Ingredients
Method
- Preheat oven to 350°F. Mix butter, flour, and sugar until crumbly. Press into a tart pan and bake for 15 minutes. Let cool.
- Beat cream cheese until smooth, then fold in the whipped cream. Spread the filling evenly over the cooled crust.
- Arrange fresh fruits on top of the filling in a decorative pattern. Drizzle honey over the fruits.
- Refrigerate for at least 2 hours before serving. Garnish with mint leaves if desired.