Simple Scandinavian Apple Pie Recipe
There’s something so comforting about a homemade apple pie, right? I remember sneaking into my grandma’s kitchen on chilly fall afternoons, the sweet aroma of caramelized apples and cinnamon filling the air. Over the years, I’ve come to realize that a truly unforgettable apple pie doesn’t have to be complicated — take this Swedish apple pie, for example. It’s a simple, rustic beauty that’s packed with flavor, and honestly, it’s one of those recipes that makes my home smell like childhood comfort whenever I bake it. My kids ask for this all the time, and I always do this when I want something cozy and sweet, but with a little Nordic twist. If you’re into those nostalgic baked desserts that hit all the right notes, stick around — you’re going to love how easy and delicious this one is.
What is Swedish Apple Pie?
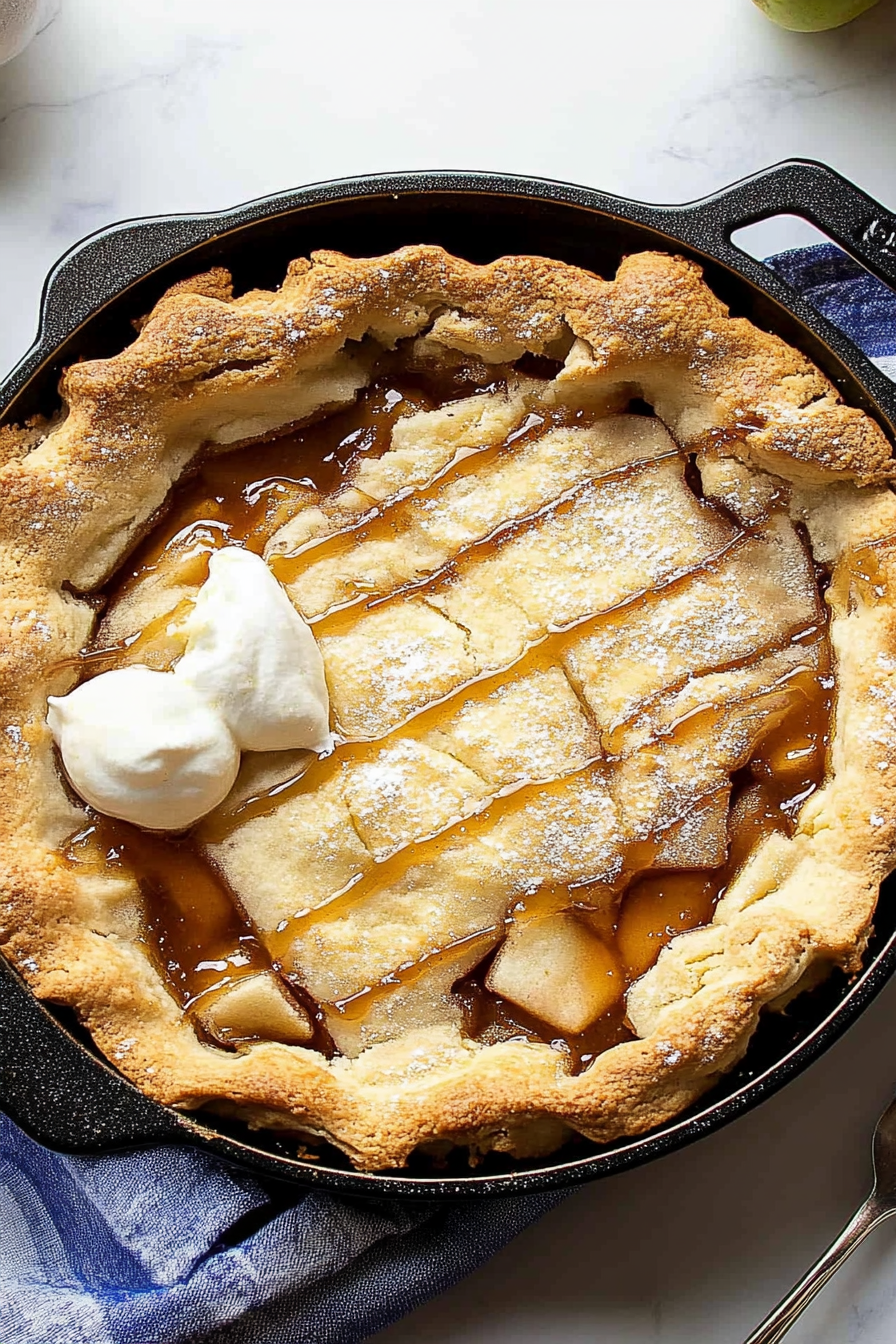
Swedish apple pie, or Swedish apple pie, is a Swedish dessert.äppelpaj as the Swedes call it, is a humble yet utterly satisfying dessert. Think of it as a cross between an apple crisp and a simple tart — it’s essentially a buttery, crumbly crust topped with sweet-tart sliced apples, baked until bubbly and golden. What makes it special is the extra dash of cinnamon and that flaky, slightly caramelized topping that’s just crispy enough to be addictive. It’s called a “pie,” but really, it’s more like a rustic, fruit-filled crumble with a Scandinavian flair. The best part? It’s incredibly straightforward — no fancy pie crusts or complicated layering required. Just good apples, a handful of pantry staples, and a little love, and you’re good to go.
Why you’ll love this recipe?
Let me tell you, this Swedish apple pie is a total winner — and it’s what I turn to when I want something that’s both simple and utterly delicious. What I love most about this is how the flavors meld together naturally. The apples are tangy and sweet, with a hint of cinnamon that warms your soul, while the topping is buttery and crumbly, almost like a cross between shortbread and granola. It’s not overly sweet, so you get that lovely balance of fruitiness and richness. Plus, it costs hardly anything to make — just a few pantry staples that I always keep on hand. My whole family devours this in minutes, especially when I add a scoop of vanilla ice cream on top. It’s versatile too — serve it warm with whipped cream for a cozy winter dessert or with a dollop of Greek yogurt for a lighter breakfast treat. Honestly, what’s not to love?
This one’s a lifesaver on busy nights when you need something quickly but crave that homemade touch. I’ve tested it with different apple varieties, like tart Granny Smiths or sweet Fuji, and each gives a slightly different flavor profile, so feel free to experiment. Every time I make it, it reminds me of those lazy Sunday afternoons when I’d bake with my grandma, sharing stories over a steaming mug of coffee. It’s one of those recipes that becomes a mini tradition in your house — and trust me, once you’ve made it once, it’s definitely going into your regular rotation.
How do I make Swedish Apple Pie?
Quick Overview
This Swedish apple pie couldn’t be easier. You start with sliced apples layered in a buttered baking dish, sprinkle with cinnamon and sugar, then top with a buttery, crumbly mixture made from flour, sugar, and butter. Bake until everything’s bubbling and golden, then finish with a quick glaze if you like. The trick is in the layering — I like to arrange the apples so they’re a little nested, creating a stunning marbled effect when you cut into it. It’s a straightforward process that’s perfect for busy weeknights or lazy weekends — no fuss, just pure cozy goodness.
Ingredients
For the Main Batter:
- 1 ½ cups all-purpose flour (preferably organic or unbleached for the best flavor)
- ¾ cup granulated sugar (or a little less if your apples are super sweet)
- ½ teaspoon baking powder (to give it that slight lift)
- ½ teaspoon salt (brings out all the flavors)
- 1 teaspoon ground cinnamon (trust me, it makes all the difference)
- ½ cup unsalted butter, cold and cubed (preferably European style for extra flavor)
For the Filling:
- 4-5 medium apples (Granny Smith, Fuji, or Honeycrisp work beautifully)
- 2 tablespoons granulated sugar
- 1 teaspoon ground cinnamon
- Optional: a squeeze of lemon juice (to keep the apples from browning and add brightness)
For the Glaze (Optional but recommended):
- ½ cup powdered sugar
- 1-2 teaspoons milk or lemon juice
- Additional cinnamon or vanilla extract for flavor enhancement
Step-by-Step Instructions
Step 1: Preheat & Prep Pan
Set your oven to 375°F (190°C) and butter a baking dish — I usually use a 9-inch round or square pan. Make sure to grease it well so nothing sticks, especially if you’re using a non-stick one that’s seen a few years of action. This is your moment to get all your ingredients ready and within arm’s reach, so everything goes smoothly.
Step 2: Mix Dry Ingredients
In a large bowl, whisk together the flour, sugar, baking powder, salt, and cinnamon. I like doing this first because it evenly distributes everything. The smell of cinnamon at this stage is pretty irresistible—already making your kitchen smell like a cozy bakery.
Step 3: Mix Wet Ingredients
In a small bowl, melt the butter just until soft — no need to be exact, but don’t get it too hot. Add it to your dry mix (the bowl with flour), and stir with a fork or your fingertips until you get a crumbly, coarse mixture — kind of like big breadcrumb crumbs. This topping is my absolute favorite part. Sometimes I add a handful of oats or chopped nuts for extra crunch, but classic is just fine.
Step 4: Combine
In a separate bowl, toss the sliced apples with sugar, cinnamon, and lemon juice. Spread the apples evenly in your prepared dish. Then sprinkle the crumbly topping over the apples, gently pressing it down with your fingers so it sticks a little — this helps it bake up nice and crispy.
Step 5: Prepare Filling
If your apples are super juicy, you can sprinkle a little more sugar over the top or add a tiny bit of cornstarch to thicken the juices. I like to keep it simple — just enough to get that caramelization effect when they bake.
Step 6: Layer & Swirl
For an extra beautiful effect, I sometimes add a few more apple slices on top and give a light swirl with a skewer or knife to create a marbled look. It’s not necessary, but it just looks so charming when served.
Step 7: Bake
Pop it into the oven and bake for about 40–45 minutes, or until the top looks golden brown and the apples are bubbling at the edges. If you notice it browning too fast, tent it loosely with foil. Every oven is different, so start checking around the 38-minute mark. The smell alone will have everyone in the house peering over your shoulder!
Step 8: Cool & Glaze
Let the pie cool slightly — about 10 minutes — to let the juices settle. If you’re using the glaze, whisk together powdered sugar with milk or lemon juice until smooth, then drizzle it over the warm pie. This adds a lovely sweetness and a shiny finish that makes it look like it came straight from a bakery window.
Step 9: Slice & Serve
Serve slices warm or at room temperature, maybe with a scoop of vanilla ice cream or a dollop of whipped cream. For a more rustic feel, just cut wedges directly from the dish. The apples should be tender but still hold their shape, and the topping should be crisp and buttery. Honestly, I can’t think of a better way to end a cozy meal or to wind down after a busy day.
What to Serve It With
This Swedish apple pie is versatile enough to shine at breakfast, brunch, or dessert. For breakfast, serve it with a dollop of Greek yogurt and a drizzle of honey — it’s a little sweet, a little tangy, and super satisfying. At brunch, I love it paired with a strong cup of coffee or tea, maybe with some crispy bacon on the side. If you’re treating it as dessert, a scoop of vanilla ice cream or softly whipped cream is perfect — the cold and creamy contrast makes every bite a delight. And for those casual afternoons, it’s just as good on a plate with a mug of hot cider or tea while you unwind. A little sprinkle of cinnamon or a few chopped nuts on top doesn’t hurt either — it’s my secret trick for that extra crunch and warmth.
We have a tradition in my family: every fall, I bake a batch of this pie, and it instantly turns into a small celebration. My kids always ask for seconds, and honestly, I get why — it’s like a warm hug in pie form. Trust me, once you’ve made this Swedish apple pie, it’ll become a go-to comfort dessert that never gets old.
Top Tips for Perfecting Your Swedish Apple Pie
If you want to make this pie completely fail-proof, here are a few tricks I’ve picked up along the way:
- Zucchini prep: Just kidding — no zucchini here! But if you want to add a little extra moisture or texture, diced pear or a handful of chopped nuts can be fun add-ins.
- Mixing advice: Don’t overwork your crumbly topping. It should look and feel like coarse breadcrumbs — this is what makes it crispy and buttery.
- Swirl customization: To get that beautiful swirl effect, reserve a few apple slices to lay on top, then gently swirl with a skewer or knife before baking. It’s all about that rustic, imperfect charm.
- Ingredient swaps: Want a healthier version? Use coconut sugar or whole wheat flour for the topping. I tested it with almond flour, and it’s surprisingly tasty — just keep an eye on the texture and bake a touch longer.
- Baking tips: Always check your pie a few minutes early if your oven runs hot. The top should be golden, and the filling bubbling around the edges. If you’re unsure, insert a toothpick — if it comes out clean with just a bit of juice, it’s ready.
- Glaze variations: For a different flavor kick, try mixing in a dash of vanilla extract or a splash of bourbon into your glaze. The options are endless, and these little upgrades make a big difference.
Honestly, baking is about experimenting and adjusting to your taste, and this recipe has been my tried-and-true for years. I encourage you to add your personal touch — maybe a handful of chopped pecans or a sprinkle of sea salt on top before baking. Trust me, that little saltiness balances out the sweetness beautifully.
Storing and Reheating Tips
This pie keeps well for a day or two, especially if stored in an airtight container. At room temperature, it’s best to enjoy it within 24 hours to keep that crisp topping. If you want to make it ahead, refrigerate it in a covered dish — it might soften a little, but it still tastes amazing. To reheat, just warm individual slices in the microwave or oven until bubbly and fragrant again. If you add the glaze later, it’s best to do it just before serving so it stays shiny and fresh.
If you want to freeze the whole pie, wrap it tightly in foil or store in a freezer-safe container for up to three months. Thaw it overnight in the fridge and warm gently before serving. Keep in mind, freezers can sometimes make the topping a bit softer, but trust me — it’s still just as delicious.
Frequently Asked Questions
Final Thoughts
This Swedish apple pie has become one of those recipes I turn to again and again—whether it’s a cozy night in, a family gathering, or just a simple treat to brighten up my day. It’s a perfect blend of rustic charm and homey goodness that I think everyone should try. The scent alone will make your house feel like a Scandinavian retreat, and I promise, the taste will bring smiles all around. Once you’ve baked it once, I bet it’ll be part of your regular dessert lineup — it’s just that good. Don’t forget to leave a comment below if you try it out or tweak the recipe to make it your own. I’d love to hear about your favorite variations or toppings! Happy baking, and enjoy every bite of this warm, comforting Swedish apple pie — you’ve officially got a new family favorite.
Swedish Apple Pie
Ingredients
Method
- Preheat oven to 350°F and spray a 9-inch oven-safe skillet with nonstick cooking spray.
- In a large bowl, combine sliced apples with sugar and cinnamon. Toss until evenly coated. Pour into prepared pie pan.
- In a medium bowl, mix melted butter, egg, sugar, and flour until creamy.
- Spread the mixture evenly over the apples in the pan.
- Bake for 60 minutes or until the top is golden and apples are tender.
- Let the pie cool slightly before serving. Optionally, top with ice cream.