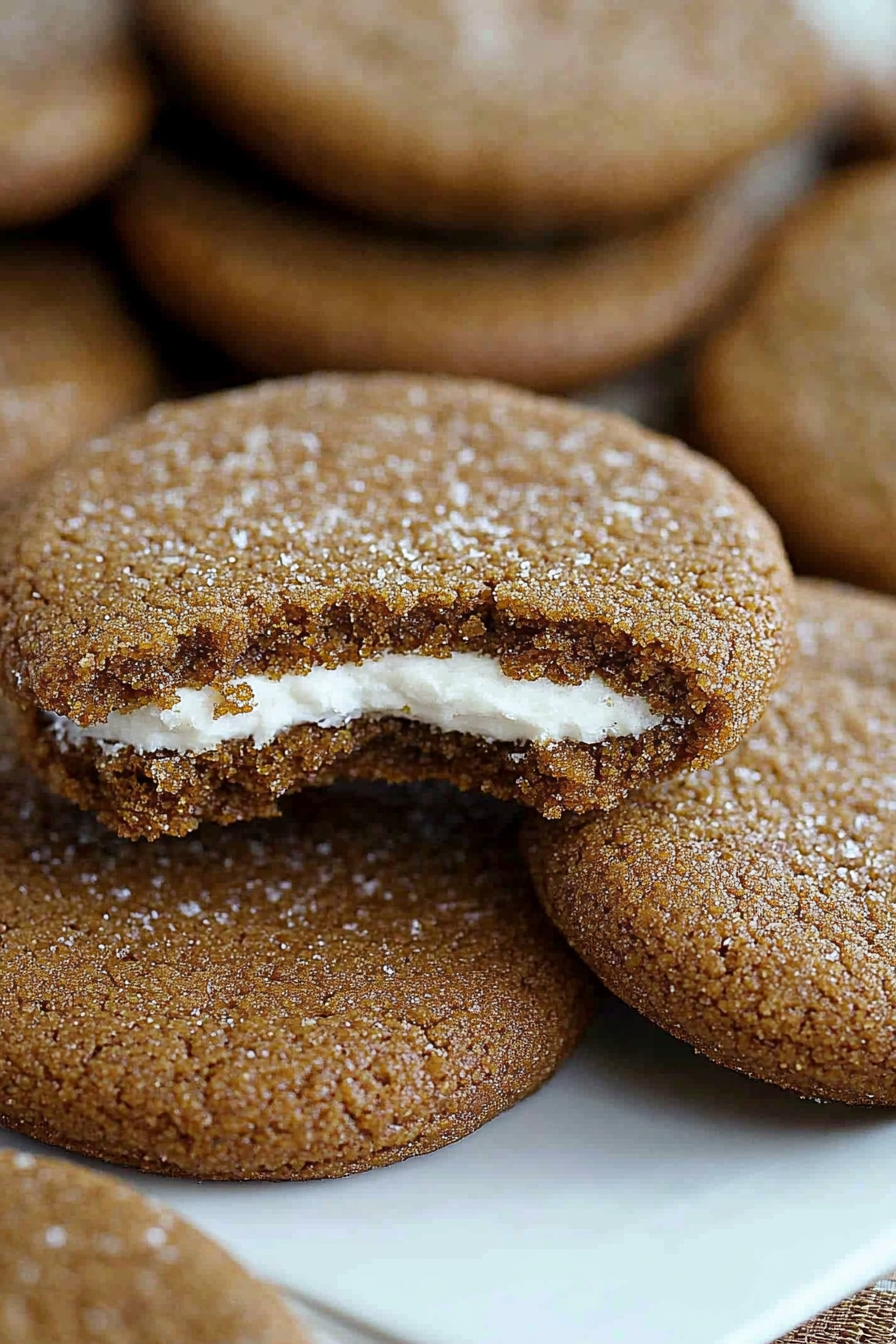
Spiced Sandwich Cookies How to Bake Them
Oh, you know those days when a craving hits – a deep, undeniable urge for something warm, spiced, and utterly comforting? That’s exactly how I feel about these ginger cookies. They’re not just cookies; they’re like a hug in cookie form, a little edible memory of crisp autumn days and cozy evenings. They’re the kind of treat that makes your kitchen smell absolutely divine, drawing everyone in with the promise of something delicious. If you’ve ever had those wonderfully chewy, molasses-rich ginger snaps that practically melt in your mouth, you’re in for a real treat. These ginger cookies, though, have a special something – a perfect balance of chewiness and spice that’s just pure bliss. I’ve tried a lot of ginger cookie recipes over the years, but this one… this one’s the keeper. It’s what my family asks for, what I bake when I need a pick-me-up, and what I bring to every potluck. They’re truly my go-to, and I can’t wait to share them with you.
What are some of the best ginger cookies?
So, what exactly are these magical ginger cookies? Think of them as the ultimate chewy ginger snap, but elevated. They’re not the kind of brittle, snap-in-half cookies you might be used to. Instead, these are delightfully soft and chewy in the center, with just a hint of crispness around the edges. The star of the show, of course, is that warm, intoxicating flavor of ginger, perfectly complemented by the rich sweetness of molasses and a touch of brown sugar. We’re talking about a symphony of spices here – cinnamon, cloves, and that wonderful zing from the ginger. They’re essentially little discs of pure comfort, designed to be dunked in milk or coffee, or just savored on their own. The name “ginger cookies” might sound simple, but the experience of eating one is anything but. It’s a flavor that feels both classic and incredibly satisfying, a true testament to the power of simple, good ingredients.
Why you’ll love this recipe?
There are so many reasons why I keep coming back to this ginger cookie recipe, and I’m pretty sure you’ll fall in love with them too. First off, the flavor is just out of this world. That deep, warm spice combination with the molasses is incredibly comforting, especially during the cooler months. It’s like tasting sunshine and spice all rolled into one. But it’s not just about the taste; it’s about how incredibly *easy* they are to make. Seriously, even if you’re a baking novice, you can whip these up without breaking a sweat. The ingredients are all pretty standard pantry staples, too, so you probably won’t even need a special trip to the store. This makes them super cost-effective, which is always a win in my book, especially when you want to bake a big batch without feeling guilty about the cost. And talk about versatile! They’re perfect for a holiday cookie exchange, a simple afternoon treat with a cup of tea, or even as a little something special to tuck into a lunchbox. What I love most about this recipe is that it manages to be both incredibly comforting and a little bit sophisticated. They’re not overly fussy, but they have a depth of flavor that makes them feel truly special. If you’re a fan of spiced baked goods, or just need a reliable cookie recipe that always delivers, you absolutely have to give these ginger cookies a try. They’re way better than store-bought and have that wonderful homemade charm that just can’t be replicated. Plus, the smell that fills your kitchen while they bake? Priceless!
How do you make ginger cookies?
Quick Overview
Making these chewy ginger cookies is surprisingly straightforward. We’ll start by creaming together butter and sugars, then incorporate molasses and an egg to create a rich base. The dry ingredients, packed with ginger and other warm spices, get mixed separately and then gently combined. The dough chills for just a bit to make it easier to handle, then we roll it into balls, coat them in a bit of extra sugar for that signature sparkle and crackle, and bake them until they’re beautifully puffed and set. It’s a simple, almost foolproof process that guarantees delicious, chewy results every single time. You don’t need any fancy equipment, just a bowl, a whisk, and your oven. It’s the kind of recipe that makes you feel like a baking pro without any of the stress.
Ingredients
For the Cookie Dough: For the Cookie Dough: For the Cookie Dough: For the Cookie Dough: For the Cookie Dough: For
This is where all the magic happens! I always try to use unsalted butter that’s softened to room temperature – it creams much better and gives you more control over the salt content. For the sugars, a mix of granulated and packed light brown sugar is key for that perfect chewy texture and caramel-like sweetness. And the molasses! Make sure it’s unsulphured molasses; it has a much richer, less bitter flavor that’s perfect for cookies. You’ll need about 1/2 cup. For the spices, I always go for ground ginger, of course, but don’t skimp on the cinnamon and a tiny pinch of cloves to really round out the flavor. And a good quality vanilla extract makes a world of difference!
For Rolling:
This is a little extra step, but it’s worth it! Rolling the dough balls in granulated sugar before baking gives them that lovely crinkly surface and a little sparkle. It also helps create that perfect chewy texture on the inside while keeping the edges just slightly crisp.
Step-by-Step Instructions
Step 1: Preheat & Prep Pan
First things first, get your oven preheating to 350 degrees Fahrenheit (175 degrees Celsius). This ensures the oven is at the perfect temperature when your cookies are ready to bake, leading to even cooking. Then, grab your baking sheets and line them with parchment paper or silicone baking mats. This is a lifesaver for easy cleanup and prevents your cookies from sticking. I usually get two baking sheets ready so I can bake in batches.
Step 2: Mix Dry Ingredients
In a medium bowl, whisk together your flour, baking soda, ground ginger, cinnamon, and cloves. Baking soda is crucial here; it helps give the cookies their lift and that lovely chewy texture. Make sure everything is thoroughly combined so the spices are evenly distributed throughout the dough. This step ensures every bite of your ginger cookies is packed with flavor!
Step 3: Mix Wet Ingredients
In a large bowl, cream together the softened unsalted butter, granulated sugar, and packed light brown sugar until light and fluffy. This usually takes about 2-3 minutes with an electric mixer. Then, beat in the unsulphured molasses and the egg until well combined. You want this mixture to be smooth and fully incorporated. This rich, wet base is what gives our ginger cookies their wonderful chewiness and deep flavor.
Step 4: Combine
Gradually add the dry ingredients to the wet ingredients, mixing on low speed (or by hand) until just combined. Be careful not to overmix! Overmixing can develop the gluten too much, leading to tougher cookies. Stop mixing as soon as you no longer see streaks of dry flour. The dough will be soft and a bit sticky at this stage.
Step 5: Chill the Dough (Optional but Recommended!)
While you can bake the dough right away, I highly recommend chilling it for at least 30 minutes to an hour. This firms up the dough, making it much easier to roll into balls and preventing the cookies from spreading too much in the oven. You can even make the dough a day ahead and keep it chilled in the refrigerator!
Step 6: Roll & Sugar Coating
Once the dough is chilled and easier to handle, roll it into small balls, about 1 to 1.5 inches in diameter. You can use a cookie scoop for consistency. Then, in a small bowl, pour some extra granulated sugar. Roll each dough ball generously in the sugar until it’s well coated. This gives the cookies that classic, crinkly appearance and a slight sugary crunch.
Step 7: Bake
Place the sugar-coated dough balls onto your prepared baking sheets, leaving about 2 inches between them to allow for spreading. Bake for 9-12 minutes, or until the edges are set and slightly golden brown, but the centers still look a little soft. They will continue to cook and firm up as they cool on the baking sheet. Don’t overbake them – that’s the secret to a chewy cookie!
Step 8: Cool & Enjoy
Let the cookies cool on the baking sheets for about 5 minutes before carefully transferring them to a wire rack to cool completely. This is crucial for achieving that perfect chewy texture. Once they’re cooled, these delicious ginger cookies are ready to be devoured! The aroma alone is enough to make your mouth water.
What to Serve It With
These ginger cookies are fantastic all on their own, but they also pair wonderfully with a variety of drinks and occasions. For a cozy morning coffee break, I love dunking them into a steaming mug of dark roast coffee or a creamy latte. The warmth and spice of the cookie are just perfection with the bold coffee flavor. If you’re planning a brunch spread, these cookies add a touch of homemade charm to any table. They look beautiful nestled among pastries and fruit. For a more decadent dessert experience, they’re surprisingly good alongside a scoop of vanilla bean ice cream or a dollop of whipped cream. And for those moments when you just need a little comfort, a glass of cold milk is classic. My kids, in particular, go crazy for a ginger cookie and a tall glass of milk after school. I’ve also found that they make a lovely addition to a cheese board, offering a sweet contrast to savory elements.
Top Tips for Perfecting Your Ginger Cookies
Over the years, I’ve learned a few tricks that help make these ginger cookies absolutely perfect every time. First, about the molasses: make sure you’re using unsulphured molasses. It really makes a difference in the flavor profile, giving you that deep, rich taste without any bitterness. If your molasses is very thick and hard to stir, warming it *very slightly* in a small saucepan can make it much easier to incorporate. When creaming your butter and sugars, don’t rush it! Getting that mixture light and fluffy is the foundation for a tender cookie. My electric mixer usually takes about 3-4 minutes on medium-high speed to achieve this. And when you’re combining the wet and dry ingredients, remember my mantra: *do not overmix*. A few gentle stirs until just combined is all you need. Overmixing is the quickest way to tough, dense cookies. If your dough seems too sticky to roll after chilling, don’t hesitate to add another tablespoon or two of flour, but add it sparingly. The chill time is really key; it makes the dough manageable and helps prevent excessive spreading. For that iconic crinkly top, ensure you roll the dough balls evenly and coat them well in sugar. When it comes to baking, ovens can be so different! Keep an eye on your first batch. If they seem to be browning too quickly on the edges, you might need to lower your oven temperature by 10-15 degrees Fahrenheit for subsequent batches. And the “doneness” test is crucial: they should look slightly underbaked in the center when you take them out. They’ll continue to set up as they cool on the baking sheet, and that’s what gives you that perfect chewy interior. If you’re making a double batch, make sure you’re not overcrowding your baking sheets; give them room to spread. I’ve also found that using a good quality cookie scoop helps ensure all your cookies are the same size, which leads to more consistent baking.
Storing and Reheating Tips
Once these delightful ginger cookies are baked and cooled, you’ll want to store them properly to maintain that wonderful chewy texture. At room temperature, they’re best kept in an airtight container. I usually add a slice of bread to the container; it sounds strange, but it helps keep the cookies soft and chewy by releasing moisture. They’ll stay fresh like this for about 3-4 days. If you need to store them for longer, the refrigerator is a good option, but they can sometimes lose a bit of their chewiness there. Again, an airtight container is key, and they should last up to a week. For long-term storage, the freezer is your best friend! You can freeze the baked and cooled cookies in an airtight container or a heavy-duty freezer bag. They’ll keep their best quality for about 2-3 months. To reheat them, you can simply bring them to room temperature from the freezer or pop them in a warm oven (around 300°F or 150°C) for a few minutes until they’re warmed through. If you’ve iced them, it’s best to add the icing *after* they’ve been stored and reheated, as the icing can get sticky or melt in storage.
Frequently Asked Questions
Final Thoughts
There you have it – my absolute favorite recipe for chewy ginger cookies! I truly believe these are more than just cookies; they’re a little slice of happiness that brings warmth and comfort to any moment. The way the spices meld together, the perfect chewy texture, and that irresistible aroma that fills your home are just unparalleled. They’re so simple to make, yet they taste like they came from a fancy bakery. I hope you get a chance to try them and experience that same joy I do every time I bake a batch. If you love these, you might also enjoy my Double Chocolate Chip Cookies or my Classic Shortbread. Happy baking, and I can’t wait to hear how your ginger cookies turn out! Feel free to leave a comment below and share your baking adventures!
Ginger Cookies
Ingredients
Method
- Preheat the oven to 350°F and line a baking sheet with parchment paper.
- In a medium bowl, whisk together the flour, ginger, baking soda, cinnamon, cloves, and salt.
- In the bowl of a stand mixer, beat the softened butter and brown sugar until light and fluffy.
- Beat in the egg and molasses, scraping down the sides as needed.
- Gradually add the dry ingredients to the wet mixture and mix until fully combined.
- Shape the dough into 1-inch balls and roll in granulated sugar. Place on lined baking sheet and flatten slightly.
- Bake for 8-10 minutes. Let cool on the sheet briefly before transferring to wire racks to cool completely.